SSO 登入還沒搞定不過先來嘗試當初選擇 Rocket.chat 的另一個理由,將 Rocket.chat 嵌入我們的主應用的功能。
嵌入的方式是用 iframe 來達成,首先來設定。
在 Administration → Workspace → Settings → Accounts → Iframe ,先 Enabled。
然後 Iframe URL 填準備嵌入的 Nextjs 應用網址,例:http://localhost:3000
API URL 的部分需要說明一下 Rocket.chat iframe 的認證方式,Rocket.chat 會在 iframe 載入時呼叫 API URL 確認用戶是否已登入,這部分需要在 Nextjs 這端實作。
為求快速驗證功能先做一個陽春的 sso API,直接跟 Rocket.chat 取得 token 後回傳。
// src/app/api/sso/route.ts
import axios from "axios";

export async function POST(request: Request) {
  try {
    const res = await axios.post("http://localhost:3001/api/v1/login", {
      username: 'admin-user',
      password: 'admin-user-password',
    });
    if (res.data.status === "success") {
      return Response.json({
        loginToken: res.data.data.authToken,
      });
    }
  } catch (error) {
    return Response.json({
      status: 401,
    });
  }
}
先直接用創建 Workspace 時建立的 admin 帳號密碼經由 API 登入 Rocket.chat 取得 token 並回傳。
另外為了讓 iframe 請求 sso API 時不會被 CORS 擋住,要設定一下 Nextjs config。
// next.config.js

...

const config = {
  ...
  async headers() {
    return [
      {
        // matching all API routes
        source: "/api/:path*",
        headers: [
          { key: "Access-Control-Allow-Credentials", value: "true" },
          {
            key: "Access-Control-Allow-Origin",
            value: "*", // replace this your actual Rocket.chat origin
          },
          {
            key: "Access-Control-Allow-Methods",
            value: "GET,DELETE,PATCH,POST,PUT",
          },
          {
            key: "Access-Control-Allow-Headers",
            value:
              "X-CSRF-Token, X-Requested-With, Accept, Accept-Version, Content-Length, Content-MD5, Content-Type, Date, X-Api-Version",
          },
        ],
      },
    ];
  },
};

...
然後回頭設定 Rocket.chat 的 Iframe API URL
http://localhost:3000/api/sso
這邊 sso API 寫的比較簡略,只是直接登入,不過如果用戶在 Rocket.chat 不存在也能先建立帳號後取得 token,可以看看官方的範例。
另外先關掉 Administration → Settings → General 裡的 Restrict access inside any Iframe 選項好方便 localhost 連線,正式的時候要記得開回來。
然後就能在 Nextjs 開個 iframe 來看看效果,開一個新的 chat 頁面。
// src/app/[locale]/chat/page.tsx
"use client";

const Page = () => {
  return (
    <>
      <h1>{"Chat"}</h1>
      <iframe
        src="http://localhost:3001/channel/general/?layout=embedded"
        title="chat"
        width={400}
        height={600}
      ></iframe>
    </>
  );
};

export default Page;
iframe src 的格式如下:
{rocket_chat_url}/channel/{channel_name}/?layout=embedded
layout=embedded 會讓 Rocket.chat 以單一 channel 的模式呈現。
呈現的畫面會像這樣
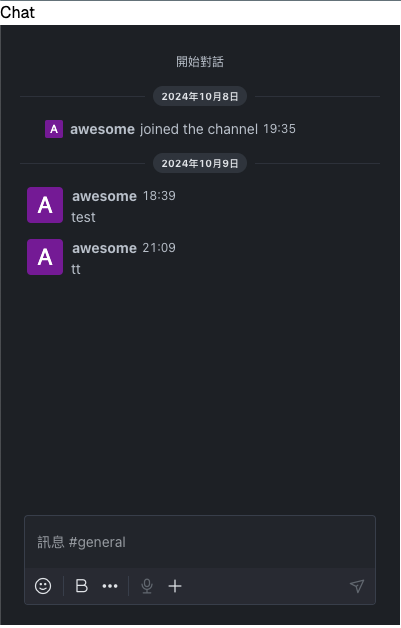
第一步遷入的效果看來是成功了,不過課題還很多,像是用戶驗證,樣式調整,還有選擇聊天室的介面等等。