在社群分享酷酷的元件時,有人問到「元件有沒有不需要依賴 Vue 的版本?」
當時沒有,現在有了!(≧∇≦)ノ
Web Component 是 Web 原生 API 的統稱,允許使用者建立自定義元素(custom elements),也就是說,我們可以不依賴 Vue、React 這類前端框架,也能夠建立元件,將模板、樣式和邏輯封裝在一起並於網頁使用 。
Vue 在發展的過程中始終緊跟 Web 標準,在 Custom Elements Everywhere 測試中得到滿分,Vue 本身的設計理念也互補於 Web Component,也就是說 Vue 本身的設計適合搭配 Web Component。
Vue 提供了系列的 API 協助使用者建立 Web Component,可以將現有的 Vue 元件轉換成 Web Component。
讓我們試試看把先前辛苦開發的 Vue 元件變成 Web Component 吧!◝( •ω• )◟
本文著重於將 Vue 元件轉換成 Web Component,官方文件還有更多關於 Web Component 資訊,歡迎來逛逛。
這裡我們使用 vue3-webcomponent-wrapper,可以直接包裝現有元件,就不需要將元件檔名加上 .ce.vue 結尾了。
第一步安裝套件。
npm i -D vue3-webcomponent-wrapper
追加一個獨立的 tailwind.css,用於元件樣式打包。
src\tailwind.css
@tailwind base;
@tailwind components;
@tailwind utilities;
接著新增 main.js,用於提供註冊 Web Component 的功能。
src\main.js
import { createApp, h } from 'vue';
import wrapper from 'vue3-webcomponent-wrapper';
import './tailwind.css';

import SliderStubborn from './components/slider-stubborn/slider-stubborn.vue';

/** 呼叫此 function 就會註冊 Web Component */
export function register() {
  const CodSliderStubborn = wrapper(SliderStubborn, createApp, h);
  window.customElements.define('cod-slider-stubborn', CodSliderStubborn);
}
接著修改一下 vite.config,將 build 改成 Library Mode。
vite.config.ts
import { defineConfig } from 'vite';
import vue from '@vitejs/plugin-vue';
import path from 'path';

// https://vitejs.dev/config/
export default defineConfig(({ command, mode }) => {
  return {
    build: {
      lib: {
        entry: 'src/main.js',
        formats: ['es', 'cjs'],
        fileName: 'index',
      },
    },
    resolve: {
      alias: {
        '@': path.resolve(__dirname, './src')
      },
    },
    plugins: [
      vue(),
    ],
    test: {
      include: ['src/**/*.{test,spec}.ts'],
      environment: 'happy-dom',
      coverage: {
        reporter: ['html'],
      },
    },
  }
})
新增 build 腳本。
package.json
{
  "name": "chill-component",
  "version": "0.0.0",
  "scripts": {
    ...
    "build": "vite build"
  },
  ...
}
執行 build 吧!◝( •ω• )◟
npm run build
結束後會注意到 dist 目錄下跑出許多檔案,這就是我們編譯完成的 Web Component 了!ヽ(●`∀´●)ノ
現在讓我們實際使用 Web Component,新增一個乾淨的 HTML 吧。( ´ ▽ ` )ノ
web-component.html
<!DOCTYPE html>
<html lang="en">

<head>
  <meta charset="UTF-8">
  <meta
    name="viewport"
    content="width=device-width, initial-scale=1.0"
  >
  <title>Web Component Test</title>
</head>

<body>
  <h1>Testing Web Component</h1>
</body>

</html>
接著我們需要引入編譯完成的 JS 檔案,不過這裡我們需要 VSCode 的 Live Server 外掛協助才行,請大家先安裝 Live Server 外掛。
Live Server 用於啟動一個 Web Server,可以簡單快速的測試實際網頁內容。
接著對目錄中的 web-component.html 點擊右鍵,應該會有個「Open with Live Server」,給他用力點下去。
如果沒有的話可能是 Live Server 沒有安裝成功或發生異常,請嘗試重新安裝或重啟 VSCode。
成功啟動後,右下角應該會跳出此通知。

並開啟以下網頁。
這就表示我們成功開啟剛剛新增的 web-component.html 了!( ‧ω‧)ノ╰(‧ω‧ )
最後也是最重要的部分,引入 Web Component。
web-component.html
<!DOCTYPE html>
<html lang="en">

<head>
  ...
  <link
    rel="stylesheet"
    href="./dist/style.css"
  />
  <title>Web Component Test</title>
</head>

<body>
  <h1>Testing Web Component</h1>

  <cod-slider-stubborn></cod-slider-stubborn>
</body>

<script type="module">
  // 引入 Web Component
  import { register } from './dist/index.mjs';
  // 註冊 Web Component
  register();
</script>

</html>
type="module" 用於告訴瀏覽器使用 ES Module 的方式引入 JS,由於是 ES Module,所以我們實際上需要引入 dist/index.mjs。
這個時候會在 console 中發現以下錯誤。
Uncaught ReferenceError: process is not defined
這是環境變數問題,修復方式也很簡單,讓我們修改一下 vite.config
vite.config.ts
...

// https://vitejs.dev/config/
export default defineConfig(({ command, mode }) => {
  return {
    define: {
      'process.env': {}
    },
    ...
  }
})
再執行一次 npm run build 後就沒有這個問題了!( •̀ ω •́ )✧
現在畫面應該會變成這樣。
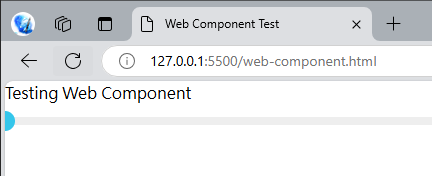
恭喜!我們成功編譯並使用 Web Component 了!
首先加一點樣式。
web-component.html
<!DOCTYPE html>
<html lang="en">
...
<style>
  h1 {
    padding: 1rem;
  }

  .slider-container {
    padding: 0rem 2rem;
  }
</style>

<body>
  <h1>Testing Web Component</h1>

  <div class="slider-container">
    <cod-slider-stubborn id="slider"></cod-slider-stubborn>
  </div>
</body>

...

</html>
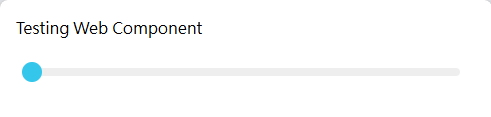
畫面看起來舒服多了。
最後加上互動元素與邏輯。
web-component.html
<!DOCTYPE html>
<html lang="en">
...

<style>
  h1 {
    padding: 1rem;
  }

  .disabled-checkbox {
    margin-bottom: rem;
  }

  .slider-container {
    padding: 0rem 2rem;
  }
</style>

<body>
  <h1>Testing Web Component</h1>

  <div class="slider-container">
    <label class="disabled-checkbox">
      <input type="checkbox">
      停用 slider
    </label>

    <cod-slider-stubborn id="slider"></cod-slider-stubborn>
  </div>
</body>

<script type="module">
  // 引入 Web Component
  import { register } from './dist/index.mjs';
  // 註冊 Web Component
  register();

  const slider = document.getElementById('slider');
  // 接收 Slider 事件
  slider.addEventListener('update:modelValue', (event) => {
    console.log('Slider Value:', event.detail);
  });

  const checkbox = document.querySelector('.disabled-checkbox input');
  checkbox.addEventListener('change', (event) => {
    const value = event.target.checked;

    console.log('checkbox change:', value);
    slider.setAttribute('disabled', value);
  });
</script>

</html>
好久沒有寫原生的 JS 了,有種反璞歸真的感覺。(´,,•ω•,,)
現在拉動 slider 會在 console 看到數值變化。
停用後也可以拉長握把。
我們成功將 Vue Component 變成 Web Component 了!✧⁑。٩(ˊᗜˋ*)و✧⁕。
以上程式碼已同步至 GitLab,大家可以前往下載:

