iT邦幫忙

2025 iThome 鐵人賽

DAY 5
0
DevOps

DevOps 進化論:從全能型戰士到安全守門員系列 第 5

Day 5:建立簡易的CI pipeline (GitHub Actions)

  • 分享至 

  • xImage
  •  

前言

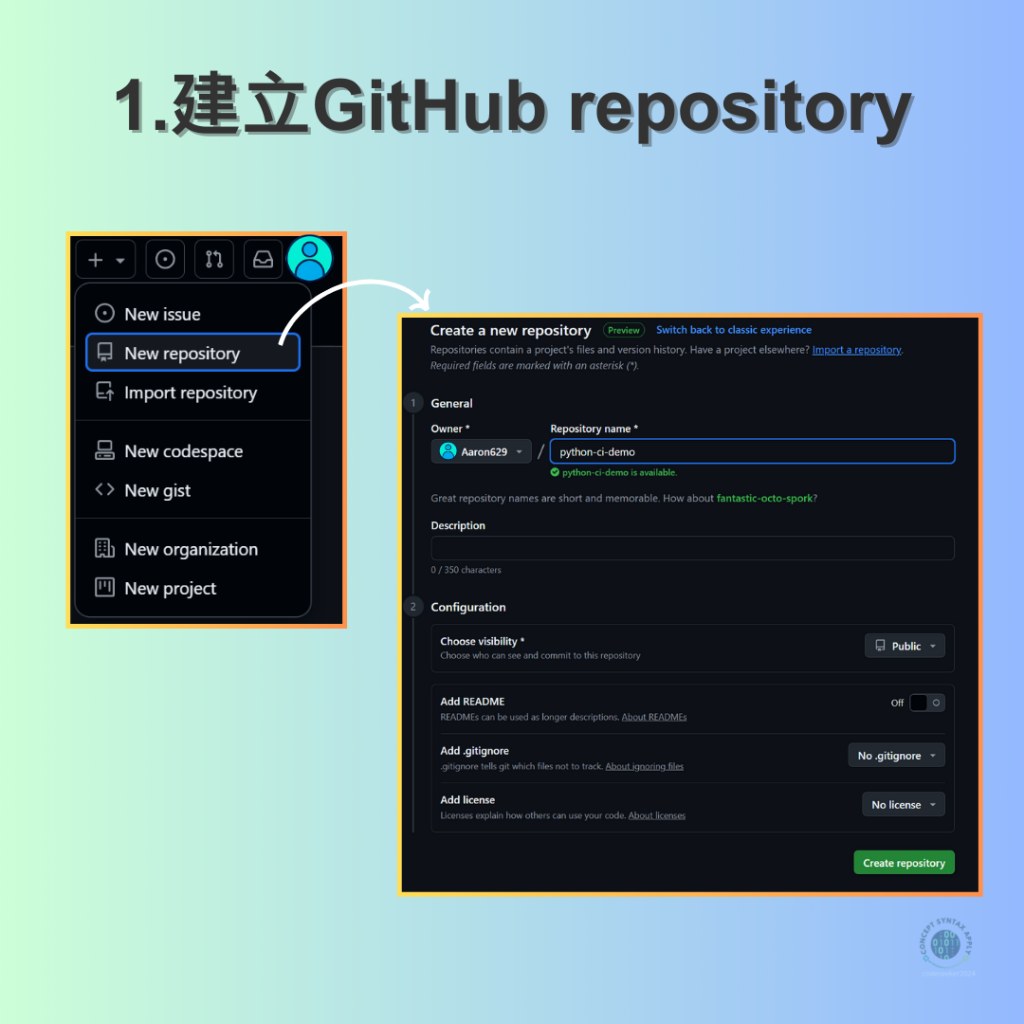
大多數面試會看 GitHub 展示專案。就既有的 SCM(Source Code Management)而言,GitHub Actions 是最容易入門的 CI/CD 工具:不需學新平台,直接在熟悉的 GitHub 環境實踐 CI/CD。

● 目標

1.當程式碼 push 或建立PR時,自動觸發workflow

2.拉取程式碼,設定Python環境

3.安裝依賴套件

4.執行測試(pytest)

5.在GitHub頁面查看 pipeline 結果

專案目錄

https://ithelp.ithome.com.tw/upload/images/20250818/20178156HF5UG8qnHC.png

實作步驟

1.建立 GitHub repository

https://ithelp.ithome.com.tw/upload/images/20250818/20178156rmnFgxoS7e.png

2.建立專案所需檔案

https://ithelp.ithome.com.tw/upload/images/20250818/20178156Itrhi719nf.png
https://ithelp.ithome.com.tw/upload/images/20250818/201781563epIfS03Jm.png
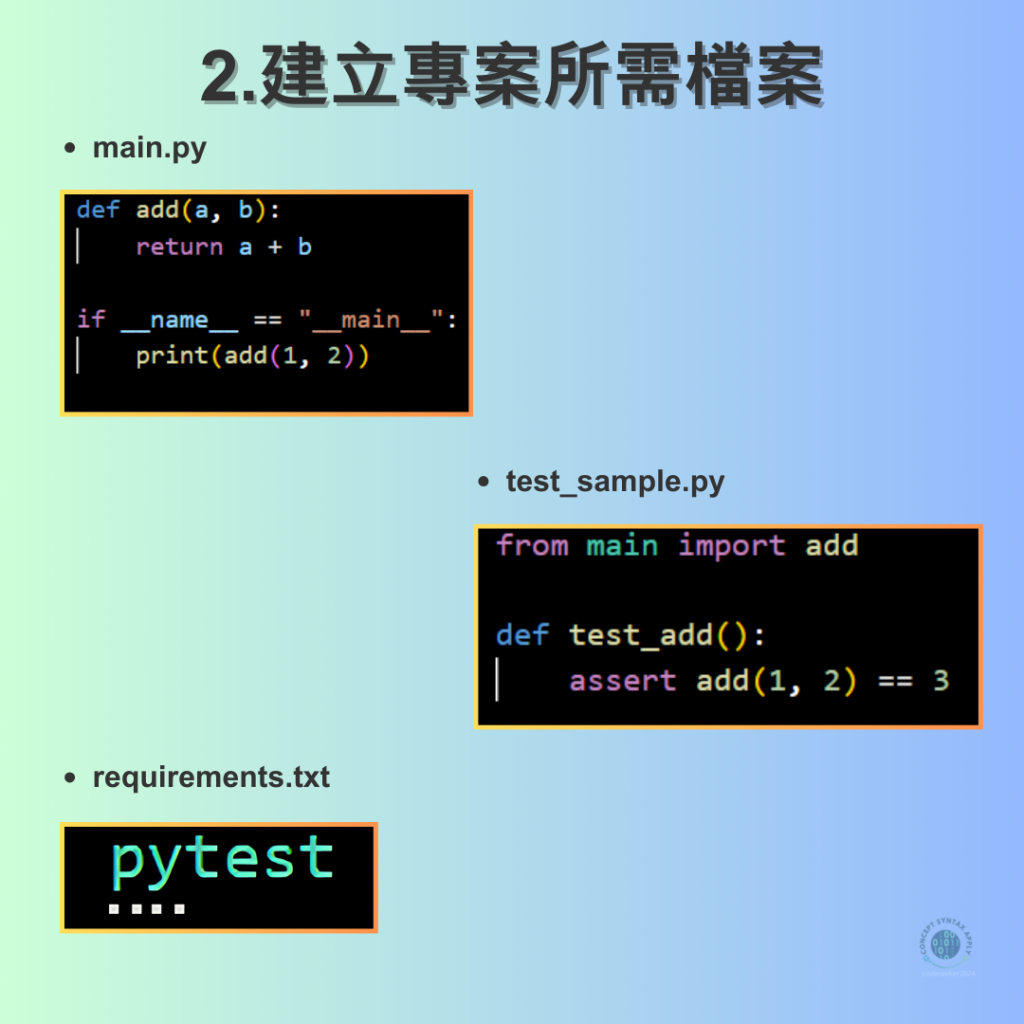
▪建立main.py、test_sample.py以及requirements.txt作為本次測試的基本檔案
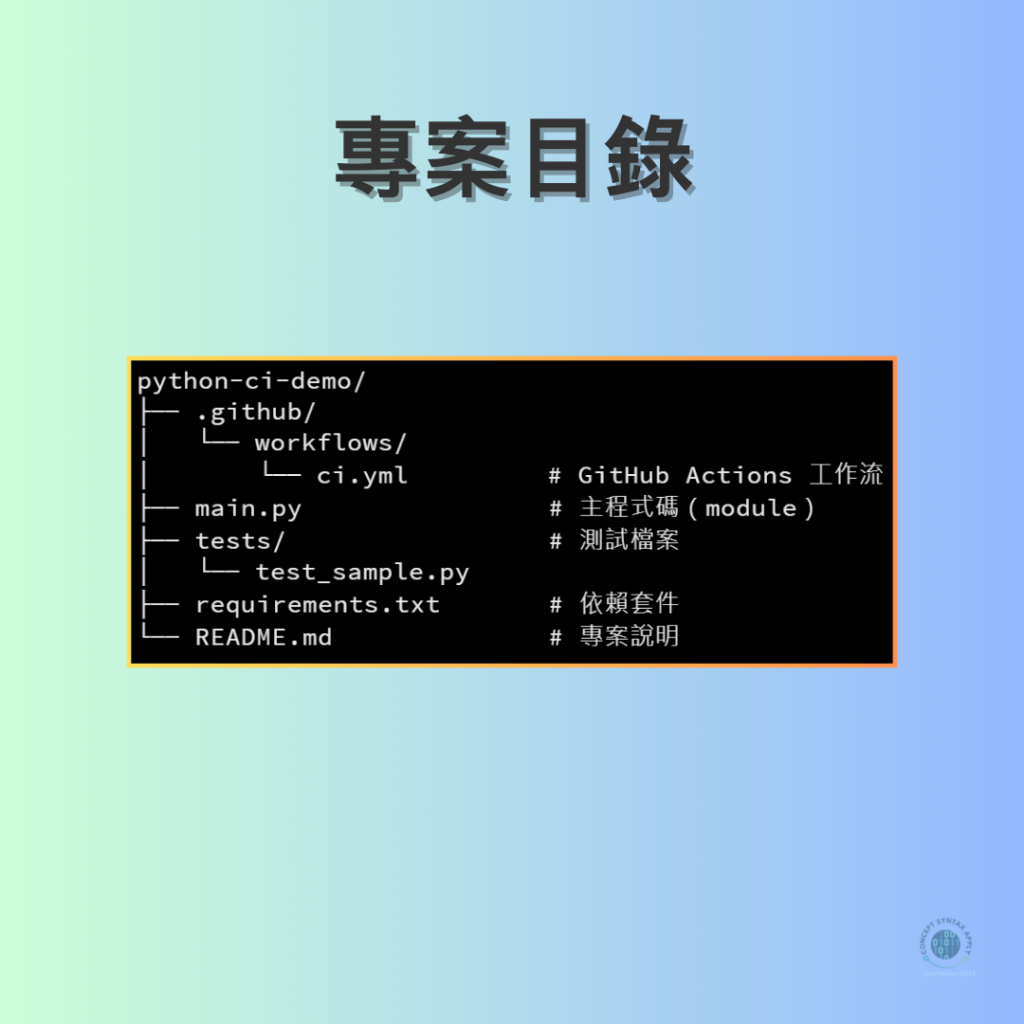
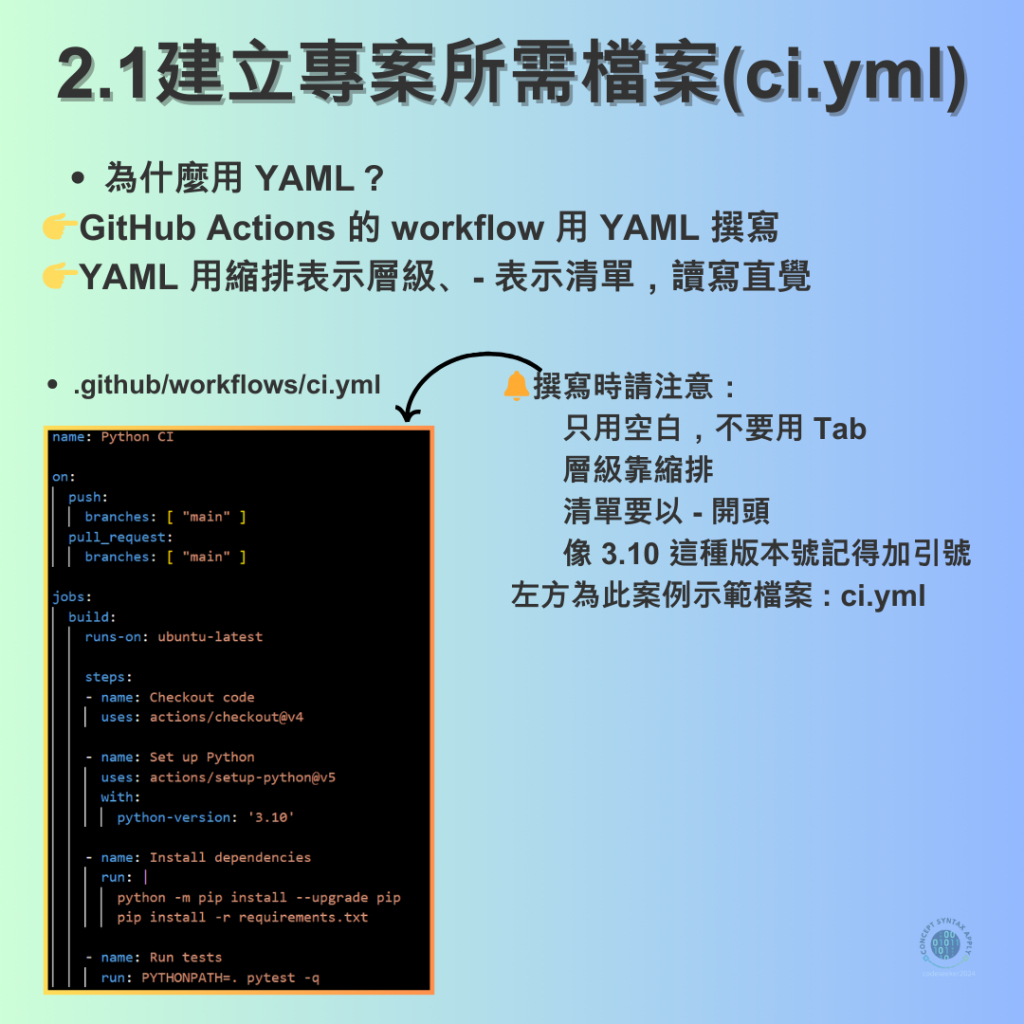
▪在專案中建立資料夾 .github/workflows/,並新增檔案 ci.yml。
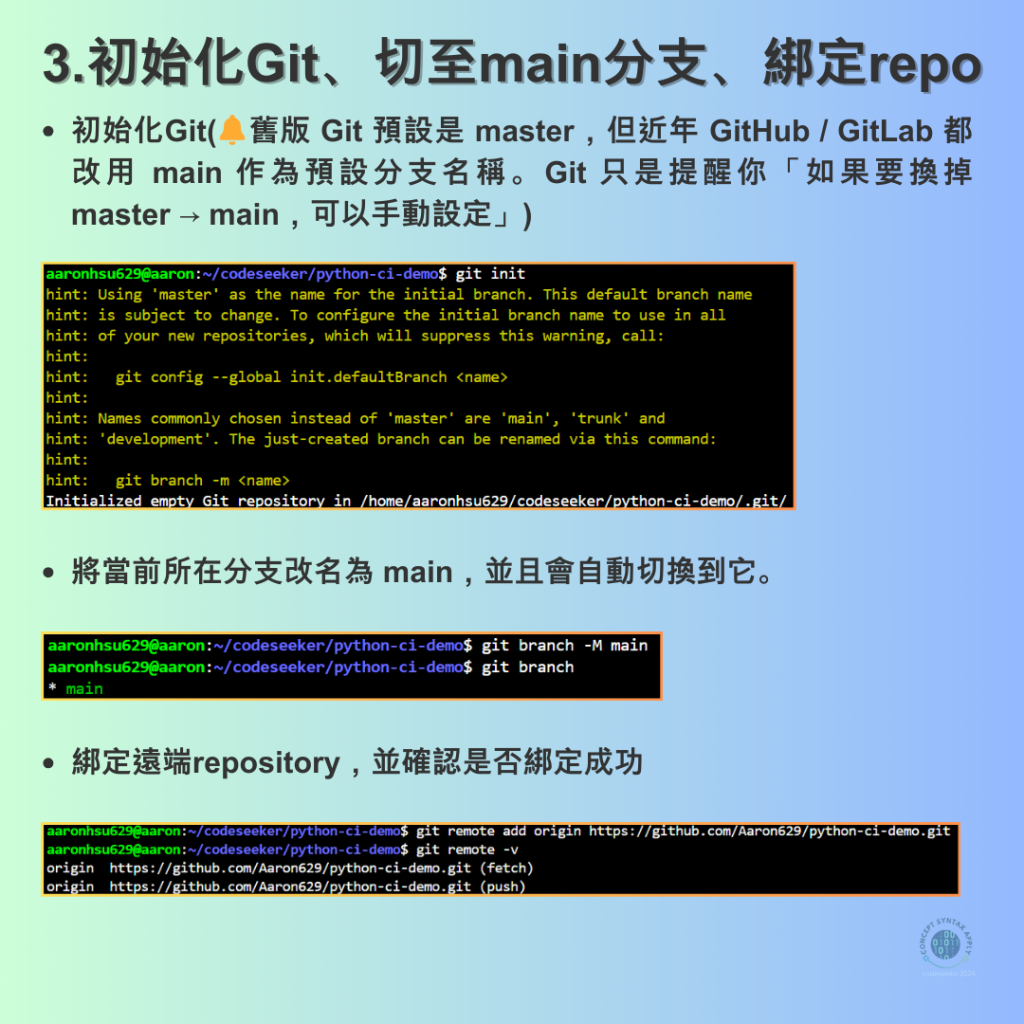
3.初始化 Git、切至 main 分支、綁定 repo

https://ithelp.ithome.com.tw/upload/images/20250818/20178156lk6QPKSmGj.png

git init                    #初始化
git branch -M main          #改名並切至main
git remote add origin <url> #url替換成該repo的url 
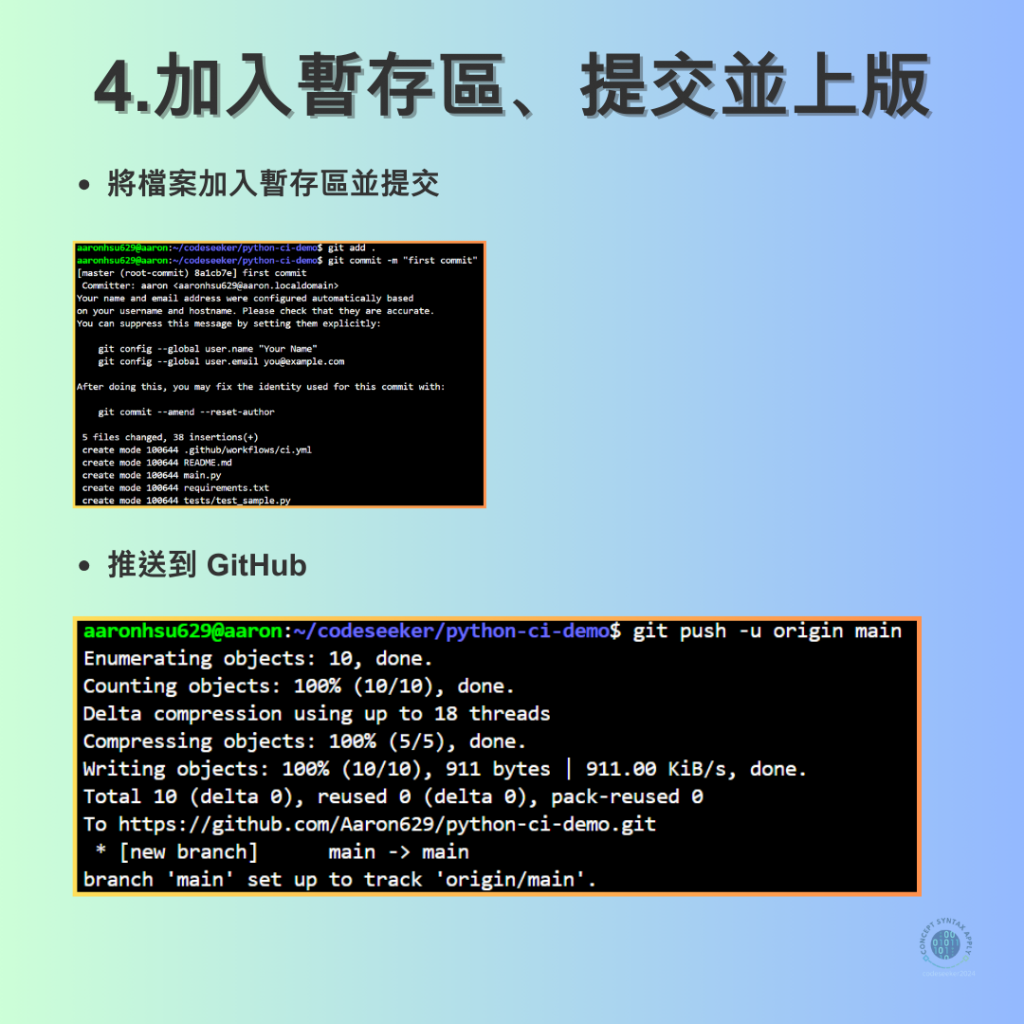
4.加入暫存區、提交並上版

https://ithelp.ithome.com.tw/upload/images/20250818/20178156GOqpgwM7tI.png

git add .
git commit -m "add ci pipeline" 
git push -u origin main

5.檢視結果

https://ithelp.ithome.com.tw/upload/images/20250818/20178156tePYXgisAz.png

▪到 GitHub Repo → Actions 分頁,就能看到 pipeline 自動執行。

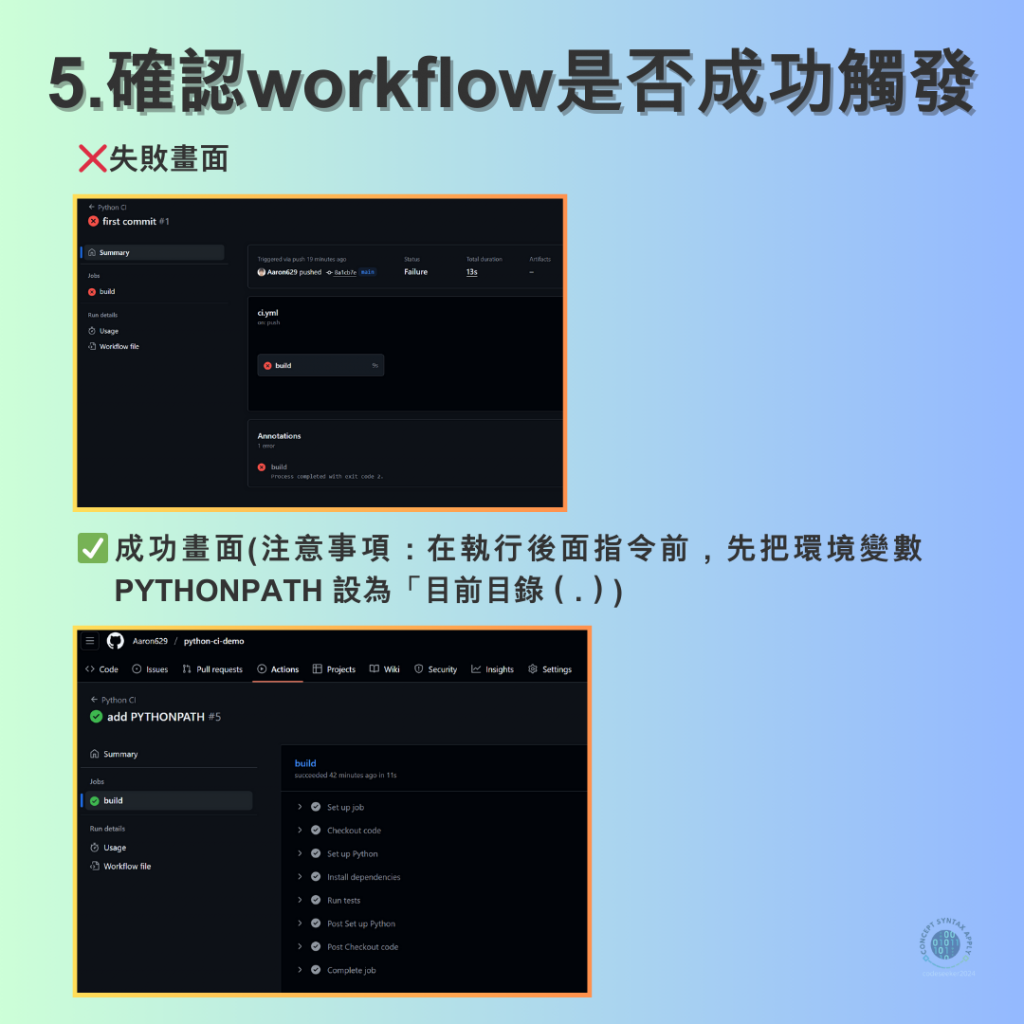
✅如果測試成功,會看到綠色的「✔ Passed」。
❌如果失敗,GitHub 會顯示錯誤訊息,幫助你排查問題。

注意事項

▪檔案/匯入路徑是常見錯誤,須特別留意(建議測試放在 tests/,若 from main import ...,在 workflow 的測試步驟加 PYTHONPATH=.)。

▪本範例是最小化的 CI pipeline:checkout → setup-python → pip install → pytest。

▪進階可與雲端整合,建立完整 CI/CD;推送至 GitHub 觸發自動部署(請用 GitHub Secrets 管理金鑰/憑證)。

總結

▪搭好最小可行的 CI:push/PR → 觸發 workflow → 設定 Python → 安裝依賴 → 執行 pytest → 在 Actions 檢視結果。

▪產出一份可複用的 ci.yml,之後所有 Python 專案都能直接套用。


上一篇
Day 4:CI/CD 是什麼?工具比較(Jenkins, GitHub Actions, GitLab CI)
下一篇
Day 6:測試自動化(Unit Test + Integration Test)
系列文
DevOps 進化論:從全能型戰士到安全守門員19
圖片
  熱門推薦
圖片
{{ item.channelVendor }} | {{ item.webinarstarted }} |
{{ formatDate(item.duration) }}
直播中

尚未有邦友留言

立即登入留言