大家好!我目前正在就讀資訊類科系,平常以接觸程式撰寫居多,對於資安領域的技術沒有太多了解 因此希望藉由這30天的機會,以OWASP ZAP作為主要工具,從實際操作和分析,從環境架設、基本掃描到進階弱點發掘,一步步建立資安思維。
我將學習如何利用ZAP自動化及主動/被動掃描常見的資安漏洞,並理解其背後的原理,以及該如何修復,例如SQL Injection、XSS等,讓我從「資安小白」進化成具備基本滲透測試技能的「資安入門者」。
locate zap.sh,尋找zap.sh的存放位置。/usr/share/zaproxy/zap.sh -daemon -host 127.0.0.1 -port 8080 -config api.key=changemekey=changeme Found Java version 21.0.8 Available memory: 1973 MB Using JVM args: -Xmx493m The home directory is already in use. Ensure no other ZAP instances are running with the same home directory: /home/kali/.ZAP/
curl "http://127.0.0.1:8080/JSON/spider/action/scan/?apikey=changeme&url=http://127.0.0.1/DVWA/index.php&recurse=true"{"scan":"1"}
curl "http://127.0.0.1:8080/JSON/spider/view/status/?apikey=changeme&scanId=0"{"status":"100"}
curl "http://127.0.0.1:8080/JSON/ascan/action/scan/?apikey=changeme&url=http://127.0.0.1/DVWA/index.php&recurse=true&inScopeOnly=false"{"scan":"0"}
curl "http://127.0.0.1:8080/JSON/spider/view/results/?apikey=changeme&scanId=0"{"results":["http://127.0.0.1/DVWA/login.php","http://127.0.0.1/DVWA/index.php","http://127.0.0.1/sitemap.xml","http://127.0.0.1/DVWA/dvwa/css/login.css","http://127.0.0.1/robots.txt","http://127.0.0.1/DVWA/dvwa/images/login_logo.png"]}
curl "http://127.0.0.1:8080/JSON/ascan/action/scan/?apikey=changeme&url=http://127.0.0.1/DVWA/index.php"{"scan":"1"}
curl "http://127.0.0.1:8080/JSON/ascan/view/status/?apikey=changeme&scanId=0"{"status":"100"}
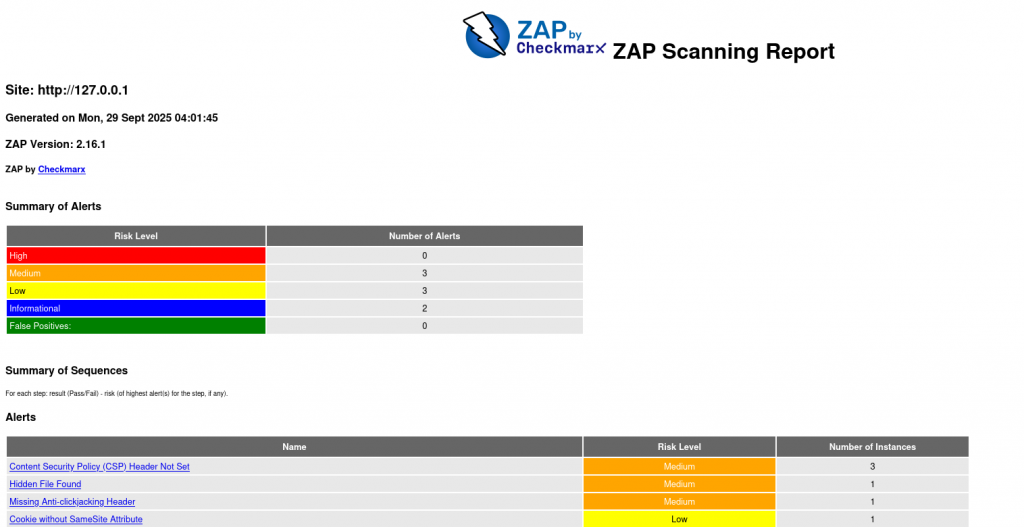
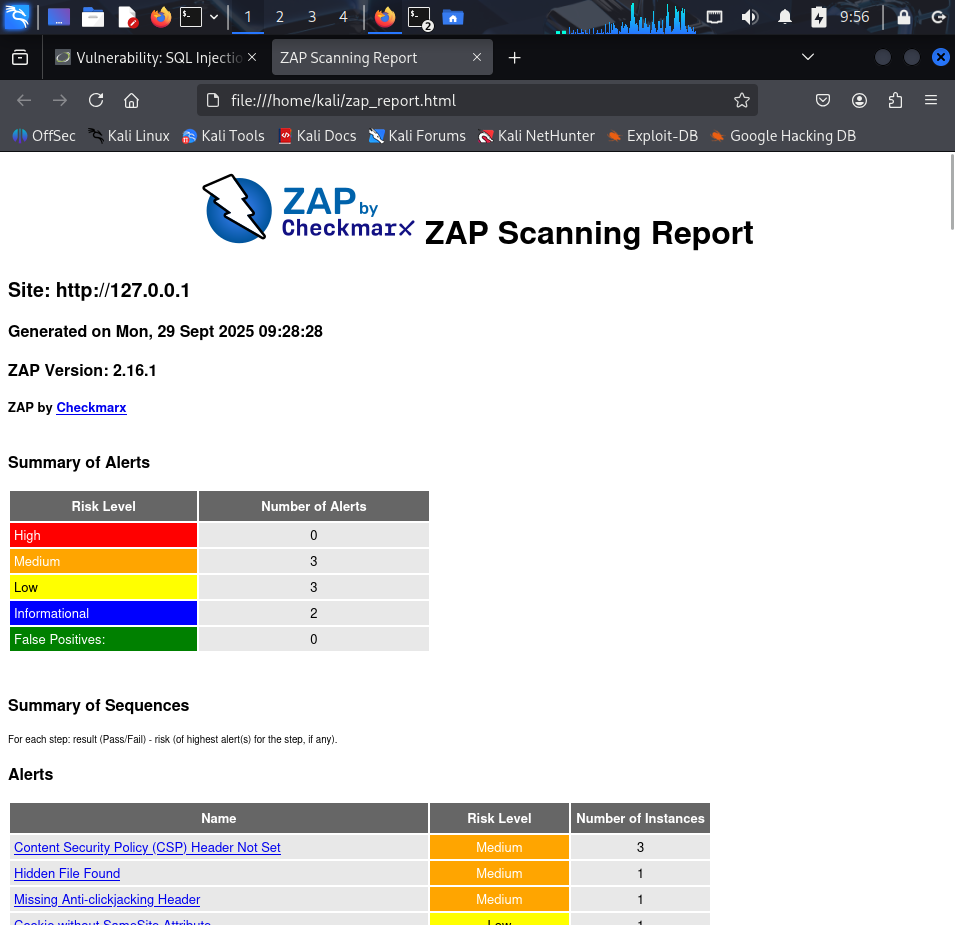
curl "http://127.0.0.1:8080/OTHER/core/other/htmlreport/?apikey=changeme" > zap-report_20250929.html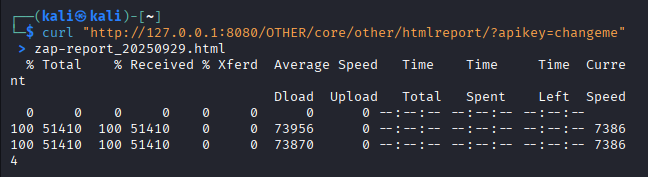
sudo apt updatesudo apt install -y python3-venv python3-pip
python3 -m venv ~/zapenvsource ~/zapenv/bin/activate
pip install --upgrade pippip install python-owasp-zap-v2.4
nano zap_auto.py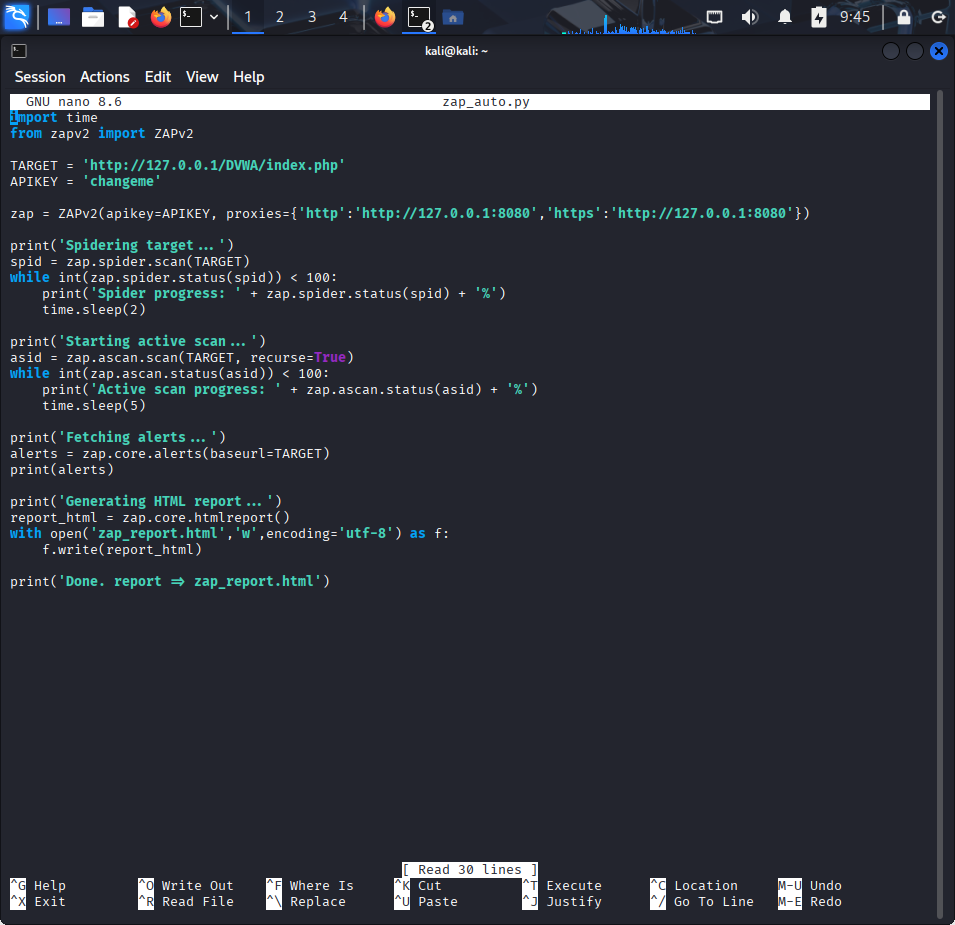
python zap_auto.py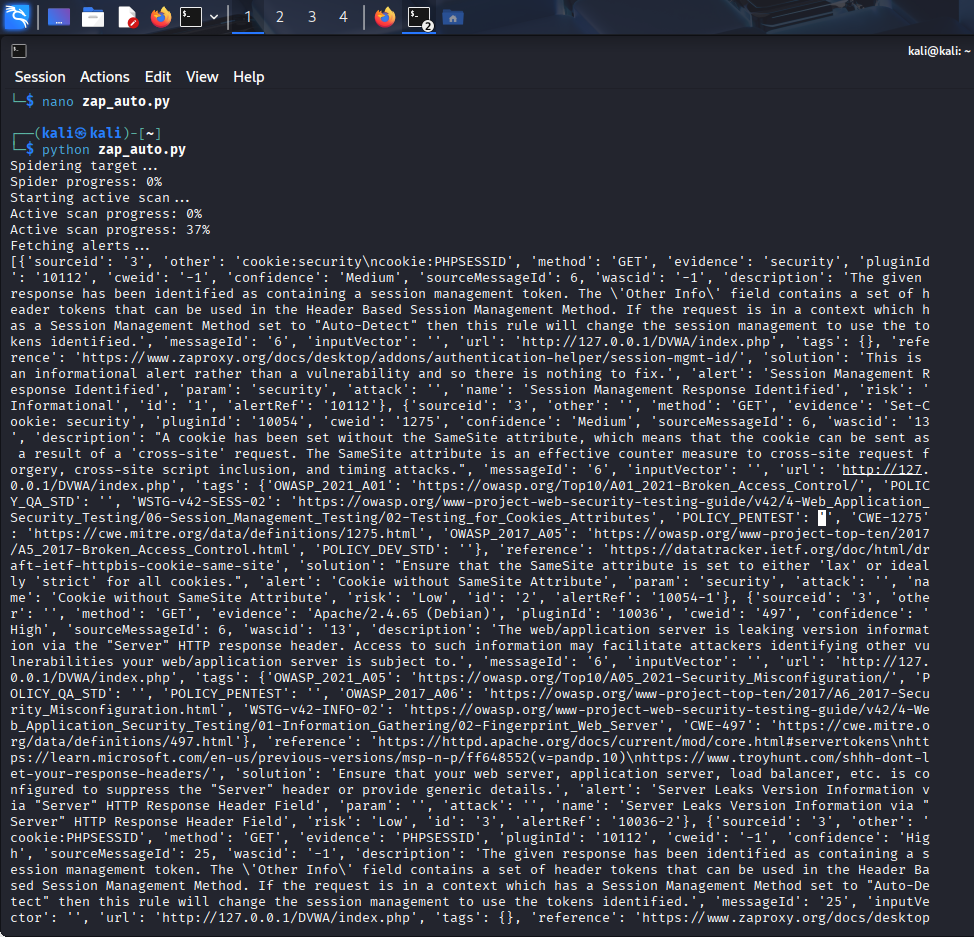
deactivate


 iThome鐵人賽