昨天我們成功在本地建立了第一個 Terraform 專案,不知道大家有沒有注意到專案資料夾中會多出一個檔案 terraform.tfstate。今天就是要深入探討這隻檔案的重要性!
🐈🐈🐈
我們先來回顧一下昨天練習的操作結果並仔細做個觀察!
首先讓我們先回到昨天的 hello-terraform 專案:
cd hello-terraform
ls -la
你應該會看到:
.
├── .gitignore
├── .terraform/                 # Provider 快取資料夾
├── .terraform.lock.hcl         # Provider 版本鎖定檔案
├── hello-terraform.txt         # 我們建立的檔案
├── main.tf                     # Terraform 配置
└── terraform.tfstate           # ← 今天的主角!
# 可以檢視 state 檔案大小和建立時間
ls -lh terraform.tfstate

# 快速檢視內容
head terraform.tfstate

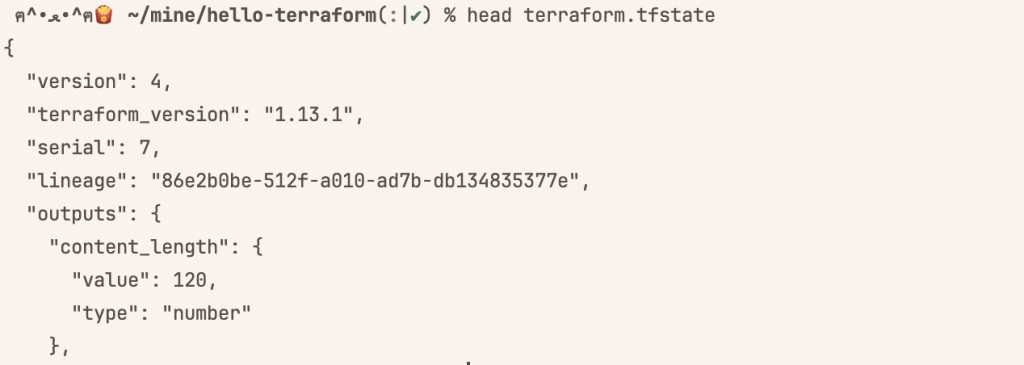
這是一個 JSON 檔案,而且包含了許多資訊~
接著我們來說說這隻檔案到底有什麼特別的?
想像一下這個情境:
👨💼 老闆:「我們現在有幾台伺服器?」
👩💻 你:「讓我用 terraform state list 查一下...」
因為 State 是 Terraform 的「記憶系統」,它會記錄著:
所以在上面的場景中,我們可以查詢 State 來確認目前有哪些資源~
Terraform 不同於其他工具的關鍵特色:
# 你寫的配置 (main.tf)
resource "local_file" "hello_world" {
  filename = "hello-terraform.txt"
  content  = "Hello Terraform!"
}
Terraform 會透過 State 檔案知道目前有哪些資源,我們可以想想並比較一下:
沒有 State 會發生什麼?
# 假設沒有 state 檔案
terraform plan
# 結果:Terraform 認為需要建立新檔案(即使檔案已存在)
有了 State 的話:
terraform plan
# 結果:No changes. Infrastructure is up-to-date
有 State 檔案記錄著 Tarreform 才能知道目標資源與實際資源的差異,就不會出現重複創建的問題。
接著我們來解剖這隻檔案的內容!
我們可以用以下三種方式來檢視 State 檔案的內容:
# 方式一:直接查看(內容較多)
cat terraform.tfstate

# 方式二:使用 jq 格式化顯示(如果有安裝)
cat terraform.tfstate | jq '.'

# 方式三:使用 Terraform 原生指令(推薦)
terraform show
輸入指令後會看到類似這樣的內容:
{
  "version": 4,
  "terraform_version": "1.6.0",
  "serial": 1,
  "lineage": "12345678-1234-5678-9abc-123456789abc",
  "outputs": {...},
  "resources": [...],
  "check_results": null
}
這邊幫大家整理出來各欄位的詳細說明:
| 欄位 | 說明 |
|---|---|
version |
State 檔案格式版本 |
terraform_version |
建立此 state 的 Terraform 版本 |
serial |
狀態序號(每次變更遞增) |
lineage |
State 檔案的唯一識別碼 |
outputs |
輸出值的實際結果 |
resources |
所有受管理資源的詳細資訊 |
前面文章中也提到 Resources 是核心元件我們來看看它在 State 中的樣貌:
{
  "resources": [
    {
      "mode": "managed",
      "type": "local_file",
      "name": "hello_world",
      "provider": "provider[\"registry.terraform.io/hashicorp/local\"]",
      "instances": [
        {
          "schema_version": 0,
          "attributes": {
            "content": "🚀 Hello Terraform!\n\n這是我的第一個...",
            "content_base64sha256": "...",
            "content_base64sha512": "...",
            "content_md5": "...",
            "content_sha1": "...",
            "content_sha256": "...",
            "content_sha512": "...",
            "directory_permission": "0777",
            "file_permission": "0777",
            "filename": "hello-terraform.txt",
            "id": "..."
          },
          "sensitive_attributes": [],
          "private": "..."
        }
      ]
    }
  ]
}
Resource 結構解析:
mode: 資源模式
managed: 由 Terraform 管理的資源data: Data Source(唯讀資源)type: 資源類型(如 local_file、aws_instance)name: 資源名稱(你在 .tf 檔案中定義的)provider: 使用的 Providerinstances: 資源實例(支援多實例)
attributes: 所有資源屬性的實際值sensitive_attributes: 敏感屬性清單private: Provider 內部使用的私有資料這裡就比較單純,是用於儲存所有 output 的實際計算結果,會像這樣:
{
  "outputs": {
    "content_length": {
      "value": 120,
      "type": "number"
    },
    "hello_file_path": {
      "value": "/path/to/hello-terraform/hello-terraform.txt",
      "type": "string"
    }
  }
}
Terraform 在每次 plan 或 apply 時都會進行三方比較,這也是我們在前面文章中提到的狀態管理機制!
1. 配置檔案 (main.tf)      ← 你想要的狀態
      ↓
2. State 檔案             ← Terraform 記錄的狀態
      ↓
3. 實際資源                ← 真實世界的狀態
我們可以在本地做個測試來觀察 State 的變化會更清楚~
我們先配置與狀態一致的 main.tf:
terraform plan
# 結果:No changes. Infrastructure is up-to-date.
再來修改 main.tf 中的 content:
resource "local_file" "hello_world" {
  filename = "hello-terraform.txt"
  content  = "Hello Terraform! 我修改了內容!"  # ← 修改這裡
}
terraform plan
觀察輸出結果:
# local_file.hello_world will be updated in-place
  ~ resource "local_file" "hello_world" {
      ~ content = "🚀 Hello Terraform!..." -> "Hello Terraform! 我修改了內容!"
        # (其他屬性保持不變)
    }

Plan: 0 to add, 1 to change, 0 to destroy.
# 刪除實際檔案(但保留 state)
rm hello-terraform.txt

terraform plan
觀察輸出結果:
# local_file.hello_world will be created
  + resource "local_file" "hello_world" {
      + content = "Hello Terraform! 我修改了內容!"
      + filename = "hello-terraform.txt"
      # ...
    }
會發現即使我們只是刪除了檔案,Terraform 仍然知道這個資源應該存在!
這邊幫大家整理 State 檔案會在哪些情況更新:
# 列出所有受管理的資源
terraform state list

# 顯示特定資源的詳細資訊
terraform state show local_file.hello_world

# 查看整個 state 的內容
terraform show

# 以 JSON 格式輸出 state
terraform show -json
# 重新整理 state(與實際資源同步)
terraform refresh

# 這等同於
terraform apply -refresh-only
# Terraform 會自動建立備份
ls -la *.tfstate*
# 你會看到:
# terraform.tfstate
# terraform.tfstate.backup

# 手動建立備份
cp terraform.tfstate "terraform.tfstate.backup.$(date +%Y%m%d_%H%M%S)
State 檔案可能會包含敏感資訊,例如:
{
  "attributes": {
    "password": "super_secret_password",
    "api_key": "ak_1234567890abcdef",
    "private_key": "-----BEGIN PRIVATE KEY-----...",
    "database_url": "postgres://user:pass@host:5432/db"
  }
}
我們建立一個包含敏感資料的範例試試看:
# 在 main.tf 中新增
variable "secret_message" {
  description = "機密訊息"
  type        = string
  default     = "這是機密資料:password123"
  sensitive   = true  # 標記為敏感
}

resource "local_file" "secret_file" {
  filename = "secret.txt"
  content  = var.secret_message
}
terraform apply
檢查 state 檔案:

大家會發現即使標記為 sensitive,資料仍會以明文儲存在 state 檔案中!
這邊提供大家安全實踐的方法~
# Terraform 狀態檔案(敏感資料)
*.tfstate
*.tfstate.*

# Terraform 工作目錄
.terraform/
.terraform.lock.hcl

# 執行計畫檔案
*.tfplan

# 變數檔案(可能包含敏感資料)
*.tfvars
terraform.tfvars

# 除了範例檔案
!*.tfvars.example

# 備份檔案
*.backup

# IDE 檔案
.vscode/
.idea/
*.swp
*.swo
*~

# macOS 檔案
.DS_Store
# 限制 state 檔案的讀取權限
chmod 600 terraform.tfstate
chmod 600 terraform.tfstate.backup
除了上面兩個方式外也可以定期清理敏感檔案~
🐈🐈🐈
今天探討了 State 檔案的重要,不過我們現在都還是個人操作,但當需要團隊協作的時候,這些狀態檔案又該怎麼運作呢?
我們可以先想像一下:
👨💻 工程師 A 正在修改網路設定
👩💻 工程師 B 同時在調整伺服器配置
然後兩人同時執行 terraform apply …結果呢?狀態檔案會衝突,基礎設施也可能損毀!
那該怎麼避免這可怕問題發生呢?明天跟大家分享團隊合作的關鍵:Remote State 與 Backend!

