前言
mac經過一夜的獨自升級到 15.6.1 Gemma3就可以使用了
# Use a pipeline as a high-level helper
from transformers import pipeline

pipe = pipeline("text-generation", model="google/gemma-3-4b-it")
messages = [
    {"role": "user", "content": "gemma 家族 用繁體中文"},
]
pipe(messages)
[{'generated_text': [{'role': 'user', 'content': 'gemma 家族 用繁體中文'},
   {'role': 'assistant',
    'content': 'Gemma 家族指的是 Google 的 Gemma 模型系列,以下是它們的繁體中文名稱:\n\n* **Gemma:**  簡稱 Gemma\n* **Gemma 2:**  Gemma 2 (通常直接稱為 Gemma 2)\n* **Gemma 3:**  Gemma 3 (通常直接稱為 Gemma 3)\n\n**重要說明:**\n\n* **Gemma** 是一個英文名稱,直接沿用在繁體中文中是最常見的做法。\n*  “2” 和 “3” 通常只在描述版本號時使用,而非正式名稱。\n\n希望以上資訊對您有幫助!\n'}]}]
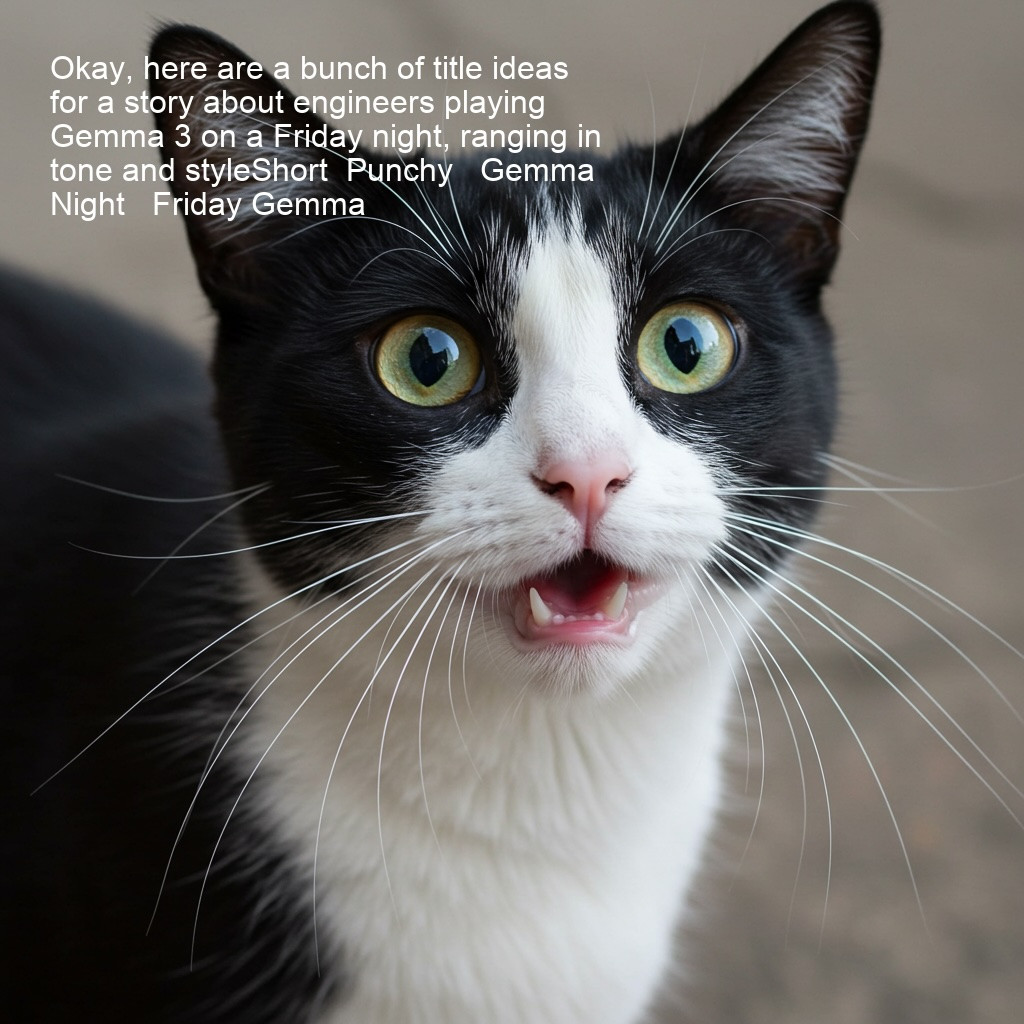
Gemma 迷因圖
可以產生文字後,我們就來一點好玩的,來把產生的文字放到圖上吧
範例code
# 1️⃣ 安裝必要套件(如果還沒裝)
!pip install transformers accelerate torch pillow requests

# 2️⃣ 導入套件
import torch
from transformers import pipeline
from PIL import Image, ImageDraw, ImageFont
import requests
from io import BytesIO
import textwrap
import re

# 3️⃣ 設定裝置
device = "mps" if torch.backends.mps.is_available() else "cpu"
print(f"使用裝置:{device}")

# 4️⃣ 建立文字生成 pipeline
pipe = pipeline(
    "text-generation",
    model="google/gemma-3-4b-it",
    device=device
)

# 5️⃣ 生成迷因文字(只取模型回答)
prompt = "can you thing a title is engineers play Gemma 3 on a Friday night"
output = pipe([{"role": "user", "content": prompt}], max_new_tokens=50)

# 6️⃣ 取得文字,兼容 list / dict / str
gen_text = output[0]["generated_text"]

# 只抓 assistant 的回答
if isinstance(gen_text, list):
    text_list = []
    for item in gen_text:
        if isinstance(item, dict) and item.get("role") == "assistant":
            text_list.append(item["content"])
        elif isinstance(item, str):
            text_list.append(item)
    gen_text = " ".join(text_list)

elif isinstance(gen_text, dict) and gen_text.get("role") == "assistant":
    gen_text = gen_text["content"]

# 7️⃣ 清理亂碼,只保留中文、英文、常用標點
clean_caption = re.sub(r"[{}'\"]", "", gen_text)        # 移除大括號、引號
clean_caption = clean_caption.strip()
clean_caption = re.sub(r"[^0-9a-zA-Z\u4e00-\u9fff。,!?,.!? ]+", "", clean_caption)

print("生成的迷因文字:", clean_caption)

# 8️⃣ 下載模板圖片
img_url = "https://github.com/bebechien/gemma/blob/main/images/surprise.jpg?raw=true"
response = requests.get(img_url)
img = Image.open(BytesIO(response.content)).convert("RGB")

# 9️⃣ 將文字疊到圖片上,並自動換行
draw = ImageDraw.Draw(img)
font = ImageFont.truetype("/System/Library/Fonts/Supplemental/Arial.ttf", 32)

max_width = 40  # 每行最大字數
lines = textwrap.wrap(clean_caption, width=max_width)

y_text = 50
for line in lines:
    draw.text((50, y_text), line, font=font, fill="white")
    bbox = font.getbbox(line)
    line_height = bbox[3] - bbox[1]
    y_text += line_height + 5  # 每行字高度 + 間隔

# 🔟 顯示並存檔
img.show()
img.save("meme_output.png")
print("迷因圖已存為 meme_output.png")
執行結果