
昨天我們加上了中介層:logging、recovery、config。
今天要邁出關鍵的一步:建立第一個業務相關 API —— /search。
雖然我們還沒有連 Elasticsearch,但這一步的目標是:
我們希望 /search API 可以做到:
GET /search?q=keyword 查詢{
"query": "golang",
"hits": [
{ "id": 1, "title": "Learning Go" },
{ "id": 2, "title": "Go Concurrency Patterns" }
]
}
在 main.go 增加一個 handler:
package main
import (
"encoding/json"
"fmt"
"log"
"net/http"
)
// 假資料
type SearchResult struct {
ID int `json:"id"`
Title string `json:"title"`
}
type SearchResponse struct {
Query string `json:"query"`
Hits []SearchResult `json:"hits"`
}
func searchHandler(w http.ResponseWriter, r *http.Request) {
query := r.URL.Query().Get("q")
if query == "" {
http.Error(w, "missing query parameter: q", http.StatusBadRequest)
return
}
resp := SearchResponse{
Query: query,
Hits: []SearchResult{
{ID: 1, Title: "Learning Go"},
{ID: 2, Title: "Go Concurrency Patterns"},
},
}
w.Header().Set("Content-Type", "application/json")
if err := json.NewEncoder(w).Encode(resp); err != nil {
http.Error(w, fmt.Sprintf("encode error: %v", err), http.StatusInternalServerError)
}
}
func main() {
cfg := LoadConfig()
mux := http.NewServeMux()
mux.HandleFunc("/healthz", healthHandler)
mux.HandleFunc("/search", searchHandler)
handler := LoggingMiddleware(RecoveryMiddleware(mux))
log.Printf("Server listening on %s", cfg.Port)
if err := http.ListenAndServe(cfg.Port, handler); err != nil {
log.Fatal(err)
}
}
/search新增 search_test.go:
package main
import (
"encoding/json"
"net/http"
"net/http/httptest"
"testing"
)
func TestSearchHandler(t *testing.T) {
tests := []struct {
name string
query string
wantStatus int
wantHits int
}{
{
name: "valid query",
query: "golang",
wantStatus: http.StatusOK,
wantHits: 2,
},
{
name: "missing query",
query: "",
wantStatus: http.StatusBadRequest,
wantHits: 0,
},
}
for _, tt := range tests {
t.Run(tt.name, func(t *testing.T) {
req := httptest.NewRequest(http.MethodGet, "/search?q="+tt.query, nil)
w := httptest.NewRecorder()
searchHandler(w, req)
if w.Code != tt.wantStatus {
t.Errorf("status got %d, want %d", w.Code, tt.wantStatus)
}
if tt.wantStatus == http.StatusOK {
var resp SearchResponse
if err := json.Unmarshal(w.Body.Bytes(), &resp); err != nil {
t.Fatalf("failed to parse JSON: %v", err)
}
if len(resp.Hits) != tt.wantHits {
t.Errorf("hits got %d, want %d", len(resp.Hits), tt.wantHits)
}
}
})
}
}
啟動伺服器:
go run .
測試:
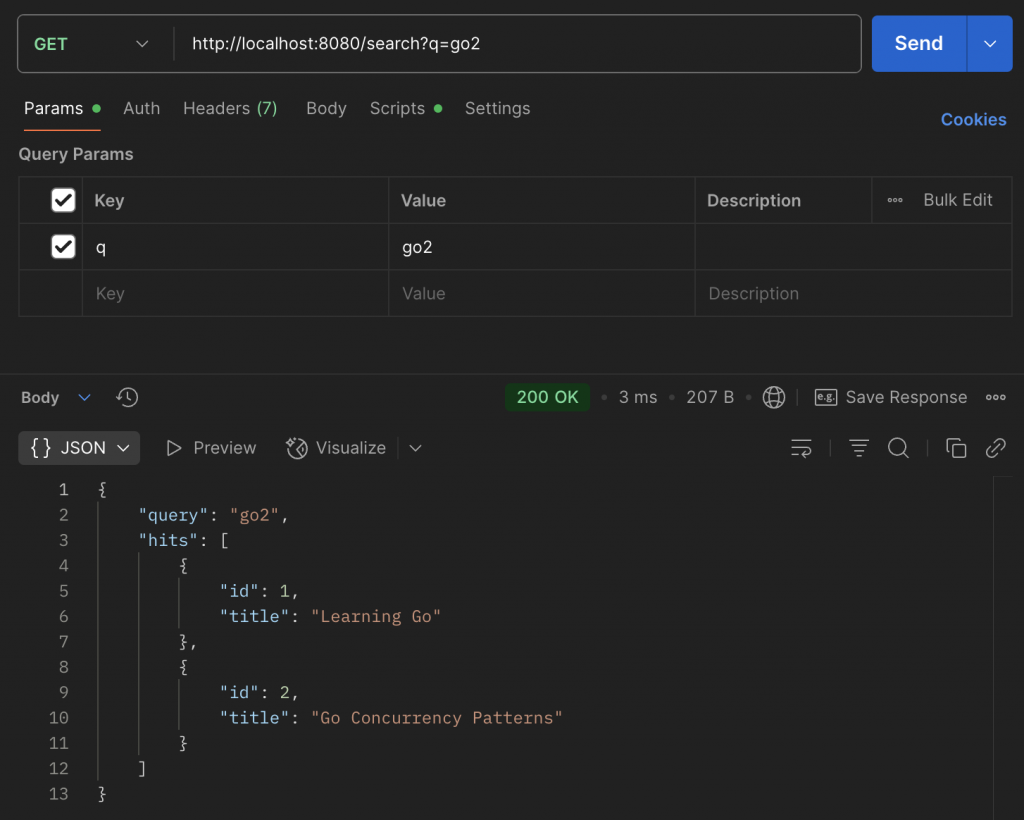
curl "http://localhost:8080/search?q=go2"
輸出應該是:
{
  "query": "golang",
  "hits": [
    { "id": 1, "title": "Learning Go" },
    { "id": 2, "title": "Go Concurrency Patterns" }
  ]
}
今天我們完成了:
/search API 規格這一步讓 API「看起來是真的」,雖然還沒接 Elasticsearch,但它已經是個完整的 endpoint,可以被前端或其他服務測試串接。
👉 明天我們要讓 API 更可靠:加入 context/timeout,避免下游請求無限卡住。

 iThome鐵人賽