在前十天,我們已經完成了從環境、設定、專案結構、依賴管理、一鍵化工作流、程式風格到型別與資料契約的基礎建設。
專案終於能「穩定地跑」,但還缺一塊關鍵拼圖:自動化測試。
測試不是附屬品,而是工程化專案的生命線。今天,我們會建立一個完整的測試藍圖,涵蓋:
沒有測試的專案,開發就像拆定時炸彈:每次修改都擔心哪裡會爆。
常見問題包括:
一個良好的測試策略應具備:
延續 Day 4 的專案結構,建議用 src/ + tests/ 架構:
my_project/
├─ src/my_project/
│   ├─ __init__.py
│   ├─ core.py
│   └─ adapters/
│       └─ web.py
└─ tests/
    ├─ conftest.py
    ├─ unit/
    │   └─ test_core.py
    ├─ integration/
    │   └─ test_api.py
    └─ e2e/
        └─ test_cli.py
tests/unit/:快速驗證函式與類別邏輯。tests/integration/:測 API、DB、檔案等組件交互。tests/e2e/:模擬真實使用場景,確保主要路徑能走通。pytest 的超能力就是 fixtures。它能統一產生測試需要的資源,減少重複。
範例 tests/conftest.py:
import subprocess
import sys
from pathlib import Path
from typing import NamedTuple

import pytest

class CliResult(NamedTuple):
    code: int
    out: str
    err: str

@pytest.fixture
def run_cli(tmp_path: Path) -> callable:

    def _run(args: list[str] | None = None) -> CliResult:
        cmd = [sys.executable, "-m", "demo_app.main"]
        if args:
            cmd.extend(args)
        proc = subprocess.run(cmd, capture_output=True, text=True, cwd=str(tmp_path))
        return CliResult(proc.returncode, proc.stdout, proc.stderr)

    return _run
使用方式:
import pytest

pytestmark = pytest.mark.e2e

def test_cli_prints_hello_world(run_cli):
    result = run_cli()
    assert result.code == 0
    assert "Hello World" in result.out
from your_package.core import add

def test_add_basic():
    assert add(2, 3) == 5
def test_avg_api(client):
    resp = client.post("/avg", json={"nums": [1, 2, 3]})
    assert resp.status_code == 200
    assert resp.json()["result"] == 2
def test_sqlite_roundtrip(temp_db):
    cur = temp_db.cursor()
    cur.execute("CREATE TABLE users (id TEXT, name TEXT)")
    cur.execute("INSERT INTO users VALUES (?, ?)", ("u1", "Alice"))
    temp_db.commit()
    cur.execute("SELECT name FROM users WHERE id='u1'")
    assert cur.fetchone()[0] == "Alice"
import httpx
from your_package.services.ext import fetch_title

def test_fetch_title(mocker):
    mock_resp = mocker.Mock(text="Hello World", raise_for_status=lambda: None)
    mocker.patch.object(httpx, "get", return_value=mock_resp)
    assert fetch_title("http://fake") == "Hello World"
import logging

logger = logging.getLogger("demo")

def work(x):
    logger.info("working %s", x)
    return x*2

def test_logging(caplog):
    caplog.set_level(logging.INFO)
    assert work(3) == 6
    assert "working 3" in caplog.text
在 pyproject.toml 加入:
[tool.pytest.ini_options]
addopts = """
  -ra
  --strict-markers
  --disable-warnings
  --cov=your_package
  --cov-report=term-missing
  --cov-report=xml:coverage.xml
  --cov-fail-under=80
"""
這樣就能:
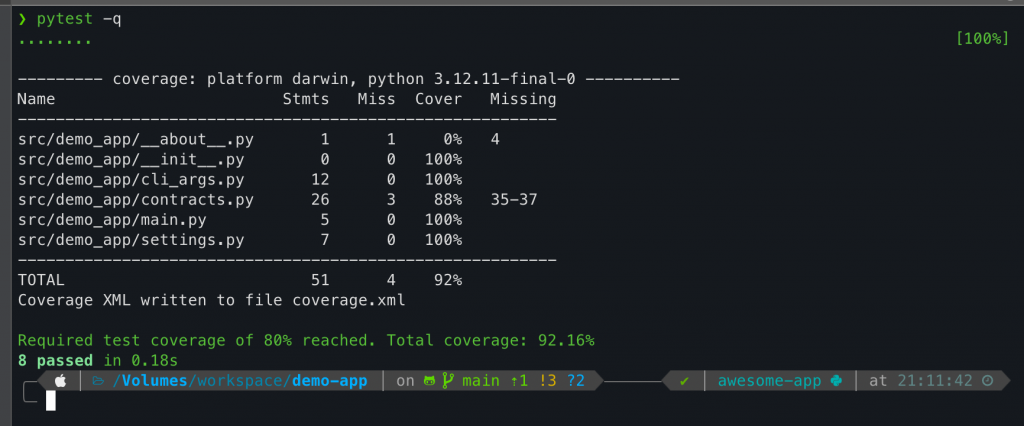
執行:
pytest -q
延續 Day 8,我們可以在 pyproject.toml 增加:
[tool.hatch.envs.test]
dependencies = ["pytest", "pytest-cov", "pytest-mock", "httpx", "fastapi"]
[tool.hatch.envs.test.scripts]
unit = "pytest -m 'not slow and not e2e'"
all = "pytest"
ci = "pytest --junitxml=report.xml"
noxfile.py:
import nox

@nox.session(python=["3.10", "3.11", "3.12"])
def tests(session):
    session.install(".[dev]")
    session.run("pytest", "--cov=your_package", "--cov-fail-under=80")
我們還可以在pyproject.toml增加下列,確保在push前的unit test可以達到一定的覆蓋率。
pre-commit-install-push = "pre-commit install --hook-type pre-push"
最後調整.pre-commit的檔案,就能達到在push前檢查單元測試的執行狀況和覆蓋率
      # 建議在 push 時跑完整測試(含 coverage gate)
      - id: hatch-tests
        name: hatch tests (with coverage gate)
        entry: hatch
        language: system
        args: ["run", "test-all"]
        stages: [push]
        pass_filenames: false
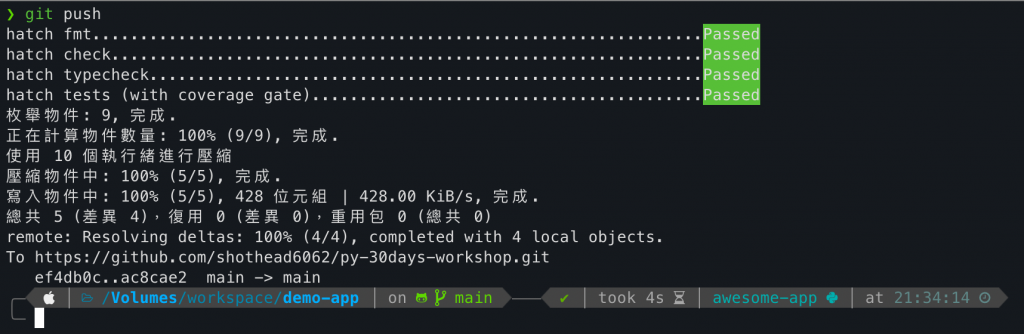
如下圖,我們在push就觸發了pre-commit的機制,讓他再次檢查,並且確認一下test Coverage是否有達標,為什麼測試覆蓋率要在push前,因為我們在編寫程式的時候,如果測試覆蓋率還不足,那會造成我們無法commit。在工作的過程中,會是一件很惱人的事情。
從今天開始,我們的專案已經具備了完整的測試基礎。
接下來的 Day 12,我們會進一步探討 設定與祕密管理,看看如何處理 .env、pydantic-settings 與雲端祕密服務,讓專案更安全地管理敏感資訊。 🚀


 iThome鐵人賽