🎯 系列目標:用 30 天時間,從零開始打造一個專屬輔大學生的課表生成 Chrome 擴充功能
💻 作者:輔大智慧資安 412580084
📅 Day 27:進階功能實作 - 重新載入與匯出
昨天 Day 26 我們完成了簡化的響應式設計,特別優化了手機版表格的寬度顯示和文字處理。今天我們將實作課表的進階功能,包括重新載入和匯出圖片功能。
今天我們要完成:
重新載入功能允許使用者在不重新整理頁面的情況下,重新從 Chrome Storage 讀取最新的課表資料並更新顯示。這個功能在課表資料更新後特別有用。
在 fju-schedule-extension 專案中,重新載入按鈕已經在 schedule.html中定義:
<!-- 控制面板 -->
<div class="controls-panel">
    <button id="refreshDataBtn" class="control-btn">
        🔄 重新載入
    </button>

    <select id="themeSelector" class="theme-selector">
        <option value="default">🌟 預設主題</option>
        <option value="forest">🌲 森林主題</option>
        <option value="ocean">🌊 海洋主題</option>
        <option value="lavender">🌺 薰衣草主題</option>
        <option value="sunset">🌞 夕陽主題</option>
        <option value="violet">🌷︎ 紫羅蘭主題</option>
        <option value="sakura">🌸 櫻花主題</option>
    </select>

    <button id="exportImageBtn" class="control-btn">
        📷 匯出圖片
    </button>
</div>
在 schedule-renderer.js中實現重新載入功能處理意外情況時:
// 重新載入課表
async reloadSchedule() {
  this.log('🔄 開始重新載入課表');

  try {
    // 顯示載入狀態
    this.showNotification('正在重新載入課表...', 'info');

    // 重新渲染課表
    const success = await this.renderSchedule();

    if (success) {
      this.showNotification('課表重新載入成功', 'success');
    } else {
      this.showNotification('課表重新載入失敗', 'error');
    }

    return success;

  } catch (error) {
    this.log(`❌ 重新載入失敗: ${error.message}`);
    this.showNotification('重新載入失敗: ' + error.message, 'error');
    return false;
  }
}

// 初始化控制按鈕
initControls() {
  // 重新載入按鈕
  const refreshBtn = document.getElementById('refreshDataBtn');
  if (refreshBtn) {
    refreshBtn.addEventListener('click', async () => {
      try {
        refreshBtn.disabled = true;
        refreshBtn.textContent = '🔄 載入中...';

        await this.reloadSchedule();

        refreshBtn.disabled = false;
        refreshBtn.textContent = '🔄 重新載入';

      } catch (error) {
        refreshBtn.disabled = false;
        refreshBtn.textContent = '🔄 重新載入';
        this.showNotification('重新載入失敗: ' + error.message, 'error');
      }
    });
  }

  // 匯出圖片按鈕
  const exportImageBtn = document.getElementById('exportImageBtn');
  if (exportImageBtn) {
    exportImageBtn.addEventListener('click', () => {
      this.exportAsImage();
    });
  }
}
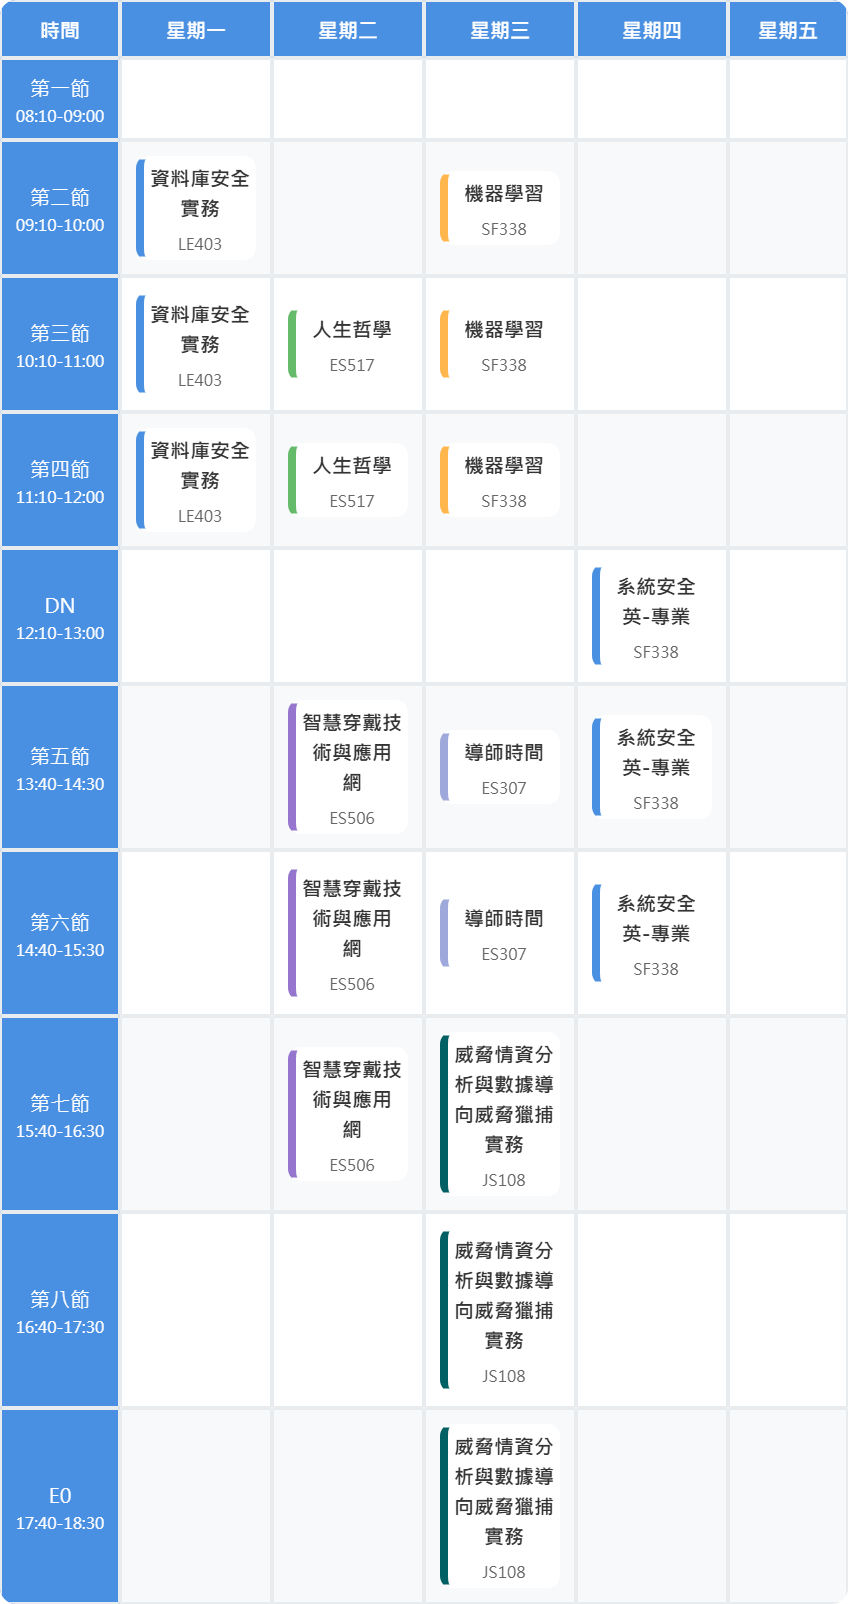
我們使用 html2canvas 庫將整個課表容器轉換為圖片並下載。這個功能允許使用者保存課表圖片以便分享或打印
檔案下載:html2canvas 下載
在 schedule-renderer.js 中實現匯出功能:
// 匯出為圖片
exportAsImage() {
  this.log('🖼️ 開始匯出為圖片');

  try {
    // 檢查是否有所需的庫
    if (typeof html2canvas === 'undefined') {
      this.showNotification('缺少 html2canvas 庫,請先引入該庫', 'error');
      return;
    }

    // 獲取課表容器
    const scheduleContainer = document.querySelector('.schedule-container');
    if (!scheduleContainer) {
      throw new Error('找不到課表容器');
    }

    // 顯示匯出狀態
    this.showNotification('正在生成圖片...', 'info');

    // 使用 html2canvas 轉換為圖片
    html2canvas(scheduleContainer, {
      scale: 2, // 提高圖片品質
      useCORS: true,
      backgroundColor: '#ffffff'
    }).then(canvas => {
      // 轉換為圖片數據
      const imageData = canvas.toDataURL('image/png');

      // 創建下載連結
      const link = document.createElement('a');
      link.download = `輔大課表_${new Date().toISOString().split('T')[0]}.png`;
      link.href = imageData;
      link.click();

      this.showNotification('課表圖片匯出成功', 'success');
      this.log('✅ 課表圖片匯出完成');
    }).catch(error => {
      throw error;
    });

  } catch (error) {
    this.log(`❌ 圖片匯出失敗: ${error.message}`);
    this.showNotification('圖片匯出失敗: ' + error.message, 'error');
  }
}
確保主題系統在響應式設計中正常工作,特別是深色模式在手機版和電腦版都能正確顯示:
/* 深色模式適配 */
@media (prefers-color-scheme: dark) {
  :root {
    --background-color: #1a1a1a;
    --container-bg: #2d2d2d;
    --text-color: #e0e0e0;
    --header-color: #ffffff;
    --hover-color: #3a3a3a;
    --border-color: #444444;
    --course-card-bg: #333333;
    --course-shadow: rgba(0, 0, 0, 0.3);
  }

  .schedule-table tr:nth-child(even) {
    background-color: #333333;
  }

  .schedule-table tr:hover {
    background-color: #3a3a3a;
  }

  .course-name {
    color: #ffffff;
  }

  .course-room {
    color: #cccccc;
  }
}
測試步驟:
今天我們完成了課表的進階功能實作,包括重新載入和匯出圖片功能,並確保這些功能在響應式設計中正常工作。明天我們將進行專案整合測試,確保所有功能協同工作正常!
 alan_1024
