Grounding DINO 是一種開源的零樣本(zero-shot)物件檢測模型,由 IDEA-Research 團隊於 2023 年提出,被認為是當前開放詞彙物件偵測 (Open-Vocabulary Object Detection) 和 視覺定位 (Visual Grounding) 領域的領先者。它結合了語言和視覺訊息,能夠在不需額外訓練的情況下,根據文字描述,在圖像中定位並框選出對應的物件。
Grounding DINO 的目標是將自然語言描述與圖像中的視覺物件進行關聯(grounding),實現靈活的物件檢測。
在傳統的物件偵測(object detection)任務中,多數模型都是 closed-set 模型,也就是訓練時就已經固定好一組類別(例如 COCO 裡的 80 類、Pascal VOC 裡的 20 類等)。這樣一來如果在測試時遇到訓練時沒見過的物件(例如奇怪的動物、新型產品等),模型往往無法辨識或會把它錯誤地標成某個已知類別。為了解決這個問題,就有 open-set / open-vocabulary / zero-shot 偵測(或稱開放類別偵測)的興趣:希望模型能夠透過提示文字 (“狗”、“藍色球” 或 “在桌子上那個杯子” 這類指代語句) 來偵測圖中任意物件,甚至是訓練時未包含的類別。
Grounding DINO 就是在這條路上比較成功的一個模型,不依賴於預定義的類別標籤,它把 DINO(DETR 的一種變體)和基於語言-視覺對齊(grounded pre-training)的思想結合起來,讓物件偵測具有更好的泛化能力。
Grounding DINO 的出現極大地推動了電腦視覺的實用化,尤其適用於需要精確定位和靈活指令的專業應用:
這個範例可以在Colab T4運行,直接複製貼上就可以了。
# 安裝必要套件
# !pip install -q transformers accelerate timm opencv-python matplotlib

import torch
import requests
import cv2
import matplotlib.pyplot as plt
from transformers import AutoProcessor, AutoModelForZeroShotObjectDetection

# 載入模型
model_id = "IDEA-Research/grounding-dino-base"
processor = AutoProcessor.from_pretrained(model_id)
model = AutoModelForZeroShotObjectDetection.from_pretrained(model_id)

# 測試圖片
image_url = "https://ultralytics.com/images/zidane.jpg"
image_path = "zidane.jpg"
with open(image_path, "wb") as f:
    f.write(requests.get(image_url).content)

# 讀取圖片 (OpenCV BGR → RGB)
image = cv2.cvtColor(cv2.imread(image_path), cv2.COLOR_BGR2RGB)

# 設定文字提示
texts = ["person", "soccer ball"]

# 前處理
inputs = processor(images=image, text=texts, return_tensors="pt")

# 推論
with torch.no_grad():
    outputs = model(**inputs)

# 解析輸出
target_sizes = torch.tensor([image.shape[:2]])
results = processor.post_process_grounded_object_detection(
    outputs,
    target_sizes=target_sizes,
    threshold=0.3
)

# results 是 list of dict
result = results[0]

# 繪製結果
annotated = image.copy()
for box, score, label in zip(result["boxes"], result["scores"], result["labels"]):
    box = [int(i) for i in box.tolist()]
    # 這裡 label 已經是字串 (e.g., "person"),直接用就好
    cv2.rectangle(annotated, (box[0], box[1]), (box[2], box[3]), (255,0,0), 2)
    cv2.putText(annotated, f"{label}: {score:.2f}", (box[0], box[1]-10),
                cv2.FONT_HERSHEY_SIMPLEX, 0.6, (255,0,0), 2)

plt.figure(figsize=(10,10))
plt.imshow(annotated)
plt.axis("off")
plt.show()
(輸出結果)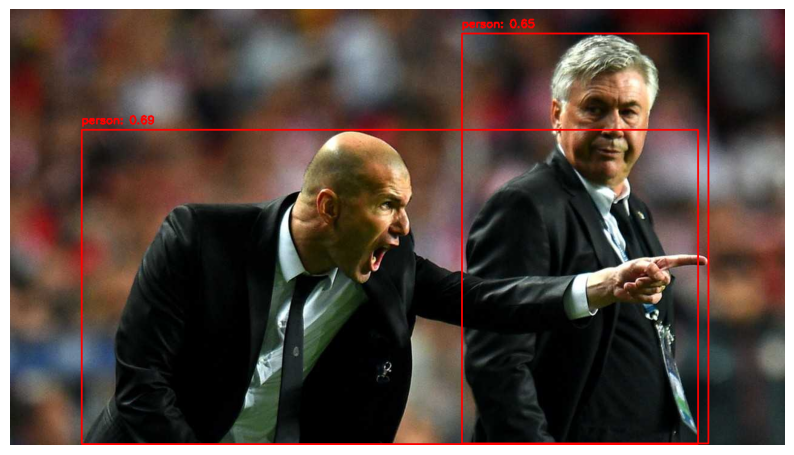
這個結果看起來不錯!
前面介紹的模型,有的沒有實作範例,其實是因為沒有在Colab跑成功,努力中,若之後有成功再附上。

