測試報告是測試裡非常重要的一環,讓我們的產出變得具象化,就像是辛苦的戰役過後,清楚地記錄所有過程、勝負的戰報,讓團隊能一目了然地看到成果與問題。
Test Report 是整個自動化測試的靈魂
老闆和客戶不會知道你的測試架構設計的有多完美
他們第一眼看到的是你的Test Report 能提供多少資訊來判斷測試結果和解決問題
-- 引用自小書僮David的筆記本
Playwright 本身提供多種 Report 格式,可以直接在 config 裡設定:html、line、json、dot、blob、junit 等等,HTML 格式雖已經能夠完整的呈現測試結果,但無法很直觀的查看各 project 的測試結果,Allure Report 不僅能依據 project 分類統計測試案例 pass / fail / broken 的數量,還會記錄實際測試執行的 Timestamp,讓團隊更容易 debug。
在開始使用 Allure Report 之前,必須先安裝在系統上。
由於 Allure Report 是以 JAVA 開發,如果要使用需要 Java 環境支援,因此請先確認系統已安裝 Java 8 或以上版本,並設定好環境變數 JAVA_HOME。
接著,依照你的作業系統執行以下安裝指令:
scoop install allure
brew install allure
brew install allure
npm install -g allure-commandline
安裝完成後,才能正常產生圖形化的測試報告。若未安裝 Allure,即使測試執行後會生成 Allure 所需的原始資料,也無法將其轉換為可視化的報告。
依據你使用的套件管理系統安裝 Allure Report 套件到專案內:
npm install --save-dev @playwright/test allure-playwright
yarn add --dev @playwright/test allure-playwright allure-js-commons
pnpm install --dev @playwright/test allure-playwright
playwright.config.ts 設定報告格式Playwright 可以設定同時產出多種報告格式,需要以 array 形式表達,例如想同時產出 html 與 Allure Report,可以這樣設定:
import { defineConfig } from '@playwright/test';

export default defineConfig({
    reporter: [
        ['html'],
        ['allure-playwright']
    ],
    // ...
});
如果想讓本地產出報告格式與 CI 上產出格式不同,例如本地測試時想產出 html,而在 CI 上要產出 Allure Report,可以這樣設定:
import { defineConfig } from '@playwright/test';

export default defineConfig({
    reporter: process.env.CI ? 'allure-playwright' : 'html',
    // ...
});
輸入 npx playwright test 執行後,可看見已產出原始測試結果: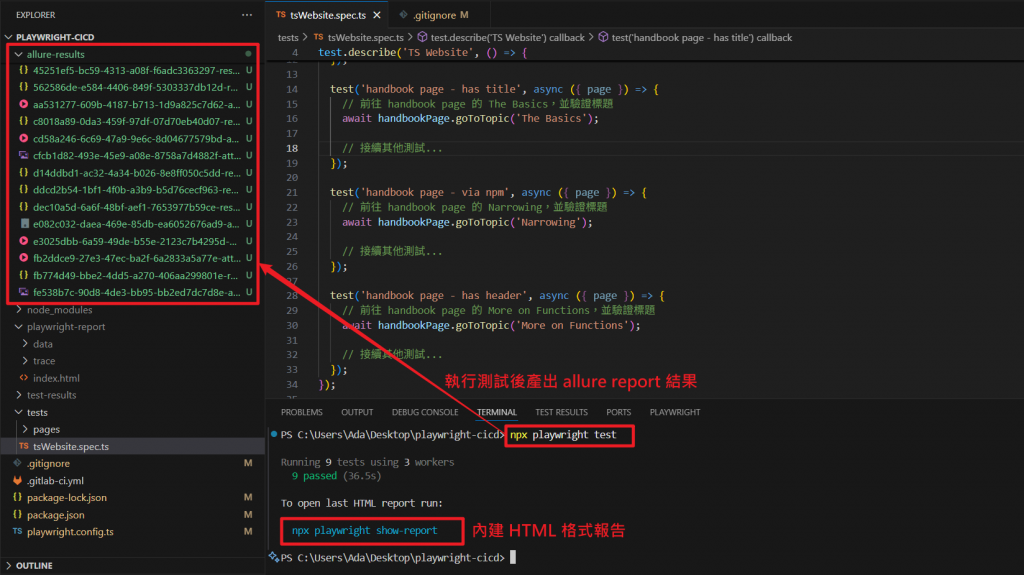
輸入 allure serve allure-results:
執行後瀏覽器會直接彈出 Allure Report 視窗: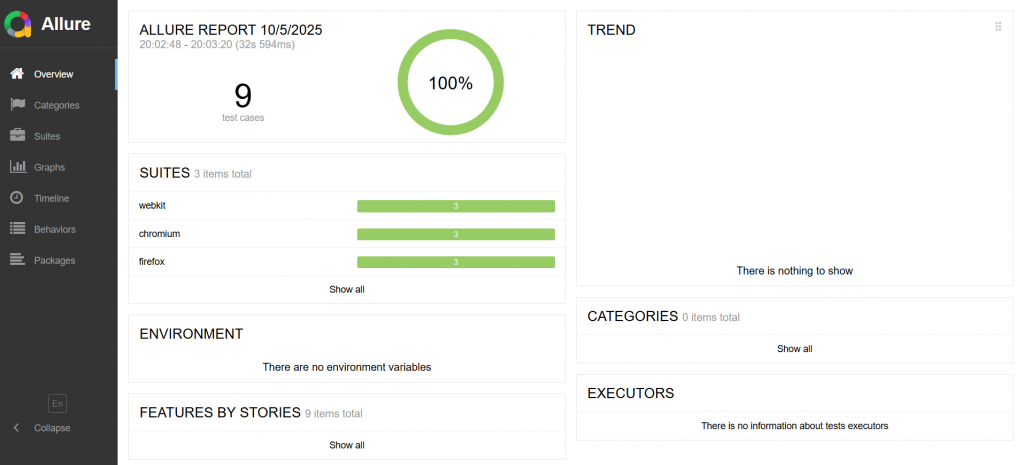
如果想要保存 Allure Report HTML 格式方便查詢,可輸入以下指令: allure generate allure-results -o allure-report --clean,這段指令是從 allure-results 拿取測試結果並生成測試報告到 allure-report 資料夾內。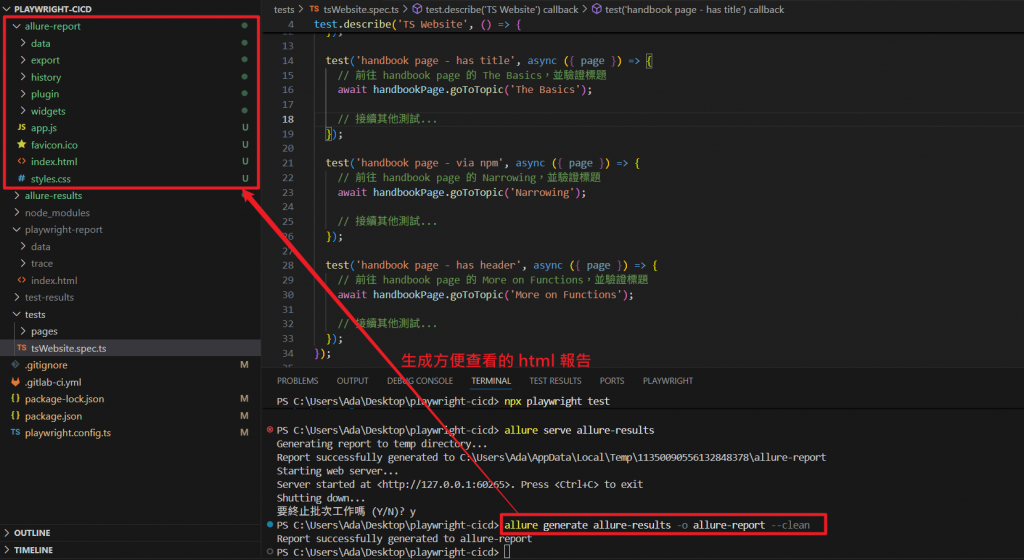
執行測試的環境也至關重要,可能會直接影響測試結果,因此可以在設定裡直接 import Node 內建的 os 套件:
import { defineConfig, devices } from '@playwright/test';
import os from 'os';

export default defineConfig({
  // ...

  outputDir: 'allure-results',
  reporter: [
    ['allure-playwright', {
      environmentInfo: {
        os_platform: os.platform(),
        os_release: os.release(),
        os_version: os.version(),
        node_version: process.version,
      }
    }]
  ]

  // ...
});
報告內就會顯示執行測試環境的作業系統相關資訊:
💡 Tips:
記得將/allure-results/與/allure-report/加入.gitignore避免本地測試的結果一同被提交到 CI/CD 環境上。
- npx playwright test --output=allure-results/
  script:
    - apt-get update && apt-get install -y openjdk-17-jdk   # 安裝 Java 17
    - npm install -g allure-commandline   # 安裝 Allure Report
    - allure generate allure-results -o allure-report --clean  # 拿取測試結果並生成測試報告
playwright.yml 加上:
- name: Install Allure CLI
  run: npm install -g allure-commandline --save-dev    # 安裝 allure report 套件
- name: Generate Allure Report
  run: allure generate allure-results --clean -o allure-report    # 拿取測試結果並生成測試報告
在 GitHub Actions 上通常不需要額外安裝 Java,但同樣須注意資料夾名稱是否正確。
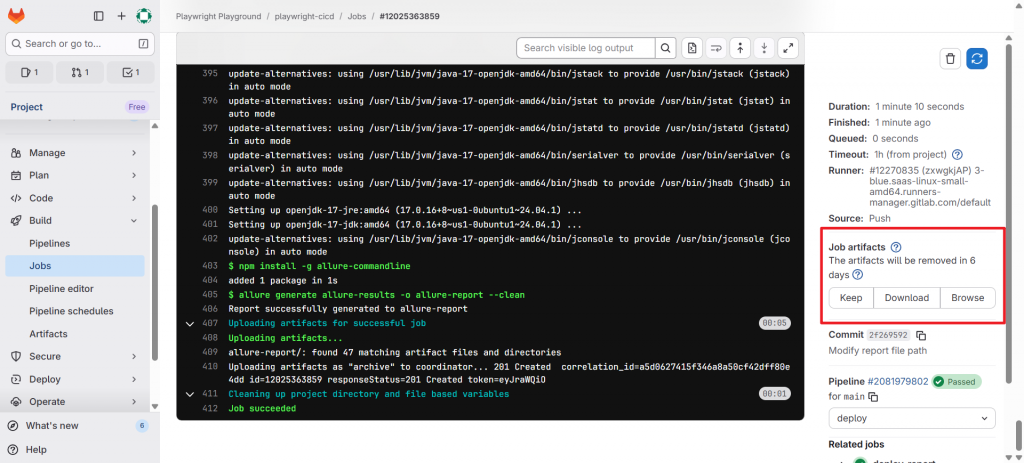
workflow 執行後,點擊部署好的靜態頁面,就能看見 Allure Report: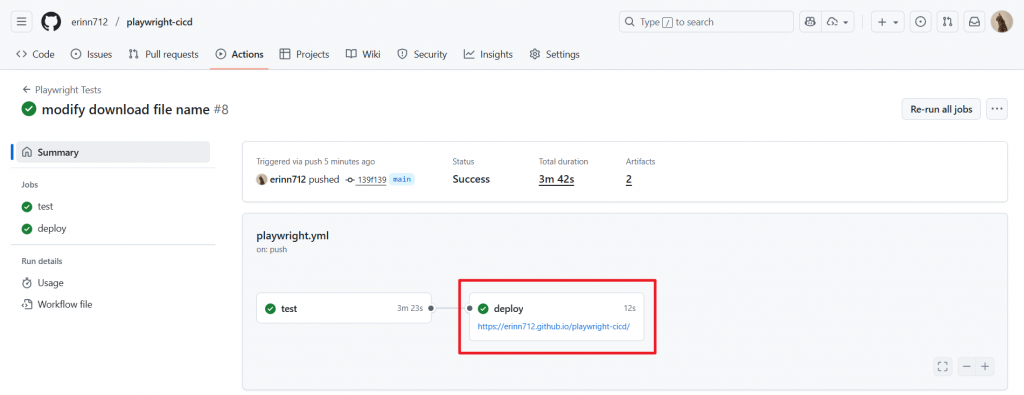
如有興趣,可至 Github Workflow 查看結果(可下載 Allure Report):https://github.com/erinn712/playwright-cicd/actions/runs/18259600503
到這裡,我們已經能夠透過 Allure Report 以圖形化呈現測試結果,並且成功整合至 CI/CD 流程中,增加團隊協作的效率,接下來,我們要運用 storageState 保存登入狀態以加快測試的速度,減少重複的登入步驟,讓自動化流程更加流暢、精簡。

