上一篇運用 storageState() 成功從正常登入流程拿到驗證資料,並在後續的測試當中重複使用,如此就不必在每次的測試之前重複再走一遍登入流程。接著,要更進一步跳過登入流程,直接透過 API 拿到驗證資料,來看看如何實作吧!
先直接以 Playwright 官網的範例來試試看:
// setup/auth.setup.ts
import { test as setup } from '@playwright/test';

const authFile = 'playwright/.auth/user.json';

setup('authenticate', async ({ request }) => {
  // 傳送驗證請求,將 user 與 password 換成自己的
  await request.post('https://github.com/login', {
    form: {
      'user': 'user',
      'password': 'password'
    }
  });
  await request.storageState({ path: authFile });
});
執行之後順利拿到登入驗證的資料: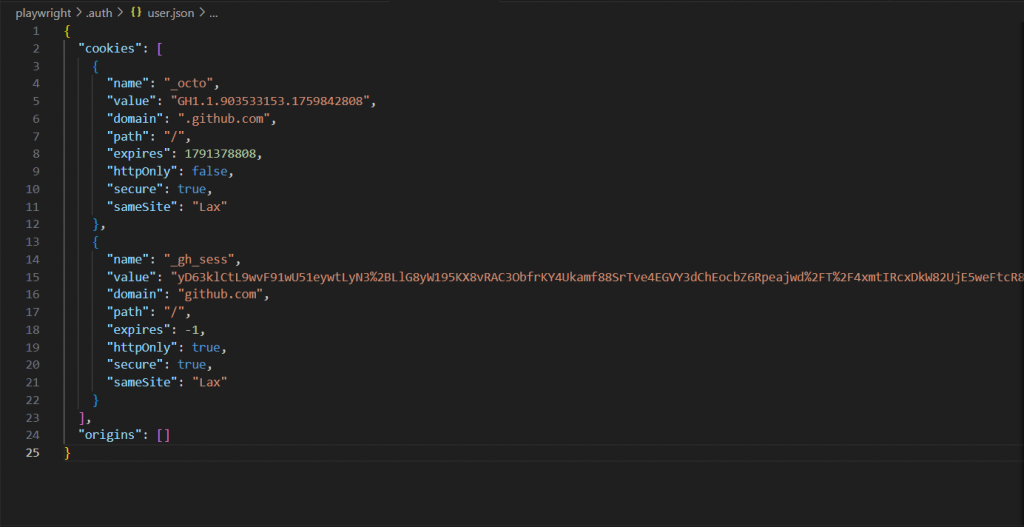
看起來一切都是如此順利 ~ 如此簡單 ~
那麼我們到 Automation Exercise 這個專門練習測試的網站試看看。
首先在網站上註冊一組帳號:
email: ada@example.com
password: ada001
查看此網站 API 列表,找到 POST To Verify Login with valid details 這一個 API: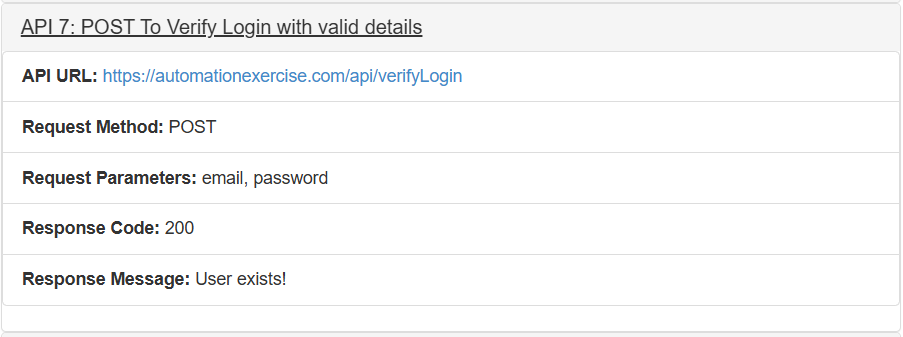
將範例內容替換成剛剛註冊的帳號資訊:
import { test as setup } from '@playwright/test';

const exerciseAuthFile = 'playwright/.auth/exerciseUser.json';

setup('exercise authenticate', async ({ request }) => {
  await request.post('https://automationexercise.com/api/verifyLogin', {
    form: {
      'user': 'ada@example.com',
      'password': 'ada001'
    }
  });
  await request.storageState({ path: exerciseAuthFile });
});
滿心期待地按下執行!成功!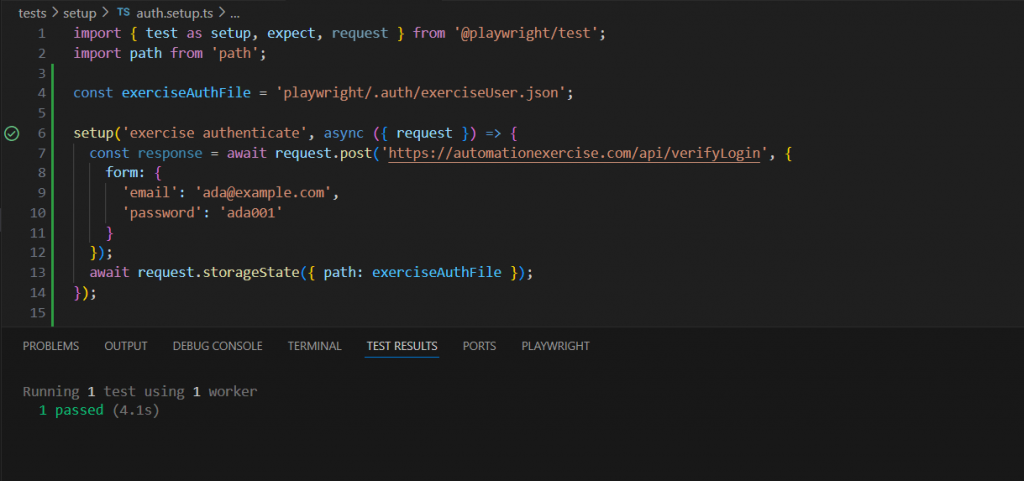
代誌不是憨人想得那麼簡單,Data 啥米都沒有...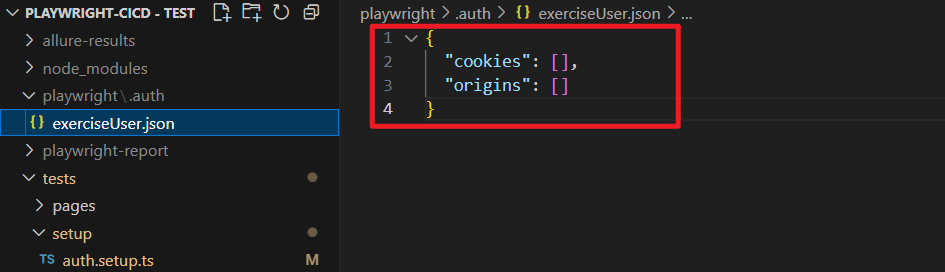
為了確認我們打 API 的過程是否正確,讓我們先到 Postman 嘗試看看:
Postman 可以拿到預期的回傳資料,代表我們打 API 的過程沒有問題,那麼為什麼以 Playwright 的方法實作卻沒有拿到預期的回傳資料呢?先仔細檢查一下回傳資料:
setup('exercise authenticate', async ({ request }) => {
  // 發送認證請求,並儲存回應
  const response = await request.post('https://automationexercise.com/api/verifyLogin', {
    form: {
      'email': 'ada@example.com',
      'password': 'ada001'
    }
  });

  // 解析回應內容
  const responseBody = await response.json();
  console.log('API Response Content:', responseBody);

  await request.storageState({ path: exerciseAuthFile });
});
原來,預期的回應結果是儲存在 body 當中: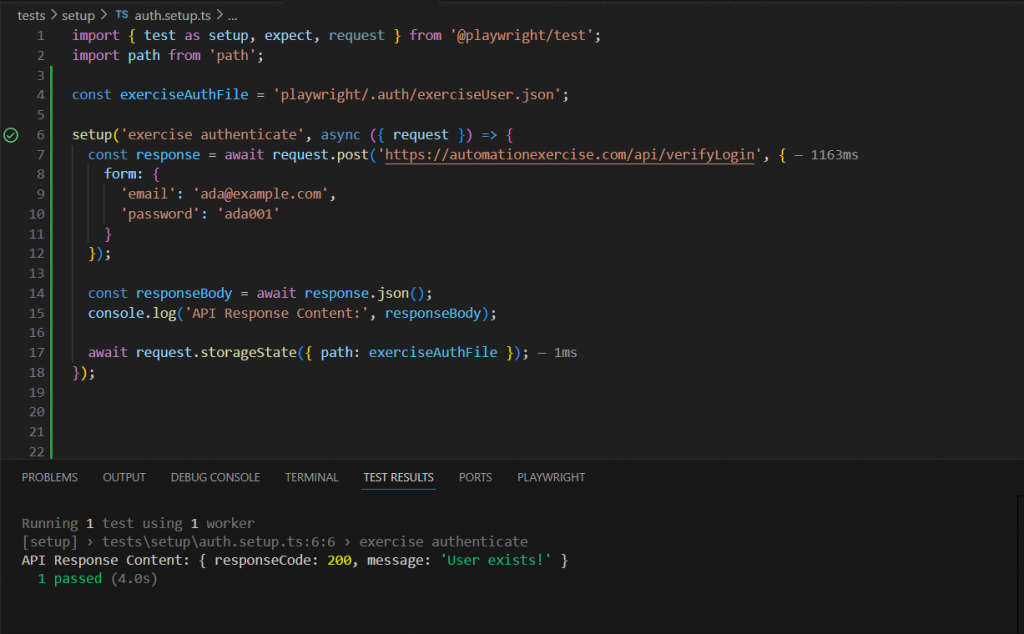
再對照一下 Github 的範例,原來,Playwright 的 storageState() 方法會從 cookies 獲取驗證,但是,並非所有登入驗證的 API 都將資料儲存在 cookies 當中,如此,我們就必須對 API 回傳的資料額外處理。
不過由於剛剛的練習網站回傳內容並沒有驗證資料,我們改用其他同樣不是將驗證資料存在 cookies 的 API 嘗試看看: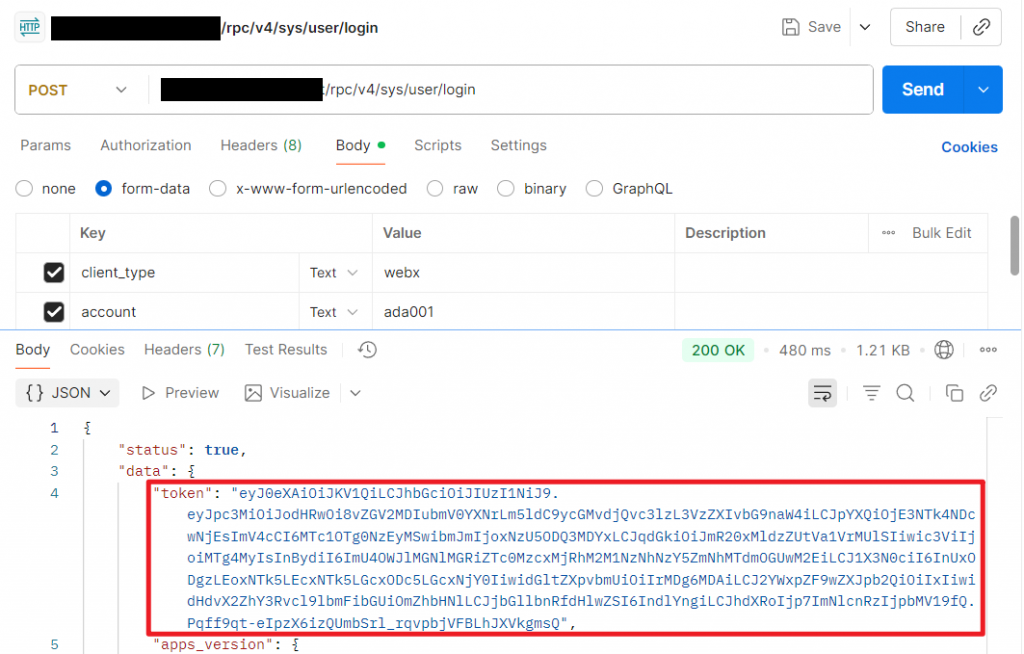
確認回傳的驗證 token 儲存在 Body 的 data 裡,就可以針對回傳內容做處理:
const url = 'baseUrl';
const account = 'ada001';
const password = 'password'

const apiAuthFile = path.join(__dirname, '../.auth/apiAuth.json');

setup('authenticate API', async ({ request }) => {
  // 傳送驗證請求
  const response = await request.post(`${url}/rpc/v4/sys/user/login`, {
    form: {
      "client_type": 'webx',
      'account': account,
      'password': password
    }
  });

  console.log('API Response status:', response.status());

  // 解析回應獲取 token
  const responseBody = await response.json();
  console.log('Login successful, received token');

  if (responseBody.status && responseBody.data && responseBody.data.token) {
    const token = responseBody.data.token;
    console.log('Token received:', token.substring(0, 50) + '...');

    // 創建包含 JWT token 的認證資訊
    const authData = {
      token: token,
      cookies: [{ value: token }],
      // 添加額外的認證資訊
      extraHTTPHeaders: {
        'Authorization': `Bearer ${token}`,
        'X-Auth-Token': token
      }
    };

    // 手動保存認證資料
    const fs = require('fs');
    const path = require('path');

    // 確保 .auth 資料夾存在
    const authDir = path.dirname(apiAuthFile);
    if (!fs.existsSync(authDir)) {
      fs.mkdirSync(authDir, { recursive: true });
    }

    // 保存 token 資料
    fs.writeFileSync(apiAuthFile, JSON.stringify(authData, null, 2));
    console.log('Auth data saved to:', apiAuthFile);

    // 驗證保存的內容
    const savedContent = fs.readFileSync(apiAuthFile, 'utf8');
    console.log('Saved auth data preview:', savedContent.substring(0, 200) + '...');

  } else {
    throw new Error('Failed to get token from API response');
  }
});
執行測試時,就能看見登入的驗證資料實際被儲存起來:
到這裡,我們嘗試透過 API 取得驗證資料並以 storageState() 將其儲存起來,接下來,我們要試圖將這個流程整合進 POM (Page Object Model) 架構中,讓測試能夠靈活地以不同角色登入,實現更具擴充性的驗證流程。


 iThome鐵人賽