今天繼續將後端資料庫firebase跟vue專案做整合
先提一下我昨天遇到的紅色標字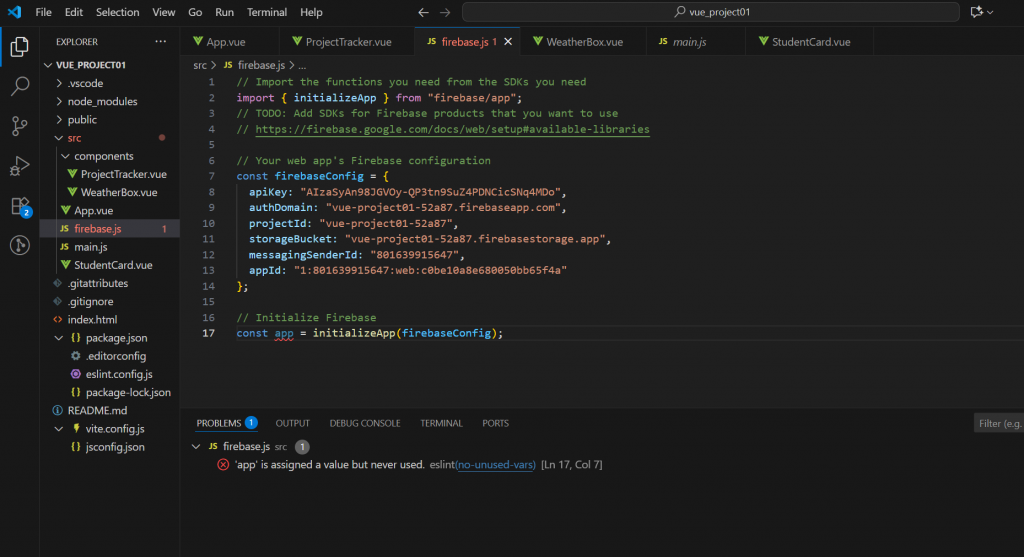
這是 ESLint 提示 app 沒有被用到。
因為現在只有initializeApp(firebaseConfig),但並沒有真的把 app 或 Firestore 匯出來使用。
所以在import下新增這段程式import { getFirestore } from "firebase/firestore";
然後底部新增兩段const db = getFirestore(app)export { db }
紅色底線就消失了~(紅底線不消失我可能會失眠)
好切回來,我們到Firebase Console啟用核心服務
先點進建好的project,在左側導航欄中,找到 Build (建構),下拉選單點擊Firestore Database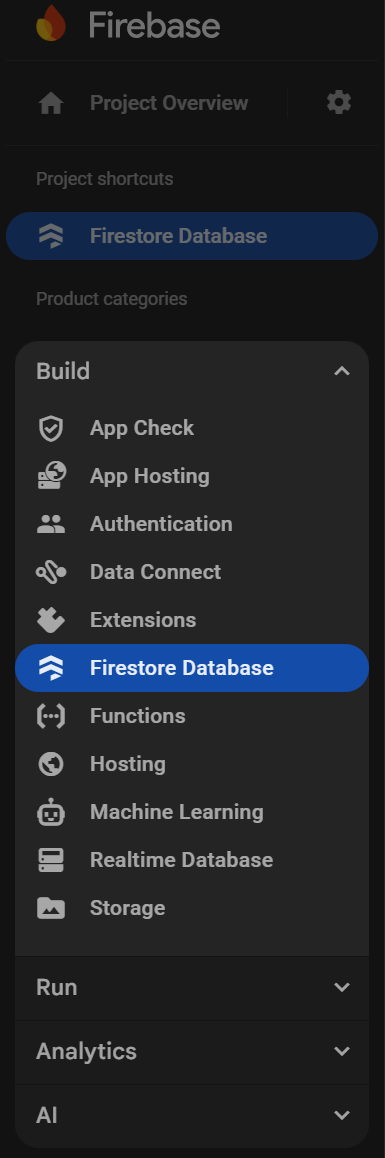
點擊Create database (建立資料庫)然後會進到這個畫面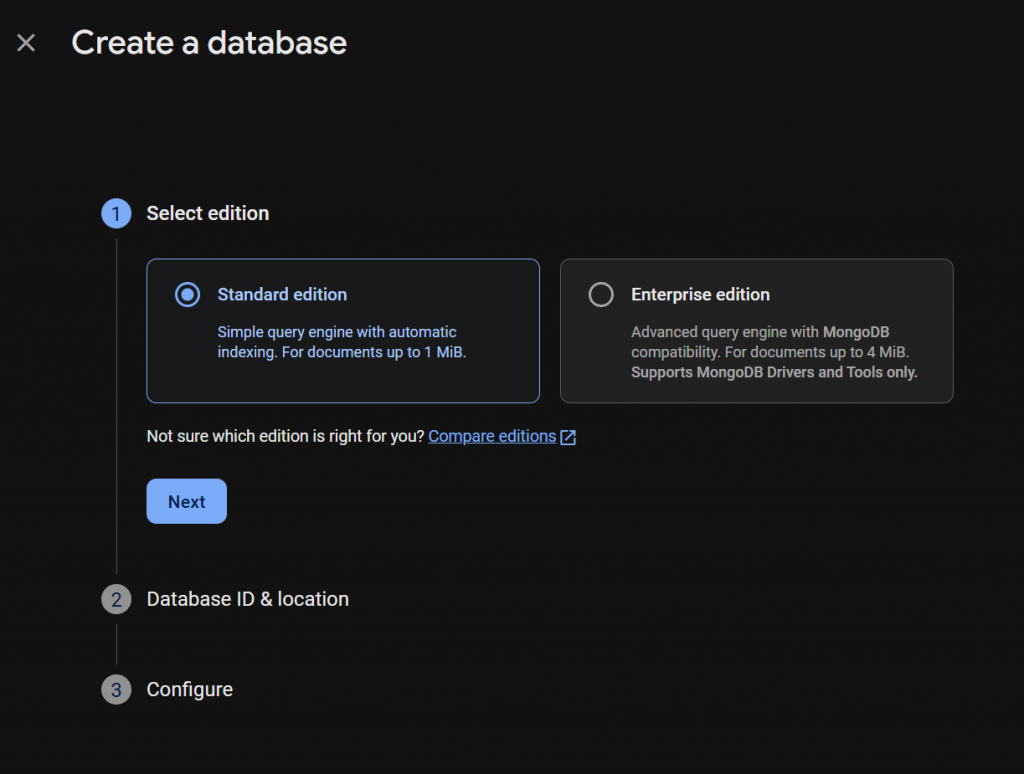
按Next後在下拉選單選擇 Location (位置)
Firebase 需要知道資料要儲存在哪個地理位置的資料中心,才能完成資料庫的建立
選擇(Taiwan)的選項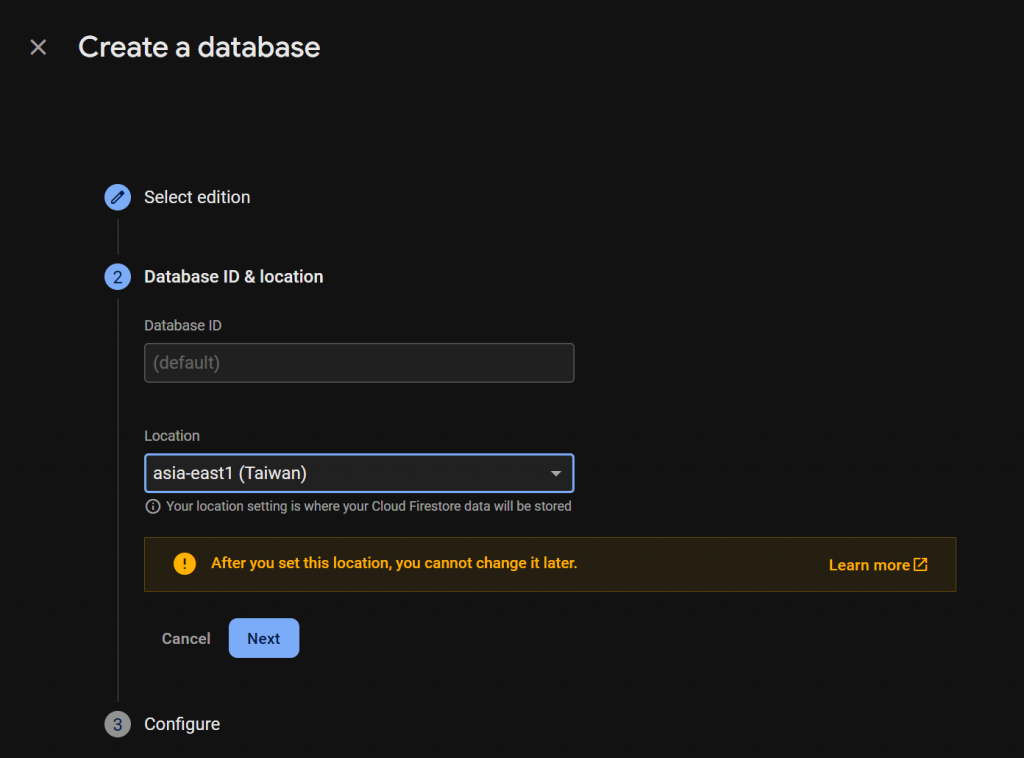
然後會出現這兩個選項,選擇Start in Test mode(測試模式)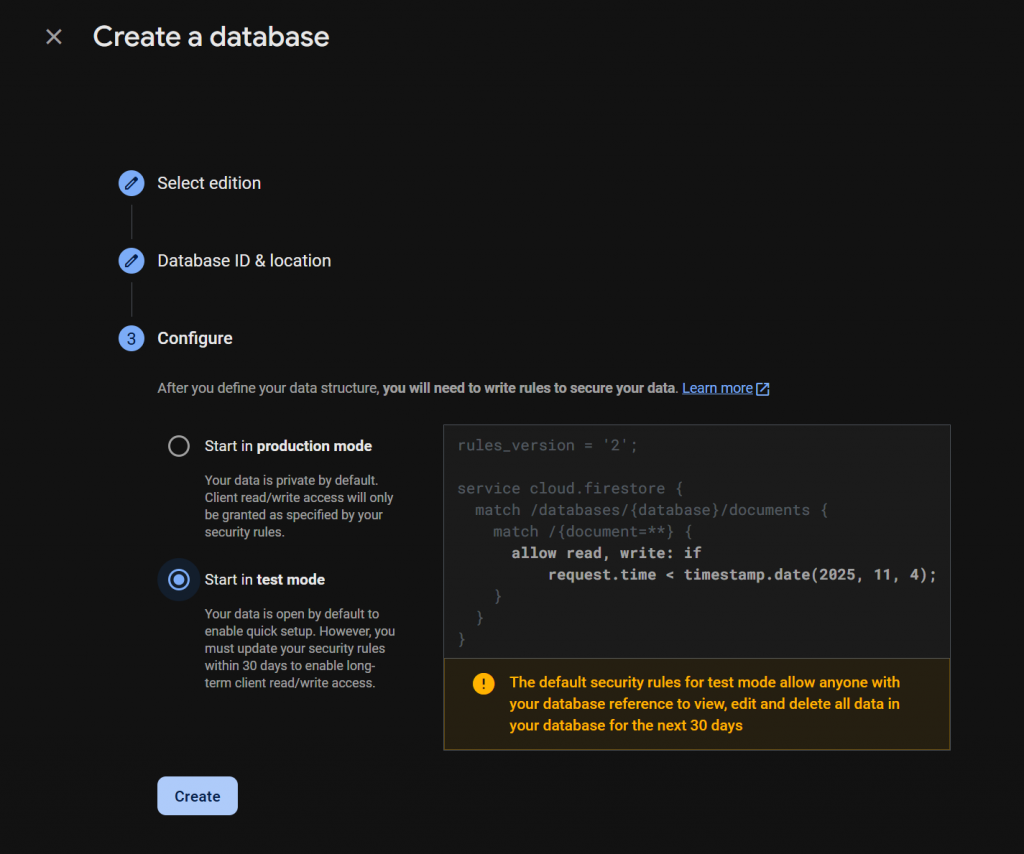
這表示任何人都可以讀寫該 Firestore 資料庫,不安全但非常方便,能快速測試。
但是30天後 Google 會自動幫你把規則收緊(變回封鎖),到時候要自己修改 rules。
目前還在學習跟測試階段,我們就只要先讓 Vue 跟 Firestore 成功連線測試。
創建完成後會看到這個畫面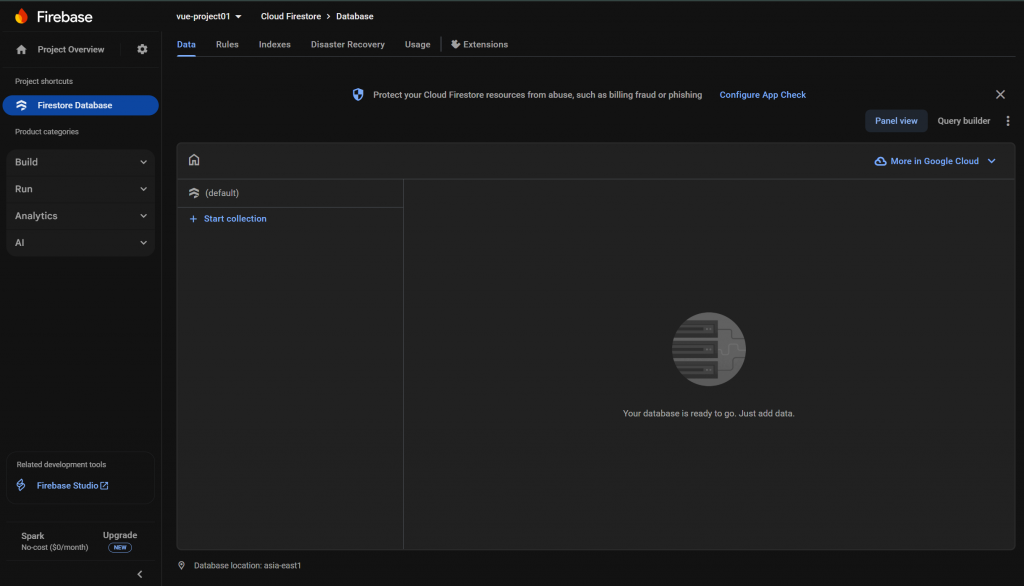
點擊Start collection建立集合,並為該集合命名,要注意這命名後面會寫在程式碼上,等等再提醒大家在程式碼寫集合名稱時該注意的地方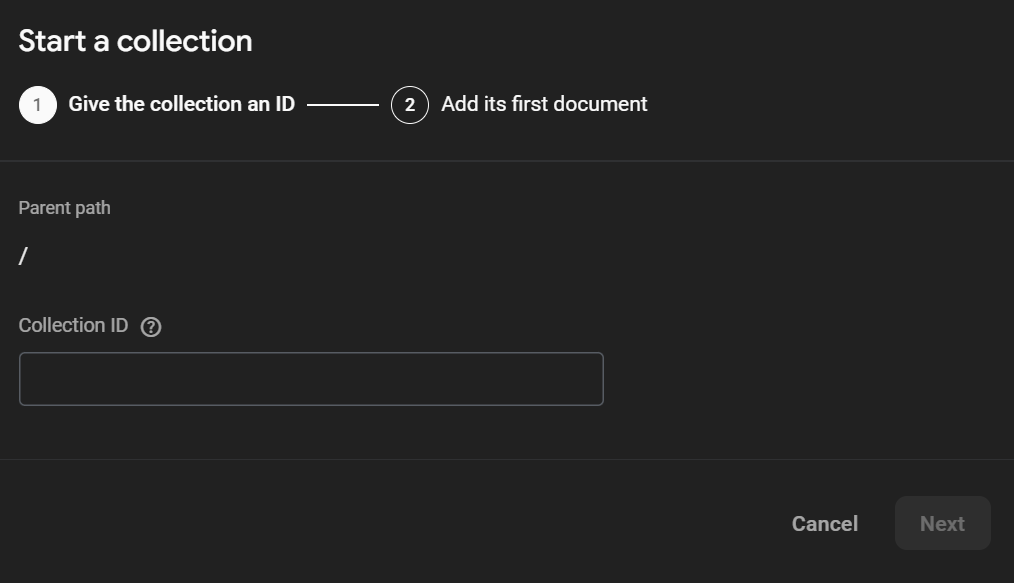
然後就能設定要儲存的資料的欄位,類型跟值
可以先設定一個代辦事項等等測試用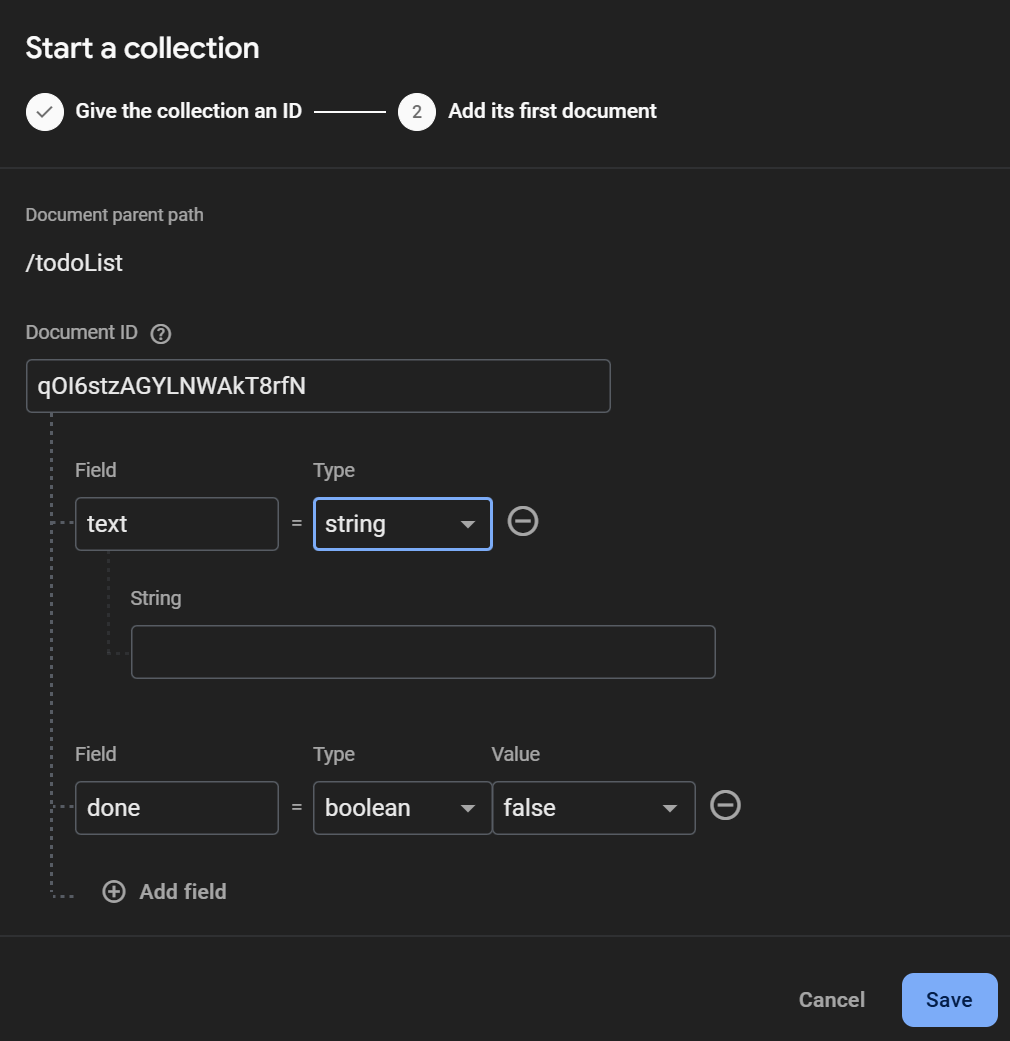
都完成後畫面會長這樣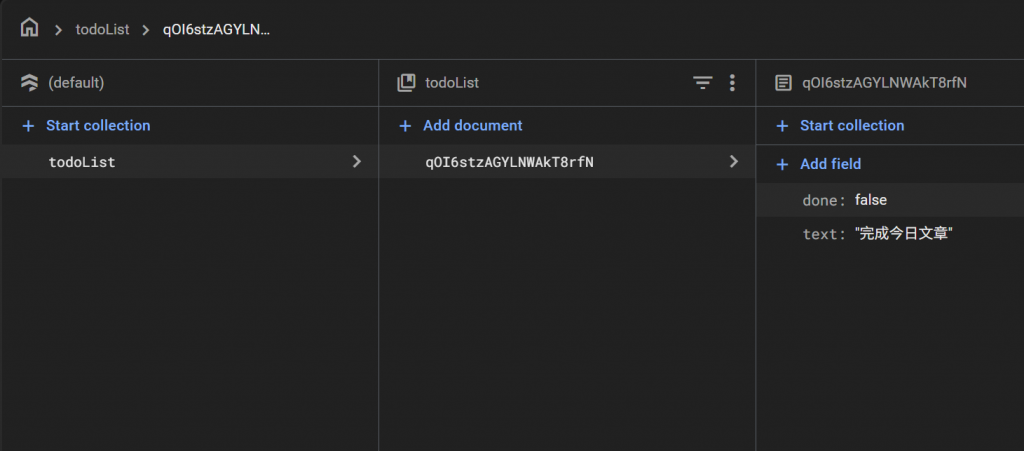
好的建立Firestore Database到這告一段落,我們來處理程式碼
先處理代辦事項的檔案App.vue
先處理<script setup>區,先import
import { db } from './firebase.js'
import { collection, addDoc, getDocs, deleteDoc, doc, updateDoc } from "firebase/firestore"
接著將下列程式碼貼上
// Firestore 集合名稱
const todosCollection = collection(db, "todoList")

// === Firestore 初始化讀取 ===
onMounted(async () => {
  await loadTasks()
})

async function loadTasks() {
  const querySnapshot = await getDocs(todosCollection)
  tasks.value = querySnapshot.docs.map(doc => ({
    id: doc.id,
    ...doc.data()
  }))
}
要注意//Firestore 集合名稱那區const todosCollection = collection(db, "todoList")中的todoList記得要改成你自行設定的集合名稱
移除所有 LocalStorage 邏輯,修改function,目前<script setup>區完整程式碼是這樣
<script setup>
import { ref, computed, onMounted } from 'vue'
import ProjectTracker from "./components/ProjectTracker.vue"
import { db } from './firebase.js'
import { collection, addDoc, getDocs, deleteDoc, doc, updateDoc } from "firebase/firestore"

// Firestore 集合名稱
const todosCollection = collection(db, "todoList")

// === Firestore 初始化讀取 ===
onMounted(async () => {
  await loadTasks()
})

async function loadTasks() {
  const querySnapshot = await getDocs(todosCollection)
  tasks.value = querySnapshot.docs.map(doc => ({
    id: doc.id,
    ...doc.data()
  }))
}

  // 儲存代辦事項
const newTask = ref('')
const tasks = ref([])

// === 新增代辦事項 ===
async function addTask() {
  if (newTask.value.trim() === '') return
  const docRef = await addDoc(todosCollection, {
    text: newTask.value,
    done: false
  })
  tasks.value.push({ id: docRef.id, text: newTask.value, done: false })
  newTask.value = ''
}

// === 切換完成狀態 ===
async function toggleTask(index) {
  const task = tasks.value[index]
  task.done = !task.done
  const taskRef = doc(db, "todos", task.id)
  await updateDoc(taskRef, { done: task.done })
}

// === 刪除代辦事項 ===
async function deleteTask(index) {
  const task = tasks.value[index]
  await deleteDoc(doc(db, "todos", task.id))
  tasks.value.splice(index, 1)
}

//=== 計數功能 (自動更新) ===
const totalCount = computed(() => tasks.value.length)
const doneCount = computed(() => tasks.value.filter(t => t.done).length)

// === 日期標題 ===
const todayTitle = computed(() => {
  const today = new Date()
  const month = today.getMonth() + 1
  const date = today.getDate()
  const weekdays = ['日', '一', '二', '三', '四', '五', '六']
  const weekday = weekdays[today.getDay()]
  return `${month}/${date} (${weekday}) 代辦事項清單`
})
</script>
接著改<template>區的一點細節,這裡直接放上<template>區完整的程式碼
<template>
  <div class= "container">
    <div class="box1"> </div>
    <div class="box2">
       <!-- 標題 (日期) -->
       <h1>{{ todayTitle }}</h1>

       <!-- 輸入框 -->
       <div class="input-box">
        <input v-model="newTask" placeholder="輸入新的代辦事項..." @keyup.enter="addTask" />
        <button @click="addTask">新增</button>
       </div>

       <!-- 計數 -->
       <div>
        <p class="textcolor">總任務數: {{ totalCount }} | 已完成: {{ doneCount }}</p>
       </div>

       <!-- 清單 -->
       <ul class="task-list">
        <li v-for="(task, index) in tasks" :key="task.id" :class="{ done: task.done }">
          <span @click="toggleTask(index)">
            <input
              type="checkbox"
              v-model="task.done"
            />{{ task.text }}</span>
          <button class="delete" @click="deleteTask(index)">刪除</button>
         </li>
        </ul>
       </div>

      <div class="box3">
        <ProjectTracker/>
      </div>

  </div>
</template>
到測試頁面會發現方才在Firestore Database建的代辦事項顯示在畫面上
如果直接進行新增,Firestore Database也會自動新增新的代辦事項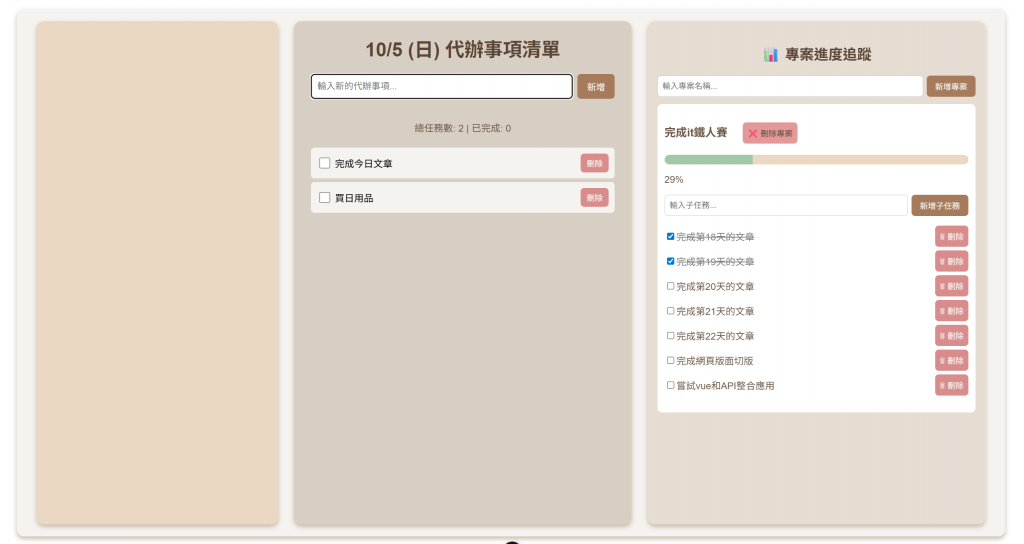

這樣代辦事項的資料就有成功存到firebase的資料庫中
好今天先用到這,貼上來步驟有點太多。
要將專案進度的資料存到firebase也是一樣的步驟,但今天先用好代辦事項就好,明天將專案進度追蹤的資料也存到firebase
各位明天見~


 iThome鐵人賽