
一、今天的學習目標
今天主要是修改index.js這份檔案。
昨天我已經完成 /add 指令的輸入介面,讓使用者可以在 Discord 中輸入三個資料:
二、程式碼實作
昨天我已經建立好 /add 指令讓使用者可以輸入title、date、time。今天要做的是把這三個輸入值從 Interaction中取出來。我在index.js處理互動的部分加入了這些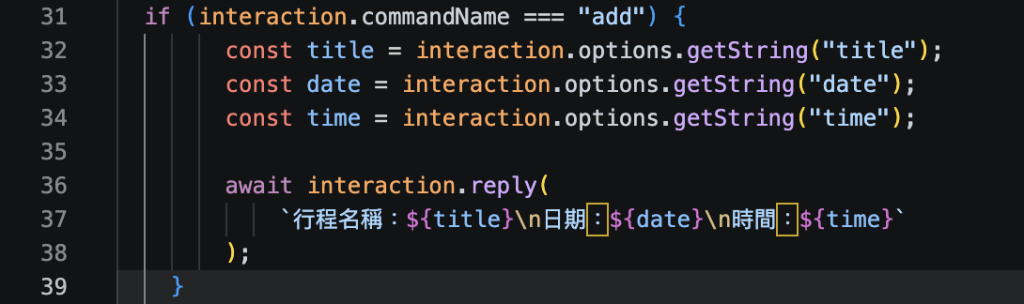
interaction.commandName === "add":判斷「這次收到的互動,是不是使用者執行 /add 指令」。
jsinteraction.options.getString(""):從這次 /add 指令的 Options 中,取得使用者輸入的資料。
取得資料後用這段:
await interaction.reply(行程名稱:${title}\n日期:${date}\n時間:${time}
);
存進三個變數中,讓後面的程式可以繼續使用。
最後再用interaction.reply()讓取得的資料傳回聊天室讓使用者確認。
三、實際測試結果
一樣使用npm.start讓程式開始執行。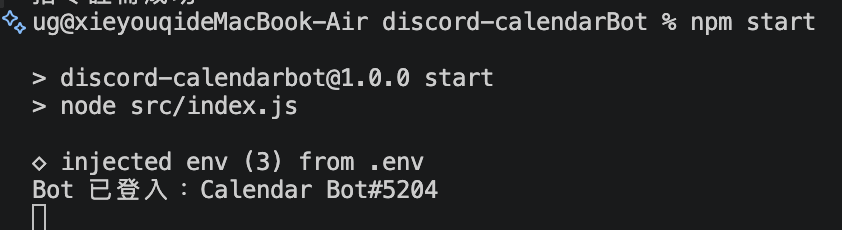
成功後到聊天室進行測試
在欄位中輸入行程時間日期後送出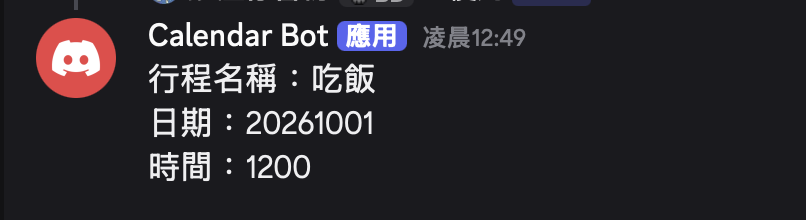
有看到Bot最後成功回覆:行程名稱:吃飯 日期:20261001 時間:1200。這代表目前程式已經可以成功取得 /add 中的三個輸入值。
四、今天修改檔案的完整程式碼
index.js
require("dotenv").config();

const { Client, Events, GatewayIntentBits } = require("discord.js");

const token = process.env.DISCORD_TOKEN;

if (!token) {
  console.error("錯誤:.env 裡還沒有設定 DISCORD_TOKEN");
  console.error("請先到 Discord Developer Portal 複製 Bot Token,然後在 .env 加上:");
  console.error("DISCORD_TOKEN=你的BotToken");
  process.exit(1);
}

const client = new Client({
  intents: [
    GatewayIntentBits.Guilds
  ]
});

client.once(Events.ClientReady, () => {
  console.log(`Bot 已登入:${client.user.tag}`);
});

client.on(Events.InteractionCreate, async (interaction) => {
  if (!interaction.isChatInputCommand()) return;

  if (interaction.commandName === "ping") {
    await interaction.reply("Pong!");
  }

  if (interaction.commandName === "add") {
        const title = interaction.options.getString("title");
        const date = interaction.options.getString("date");
        const time = interaction.options.getString("time");

        await interaction.reply(
            `行程名稱:${title}\n日期:${date}\n時間:${time}`
        );
    }
});

client.login(token).catch((error) => {
  console.error("Bot 登入失敗,請檢查 Token 或網路連線。");
  console.error(error.message);
  process.exit(1);
});

 ugg49
ugg49

 iThome鐵人賽
 看影片追技術