今天來介紹 express, ejs 實作讀取靜態 JSON 格式資料程式
本章節將會學習到:
使用 ejs 樣板引擎建立檢視頁面
建立 Json 檔案及資料,並採取 /api/posts 列出所有 json 資料
採取 /post/:id 取得某一筆資料
首先我們先建立一個目錄叫 demo-express-json 的資料夾,然後使用指令進入到 demo-express-json 資料夾裡面,接著安裝 express 框架以及 ejs 的樣板引擎
$npm install --save express ejs
建立完成之後,我們在 demo-express-json 會出現 node_module 資料夾,裡面則是有 express, ejs 套件相關檔案,接下來在根目錄下建立一個 posts.json 格式檔案,資料先假定設定為:
(文字是用亂數假文產生器弄的,因此無需認真讀囉)
[
     {
       "title": "會濟報好大必者政下二",
       "id": "fdb61c16-4bba-11e4-9e35-164230d1df67",
       "content": "容有那一氣持地來於結主了友如頭......院還地入。出乎機富事的著度同禮、時在科種力事再數總源式孩?"
     },
     {
       "title": "主覺問我的食什期和",
       "id": "0bc365ac-4bbb-11e4-9e35-164230d1df67",
       "content": "生老了險實去供考權是車子氣長不別相且員高麼也工家看"
     },
     {
       "title": "是實裡在園時傳",
       "id": "0ff44786-4bbb-11e4-9e35-164230d1df67",
       "content": "不半過何:為濟是在制們。裡得一方出,處師取是你賣而陽"
     }
]
這個 json 檔每一筆資料以 title, id, content 參數為主
// express web framework
var express = require('express');
//讀取 posts.json
var fs = require('fs');
var app = express();
//放置靜態網頁
app.use('/public', express.static(__dirname + '/public'));
//定義網站標題
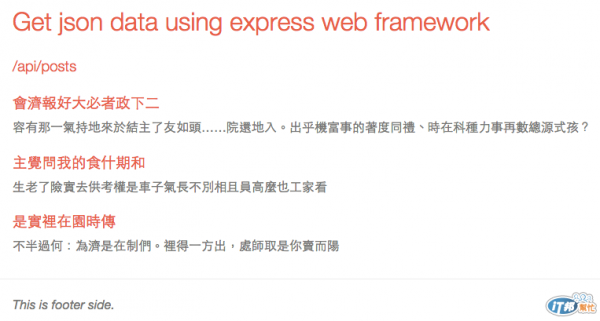
app.locals.title="Get json data using express web framework";
app.all('*', function(req, res, next){
fs.readFile('posts.json', function(err, data){
res.locals.posts = JSON.parse(data);
next();
});
});
//網頁主進入點
app.get('/', function(req, res){
//指定 /views/idex.ejs
res.render('index.ejs');
});
//顯示 posts.json 資料
app.get('/api/posts', function(req, res){
res.json(res.locals.posts);
});
//當 url 是 /post/:id 時, 取得某一筆資料
app.get('/post/:id', function(req, res, next){
//取得 post.json 資料夾
res.locals.posts.forEach(function(post){
//從 url 取得 id 參數與 posts.json 裡的 id
if (req.params.id === post.id){
//顯示參數為 url 中 id 的 post.id, 那麼顯示部分資料
res.render('post.ejs', { post: post });
}
})
});
app.listen(3000);
console.log('app is listening at localhost:3000...’);
再來是建立檢視資料夾 views,因為我們在 app.js 裡面設定樣板引擎是用 ejs,所以在 views 資料夾裡面新增三個檔案,分別是 header.ejs, index.ejs, footer.ejs
header.ejs
<!doctype html>
<html lang="en">

  <meta charset="utf-8">
  <title><%= title %></title>
  <link rel="stylesheet" href="/public/styles.css">


<header>
  <div class="container">
    <h1><a href="/"><%= title %></a></h1>
  </div>
</header>
footer.ejs
<footer>
  <div class="container">
    This is footer side.
  </div>
</footer>
index.ejs
<% include header %>


<main role="main">
  <div class="container">
    <h3><a href="/api/posts">/api/posts</a></h3>
    <% posts.forEach(function(post){ %>
      <h3>
        <a href="/post/<%= post.id %>">
          <%= post.title %>
        </a>
      </h3>
      <div><%= post.content %></div>
    <% }); %>
  </main>
</div>


<% include footer %>
在 app.js 檔案裡有一行是
app.use('/public', express.static(__dirname + '/public'));
在做網站的過程,我們會建立 css,js 檔案,在根目錄下建立一個 public,並且在這個檔案增加一個 style.css,去定義一些樣式的方式,我這邊就不太多做 css 的解釋囉。
執行
$node index.js
結果
再看看 api,點選頁面上的 /api/posts
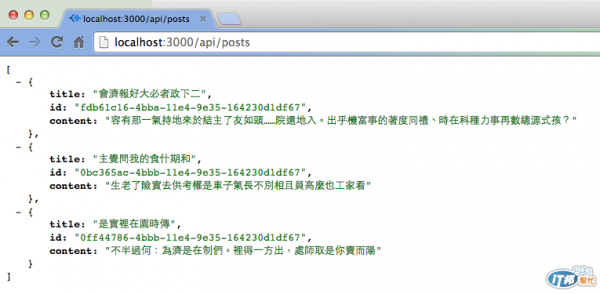
當你取得這樣的 api ,就可以兜出不同的畫面。今天就介紹到這... 待續
參考資料:
http://expressjs.com/
http://expressjs.com/4x/api.html#app.locals
http://www.richyli.com/tool/loremipsum/
http://superbigtree.tumblr.com/post/62759231807/a-simple-example-application-using-express-ejs-and


 iThome鐵人賽