鐵人賽終於到了第三十 最終篇,謝謝 IThome 鐵人提供分享的平台,每天固定的發文逼自己在一個月內練技術,在挑選專長的技術裡面一直在尋找對自己有幫助的技術方向而選定了 Node.js ,在這系列當中多半以實務開發的應用為主,到了第三十篇也不例外,不過我們先回顧一下第一篇到第三十篇的文章
=================
鐵人賽 Node.js 系列學習日誌 文章
=================
Node.js 系列學習日誌 #1 - 開始的開始,Node.js 簡介
Node.js 系列學習日誌 #2 - 安裝配置與 npm 包管理器
Node.js 系列學習日誌 #3 - forever 工具,讓程式保持執行狀態
Node.js 系列學習日誌 #4 - 介紹 Jade Template Engine 模板引擎 (上集)
Node.js 系列學習日誌 #5 - 介紹 Jade Template Engine 模板引擎 (下集)
Node.js 系列學習日誌 #6 - 使用 package.json 安裝、管理模組
Node.js 系列學習日誌 #7 - 使用 Express 框架實作網頁開發框架
Node.js 系列學習日誌 #8 - 使用 express, ejs 實作讀取靜態 JSON 格式資料
Node.js 系列學習日誌 #9 - 運用 express, socket.io, boostrap 建立一個簡單的聊天室功能
Node.js 系列學習日誌 #10 - 用 Web Storm Javascript IDE 開發 Node.js 應用程式
Node.js 系列學習日誌 #11 - nvm (Node Version Manager) 管理多個 Node.js 版本
Node.js 系列學習日誌 #12 - bower 管理相依套件工具
Node.js 系列學習日誌 #13 - npm 相依套件指定版本與自動更新 package.json
Node.js 系列學習日誌 #14 - REST 路由規則
Node.js 系列學習日誌 #15 - 撰寫程式的風格指南 (Style Guide)
Node.js 系列學習日誌 #16 - 連接 MySQL 並實現 CRUD 操作 - 資料存取前的準備
Node.js 系列學習日誌 #17 - 連接 MySQL 並實現 CRUD 操作 - 查詢 (Read)
Node.js 系列學習日誌 #18 - 連接 MySQL 並實現 CRUD 操作 - 建立 (Create)
Node.js 系列學習日誌 #19 - 連接 MySQL 並實現 CRUD 操作 - 更新 (Update)
Node.js 系列學習日誌 #20 - 連接 MySQL 並實現 CRUD 操作 - 刪除 (Delete)
Node.js 系列學習日誌 #21 - 使用 nodemailer 套件透過 gmail 發送電子信箱
Node.js 系列學習日誌 #22 - 檔案系統核心模組 fs
Node.js 系列學習日誌 #23 - 讀取 markdown 檔案內容顯示在頁面上
Node.js 系列學習日誌 #24 - 基礎工具核心模組 util.inherits 實現原型繼承
Node.js 系列學習日誌 #25 - 介紹 middleware 應用與開發
Node.js 系列學習日誌 #26 - 調校 Debug 工具 node-inspector
Node.js 系列學習日誌 #27 - 使用 express, mysql, ejs 實作註冊功能
Node.js 系列學習日誌 #28 - 使用 express, mysql, ejs 實作登入/登出功能
Node.js 系列學習日誌 #29 - 部署上線至 Heroku 雲端平台環境
Node.js 系列學習日誌 #30 - 野生柯P相簿 API 列表
=================
文章開始
=================
本篇將介紹最近滿多人討論的野生柯 p API,將會透過 node-rest-client 取得野生柯 P相簿 API 列表

首先先建立一個 express web framework 框架,請在 terminal 上輸入:
$express -e nodejs-kp-albums-sample
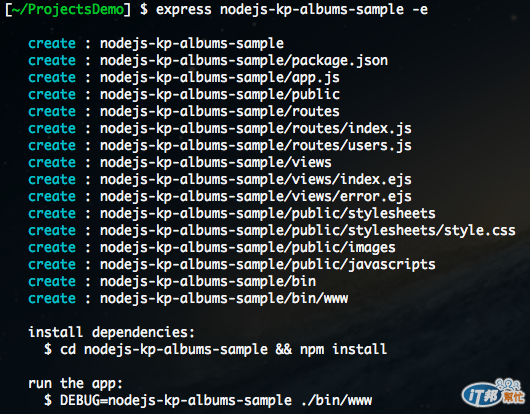
接著按照只是安裝相依套件
$cd nodejs-kp-albums-sample && npm install
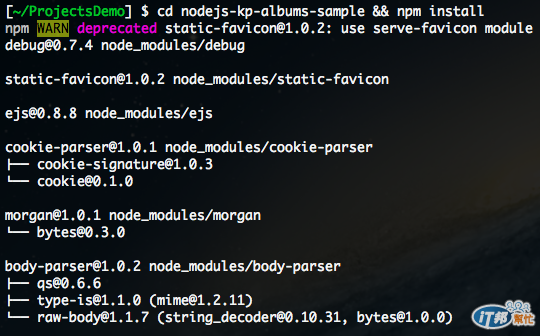
接著由於我們要使用到柯 p 官網提供的相簿 api ,在開發前我們需要安裝一個可以支援 restful api 的套件 node-rest-client,接著請在 terminal 輸入
$npm install node-rest-client —save

一切安裝完成之後,就開始來撰寫程式的部分,請先打開 app.js 檔案,在這邊我們要引用裝好的 node-rest-client 套件,將以下語法填入
var Client = require('node-rest-client').Client;
client = new Client();
先宣告 node-rest-client 之後,我們預計將相簿列表印在主首頁 (index),可以在 app.js 裡面找到var routes = require('./routes/index’); 與 app.use('/', routes); 這一段,也就是說根目錄的位置會指引到 /routes/index.js 檔案裡面,接著就打開 /routes/index.js ,由於我們在 app.js 完成了宣告,在 index.js 撰寫如下:
var express = require('express');
var router = express.Router();


/* GET home page. */
router.get('/', function(req, resp) {


    //取得 KP albums 相簿清單列表
     client.get("http://api.kptaipei.tw/v1/albums/", {}, function(data, res){
        var config = JSON.parse(data.toString());
        console.log(config.data);


        //將資料寫在 locals
        resp.locals.posts = config.data;


        var renderData = {
             title: '柯 p 野生 API',
             data: config.data
        };


        // 將取得到的 json 格式渲染到畫面上
        resp.render('index', renderData);
    });
});


module.exports = router;
可以看到用了 client.get 方法,其有三個參數,第一個參數請到 http://unlimited.kptaipei.tw/docs/#api-ch3 得到相簿清單的 api :http://api.kptaipei.tw/v1/albums/ ,預期會知道 api 結果會是如下
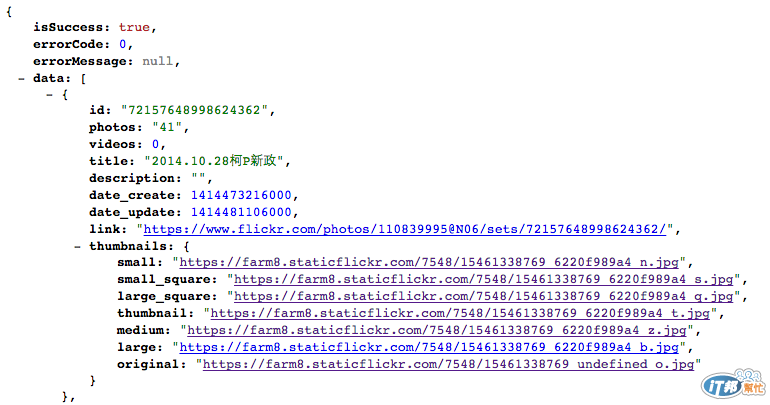
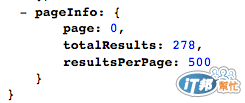
第二參數由於本篇只做列表,就保持為空 {},第三個參數就 function callback 操作,在取得 json 格式的資料之後,經過 json.parse 由字串轉換 json ,並且我們已知要抓 data 的陣列,透過物件 renderData 將資料存放,最後就將得到的資料渲染到畫面上 ,也就是 resp.render('index', renderData);
接著到了 views 的部分,就請開啓 /views/index.ejs 檔案
    <title><%= title %></title>
    <link rel='stylesheet' href='/stylesheets/style.css' />


    <%
         posts.forEach(function(post) {
              var thumb = post.thumbnails;
              var t_small = thumb.small_square;
    %>
          <img src='<%= t_small %>' alt='<%=post.title %>' />
    <% });%>
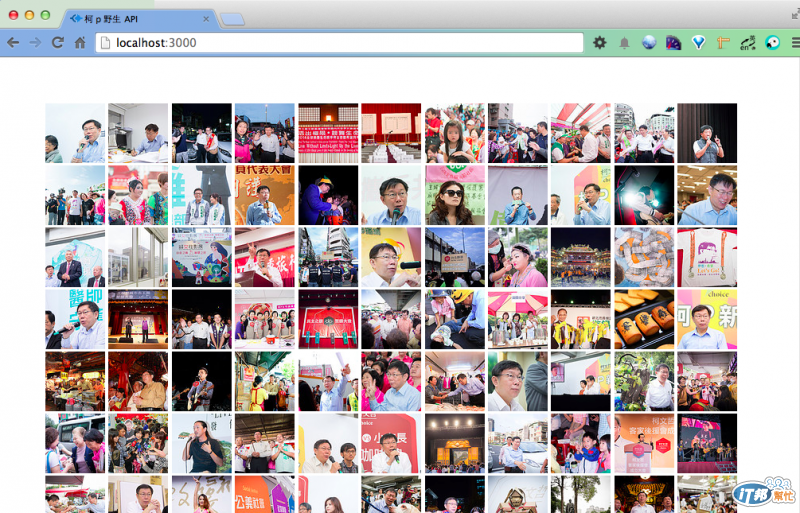
在這邊我只需要顯示柯p相簿的小張圖,也就是 thumbnails.small_square ,由於已經轉成 json 格式,那麼就當做物件找到 thumbnails.small_square 位置,將取得到的圖片網址塞到 img tag 裡的 src 屬性。那麼,一切的一切準備好之後,就請執行應用程式吧!輸入:
$npm start

網站預設為 3000 port ,請開啓 localhost:3000,結果如下圖顯示
這是我第一次參加 ithome 鐵人賽,文章終究到了尾聲,希望這個系列對愛好 node.js 的大大們有幫助,謝謝大家囉,請多多指教 :)
參考資料:
https://www.npmjs.org/package/node-rest-client
http://unlimited.kptaipei.tw/
http://unlimited.kptaipei.tw/docs/#api-ch3
