今天來做星空。
我們要怎麼做星星的效果呢?首先想到的就是使用星空的貼圖,貼一整片在背景對吧!
但是這樣子做有個缺點,那就是星空永遠是固定的。我希望做到的星空是亂數產生,每一次看起來都不一樣,
而且還會閃爍的。
我想到的是與其貼一整片的星空貼圖,不如使用只有一個的星星貼圖,然後隨機分佈在視野中。
所以星空第一階段的命題就完成了:
產生一批固定大小的正方形平行於電腦畫面,其位置隨機分佈在我們視野中。
首先我們要決定輸入的參數,
參數有
我們電腦畫面的法向量
產生正方形的數量
攝影機位置(中心)
正方形的距離法相量的最大距離
離中心最遠的距離
正方形局部坐標系的x向量
正方形局部坐標系的y向量
所以建構式我們這樣寫
function StarField(normal,number,center,radius,depth,xvec,yvec)
{
	"use strict";
	this.normal = normal;
	this.number = number;
	this.center = center;
	this.radius = radius;
	this.xvec = xvec;
	this.yvec = yvec;
	this.starFieldQuadArray=[];
	this.starFieldIndiceArray=[];
	this.depth=depth;
}
預計產生這些正方形的點坐標,以及繪圖的索引陣列。
產生一個隨機位置的正方形演算法是這樣:
亂數產生一個中心點(法向量*不超過最大深度的距離)
將中心店平行電腦畫面亂數移動x與y分量(亂數距離乘以x與y向量)
由中心產生正方形的四個點(大小由radius決定)
StarField.prototype.buildField = function(){
var unitNormal = normalVec3(this.normal);
//alert(this.xvec);

this.xvec = normalVec3(this.xvec);
this.yvec = normalVec3(this.yvec);

for(var i=0;i<this.number;i++){

	var distance = Math.random()*this.depth;
	var randomx = (Math.random()-0.5)*this.radius*100;
	var randomy = (Math.random()-0.5)*this.radius*100;


	var starCenter = [this.center[0]+unitNormal[0]*distance,
	                  this.center[1]+unitNormal[1]*distance,
	                  this.center[2]+unitNormal[2]*distance];

	starCenter[0]+=this.xvec[0]*randomx;
	starCenter[1]+=this.xvec[1]*randomx;
	starCenter[2]+=this.xvec[2]*randomx;

	starCenter[0]+=this.yvec[0]*randomy;
	starCenter[1]+=this.yvec[1]*randomy;
	starCenter[2]+=this.yvec[2]*randomy;

	this.starFieldQuadArray.push(starCenter[0]+this.xvec[0]*(this.radius/2));
	this.starFieldQuadArray.push(starCenter[1]+this.xvec[1]*(this.radius/2));
	this.starFieldQuadArray.push(starCenter[2]+this.xvec[2]*(this.radius/2));

	this.starFieldQuadArray.push(starCenter[0]+this.yvec[0]*(this.radius/2));
	this.starFieldQuadArray.push(starCenter[1]+this.yvec[1]*(this.radius/2));
	this.starFieldQuadArray.push(starCenter[2]+this.yvec[2]*(this.radius/2));

	this.starFieldQuadArray.push(starCenter[0]-this.xvec[0]*(this.radius/2));
	this.starFieldQuadArray.push(starCenter[1]-this.xvec[1]*(this.radius/2));
	this.starFieldQuadArray.push(starCenter[2]-this.xvec[2]*(this.radius/2));

	this.starFieldQuadArray.push(starCenter[0]-this.yvec[0]*(this.radius/2));
	this.starFieldQuadArray.push(starCenter[1]-this.yvec[1]*(this.radius/2));
	this.starFieldQuadArray.push(starCenter[2]-this.yvec[2]*(this.radius/2));

}


for(var i=0;i<this.number;i++){

	this.starFieldIndiceArray.push(i*4+0);
	this.starFieldIndiceArray.push(i*4+1);

	this.starFieldIndiceArray.push(i*4+1);
	this.starFieldIndiceArray.push(i*4+2);

	this.starFieldIndiceArray.push(i*4+2);
	this.starFieldIndiceArray.push(i*4+3);

	this.starFieldIndiceArray.push(i*4+3);
	this.starFieldIndiceArray.push(i*4+0);
}
}
normalVec3是我自己寫用來計算單位向量的函式。
接下來就是要決定輸入的參數,
輸入的參數要視你當下的攝影機位置,mv矩陣來決定!
例如若你的mv矩陣與攝影機位置會變動,你輸入的參數就要想辦法跟著變動,這些正方形才會一直平行于電腦畫面。
成功設定後結果如下:
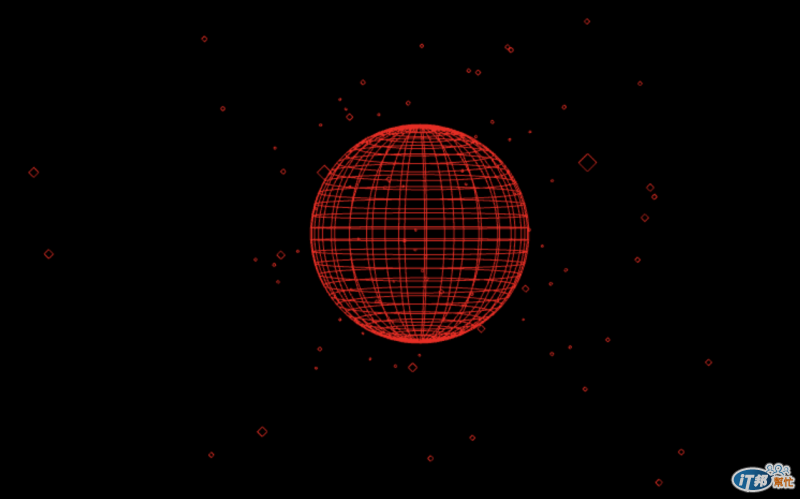
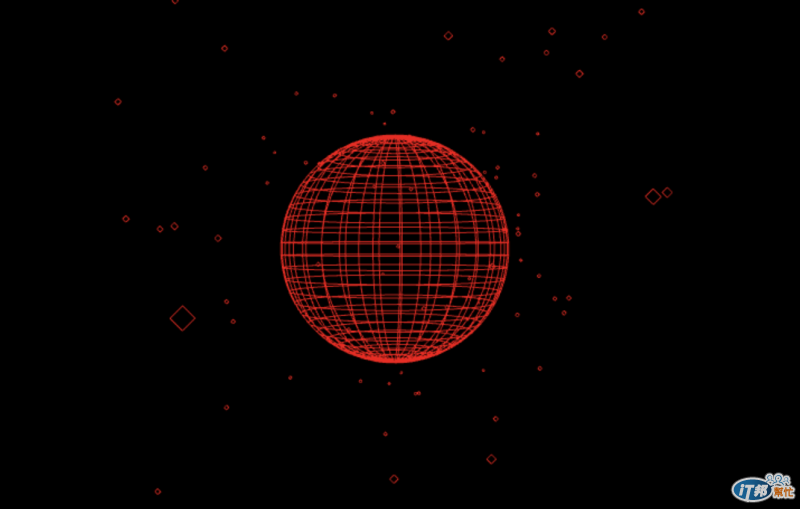
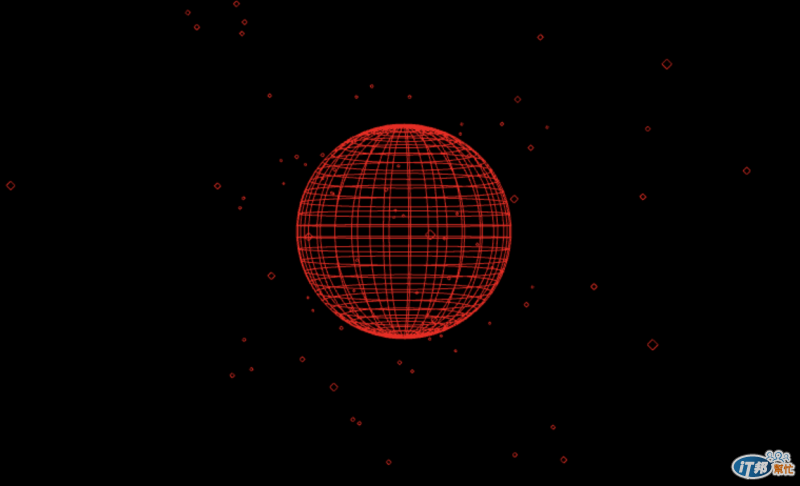
可以看到位置是不停變動的唷!
現在,地球跟星星的網格點都準備好了!
明天就可以來進行材質貼圖!


 iThome鐵人賽