當您需要進行提供或介接 WebAPI 的工作,在撰寫程式前我們會透過 Postman 進行測試,進一步了解服務是否正常與確認回傳的內容;或透過 swagger 讓工程師了解介接過程中使用的參數與回傳結果,方便進行介接與測試工作。雖然這些工作都可以自行撰寫程式進行測試,但過程相當耗費時費力,這些套件透過腳本可以進行複雜的介接功能,節省我們另行撰寫程式的時間。壓力測試也不例外,也能透過腳本撰寫的方式,進行複雜的測試。這一篇,我們將介紹如何在JMeter 中使用 BeanShell scripts 進行前處理與後處理,若有錯誤或建議,請各位先進不吝提出,謝謝。
Step 1.首先我們先新增一個執行序群組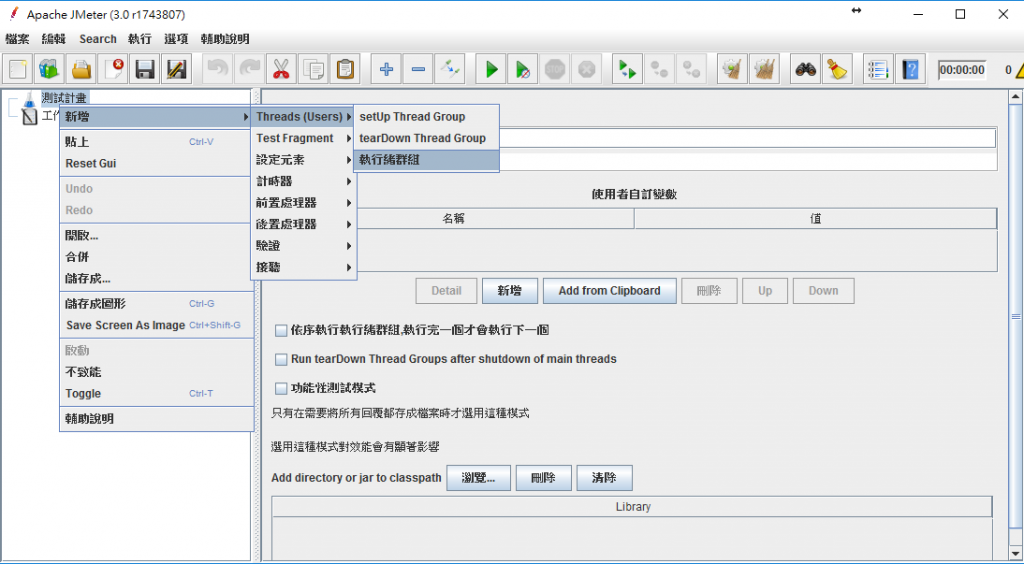
Step 2.點選新增 -> 取樣 -> Bean Shell 取樣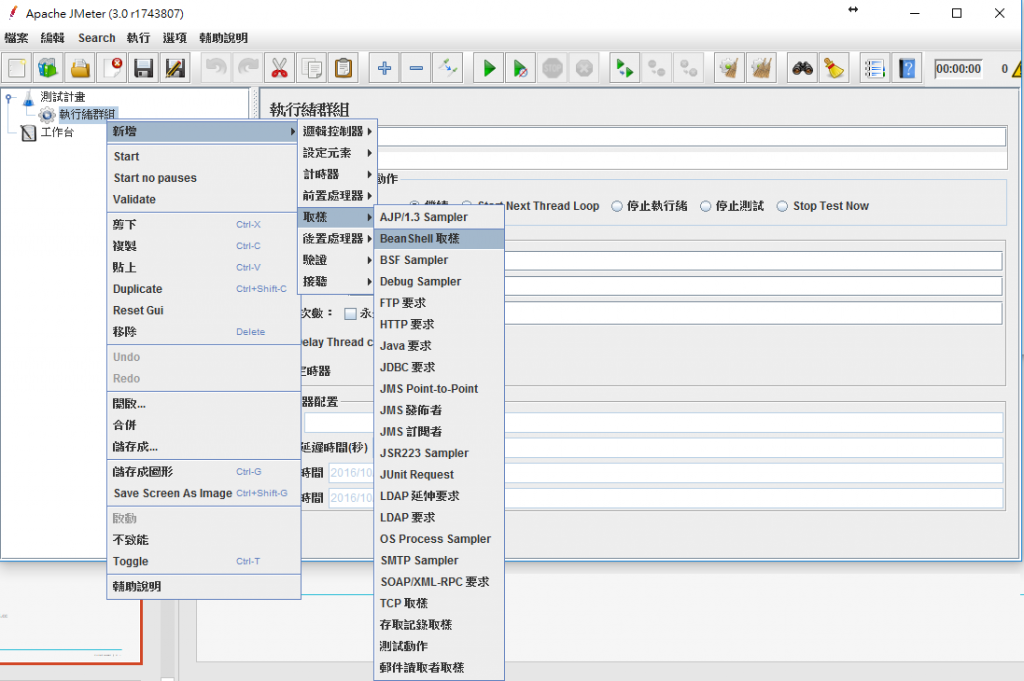
Step 3.點選新增 -> 取樣 -> Debug Sample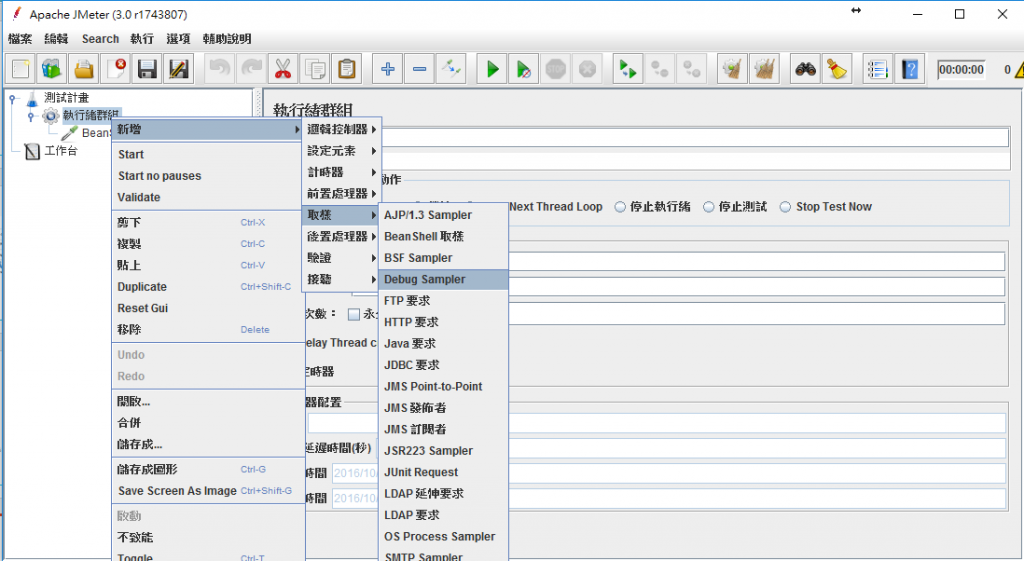
Step 4.為了顯示結果,我們增加檢視結果樹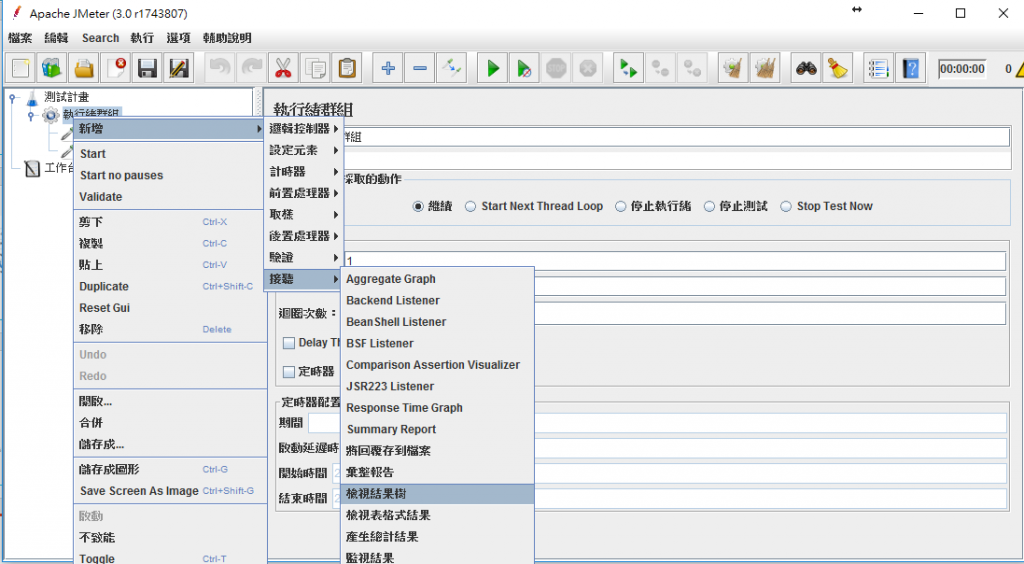
Step 5.我們撰寫下列腳本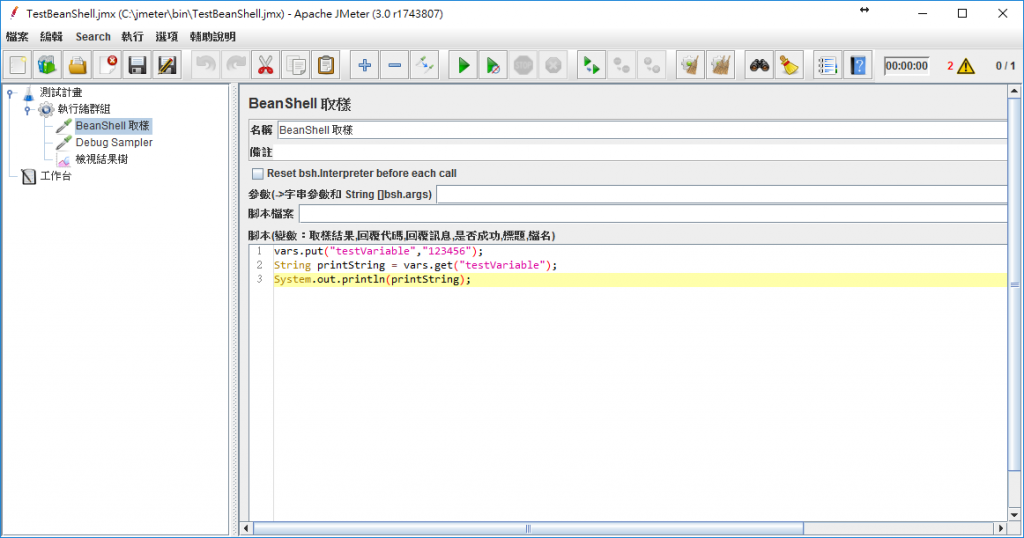
vars 是 JMeter variables,可以使用於 BeanShell scripts 內進行參數傳遞,我們可以設定變數內容後提供給下一個 Http Request 使用(前處理),或者接收到 Response 後儲存起來進行運用(後處理)。
vars.put("testVarialbe","123456");
String printString = vars.get("testVariable")
System.out.prinln(printString)
Step 6. 點選執行後,即可看到command line畫面印出結果。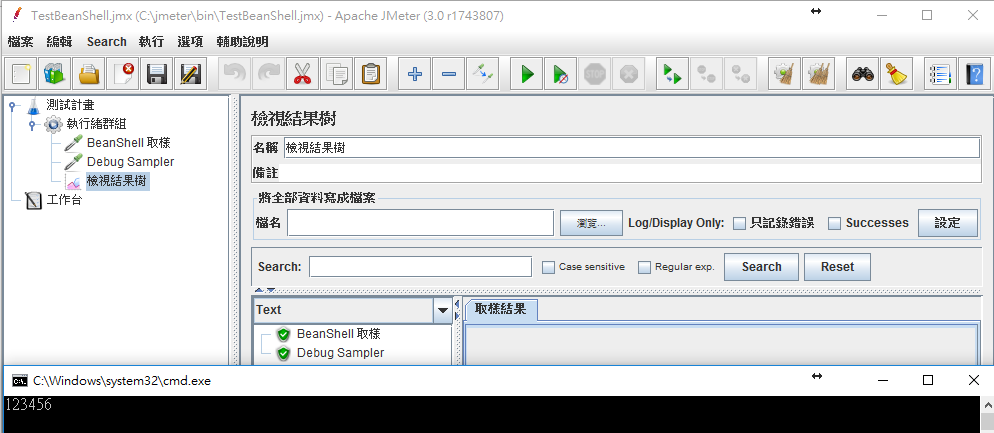
而我們在JMeter variables放入的參數,可以使用${var}在 HTTP Request 內使用,如下面兩張圖所示: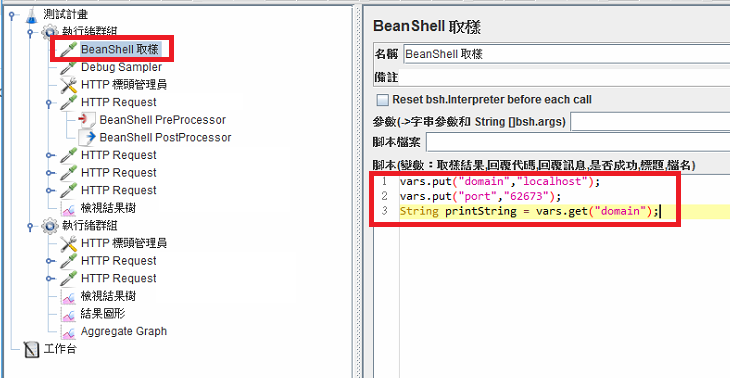
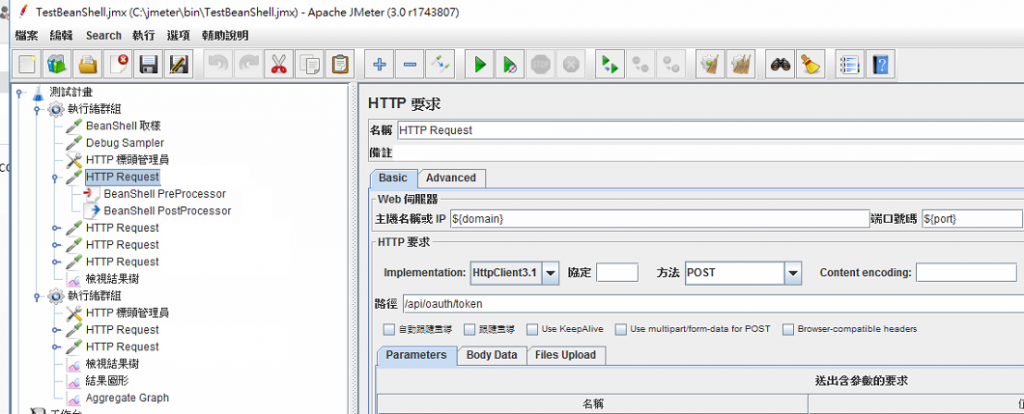
這裡簡單介紹 BeanShell PreProcessor and PostProcessor 應用案例,透過前置與後製處理器,我們能做更多WebAPI測試案例。
Step 1.點選新增 -> 前置處理器 -> BeanShell PreProcessor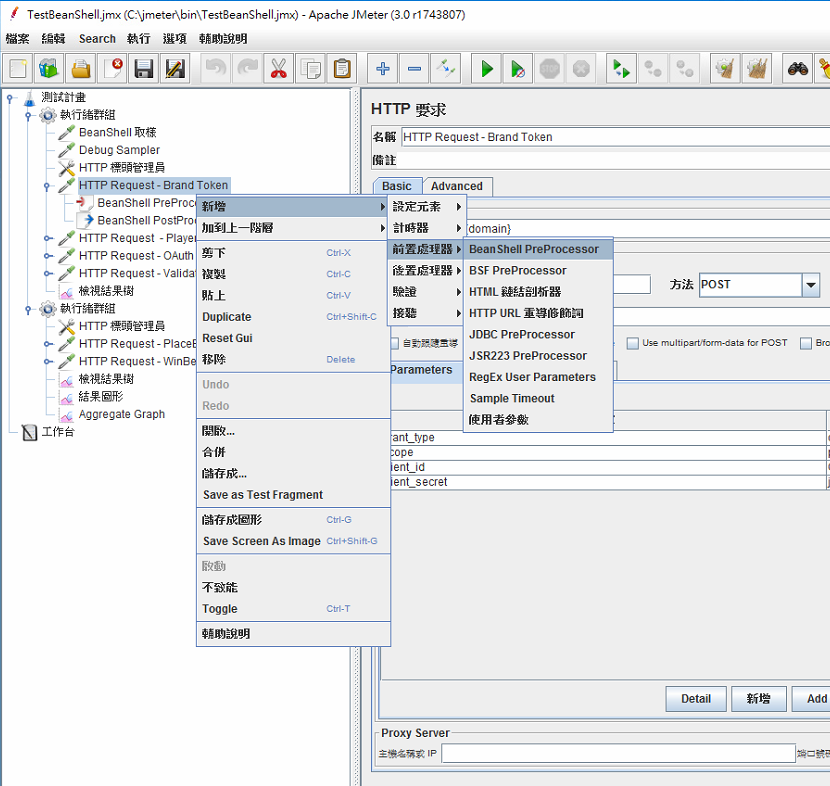
Step 2.在這邊舉使用前置處理器案例:我們可以引入套件,在request發出之前額外加入 header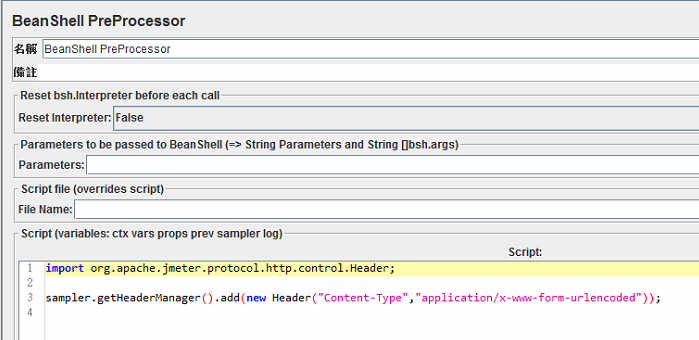
import org.apache.jmeter.protocol.http.control.Header;

sampler.getHeaderManager().add(new Header("Content-Type","application/x-www-form-urlencoded"));
Step 3.點選新增 -> 後製處理器 -> BeanShell PostProcessor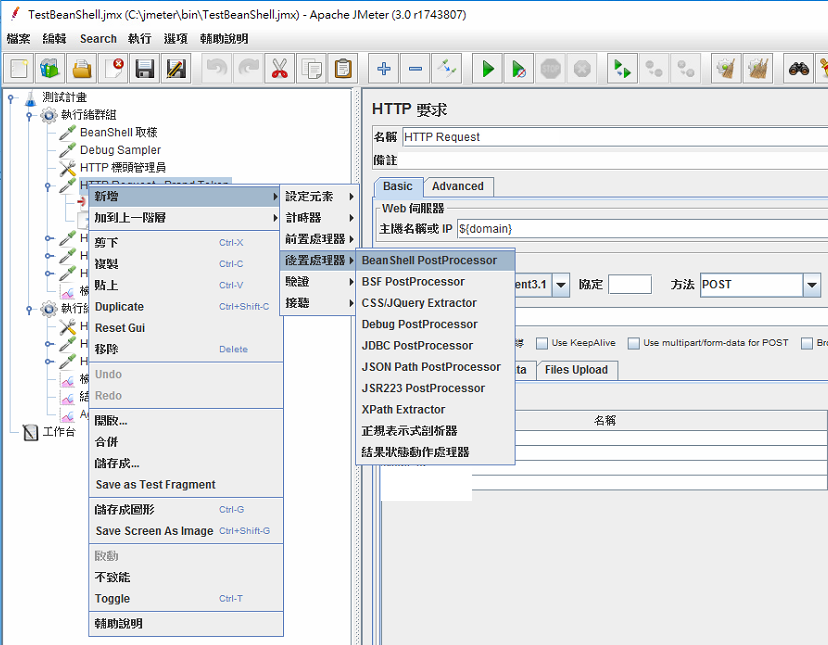
Step 4.在這邊舉使用後製處理器案例:我們可以接驗證後的token存起來,當作下次呼叫API驗證用(需要引入com.eclipsesource.json.*套件)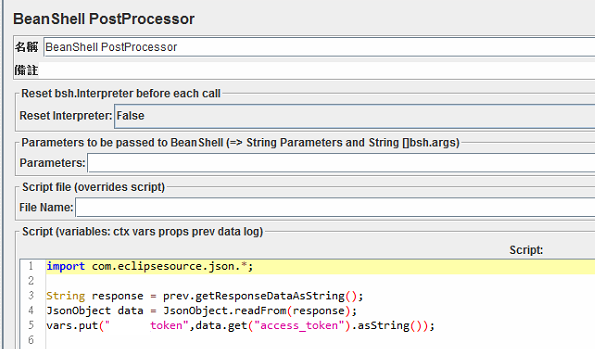
import com.eclipsesource.json.*;

String response = prev.getResponseDataAsString();
JsonObject data = JsonObject.readFrom(response);
vars.put("access_token",data.get("access_token").asString());
上一篇:Jmeter 基本介紹
下一篇:JMeter 與 TeamCity 整合
返回目錄
無
註:本系列文章將於2016 IT邦幫忙鐵人賽進行同時,一併發佈於個人blogger與dotblog。

小地方更正
vars.put("testVarialbe","123456");
String printString = vars.get("testVarialbe");
System.out.println(printString);
謝謝協助校正 :)