不知讀者是否還有印象 第九天的學習筆記中 我們介紹到的 Service 元件。Kubernetes 提供的 Service 能幫助在 Cluster 中運行的 Pod 能被外部服務存取。然而,每一個 Service 物件都需將指定對外的 port number 與 Node 上某個 port number 做 port mapping。這也代表,當 Service 越來越多時,我們就需要管理更多的 port number,也會使得維運上更加複雜。
而今天的學習筆記中,將介紹 Kubernetes 上的另一個設計元件,Ingress 。透過 Ingress 不但能使 Node 對外開放的 port 統一,結合 Ingress Controller 更能在 Kubernetes Cluster 中實現負載平衡 的功能。
今天的學習筆記內容如下:
小提醒:今天的程式碼都可以在 demo-ingress 找到
若將 Service 圖像化,可以看到當多個 Service 同時運行時,Node 都需要有相對應的 port number 去對應相每個 Service 的 port number,如下圖,

通常像 AWS 或是 GCP 這樣的雲端服務,每台機器都會配置屬於它自己的防火牆(firewall)。這也代表,不論新增、或是刪除 Service 物件,我們都必須額外調整防火牆的設定,端口(port)的管理也相對複雜。若是使用 Ingress ,我們只需開放一個對外的 port number,Ingress 可以在設定檔中設置不同的路徑,決定要將使用者的請求傳送到哪個 Service 物件

這樣的設計,除了讓運維者無需維護多個 port 或頻繁更改防火牆(firewall)外,可以自設條件的功能也使得請求的導向更加彈性。
藉由以下幾個範例,能讓我們更了解 Ingress 的具體功能有哪些,
以 ingress-example-1.yaml 為例,
apiVersion: extensions/v1beta1
kind: Ingress
metadata:
  name: example-1
spec:
  rules:
  - http:
      paths:
      - path: /test
        backend:
          serviceName: test
          servicePort: 80
由上述 YAML 設定檔我們可以知道,
extensions/v1beta1
/test 則該流量將導到名稱為 test 的 Service 物件
創建新 Ingress 物件的方式,與其他元件一樣,使用 kubectl create 指令:
$ kubectl create -f ./ingress-example-1.yaml
ingress "example-1" created
創建好用,用 kubectl get 查看

以 ingress-example-2.yaml 為例,
apiVersion: extensions/v1beta1
kind: Ingress
metadata:
  name: example-2
spec:
  rules:
  - host: helloworld-v1.example.com
    http:
      paths:
      - path: /
        backend:
          serviceName: hellworld-v1
          servicePort: 80
  - host: helloworld-v2.example.com
    http:
      paths:
      - path: /
        backend:
          serviceName: helloworld-v2
          servicePort: 80
若是有多個 Domain Name 同時指向一台 Node 時,我們也可以透過這樣路徑的設置,將不同的 Domain Name 對應到不同的 Service 物件。
用 kubectl create 創建 example-2
$ kubectl create -f ./ingress-example-2.yaml
ingress "example-2" created
在與上圖比對可以發現,不同於 example-1 收到請求後若是路徑相符,會直接將請求導給 test 物件,example-2 會判斷該請求是送到哪個 Domain Name,再將該請求導到對應的 Service 物件。

Ingress 也可以做到本地終止 SSL (SSL termination)。
首先,先透過 ingress-ssl-sceret.yaml ,將 SSL 憑證存入 Secret 物件,
apiVersion: v1
data:
  tls.crt: base64_encoded_cert
  tls.key: base64_encoded_key
kind: Secret
metadata:
  name: ssh-secret
  namespace: default
type: Opaque
創建好後,可以在 Ingress 物件中,透過 spec.tls 將該憑證掛載載 Ingress 底下,以 ingress-example-3.yaml 為例
apiVersion: extensions/v1beta1
kind: Ingress
metadata:
  name: example-3
spec:
  tls:
  - secretName: ssh-secret
  backend:
    serviceName: apiservice
    servicePort: 80
在對 Ingress,有些基礎了解後,以下將介紹 Ingress Controller。並透過在 minikube 上架設 Nginx Ingress Controller 的實作,來幫助讀者更暸解這兩者的應用。
Ingress 本身並沒有提供負載平衡的功能,還需要透過 Ingress Controller 來實現。Ingress Controller 目前主要支援兩種型別 GCE 與 Nginx,而今天我們將透過 Nginx Ingress Controller 在 Kubernetes Cluster 內部架設 load balancer。
負載平衡(Load Balancing):**以往我們可以透過外部的資源,像是 AWS ELB 來實現,將流量分配給不同的機器。**而 Kubernetes 現在也提供了一個內部工具 Ingress Controller ,讓我們自己可以在 Kubernetes Cluster 中實現 Load Balancing 而無需透過外部資源。
我們用 helloworld-pod.yaml 來創建一個 helloworld-pod 的物件內容如下,
apiVersion: v1
kind: Pod
metadata:
  name: helloworld-pod
  labels:
    app: helloworld-pod
    tier: backend
spec:
  containers:
  - name: api-server
    image: zxcvbnius/docker-demo
    ports:
    - containerPort: 3000
這時再用 kubectl create 指令,
$ kubectl create -f ./helloworld-pod.yaml
pod "helloworld-pod" created
接著透過 helloworld-service 創建 helloworld-pod 相對應的 Service 物件,
apiVersion: v1
kind: Service
metadata:
  name: helloworld-service
spec:
  ports:
  - port: 3000
    protocol: TCP
    targetPort: 3000
  selector:
    app: helloworld-pod
一樣用 kubectl create 產生一個新 Service 物件,
$ kubectl create -f ./helloworld-service.yaml
service "helloworld-service" created
用 kubectl get 查看目前的狀態

接著我們可以到 Nginx Ingress Controller 的 Github 上,進到 deploy 這個資料夾。只需要按照該資料夾的 README.md 上的步驟,即可建置完成。
首先,創建一個名為 ingress-nginx 的 namespace。指令如下,
$ curl https://raw.githubusercontent.com/kubernetes\
>/ingress-nginx/master/deploy/namespace.yaml \
>| kubectl apply -f -

若是對 Namespace 還不熟悉的讀者也無需擔心,在 [Day 28] 如何在 k8s 管理不同的專案 - Namespaces 會在與讀者詳細介紹 Namespace 是什麼。
Kubernetes 官方提供我們一個 default-backend。當 Nginx Ingress Controller 找不到相對應的路徑時,一律回傳 default backend - 404
$ curl https://raw.githubusercontent.com/kubernetes\
>/ingress-nginx/master/deploy/default-backend.yaml \
>| kubectl apply -f -

接著在創建幾個所需的 ConfigMap,
$ curl https://raw.githubusercontent.com/kubernetes/ingress-nginx/master/deploy/configmap.yaml | kubectl apply -f -

$ curl https://raw.githubusercontent.com/kubernetes/ingress-nginx/master/deploy/tcp-services-configmap.yaml | kubectl apply -f -

$ curl https://raw.githubusercontent.com/kubernetes/ingress-nginx/master/deploy/udp-services-configmap.yaml | kubectl apply -f -
最後,創建一個 Nginx Ingress Controller
$ curl https://raw.githubusercontent.com/kubernetes\
>/ingress-nginx/master/deploy/without-rbac.yaml \
>| kubectl apply -f -
可以看到在官網提供的範例中,使用 Deployment 來確保 Ingress Controller 的運行狀態。

全部都設置好後,用 kubectl get 查看 我們剛剛所創建的物件

接著,我們還需一個 Ingress,helloworld-ingress.yaml 內容如下:
apiVersion: extensions/v1beta1
kind: Ingress
metadata:
  name: helloworld-ingress
  namespace: default
spec:
  rules:
  - host: helloworld.example.com
    http:
      paths:
      - backend:
          serviceName: helloworld-service
          servicePort: 3000
把 helloworld.example.com 收到的請求,都轉到 helloworld-service 上。
最後,若是在 minikube 上實作的讀者,不忘開啟 minikube 上 ingress 的功能
$ minikube addons enable ingress
ingress was successfully enabled
並且用 minikube ip 取得目前 minikube 的 IP address
$ minikube ip
192.168.99.100
最後,我們須將本機端發向 helloworld.example.com 的請求,都導到 minikube 上,指令如下:
$ sudo nano /etc/host
使用 MacOS 或 Linux 的讀者,都能在 /etc/host 這個檔案中找到,特定的 domain name 相對應的 ip adress。以下圖為例,
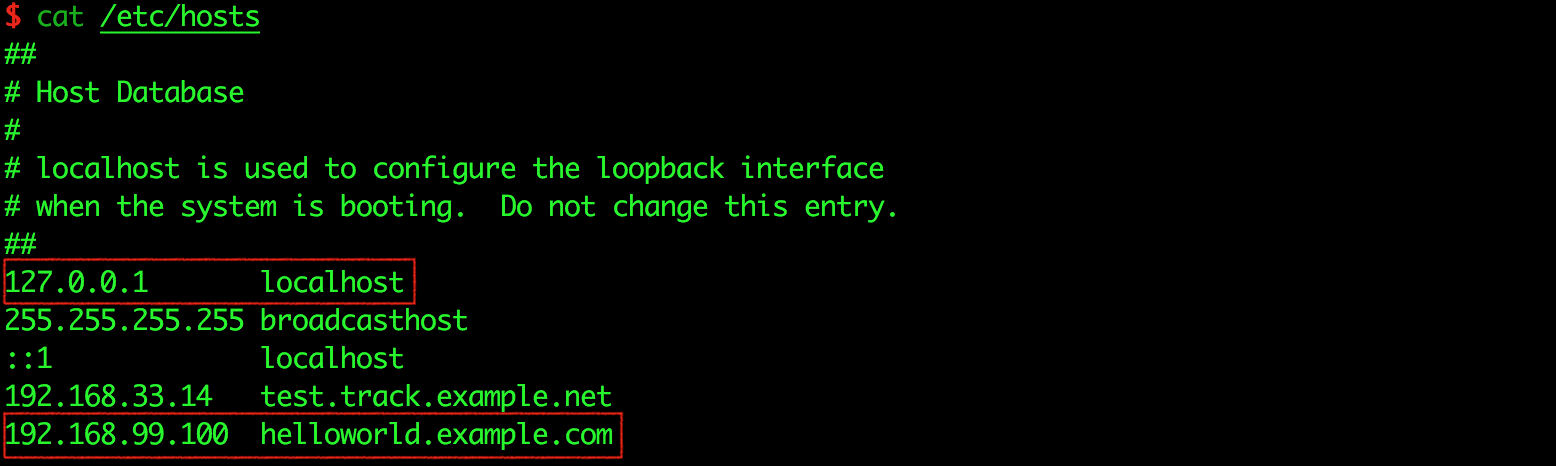
最後加上我們剛剛查訊到的 minikube ip 與 helloworld.example.com ,如此一來,當我們在本機上搜尋 helloworld.example.com 時,系統就會根據 /etc/host 的內容,將請求導到 minikube ip address。
在一切都設定完之後,可以打開瀏覽器輸入 http://helloworld.example.com/,可以看到網頁回傳 Hello World! 的字串,代表 helloworld-ingress 將流量成功導到 helloworld-pod,

如果讀者還沒忘的話,在架設 Nginx Ingress Controller 的時候,我們也創建了一個 default-backend 的物件。用來處理,當 Ingress Controller 找不到相對應的 Ingress Rule 時,會預設回傳 default backend - 404。如下圖:

在 Nginx Ingress Controller 的 Github 中,也有詳細介紹如何將 Ingress Controller 部署在 Azure,AWS,GCP 上,若有興趣的讀者不妨看一看囉。
目前 Ingress Controller 仍存在一些 issues,若是想使用 Ingress Controller 取代外部資源的 Load balancing 的讀者,不妨先仔細看過 README.md 減少踩雷的痛苦唷。
最後,歡迎大家給予建議與討論,如果能按個讚給些鼓勵也是很開心唷 :)
好像並沒有寫如何設定load balance. 也沒有測試load balance.
我在沒有ingress的情況下, 利用一個deployment設定了多個相同的pod.
讓pod是在程式啟動時, 產生一組random.
expose成一個service. 然後不斷的去HTTP GET, 會發現傳回來的random會不一樣
感覺deployment的RS本身, 有某種load balance存在.
但跟Ingress的load balance應該是不同層級.
希望能補充一下Ingress load balance怎麼做