iT邦幫忙

2018 iT 邦幫忙鐵人賽
DAY 28
0
Data Technology

Microsoft R Solution系列 第 28

Day28 – R Last Mile to Web Part4 Azure Machine Learning Studio Plot 上篇

  • 分享至 

  • xImage
  •  

Microsoft Azure Machine Learning Studio 是一個可以直接在Web上設計與開發機器學習模型, 而最後模型可以用Web Service發佈, 給其他程式呼叫使用, 所以接下的實作, 我們一樣利用Microsoft Azure Machine Learning Studio來完成R繪圖與薪資預測兩個功能, Microsoft Azure Machine Learning Studio可以在Azure Portal左側的more services, 點選後會展開選單在Intelligence + analytics類別找到如下
https://ithelp.ithome.com.tw/upload/images/20180115/20103333ctY3I0yKKv.png

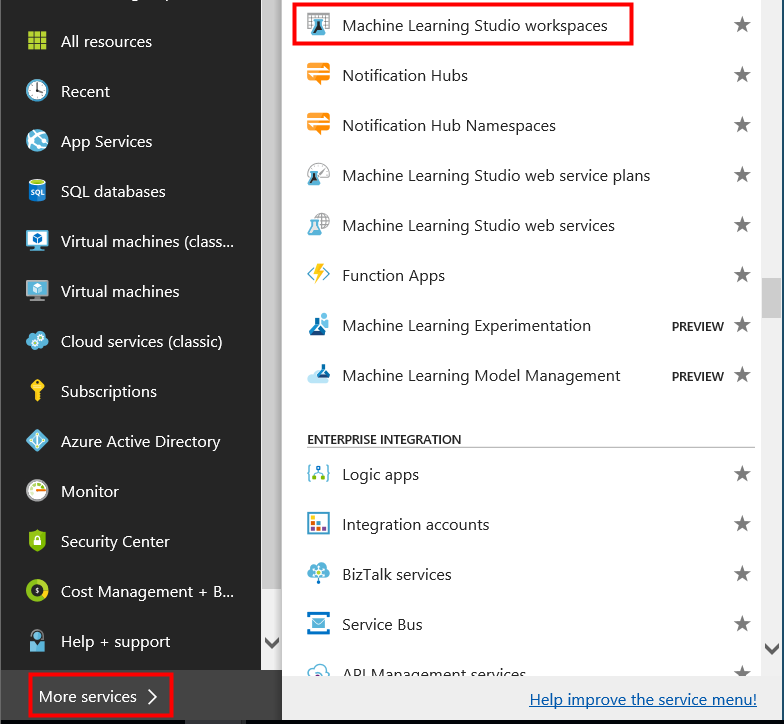
然後按下Add建立一個新的工作區, 並選擇Web Service Plan為DEVTEST, 這個Plan是測試用途低於1000次的呼叫是免費的, 最後按下Create
https://ithelp.ithome.com.tw/upload/images/20180115/201033336VV4bA0GRR.png

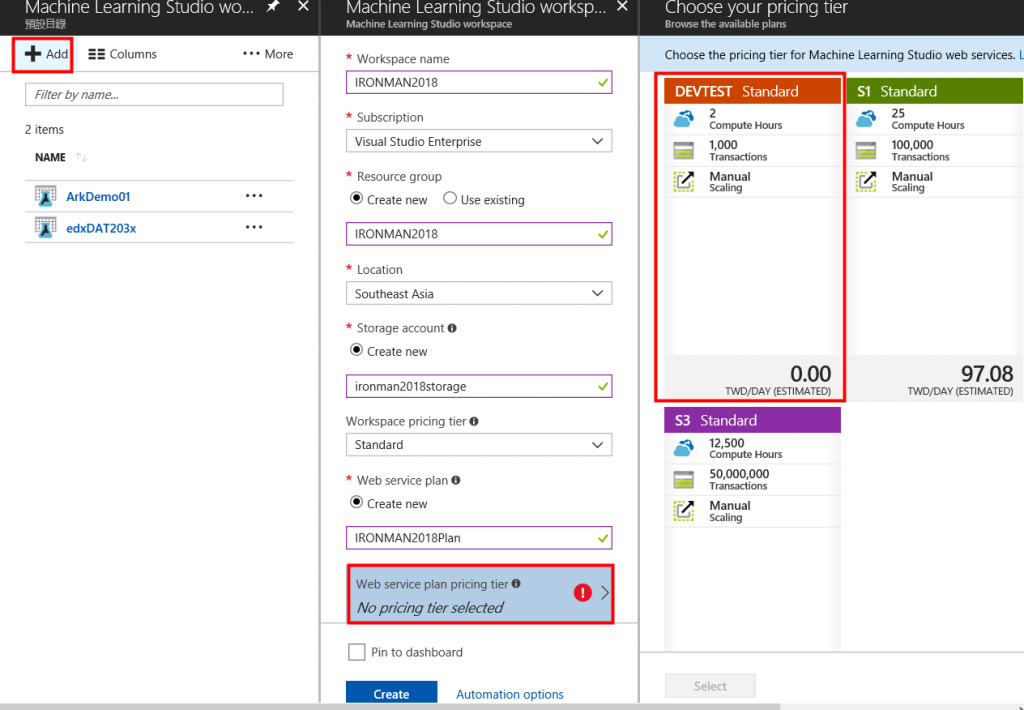
之後按下Refresh, 就可以看到剛剛建立的工作區, 就可以點擊進入
https://ithelp.ithome.com.tw/upload/images/20180115/20103333ZWnYxsdFQ8.png

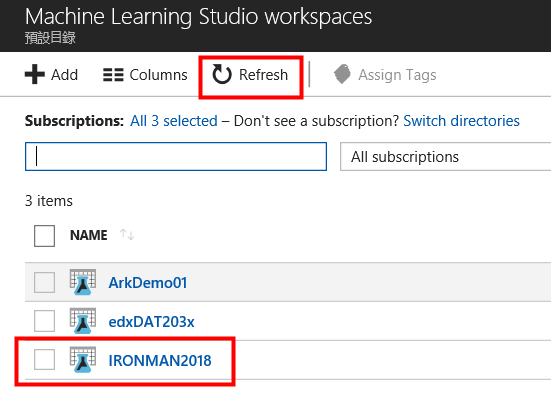
進來之後可以看到右側Launch Machine Learning Studio如下, 點選之後就可以進入Machine Learning Studio登入頁面
https://ithelp.ithome.com.tw/upload/images/20180115/201033337szdeDGp8z.png

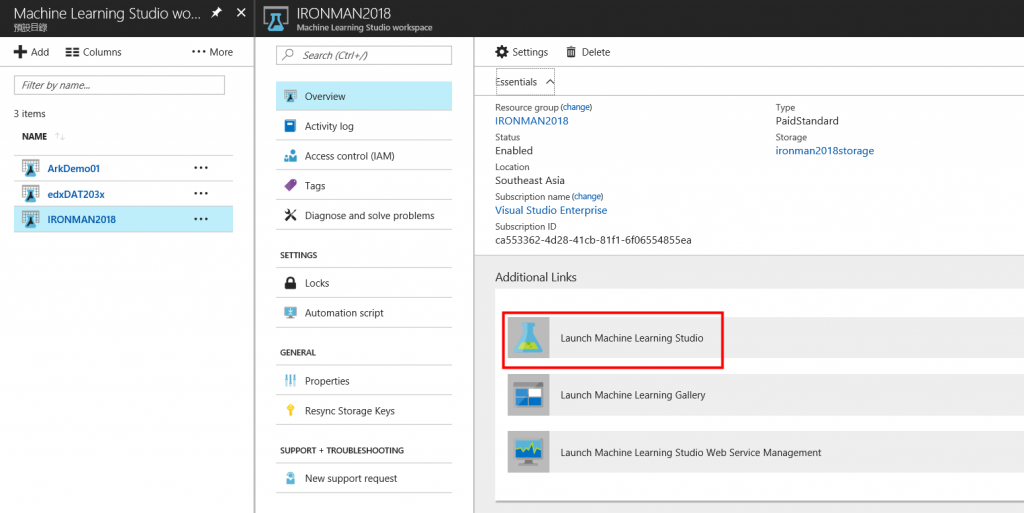
或是直接進入底下網址登入https://studio.azureml.net/
https://ithelp.ithome.com.tw/upload/images/20180115/20103333PChWH2G49B.png

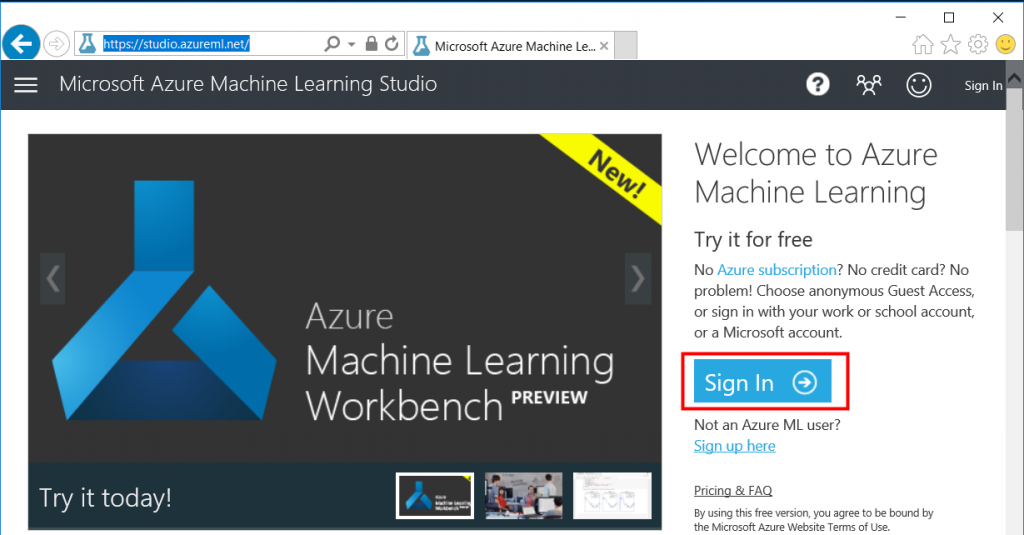
一進來的主畫面如下, 先點選DATASETS, 來上傳csv
https://ithelp.ithome.com.tw/upload/images/20180115/20103333YJwOgIqBht.png

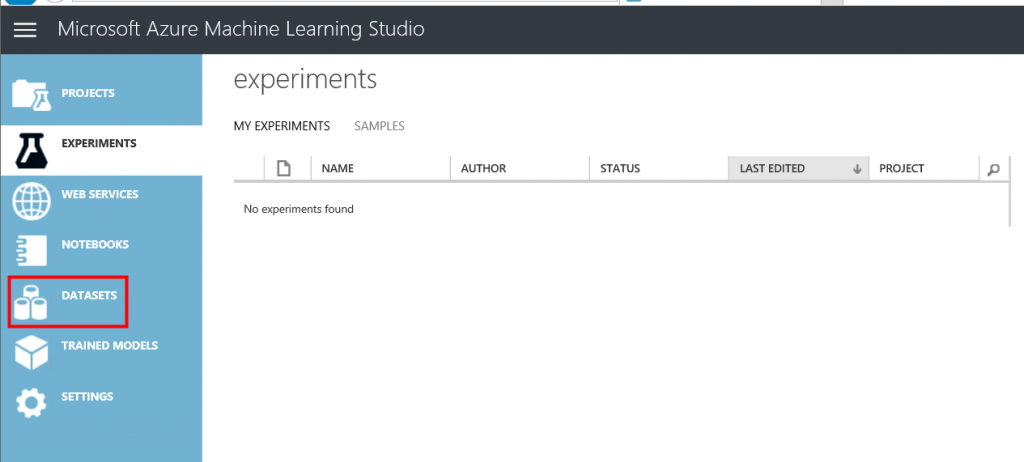
進入到DATASETS, 點選左下的New
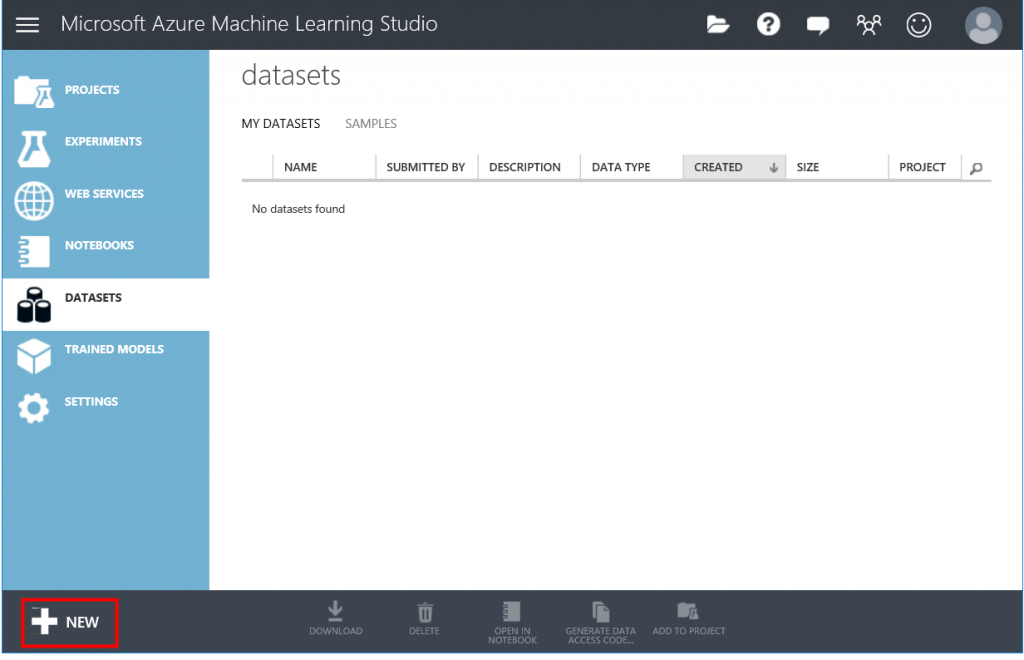
https://ithelp.ithome.com.tw/upload/images/20180115/20103333kmeLdHvhAX.png

然後點擊From LOCAL FILE
https://ithelp.ithome.com.tw/upload/images/20180115/20103333MS9hgu0Blp.png

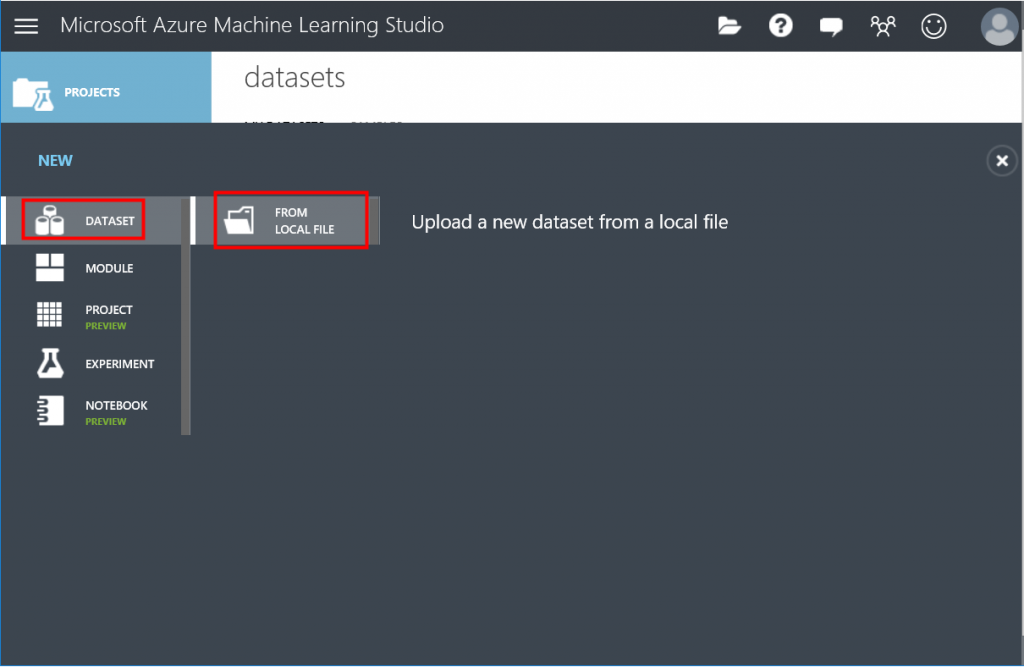
按下Browse, 可以選擇本地端檔案上傳, 最後按下打勾的按鈕
https://ithelp.ithome.com.tw/upload/images/20180115/201033336K4TiIqEJD.png

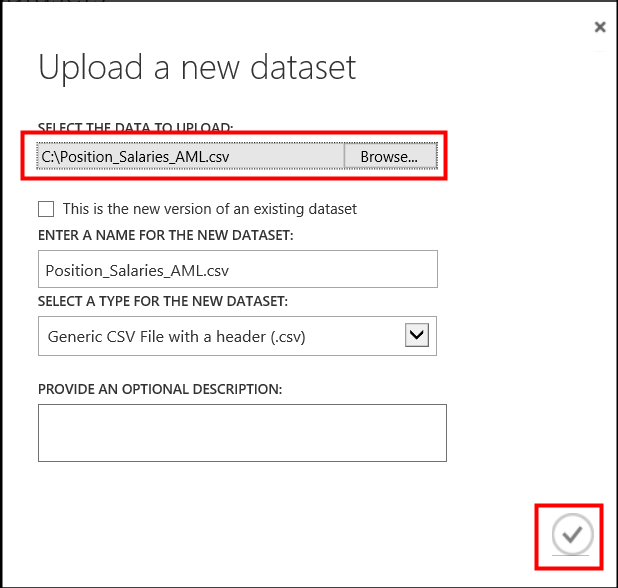
上傳成功的畫面如下, 然後點選Experiments
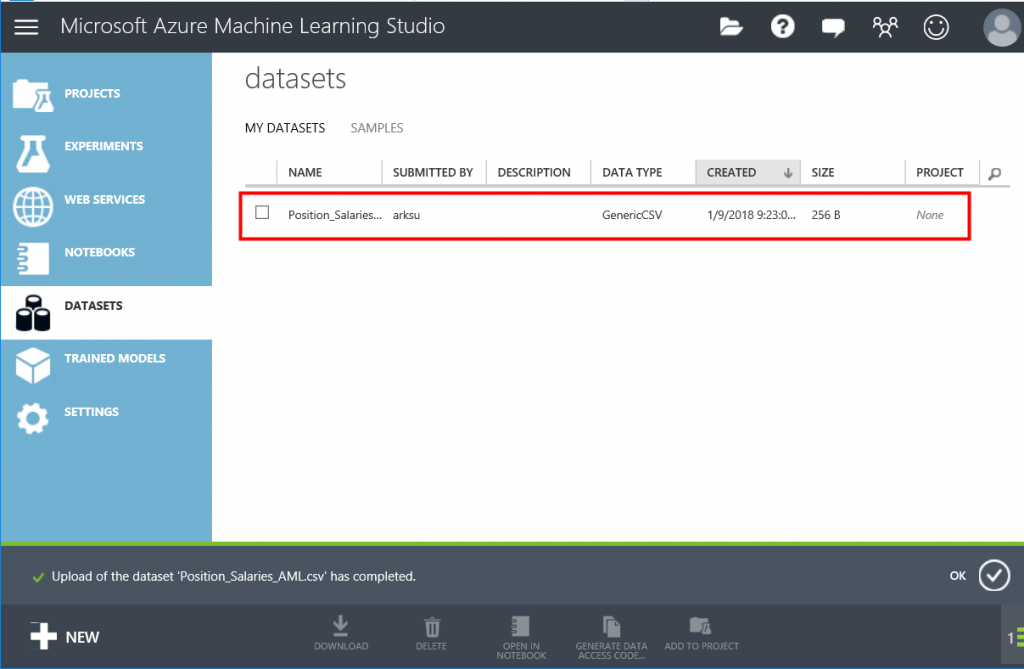
https://ithelp.ithome.com.tw/upload/images/20180115/20103333sCBkAR4CxD.png

在Experiments, 點選New
https://ithelp.ithome.com.tw/upload/images/20180115/20103333xfQzTtGvqg.png

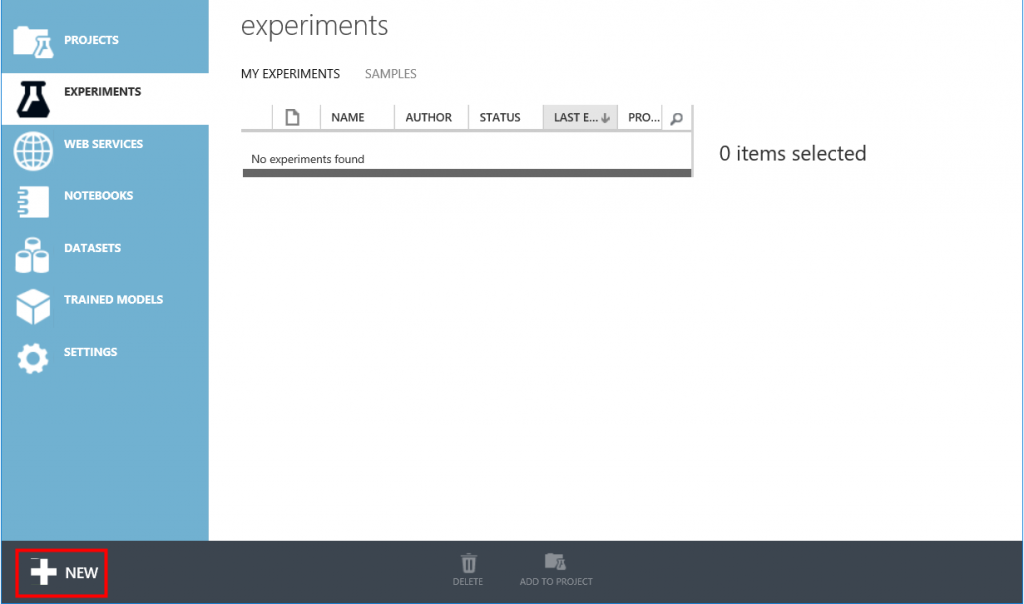
接著點選Blank Experiment
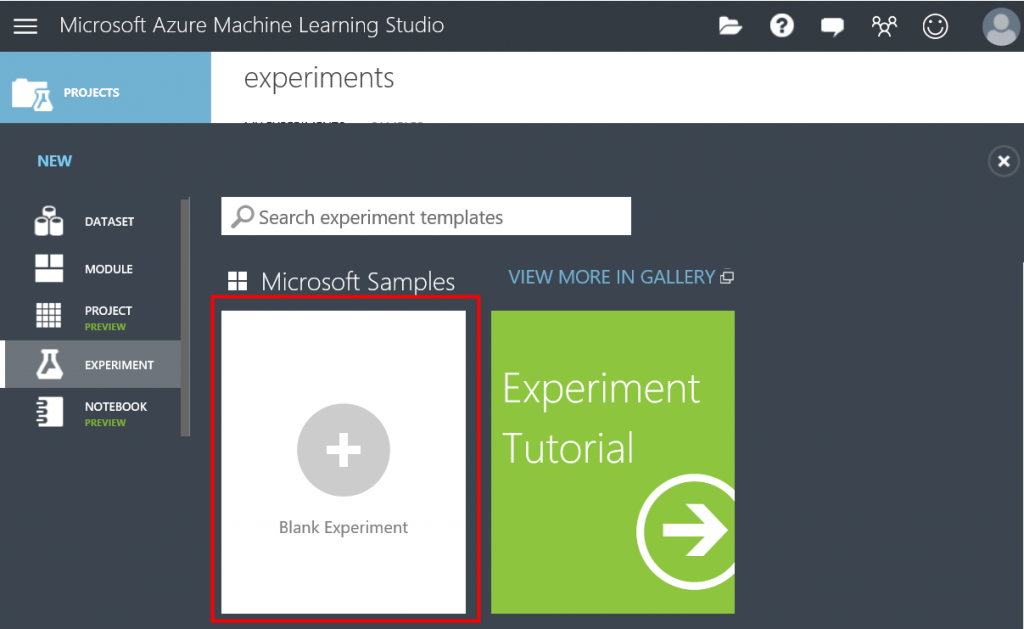
https://ithelp.ithome.com.tw/upload/images/20180115/20103333iMd08Et1yp.png

之後展開的工作區如下
https://ithelp.ithome.com.tw/upload/images/20180115/201033335QUcH2jttT.png

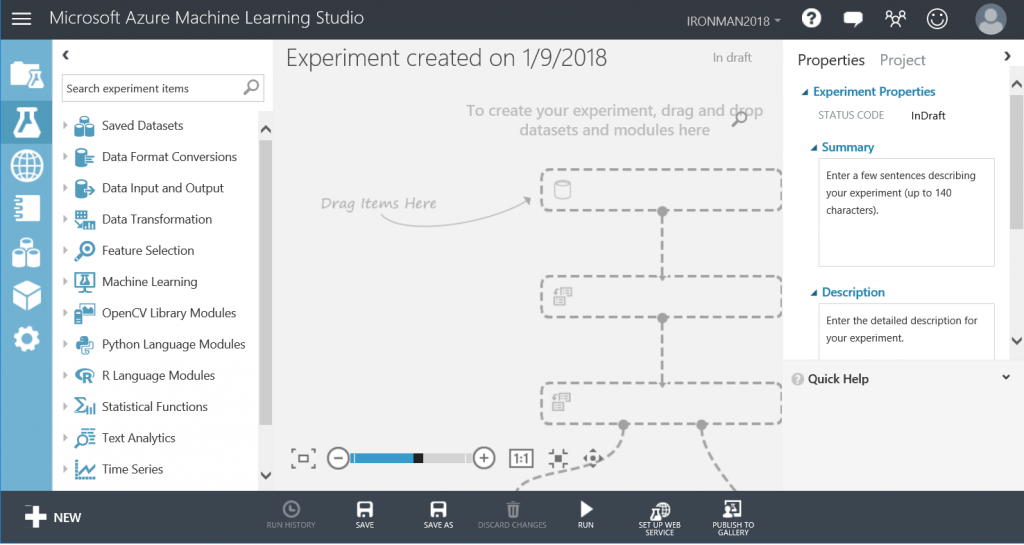
從Saved Datasets的My Datasets找到剛剛上的csv檔, 拖曳到右邊空白處如下
https://ithelp.ithome.com.tw/upload/images/20180115/20103333YHHiCTaDj5.png

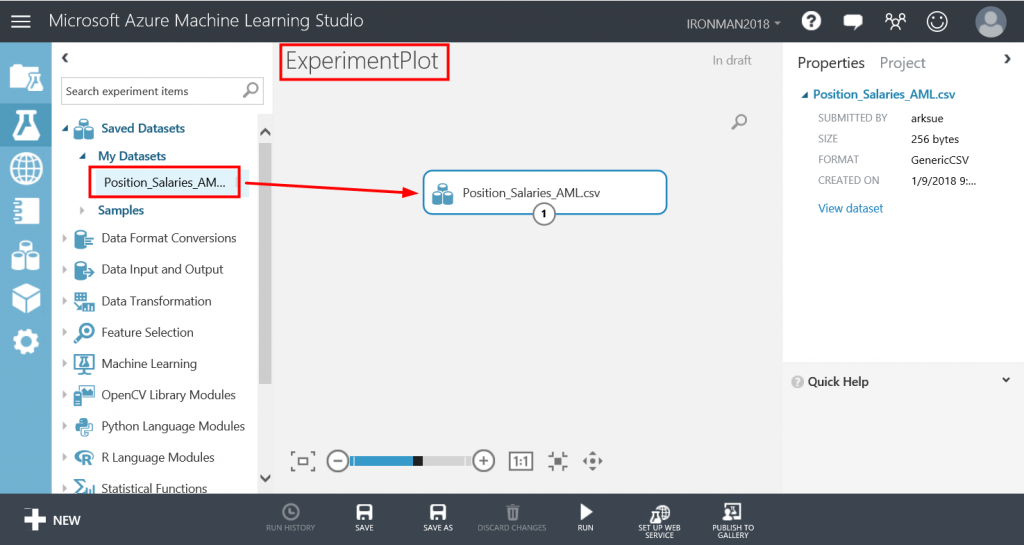
接著在R Language Modules下, 找到Execute R Script, 拖曳到右方空白處如下
https://ithelp.ithome.com.tw/upload/images/20180115/20103333FJqGz9q05s.png

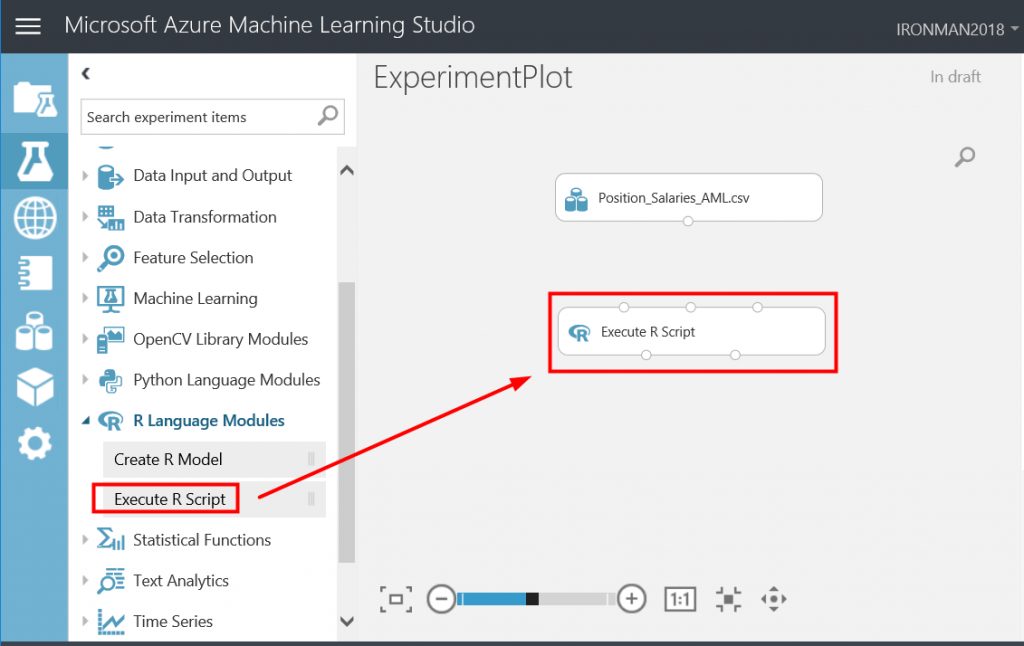
從csv模組的端點處,連結至Execute R Script模組上方左邊的端點
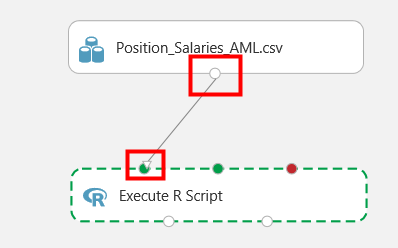
https://ithelp.ithome.com.tw/upload/images/20180115/20103333CK68anfp35.png

完成後如下, 這個連線可視為資料的流向
https://ithelp.ithome.com.tw/upload/images/20180115/201033339IsguRZJrk.png

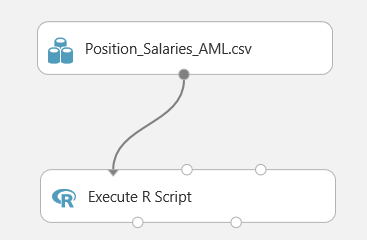
接著點選Execute R Script, 右方會出現R Script的視窗, 點選紅框內的小圖示, 可以展開R Script視窗
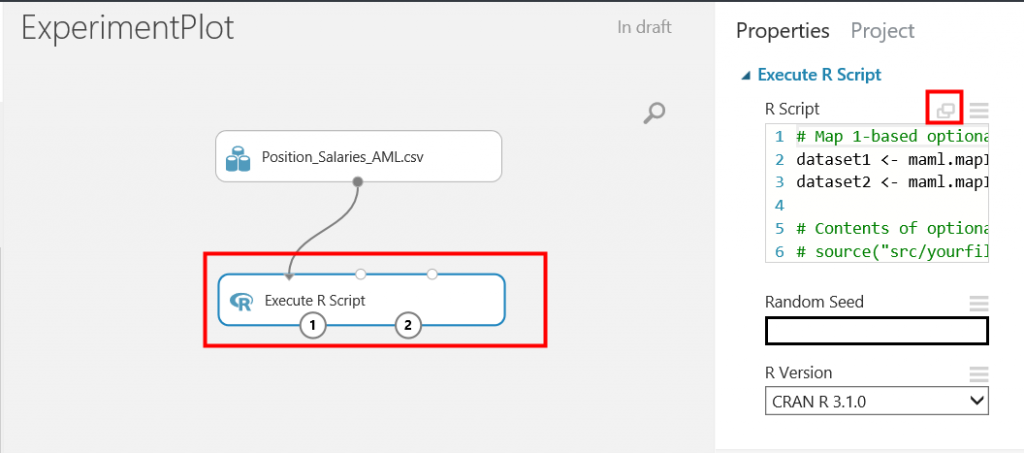
https://ithelp.ithome.com.tw/upload/images/20180115/20103333bu5NYsFyAZ.png

展開R Script視窗後如下
https://ithelp.ithome.com.tw/upload/images/20180115/20103333RF3ap6GrjR.png

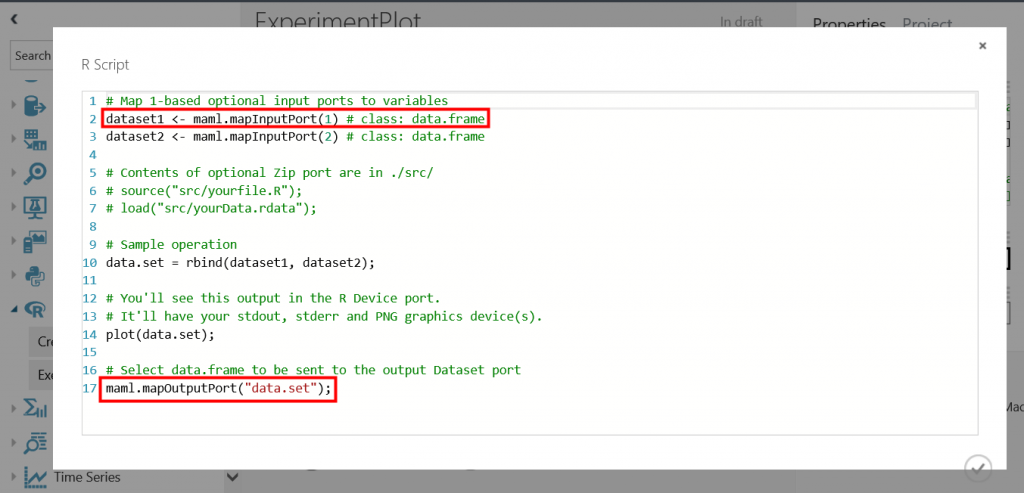
這邊有兩個地方要注意一下, dataset1 <- maml.mapInputPort(1) 代表的是Execute R Script模組上方左邊的端點接進來的資料, 而maml.mapOutputPort("data.set") 則是左下方端點要流出去的資料, 接著修改程式碼如下, 最後按下紅框內的打勾按鈕
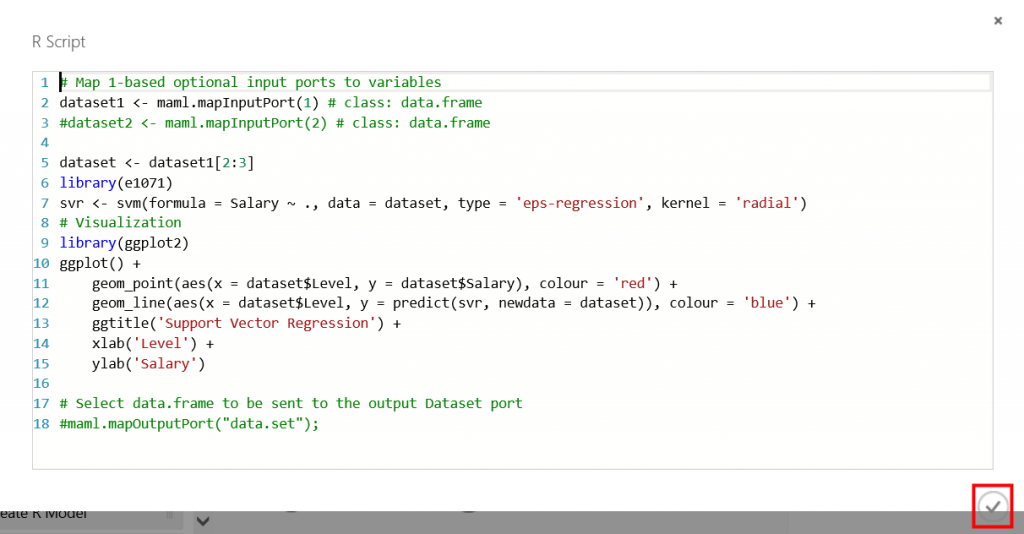
https://ithelp.ithome.com.tw/upload/images/20180115/201033337l7qE4mKjY.png

接著就可以來跑看看, 按下RUN如下
https://ithelp.ithome.com.tw/upload/images/20180115/20103333RRyBFPPwmR.png

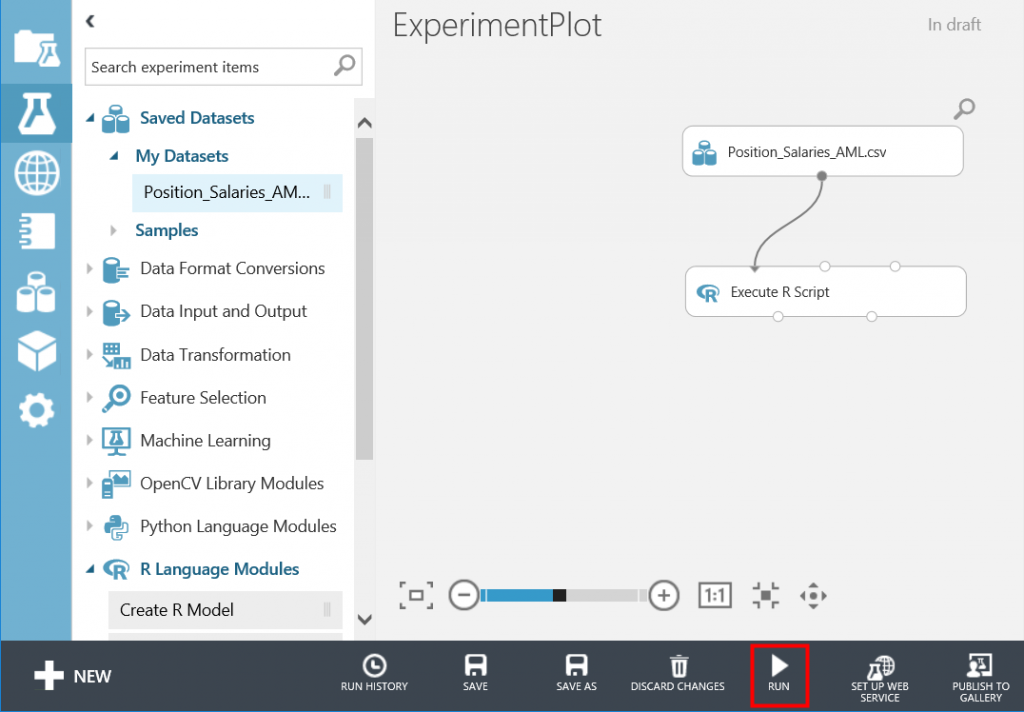
若成功執行, 會出現綠色的打勾圖示, 代表沒有錯誤, 點選在Execute R Script模組的右下方端點, 按下滑鼠右鍵, 選擇Visualize
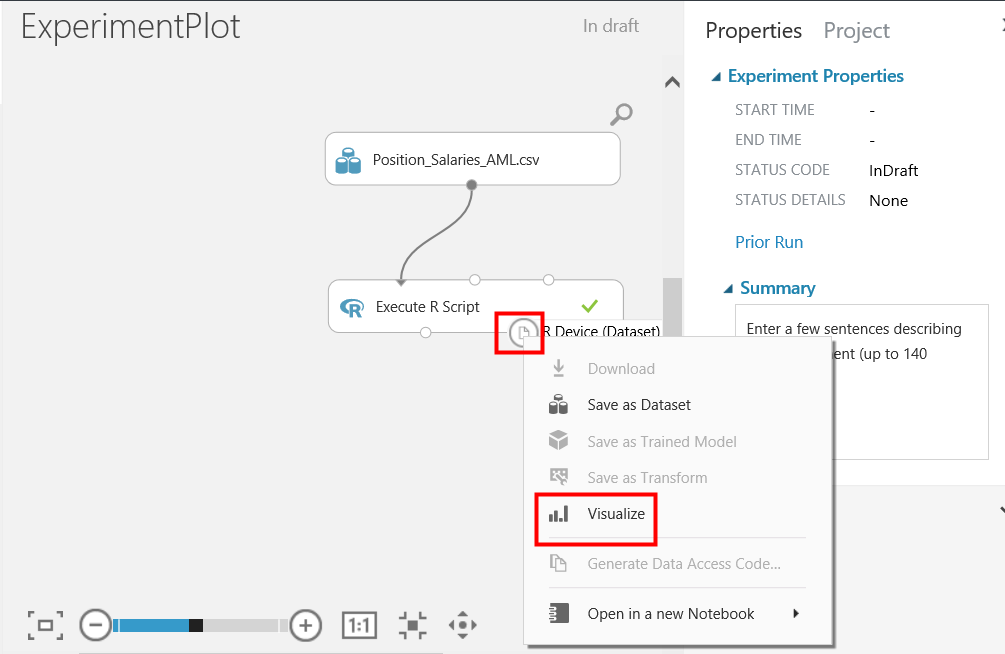
https://ithelp.ithome.com.tw/upload/images/20180115/2010333353yBbPqA72.png

之後就可以看到R繪圖如下
https://ithelp.ithome.com.tw/upload/images/20180115/20103333R8K3AyCLuK.png

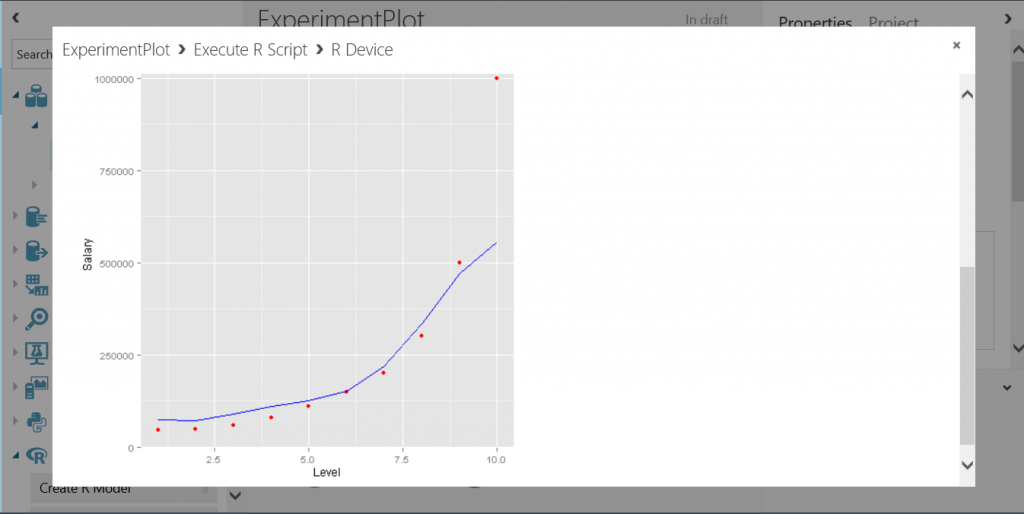
接下來就是要把產生R繪圖的這個端點, 發佈成Web Service, 在左邊選單裡, 找到Web Service, 拖曳Output到右邊空白處, 並建立端點間的連結如下
https://ithelp.ithome.com.tw/upload/images/20180115/201033334RX5POYf4v.png

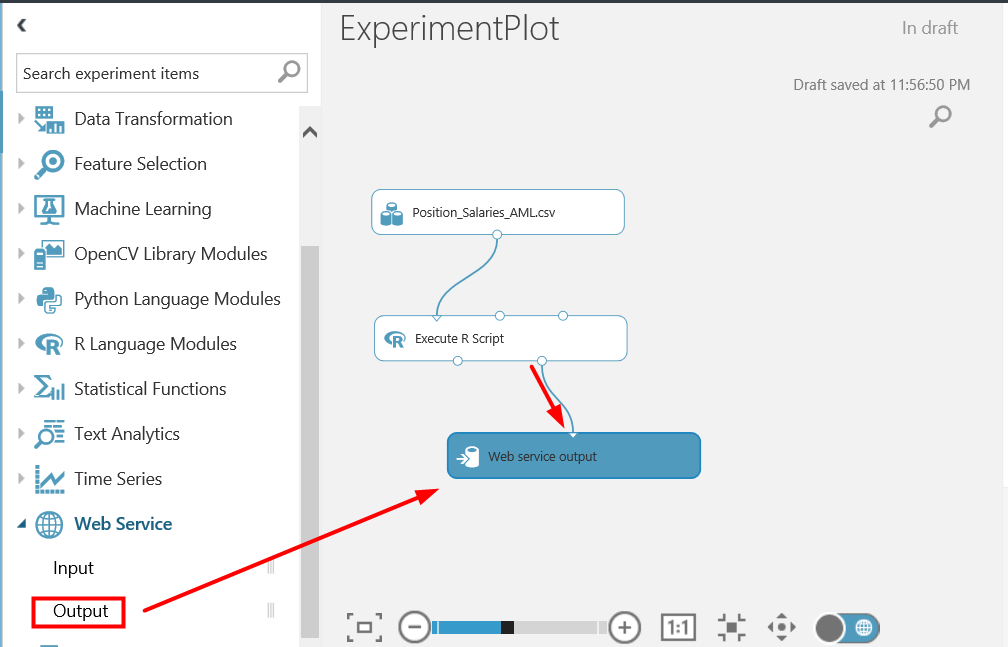
設定完成必須重新執行RUN確認沒有問題, 點選DEPLOY WEB SERVICE, 再選擇Deploy Web Service[Classic], 之後會出現對話框, 點選Yes
https://ithelp.ithome.com.tw/upload/images/20180115/20103333aZu8hdbe25.png

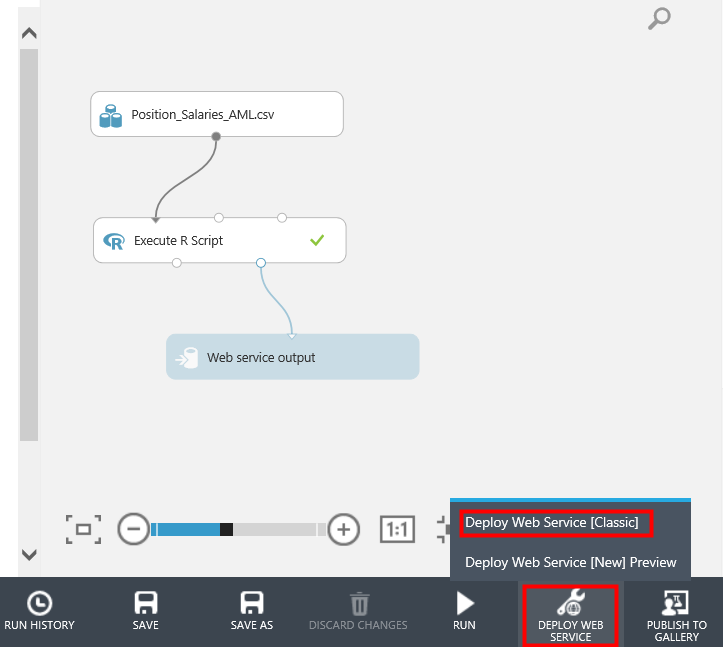
接著會跳到Web Service管理頁面, 然後複製API Key, 等一下會用到, 再點選Test如下, 會導到測試頁面
https://ithelp.ithome.com.tw/upload/images/20180115/20103333NIdSaKsMW0.png

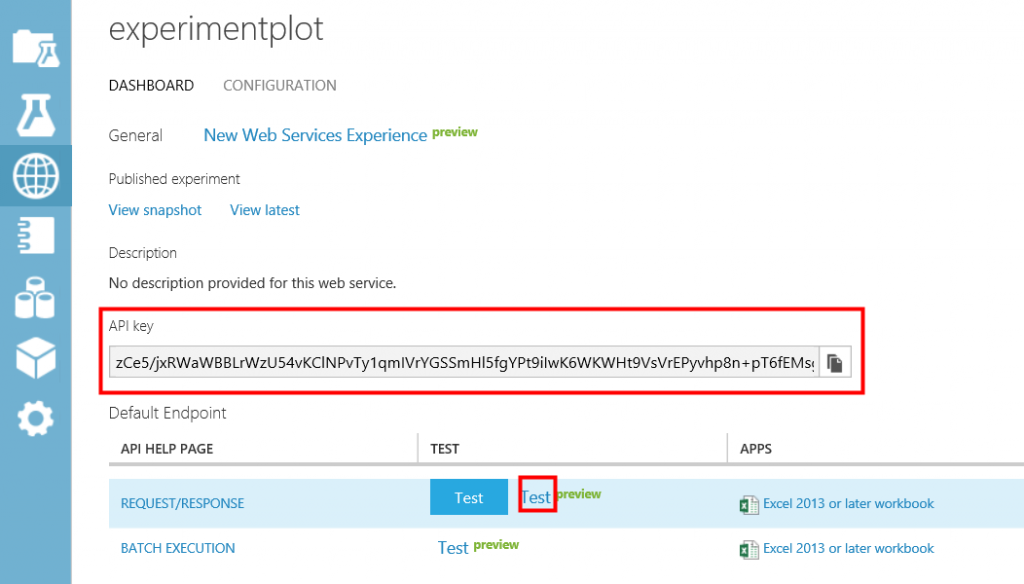
在測試頁面, 點擊Test Request-Response後, 會出現output1的回傳結果, 由結果可知是JSON格式, 也看到圖檔格式是base64字串的png
https://ithelp.ithome.com.tw/upload/images/20180115/20103333ESdK04IBbx.png

然後點選Consume, 會有底下Sample Code可參考, 所以接下來用ASP.NET Web Form來呼叫這個Service
https://ithelp.ithome.com.tw/upload/images/20180115/20103333k1riD0Wv6T.png

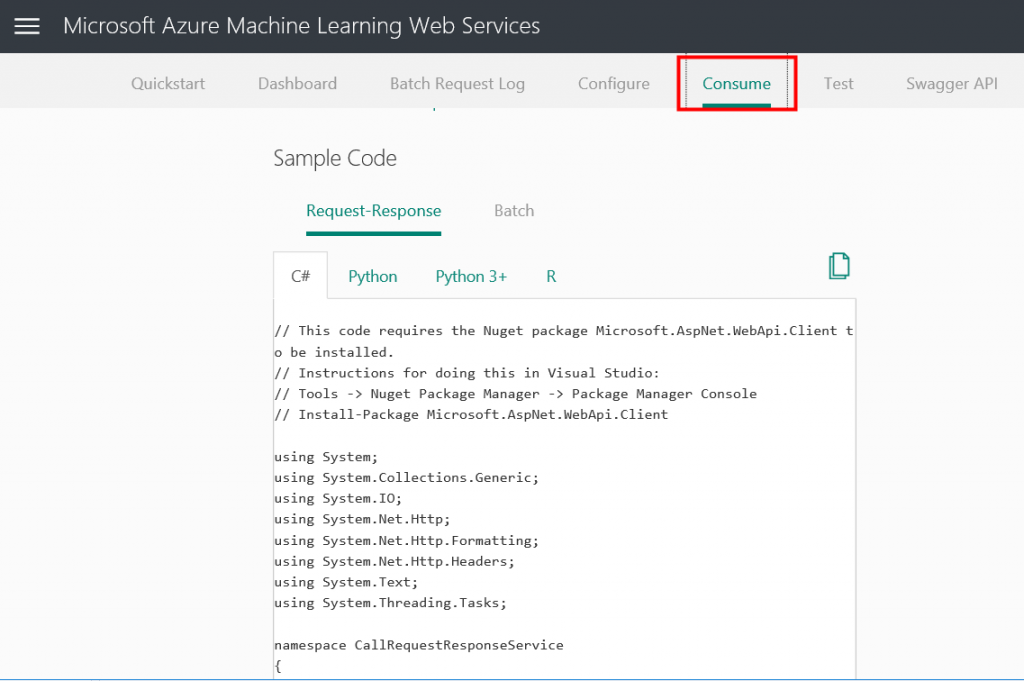
接下來在之前的ASP.NET Web Form專案裡新增一個AML.aspx, 並把前端的程式碼貼過來, 修改Title方便識別
https://ithelp.ithome.com.tw/upload/images/20180115/20103333d9kQyAPK2b.png

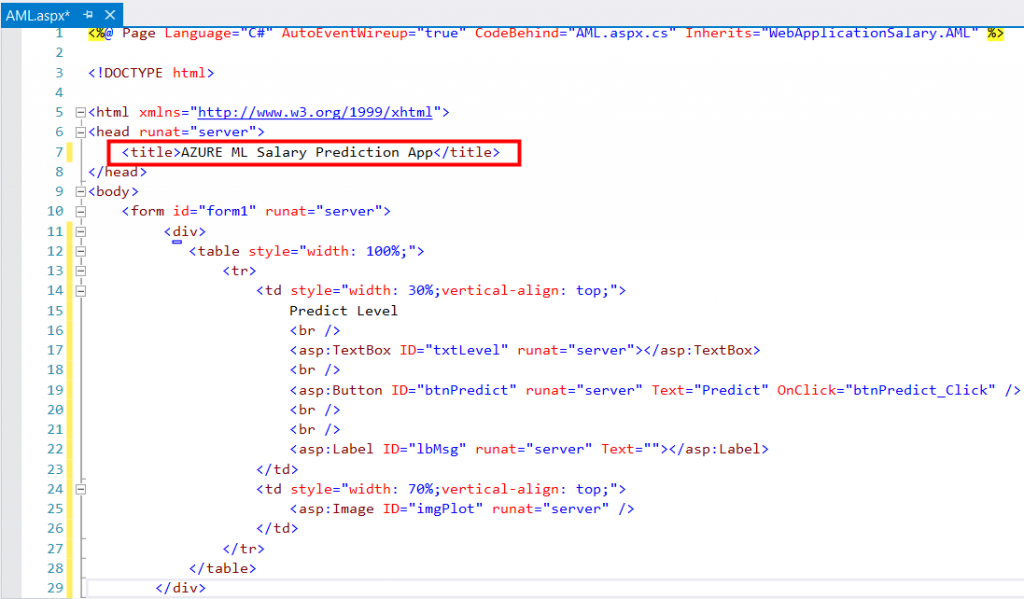
然後如Sample Code所提示的, 在NuGet安裝Microsoft.AspNet.WebApi.Client
https://ithelp.ithome.com.tw/upload/images/20180115/20103333IPJC2cYiDp.png

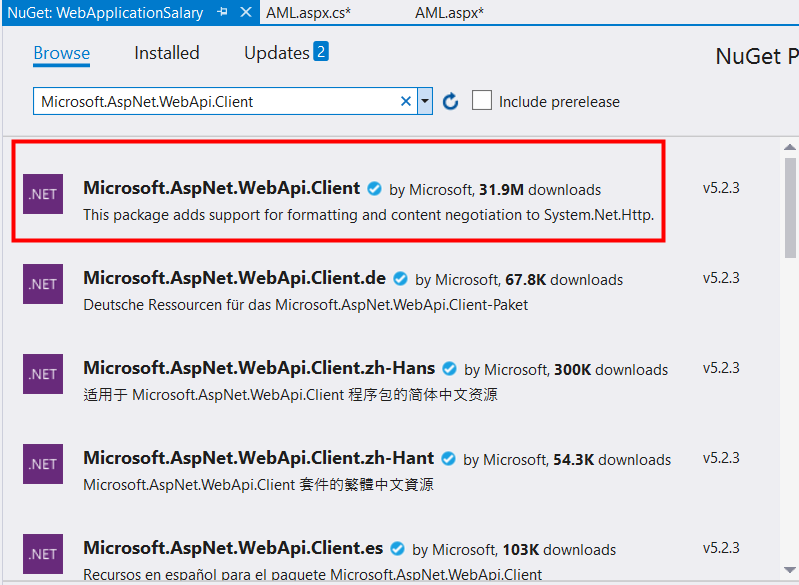
然後在AML.aspx.cs引用namespace, 加入API Key常數與btnPredict_Click事件如下
https://ithelp.ithome.com.tw/upload/images/20180115/20103333WY7y1YBW3j.png

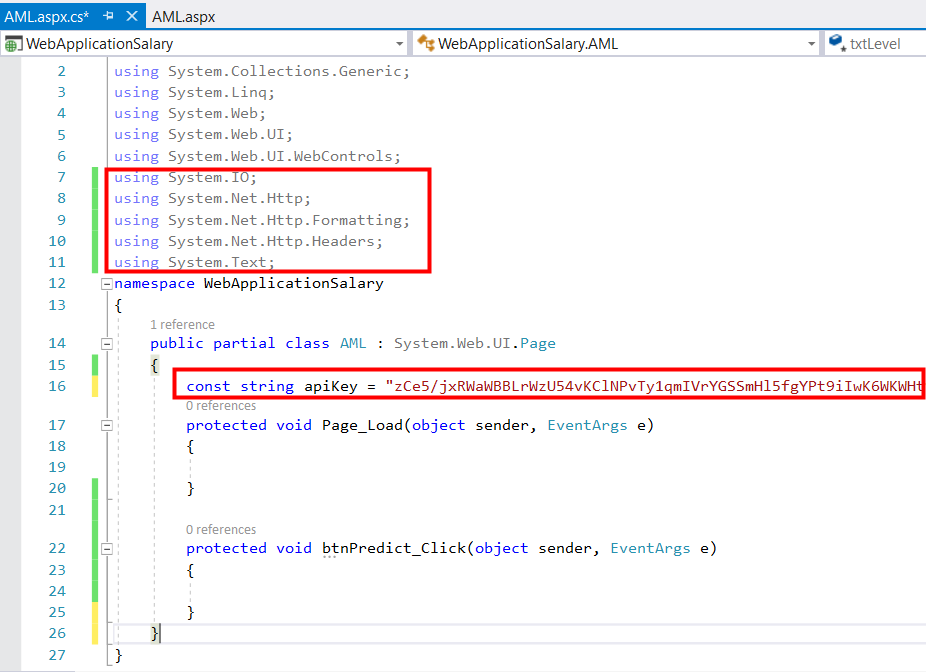
接著在Page_Load註冊一個非同步呼叫的函數如下
https://ithelp.ithome.com.tw/upload/images/20180115/201033334E8TGMLoVu.png

新增非同步呼叫的函數如下, 這邊先來試著解析回傳的JSON字串
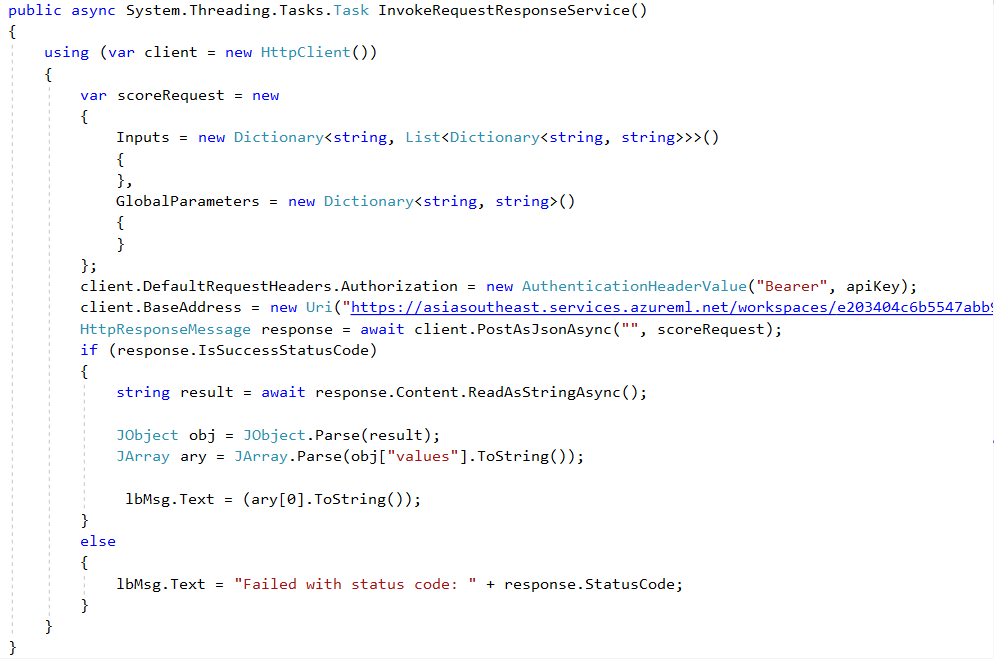
https://ithelp.ithome.com.tw/upload/images/20180115/20103333fdY6k3CZtf.png

沒想到遇到又遇大魔王居然又卡關了/images/emoticon/emoticon04.gif, 程式試跑如下
https://ithelp.ithome.com.tw/upload/images/20180115/20103333Y6oKyIFUyX.png

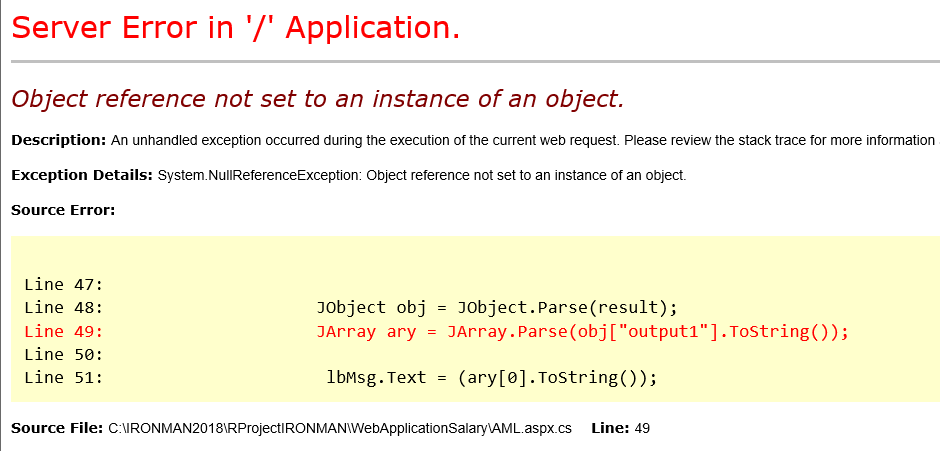
用偵錯模式看一下JSON格式如下, 並非整個格式為標準的JSON格式
https://ithelp.ithome.com.tw/upload/images/20180115/201033330qPJgmAJ3R.png

耐著性子慢慢解析, 終於解出base64字串, 修改程式碼如下
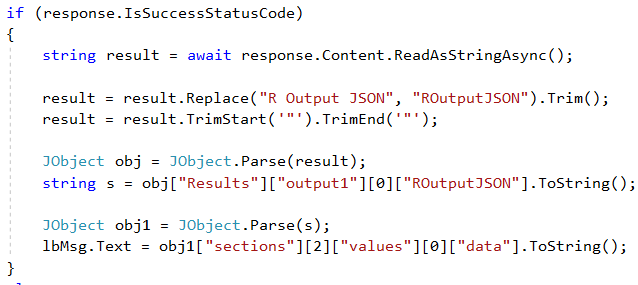
https://ithelp.ithome.com.tw/upload/images/20180115/20103333ATtzWvib1n.png

解出base64字串如下
https://ithelp.ithome.com.tw/upload/images/20180115/20103333to1sNTQgCR.png

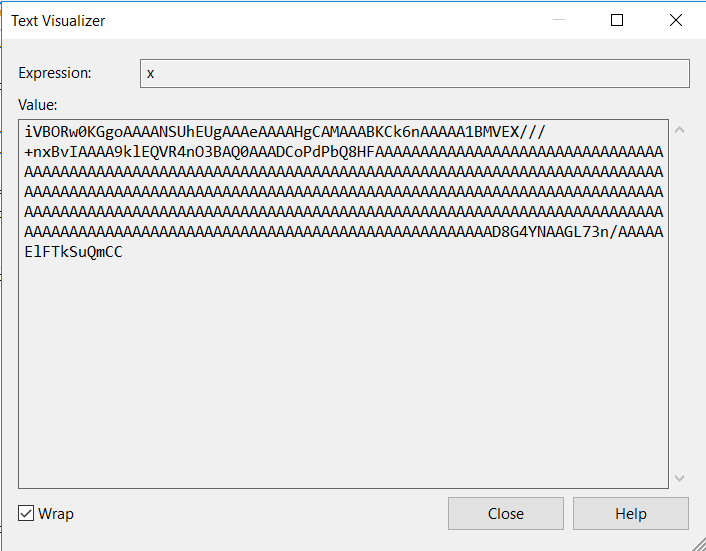
透過下列程式碼將base64字串轉成圖片
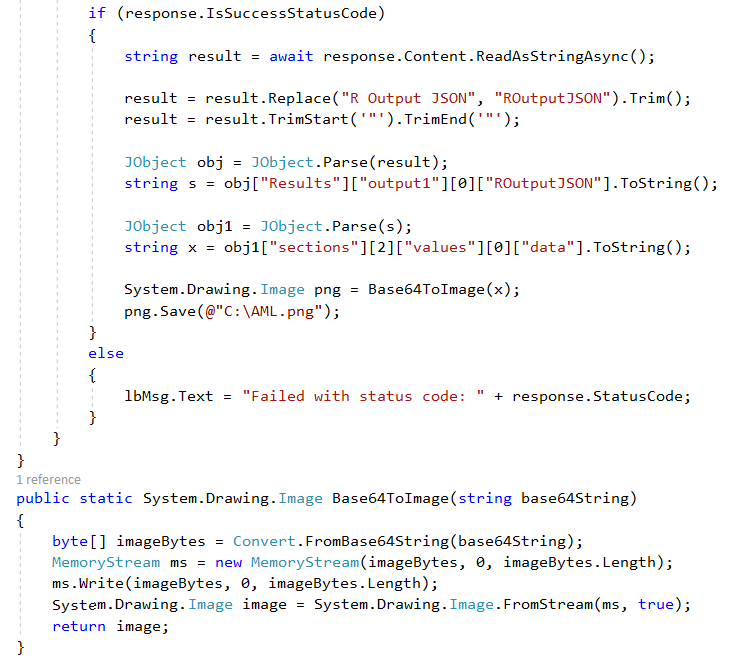
https://ithelp.ithome.com.tw/upload/images/20180115/20103333v886VRT4aX.png

圖檔產生如下
https://ithelp.ithome.com.tw/upload/images/20180115/20103333lDXyZxtgLH.png

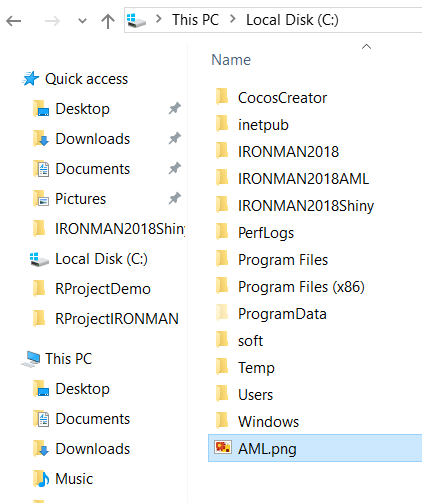
原本開開心心要結案了, 結果打開圖檔如下
https://ithelp.ithome.com.tw/upload/images/20180115/20103333WfOivWND1y.png

超傻眼/images/emoticon/emoticon06.gif, 搞到快天亮, 燒腦了一天給我空白, 今天無力再戰, 明天繼續


上一篇
Day27 – R Last Mile to Web Part3 ASP.NET與 MSSQL R Service
下一篇
Day29 – R Last Mile to Web Part4 Azure Machine Learning Studio Plot 下篇
系列文
Microsoft R Solution30
圖片
  直播研討會
圖片
{{ item.channelVendor }} {{ item.webinarstarted }} |
{{ formatDate(item.duration) }}
直播中

尚未有邦友留言

立即登入留言