
上一篇將 vuetify 的 theme 拆成獨立的檔案 (vuetify.config.js)。
這篇會將 vuetify 引入 storybook 中,同步 storybook 和 nuxt 的樣式。
總共分四個步驟:
import Vuetify from 'vuetify'
import theme from '@/vuetify.config.js'

Vue.use(Vuetify, {
  theme
})

import '!!style-loader!css-loader!stylus-loader!../assets/style/app.styl'
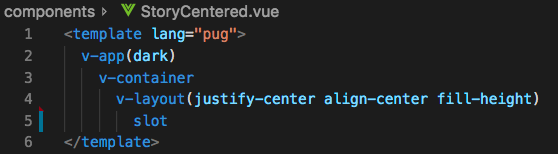
StoryCentered 這個元件非常簡單,
只有 template 的部分,
且利用 Vuetify 的 grid system,
並透過三個屬性(justify-center, align-center, fill-height)將內容置中。
真是簡單優雅又不用寫任何一行 css 呢!
.storybook/config.js 中,新增 centeredDecorator功能為將 story 置中,且不介入 story 元件的 template。
import { addDecorator } from '@storybook/vue'
import StoryCentered from '@/components/StoryCentered'

Vue.component('StoryCentered', StoryCentered)

const CenterDecorator = storyFn => {
  const story = storyFn()
  return {
    component: { story },
    template: `<StoryCentered><story></story></StoryCentered>`
  }
}
addDecorator(CenterDecorator)
這個部分就沒那麼容易理解了,
為了避免在每個 story 中都要再個別引入一次 StoryCentered,
而且引入後還要在每個 story 的 template 最外層包上元件 StoryCentered。
用 addDecorator 的方式可以說是自己想到覺得很棒的方法。
當然上面的範例是將 addDecorator(CenterDecorator) 寫在 config 中,
所以所有的 story 都會掛上 CenterDecorator,
有需要的可以改成在個別 story 中引入。
請看原本在 story 中透過 StoryCentered 置中的辦法:
./components/TheTextField/TheTextField.stories.js
import StoryCentered from '../StoryCentered'
import TheTextField from './'

Vue.component('StoryCentered', StoryCentered)
Vue.component('TheTextField', TheTextField)

storiesOf('TheTextField', module)
  .add('TheTextField', withReadme(README, () => ({
    template: (
      pug
      `StoryCentered
        TheTextField `
    )
  })))
這邊可以看到在元件 TheTextField 中的 template 用到了 StoryCentered,
但 StoryCentered 其實跟元件 TheTextField 並無關聯。
透過 addDecorator(CenterDecorator) 的方式將置中的部分分離後,
可改寫成:
import TheTextField from './'

Vue.component('TheTextField', TheTextField)

storiesOf('TheTextField', module)
  .add('TheTextField', withReadme(README, () => ({
    template: (
      pug
      `TheTextField `
    )
  })))
呼~~乾淨多了~
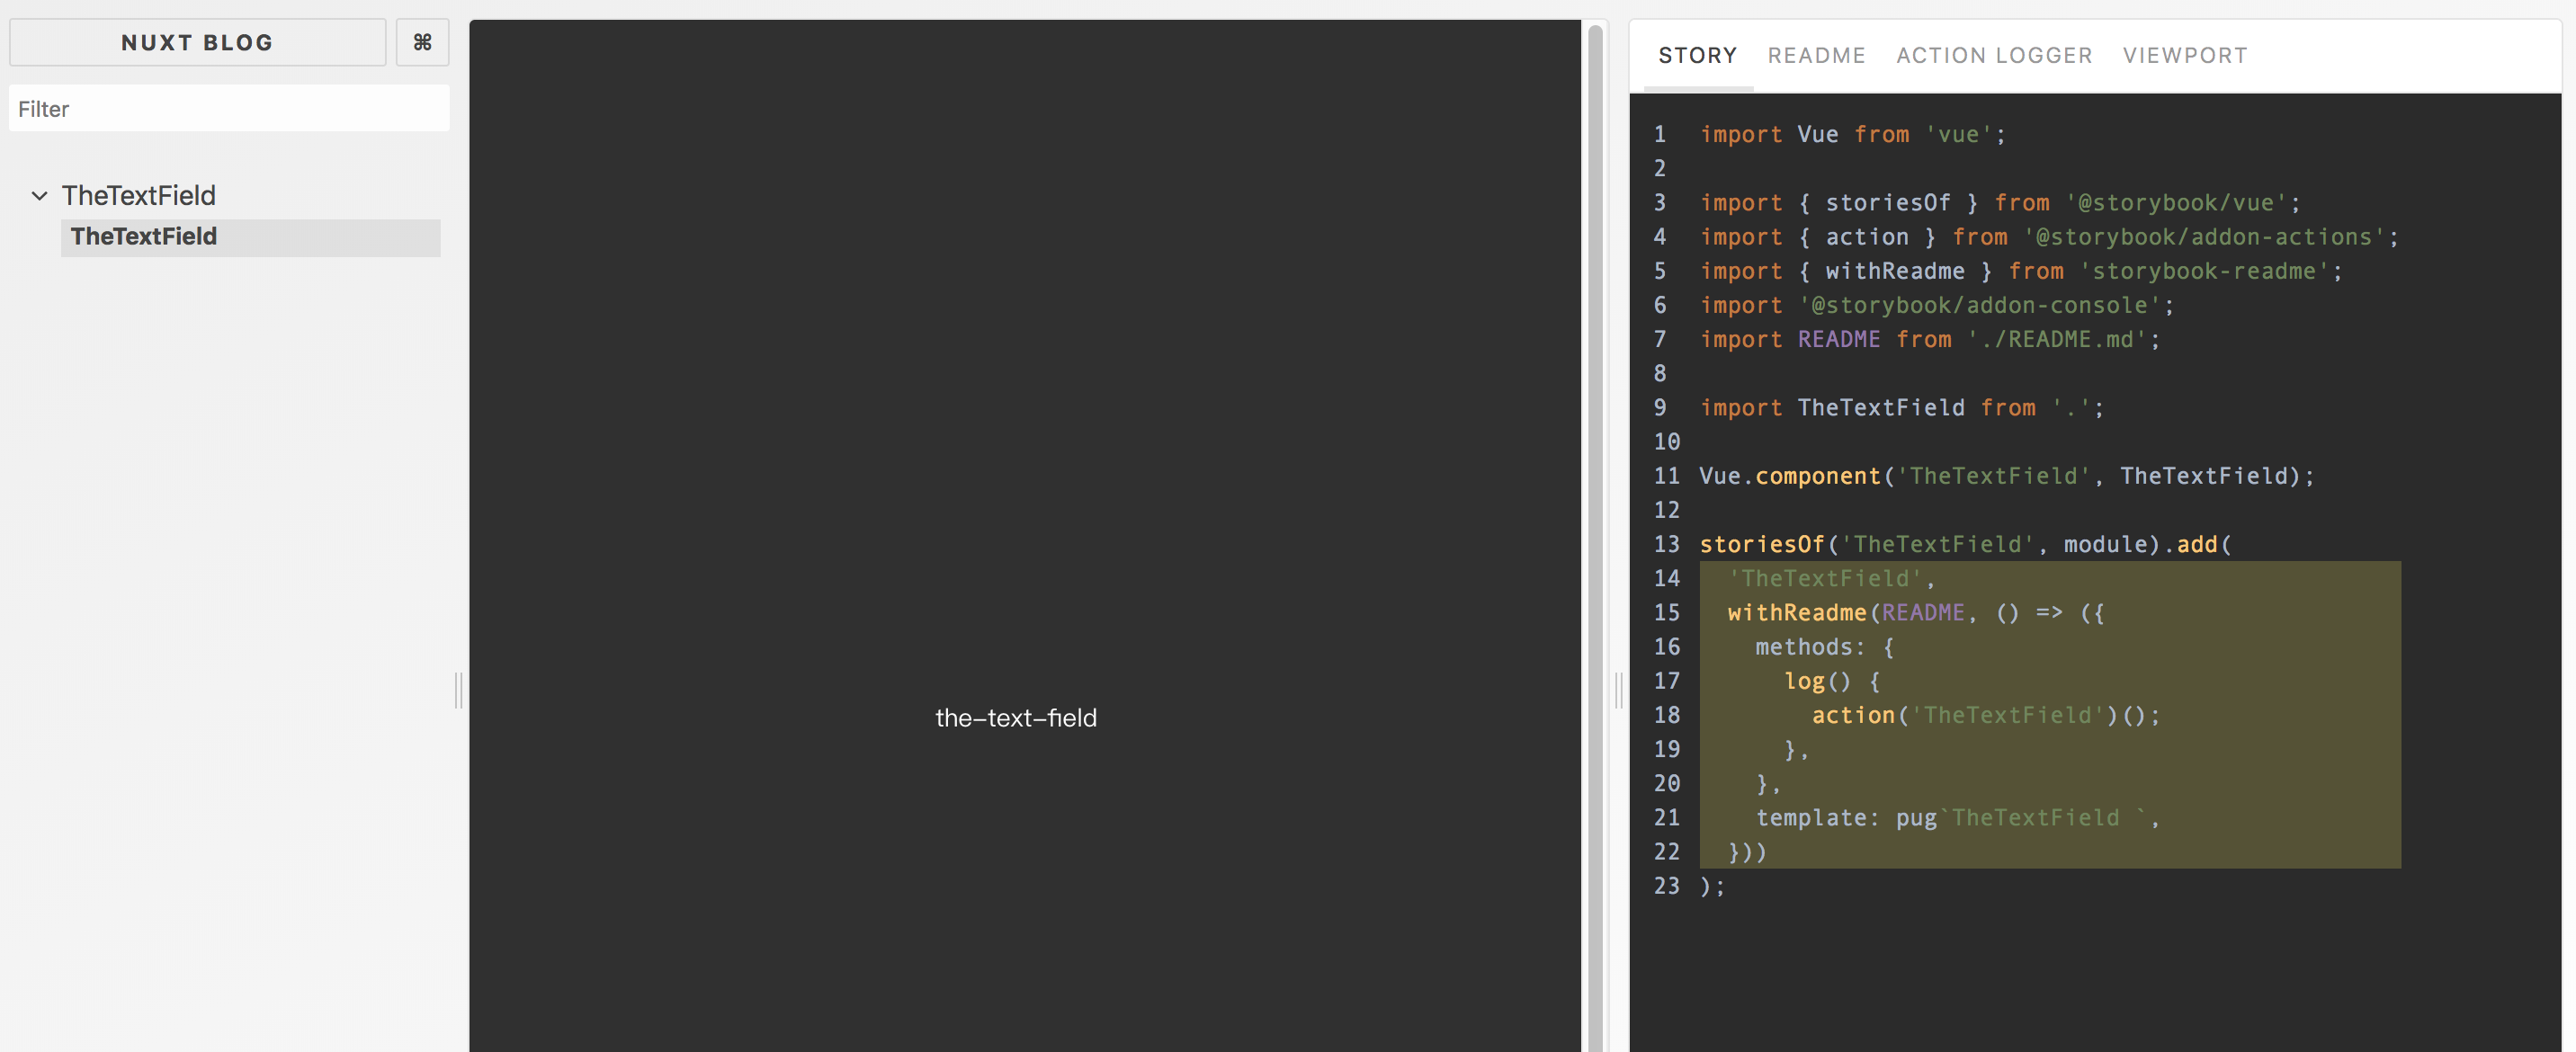
最後附上元件置中截圖:
不知道 plop 是什麼的,Day08 傳送門
import Vue from 'vue'

import { storiesOf } from '@storybook/vue'
import { action } from '@storybook/addon-actions'
import { withReadme }  from 'storybook-readme'
import '@storybook/addon-console'
import README from './README.md'

import {{ properCase name }} from '.'

Vue.component('{{ properCase name }}', {{ properCase name }})

storiesOf('{{ properCase name }}', module)
  .add('{{ properCase name }}', withReadme(README, () => ({
    methods: {
      log() {
        action('{{ properCase name }}')()
      },
    },
    template: (
      pug
      `{{ properCase name }} `
    )
  })))
指令:
git clone -b 010-vuetify-storybook --single-branch https://github.com/hunterliu1003/blog.git
cd blog
npm install
npm run storybook
