換到月Month的頁面了,這邊要用日曆來呈現,所以會結合UICollectionView使用,這也大概就是這頁的重點了吧!
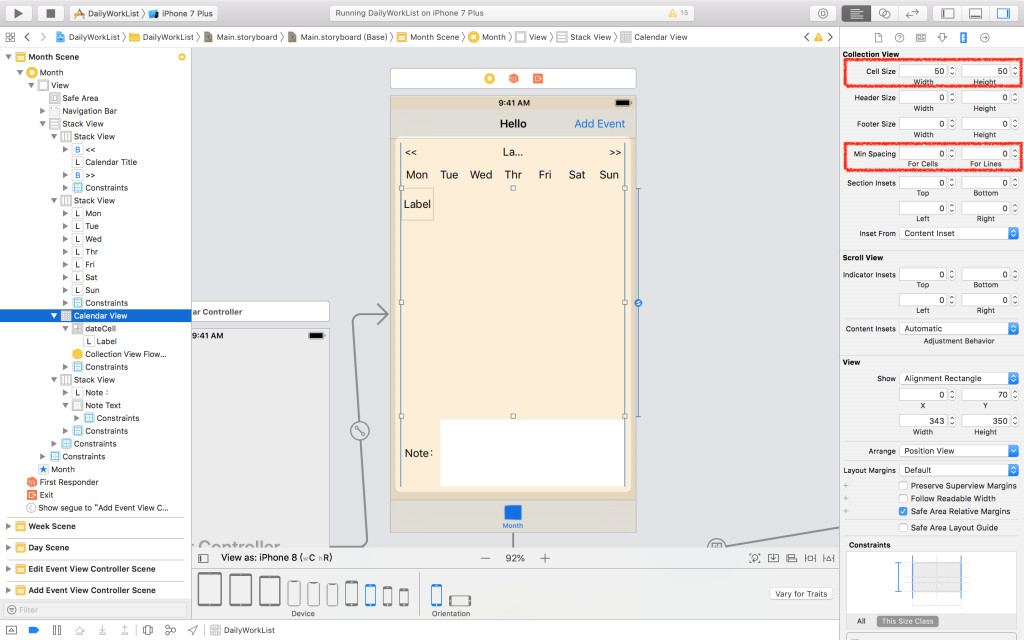

再來把Outlet加入MonthViewController
@IBOutlet weak var calendarTitle: UILabel!
@IBOutlet weak var calendarView: UICollectionView!
Class加入Protocol
class MonthViewController: UIViewController, UICollectionViewDataSource, UICollectionViewDelegate {
加入協定的Function,跟UITableView的很像,那我先假定都是31天,先顯示出來
func collectionView(_ collectionView: UICollectionView, numberOfItemsInSection section: Int) -> Int {
    return 31
}

func collectionView(_ collectionView: UICollectionView, cellForItemAt indexPath: IndexPath) -> UICollectionViewCell {
    let cell = collectionView.dequeueReusableCell(withReuseIdentifier: "dateCell", for: indexPath)
    if let textLabel = cell.contentView.subviews[0] as? UILabel {
        textLabel.text = "\(indexPath.row + 1)"
    }
    return cell
}
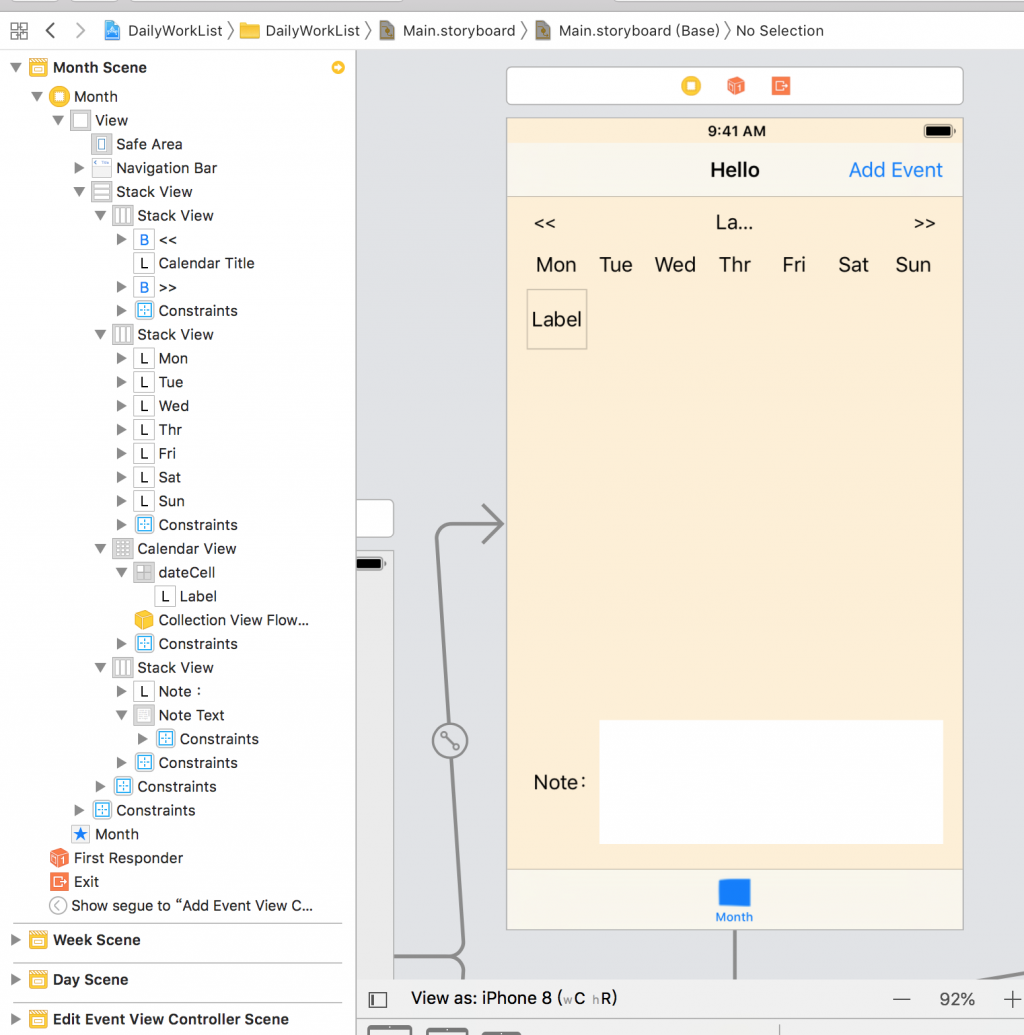
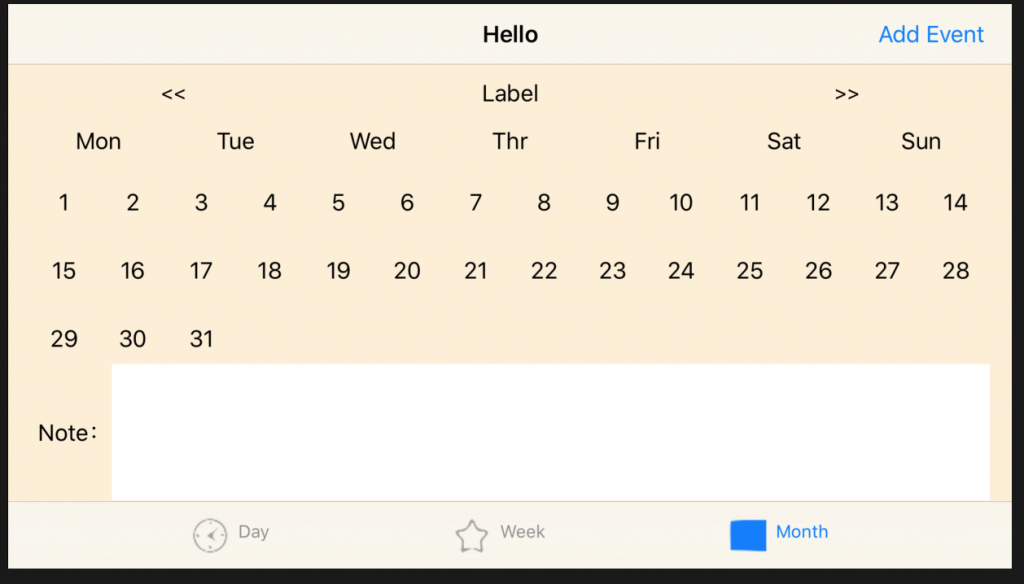
這樣就可以跑跑看囉!結果發現直的沒什麼問題,刻意橫過來看卻跑版了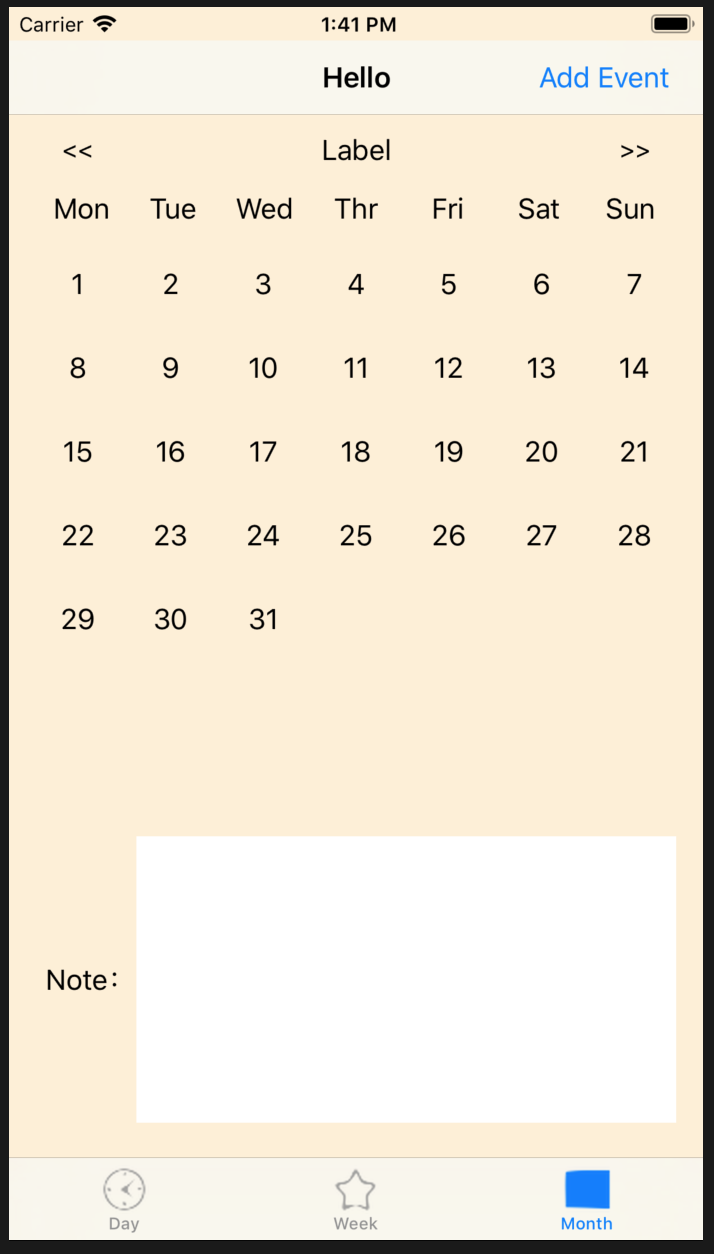
為了讓橫的也可以符合樣板(雖然不打算提供,但還是趁機學學怎麼處理),我們需要加入UICollectionViewDelegateFlowLayout這個Protocol
class MonthViewController: UIViewController, UICollectionViewDataSource, UICollectionViewDelegate, UICollectionViewDelegateFlowLayout {
然後加入
override func viewWillLayoutSubviews() {
    super.viewWillLayoutSubviews()
    calendarView.collectionViewLayout.invalidateLayout()
}

func collectionView(_ collectionView: UICollectionView, layout collectionViewLayout: UICollectionViewLayout, sizeForItemAt indexPath: IndexPath) -> CGSize {
    // 固定一列只有七個
    let width = collectionView.frame.width / 7
    return CGSize(width: width, height: 50)
}
這樣就不會跑版囉,高度可能不夠,不過沒關係,旁邊有scroll view可以往下滑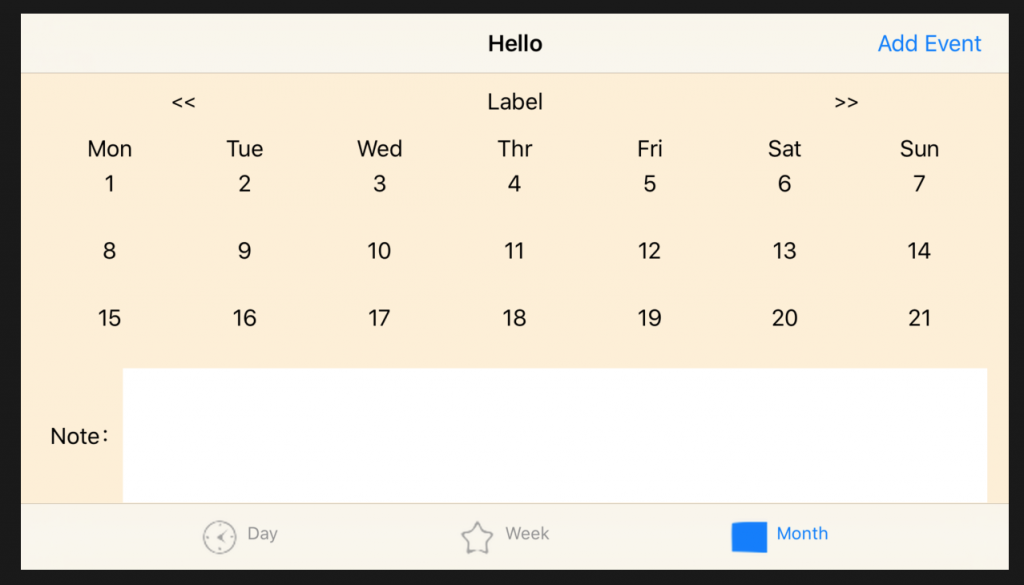
最後我們來實現每月天數與日期對應到的星期吧!先建立變數
let monthTitle = ["January", "February", "March", "April", "May", "June", "July", "August", "September", "October", "November", "December"]
var currentYear = Calendar.current.component(.year, from: Date())
var currentMonth = Calendar.current.component(.month, from: Date())
var weekday: Int {
    // 設定目前月份
    let dateComponents = DateComponents(year: currentYear, month: currentMonth)
    let date = Calendar.current.date(from: dateComponents)!
    // 取得該月1號的星期,如果是星期日就是1,但我預設星期一為第一天,故減一
    var weekday = Calendar.current.component(.weekday, from: date) - 1
    if weekday == 0 {
        weekday = 7
    }
    return weekday
}
新增changeMonth功能,當按下月份的左右按鈕時,對應著變換日期的功能
func changeMonth(value: Int) {
    // 目前的月份對應調整得值
    currentMonth = currentMonth + value
    if currentMonth > 12 {
        // 如果超過12就為明年,要把年份加一
        currentMonth = 1
        currentYear = currentYear + 1
    } else if currentMonth < 1 {
        // 如果低於1就為去年,要把年份減一
        currentMonth = 12
        currentYear = currentYear - 1
    }
    // 修改月曆title,英文字取自月份陣列中
    calendarTitle.text = "\(currentYear) " + monthTitle[currentMonth - 1]

    calendarView.reloadData()
}
接著調整一下每個月的天數
func collectionView(_ collectionView: UICollectionView, numberOfItemsInSection section: Int) -> Int {
    // 設定目前月份
    let dateComponents = DateComponents(year: currentYear, month: currentMonth)
    let date = Calendar.current.date(from: dateComponents)!
    // 取得該月份天數
    let days = Calendar.current.range(of: .day, in: .month, for: date)?.count ?? 0
    // 因為該月份不一定都是星期一起始,因此要加入空白欄位
    return days + weekday - 1
}
調整每個cell的內容
func collectionView(_ collectionView: UICollectionView, cellForItemAt indexPath:
IndexPath) -> UICollectionViewCell {
    let cell = collectionView.dequeueReusableCell(withReuseIdentifier: "dateCell", for: indexPath)
    if let textLabel = cell.contentView.subviews[0] as? UILabel {
        if indexPath.row < weekday - 1 {
            // 如果不是這個月份的日期要填空白
            textLabel.text = ""
        } else {
            textLabel.text = "\(indexPath.row - weekday + 2)"
        }
    }
    return cell
}
最後,在viewDidLoad()的地方加上changeMonth(value: 0),另外替切換月份的兩個UIButton綁上touchUpInside事件
@IBAction func previousMonth(_ sender: UIButton) {
    changeMonth(value: -1)
}
@IBAction func nextMonth(_ sender: UIButton) {
    changeMonth(value: 1)
}
這樣就完成囉!明天來做調整和從資料庫中撈出對應內容
