在瞭解了材質的種類及屬性後,今天要透過專案實作,來幫前面所建立的苦力怕模型貼上材質與皮膚,讓人物的還原度更高一些!
Photo by Manolo Chrétien on Unsplash
這是本系列第 08 篇,如果還沒看過第 07 篇可以點以下連結前往:
用 Three.js 來當個創世神 (07):材質(Material)
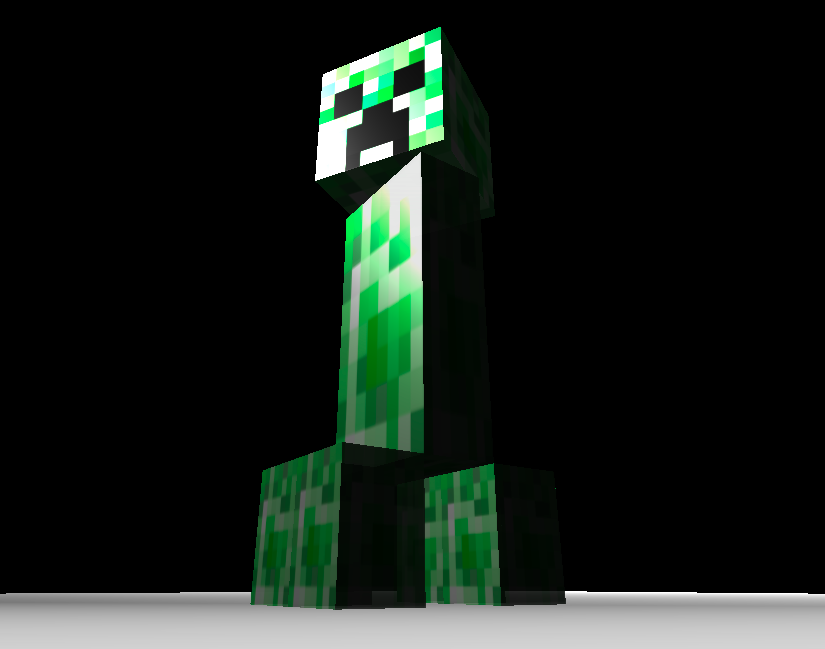
看那尊絕不凡的擺頭,恰到好處的亮澤,究竟是什麼讓今天的苦力怕散發著以往沒有的自信與霸氣?
沒錯,就是因為「材質」,俗話說的好:「佛要金裝,人要衣裝。」有了苦力怕模型後當然就是要幫他貼上皮膚讓它更像本尊一點,今天就讓我們從材質與貼圖的實作著手。
// 苦力怕臉部貼圖
const headMap = new THREE.TextureLoader().load(
  'https://dl.dropboxusercontent.com/s/bkqu0tty04epc46/creeper_face.png'
)
// 苦力怕皮膚貼圖
const skinMap = new THREE.TextureLoader().load(
  'https://dl.dropboxusercontent.com/s/eev6wxdxfmukkt8/creeper_skin.png'
)
首先為了讓苦力怕更接近原作一些,等等我們需要在材質中多加一個屬性叫做 map,這是另一個關於 Texture(紋理)的概念,文字上看起來跟材質差不多,很容易混淆,但其實它只是 Material 中的一個屬性,是拿來作為貼圖的,這邊先做簡單的載入貼圖,其它進階的應用如凹凸貼圖、環境貼圖等等之後有機會再來聊聊。
上面的程式碼先在苦力怕物件中,分別載入臉部及其他身體部位的皮膚貼圖。
需要注意的是,有時候在載入外部資源圖檔時,會遇到
Access to image at '...' from origin '...' has been blocked by CORS policy: No 'Access-Control-Allow-Origin' header is present on the requested resource.的錯誤而無法正常成像,此時可以使用瀏覽器插件避免,或尋找可以正常使用的空間建立圖檔連結(像筆者是用 dropbox),或搜尋其他關於 CORS 的解法。
// 身體與腳的材質設定
const skinMat = new THREE.MeshStandardMaterial({
  roughness: 0.3, // 粗糙度
  metalness: 0.8, // 金屬感
  transparent: true, // 透明與否
  opacity: 0.9, // 透明度
  side: THREE.DoubleSide, // 雙面材質
  map: skinMap // 皮膚貼圖
})
先來講簡單的身體與腳,這邊將剛剛載入的 skinMap 指定給 map 屬性即可載入皮膚貼圖。
材質這邊就使用昨天剛學到的 MeshStandardMaterial,為了實驗之前說明過的幾個屬性,除了貼圖外還依照 API 文件加了其他的屬性觀察差異,讀者有興趣也可以自己嘗試調整參數或是其他種材質實際體驗其中的變化。
// 準備頭部與臉的材質
const headMaterials = []
for (let i = 0; i < 6; i++) {
  let map

  if (i === 4) map = headMap
  else map = skinMap

  headMaterials.push(new THREE.MeshStandardMaterial({ map: map }))
}

// 頭
this.head = new THREE.Mesh(headGeo, headMaterials)
這邊的設計需要幫頭部的其中一面貼上臉的貼圖,而其他五面使用一般皮膚貼圖,那要如何做到「給幾何體的不同面指定不同的材質」呢?
我們直接利用一個陣列裝載六面的材質,其中試出來其中一面是苦力怕臉朝向光的方向,因此讓這面使用臉部貼圖,其他面則用皮膚貼圖,最後在 Mesh 頭部的物件時直接使用這個陣列的材質即可成功做出一個有臉的苦力怕啦,可喜可賀!可喜可賀!
稍微提一下開發時遇到的地雷,許多過去的教材與教學會使用 MeshFaceMaterial 來做,但若是使用較新版的函式庫會發現雖然有效果但會噴 warning:「THREE.MeshFaceMaterial has been removed. Use an Array instead.」
原因是因為歷經了幾次改版,這個材質曾被改名為 MultiMaterial,直到後來被開發團隊移除,作者也提供新的寫法如下:
var geometry = new THREE.BoxBufferGeometry( 1, 1, 1 );
var materials = [
	new THREE.MeshDepthMaterial(),
	new THREE.MeshNormalMaterial(),
	new THREE.MeshBasicMaterial( { wireframe: true } ),
	new THREE.MeshLambertMaterial( { color: 0xff0000 } ),
	new THREE.MeshPhongMaterial( { color: 0x0000ff } ),
	new THREE.MeshStandardMaterial( { color: 0x00ff00 } ),
];
var mesh = new THREE.Mesh( geometry, materials );
承接昨天介紹的材質,今天利用苦力怕的模型上實際觀察屬性的應用,透過材質與貼圖,讓苦力怕有了皮膚與臉,終於開始有創世神的感覺了,明天就要來看光源會如何與材質互動囉,我們明天見!
請問下,我渲染出來的 Creeper 頭是上下顛倒過來的
還需要加寫一個
this.head.rotation.z = 1 * Math.PI
才能轉回來正面,為什麼你的範例中不會?
可能的原因我想到的像是臉的貼圖上下顛倒、座標軸的基準不一樣
不過可能還是要看一下你的原始碼才比較好解釋
我的 code 邏輯上跟你一模一樣,只差在我是用 webpack 工具來開發,所以 three 是從 node module import 進來的
import * as THREE from 'three'

export const Creeper = class {
  constructor() {
    // defined Creeper's head, body and foot
    const headGeo = new THREE.BoxGeometry(4, 4, 4)
    const bodyGeo = new THREE.BoxGeometry(4, 8, 2)
    const footGeo = new THREE.BoxGeometry(2, 3, 2)

    // 苦力怕臉部貼圖
    const headMap = new THREE.TextureLoader().load(
      'https://dl.dropboxusercontent.com/s/bkqu0tty04epc46/creeper_face.png'
    )
    // 苦力怕皮膚貼圖
    const skinMap = new THREE.TextureLoader().load(
      'https://dl.dropboxusercontent.com/s/eev6wxdxfmukkt8/creeper_skin.png'
    )

    // 身體與腳的材質設定
    const skinMat = new THREE.MeshStandardMaterial({
      roughness: 0.3, // 粗糙度
      metalness: 0.8, // 金屬感
      transparent: true, // 透明與否
      opacity: 0.9, // 透明度
      side: THREE.DoubleSide, // 雙面材質
      map: skinMap // 皮膚貼圖
    })

    // 準備頭部與臉的材質
    const headMaterials = []
    for (let i = 0; i < 6; i++) {
      let map

      if (i === 4) map = headMap
      else map = skinMap

      headMaterials.push(new THREE.MeshStandardMaterial({
        map: map
      }))
    }

    // Phong Material
    // const creeperMat = new THREE.MeshPhongMaterial({
    //   color: 0x00FF00
    // })

    // head
    this.head = new THREE.Mesh(headGeo, headMaterials)
    this.head.position.set(0, 6, 0)
    this.head.rotation.z = 1 * Math.PI
    this.head.rotation.y = 0.5 // 稍微擺頭

    // body
    this.body = new THREE.Mesh(bodyGeo, skinMat)
    this.body.position.set(0, 0, 0)

    // foot
    this.foot1 = new THREE.Mesh(footGeo, skinMat)
    this.foot1.position.set(-1, -5.5, 2)
    this.foot2 = this.foot1.clone()
    this.foot2.position.set(-1, -5.5, -2)
    this.foot3 = this.foot1.clone()
    this.foot3.position.set(1, -5.5, 2)
    this.foot4 = this.foot1.clone()
    this.foot4.position.set(1, -5.5, -2)

    // group 4 foot
    this.feet = new THREE.Group()
    this.feet.add(this.foot1)
    this.feet.add(this.foot2)
    this.feet.add(this.foot3)
    this.feet.add(this.foot4)

    // group head, body, feet
    this.creeper = new THREE.Group()
    this.creeper.add(this.head)
    this.creeper.add(this.body)
    this.creeper.add(this.feet)
  }
}
剛剛嘗試把整個程式貼到 codepen,只把 import 改成外部引用,完全沒改任何邏輯,很神奇的就自己轉正了...
本來在想是不是 npm 的 three 有問題,但17天前才更新一版 0.103.0
附上兩個版本的 demo
https://codepen.io/a600masool/pen/wZqgXq?editors=0010
抱歉,現在才看到回覆。
我剛把你的 repo clone 下來 build 完後頭的確是相反的沒錯,看了一下你說的部分,試著把程式碼中的 this.head.rotation.z = 1 * Math.PI 拿掉就正常了,所以看起來不要加這行才是對的嗎,真的很奇怪的 bug。
最近回來玩這個專案發現它自己好了,看來的確是 three.js module 的問題,謝謝哦