接下來我們要藉由virtualenv設定我們所需要的環境,本次使用的是python2 + ffnet 所以我們先建立一個虛擬環境
在終端機上輸入
virtualenv fe --python=python2.7
筆記:
virtualenv 創立一個虛擬環境
fe 虛擬環境的名稱
--python 版本是多少
python2.7 版本是2.7版本
接下來是會用到的基本操作

source ~/fe/bin/activate
source 虛擬環境的啟動檔案在哪?
~/fe/bin/activate
'~':家目錄
'fe':fe資料夾(目錄)
'bin':bin資料夾(目錄)
'activate':activate檔案
2.列出使用pip安裝的模組/套件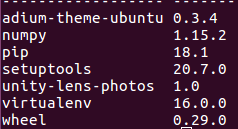
pip list
我們可以看到裡面非常的乾淨,我們可以針對每一個專案安裝相對硬的套件。
3.關閉virtualenv
deactivate
本日結束


 iThome鐵人賽