Redash 在 Python Query 中,
除了提供 add_result_column、add_result_row 兩個功能外,
另外有提供像是一般 SQL Query 操作的 execute_query
與類似 Query Result 的 get_query_result:
result = execute_query(<data_source_name_or_id>, "your SQL query")
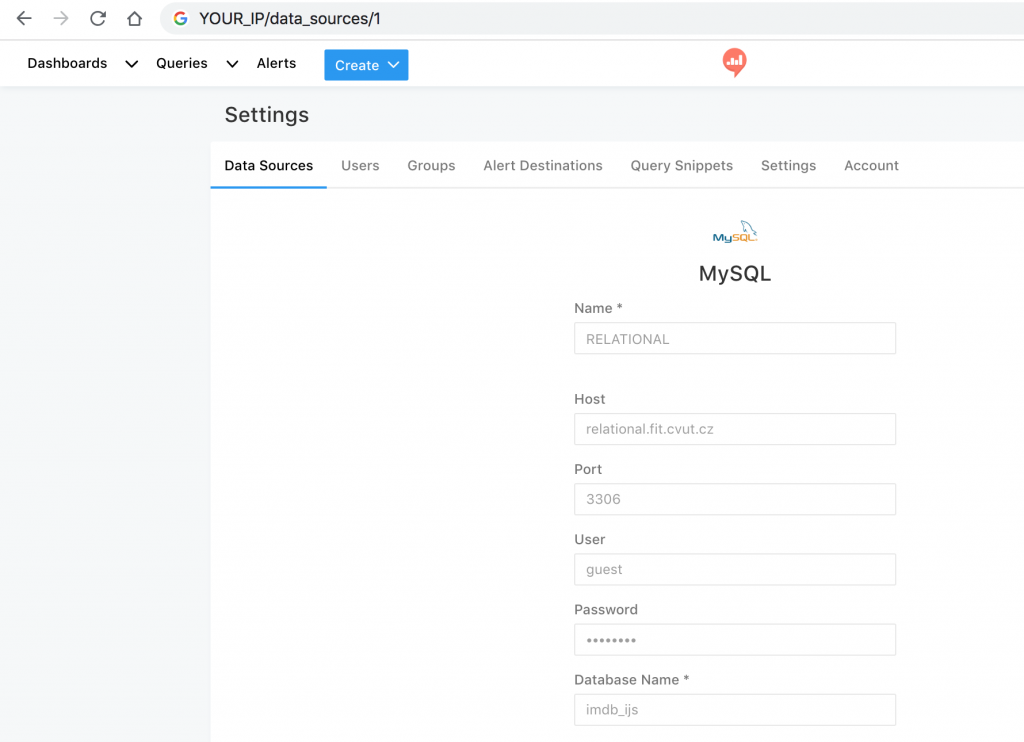
第一個參數給定 Data Source 的名稱或編號,
就像我們使用很久的 Query 介面最左方的選擇 Data Source
編號要回 Data Source,
進入每個 Source 看網址 YOUR_IP/data_sources/id 來得知 id 編號
而第二個參數就是 SQL 語法,也就是我們 Query 介面最常編輯的右方區塊。
sql = "SELECT * FROM ccs.transactions_1k WHERE TransactionID <= 3"
result = execute_query(1, sql)
print(result)
for row in result["rows"]:
    if row["Time"] < '12:00:00':
        row["TimeRange"] = 'AM'
    else:
        row["TimeRange"] = 'PM'
add_result_column(result, "TimeRange", '', TYPE_STRING)
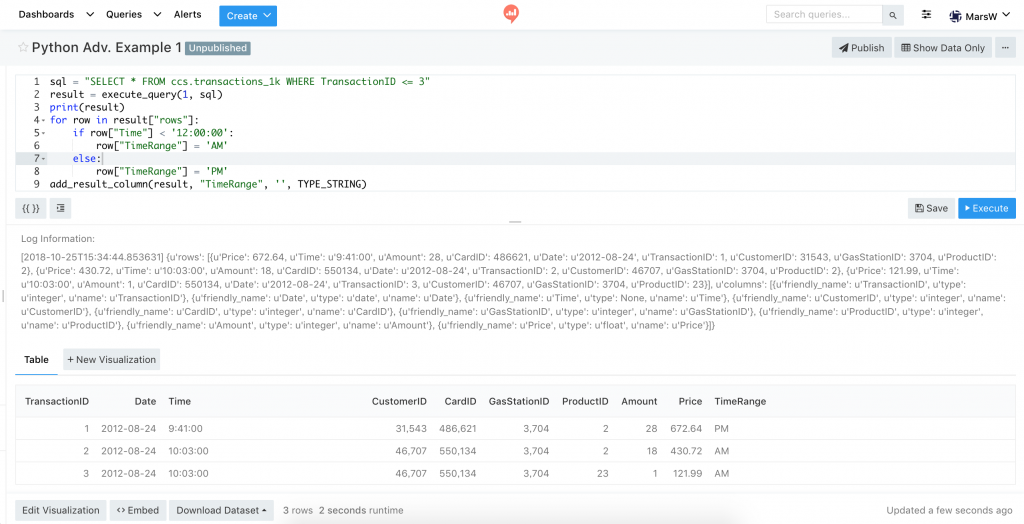
這邊會發覺如果是 Redash 本身支援的 Data Sources,用 execute_query 非常方便,
他會把 schema 組好成 columns name & type,然後把 rows 的資料也對應好!
如果要增加欄位或是修改欄位值,就先用個 loop 迴圈把每一列資料讀出,
然後做相對應運算、最後設定新增對應 columns 的 name 與 type。
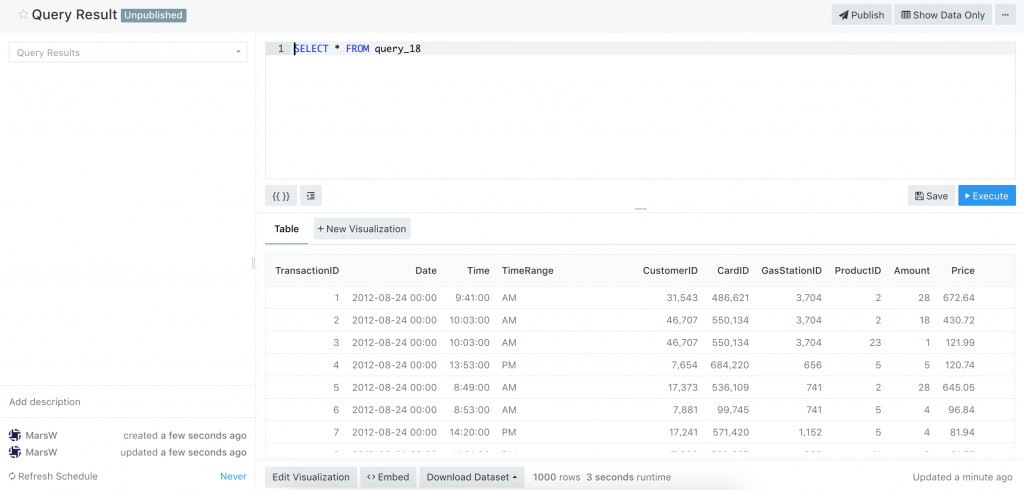
result = get_query_result(<query_id>)
這裡的操作很像 Query Result,
可以直接拿已建立好的 Query 結果再進行額外加工。
get_query_result 是 很像 Query Result,但並不是完全一樣。
官方 Query Result 文件說明:
- When you run a query, we execute the underlying queries as well to make sure you have recent results in case you schedule this query. We might fine-tune this in the future to reduce the number of times we run the same query.
也就是每次 Query 都是拿執行底層的結果,每次都是最新的資料。
而看了 Python Query 的程式碼,
發覺拿的是 query.latest_query_data.data ,也就是 cached 的資料
是上一次在 Query 頁面按下 Execute的結果 or 設 Refresh Schedule 的執行時間。
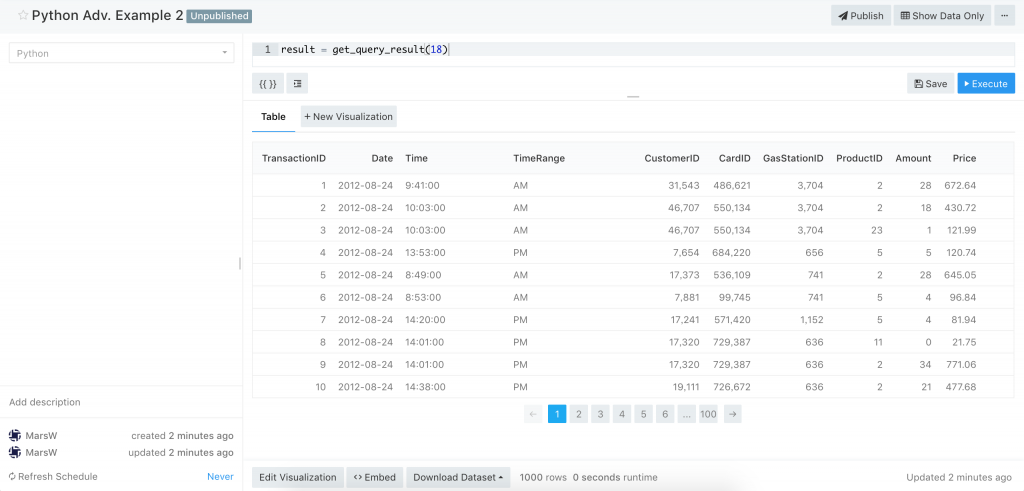
因此也可以看到 Python Query 的執行速度比 Query Result 快,
但要付出的代價就是,如果底層的 Query 沒有隨時更新,
那這樣拿到的資料就不是最即時正確的!
之前在剛使用 Python Query 時,除了設定上遇到了些麻煩,
還有實踐上也發現了一些雷區,像是上面提到的與 Query Result 的差異,
但能用 Python 開發彈性會更高,因此還是盡量做了些解決方案:
可行的方式一個是去改 redash 的底層,
把 query.latest_query_data.data 替換成 data_source.query_runner.run_query,
不過直接改系統程式碼風險比較高,另一種就是利用 Redash 提供的 API,
直接用 Python 發 requests 打 API
來「Poll for Fresh Query Results (including parameters)」
而官方文件底下也提供了 Python 的範例程式碼
不過範例程式只回傳 rows,
這裡我把 return response.json()['query_result']['data']['rows']
改成 return response.json()['query_result']['data']
然後命名成 pyapi.py,路徑放在 host 的 /opt/redash/python_modules
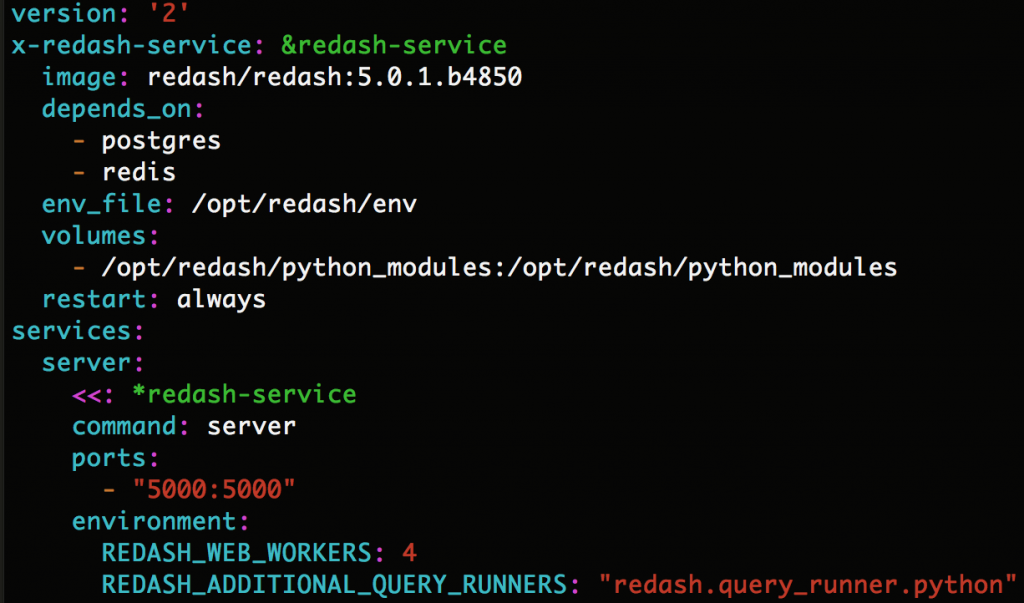
但要注意的是,如果你的安裝的 Redash 是 docker 版本,
要記得更改 docker-compose.yml,把 host 的 volume 對應進去,
才可以在原機增減修改程式碼檔案,讓 docker 也能使用的到
讓 docker 也建立他的 /opt/redash/python_modules 並把 host 的對應過去
vim /opt/redash/docker-compose.yml
在 x-redash-service 底下新增 volumes 參數
volumes:
  - /opt/redash/python_modules:/opt/redash/python_modules
設定好了之後執行以下指令或是重開機
cd /opt/redash
docker-compose up -d
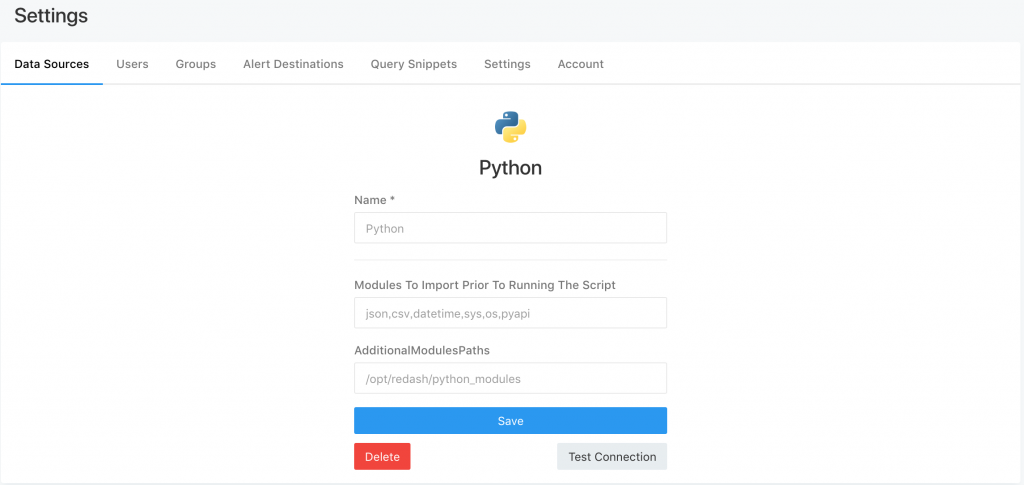
並在 Python 的 Data Sources 加上指定的目錄,以及想要 import 的模組
(此例分別為 /opt/redash/python_modules 與 pyapi )
接著在自己的 Account 頁面拿到 API Key(不是拿該 Query的 是要拿 Account 的)
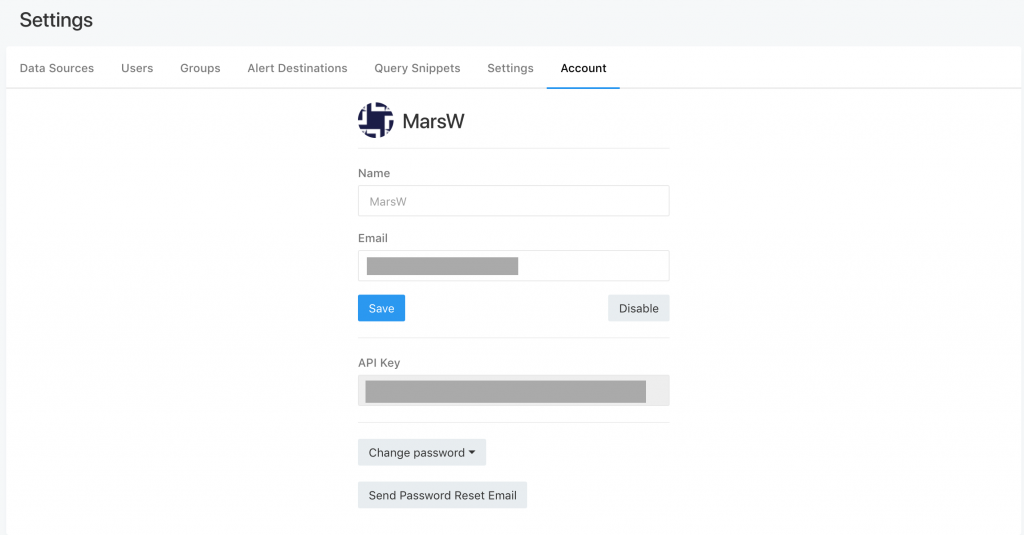
就可以在 Python Query 中直接使用此模組,以 API 方式取得即時的資料。
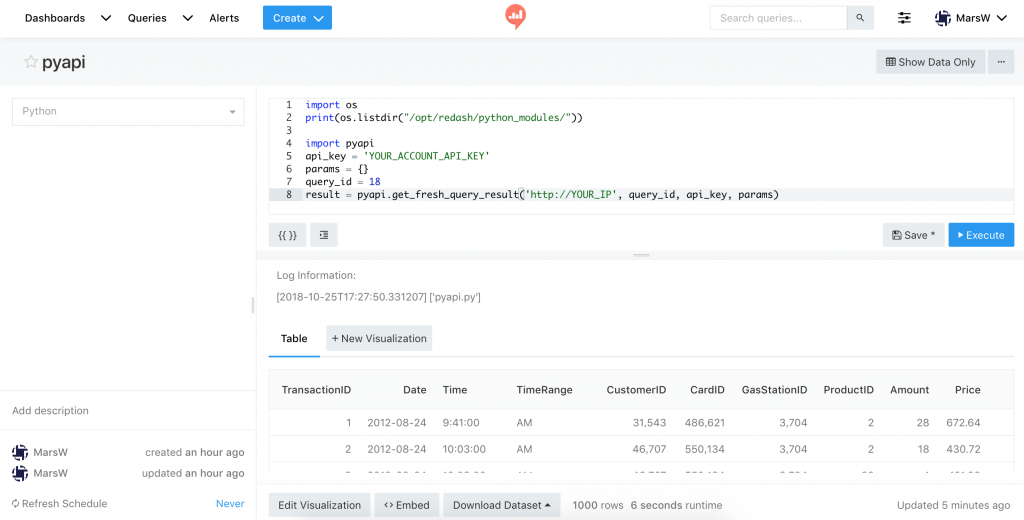
import pyapi
api_key = 'YOUR_ACCOUNT_API_KEY'
params = {}
query_id = 18
result = pyapi.get_fresh_query_result('http://YOUR_IP', query_id, api_key, params)
ps. 文章同步發表於 Medium