先前做QR Code掃描器時,有設定取得相機權限
那今天我們來看看有哪些權限可以取得跟怎設置吧
「相簿」:
NSPhotoLibraryUsageDescription
「相機」:
NSCameraUsageDescription
「麥克風」:
NSMicrophoneUsageDescription
「位置」:
NSLocationUsageDescription
「在使用期間訪問位置」:
NSLocationWhenInUseUsageDescription
「始終訪問位置」:
NSLocationAlwaysUsageDescription
「日曆」:
NSCalendarsUsageDescription
「提醒事項」:
NSRemindersUsageDescription
「運動與健身」:
NSMotionUsageDescription
「健康更新」:
NSHealthUpdateUsageDescription
「健康分享」:
NSHealthShareUsageDescription
「藍牙」:
NSBluetoothPeripheralUsageDescription
「媒體資料庫」:
NSAppleMusicUsageDescription
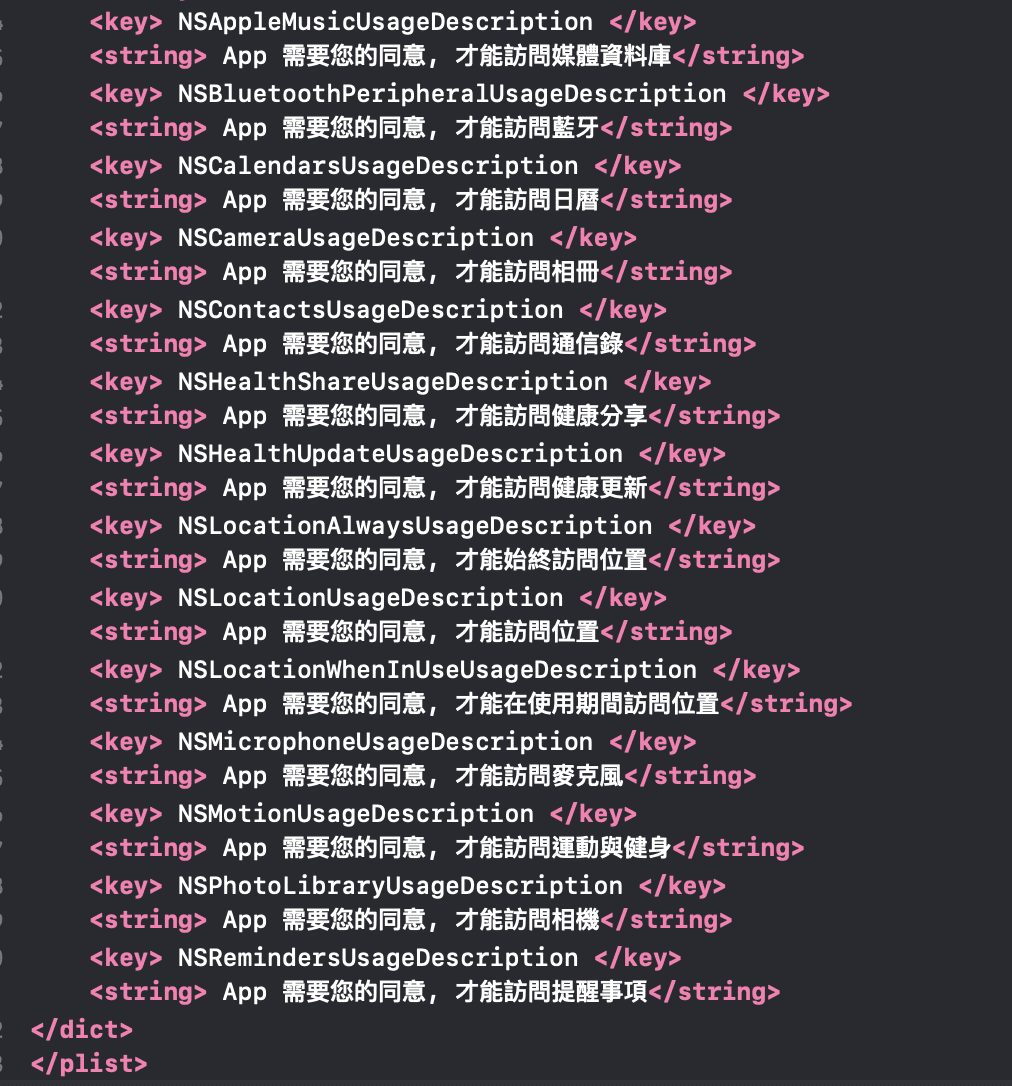
Source取得權限方式:
<key> NSAppleMusicUsageDescription </key>
<string> App 需要您的同意, 才能訪問媒體資料庫</string>
<key> NSBluetoothPeripheralUsageDescription </key>
<string> App 需要您的同意, 才能訪問藍牙</string>
<key> NSCalendarsUsageDescription </key>
<string> App 需要您的同意, 才能訪問日曆</string>
<key> NSCameraUsageDescription </key>
<string> App 需要您的同意, 才能訪問相冊</string>
<key> NSContactsUsageDescription </key>
<string> App 需要您的同意, 才能訪問通信錄</string>
<key> NSHealthShareUsageDescription </key>
<string> App 需要您的同意, 才能訪問健康分享</string>
<key> NSHealthUpdateUsageDescription </key>
<string> App 需要您的同意, 才能訪問健康更新</string>
<key> NSLocationAlwaysUsageDescription </key>
<string> App 需要您的同意, 才能始終訪問位置</string>
<key> NSLocationUsageDescription </key>
<string> App 需要您的同意, 才能訪問位置</string>
<key> NSLocationWhenInUseUsageDescription </key>
<string> App 需要您的同意, 才能在使用期間訪問位置</string>
<key> NSMicrophoneUsageDescription </key>
<string> App 需要您的同意, 才能訪問麥克風</string>
<key> NSMotionUsageDescription </key>
<string> App 需要您的同意, 才能訪問運動與健身</string>
<key> NSPhotoLibraryUsageDescription </key>
<string> App 需要您的同意, 才能訪問相機</string>
<key> NSRemindersUsageDescription </key>
<string> App 需要您的同意, 才能訪問提醒事項</string>
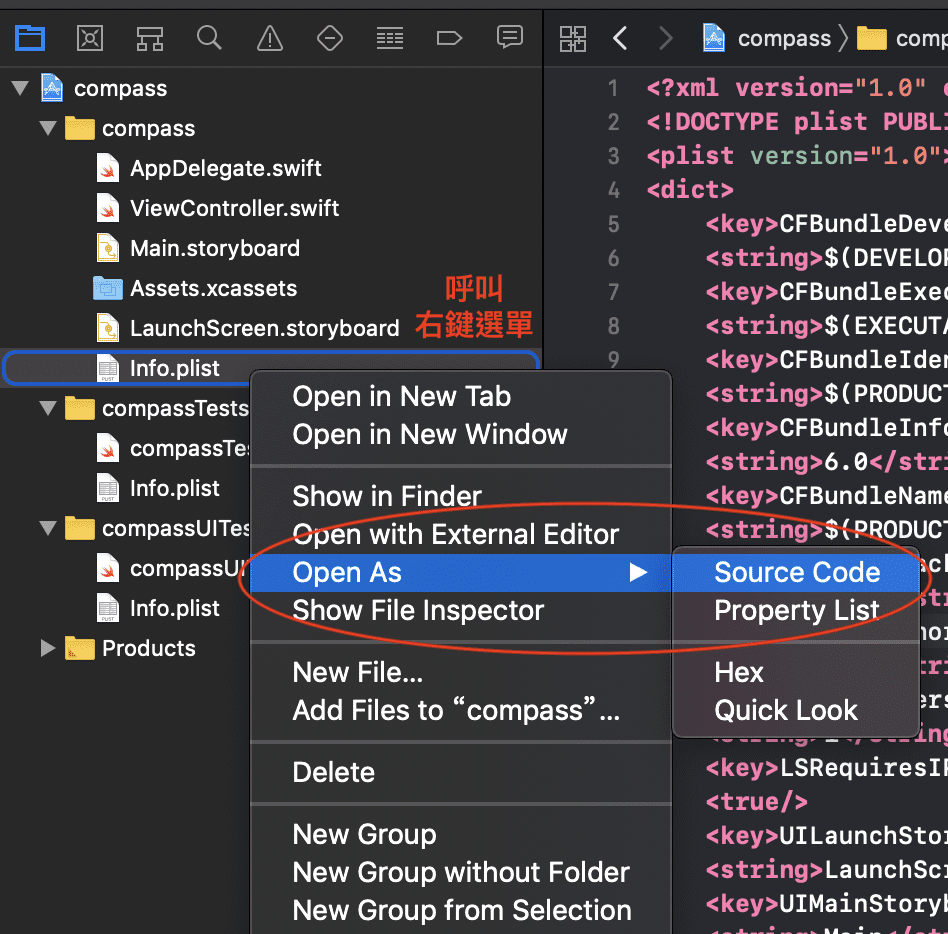
那Info.plist要開啟Source Code模式怎開啟呢
Step1. Info.plist右鍵選單->「Open As」->「Source Code」
Step2. 在貼上上方代碼
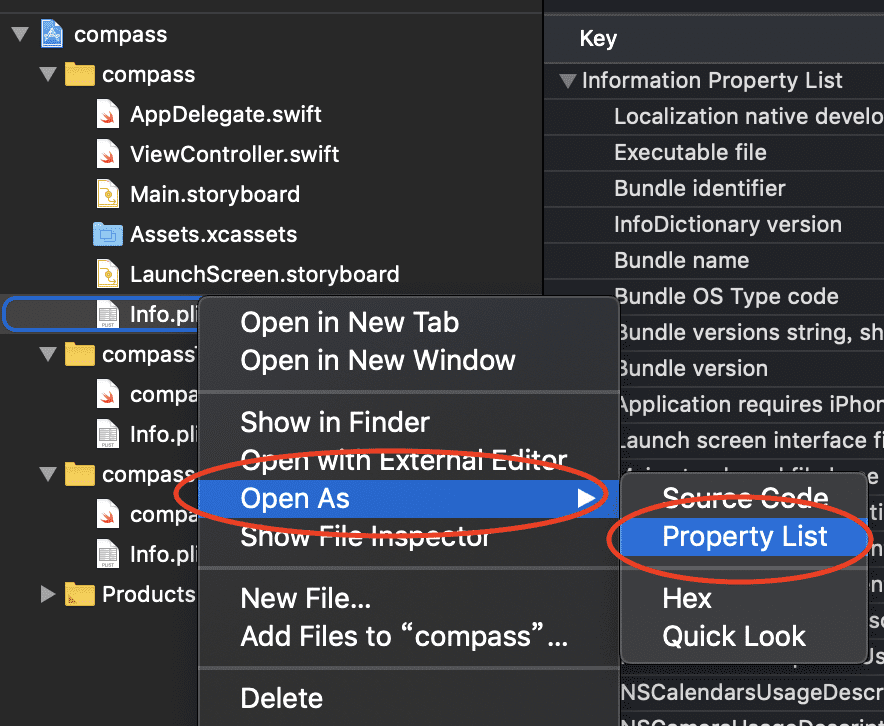
Step3. Info.plist右鍵選單->「Open As」->「Property List」
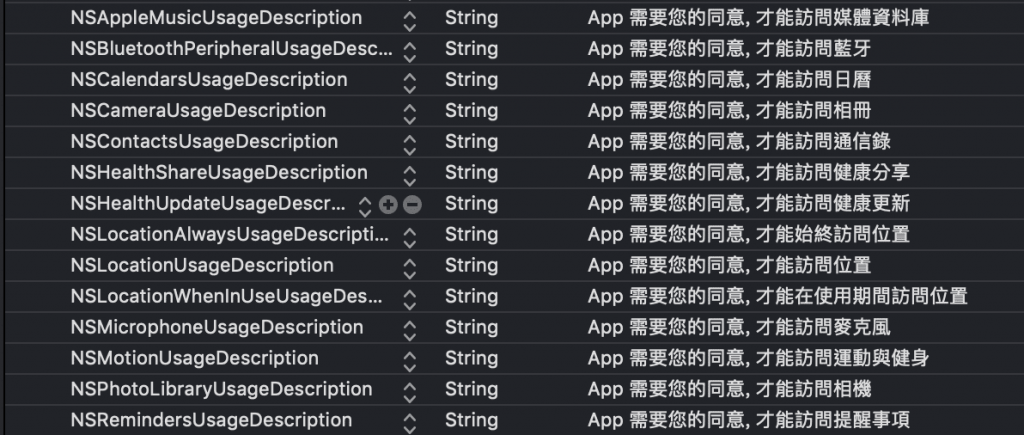
Step4. 就會出現在列表了
[筆者碎碎唸]
今天,從眼神中看出略有疲憊,因此今天就偷懶一下,說個上述觀念吧Sorry!

頭尾的空白要消除才行吧 key 、 string 裡的
當年在寫這篇,Step1 顯示出來最初的數值就是如圖那樣
也許這幾年內有變嚴謹吧