今天要介紹的是 Activity Lifecycle (生命週期),主要提供不同的操作畫面顯示給使用者進行互動,之前的教學中都是單一頁面,接下來的課程會使用複數個的頁面設計搭配按鈕進行切換,並且額外說明一些控制元件的使用介紹。
一開始請另外新增一個專案,名稱命名為 GoActivity,一樣是使用 Empty Activity,建置完成後,修改 res > values > styles.xml,同樣改成 NoActionBar,另外這邊注意右上角有 theme editor 可以開啟。

前往主題樣式編輯器,可從下拉選單挑選中意的樣式,左側預覽視窗會展示各種元件的樣貌。
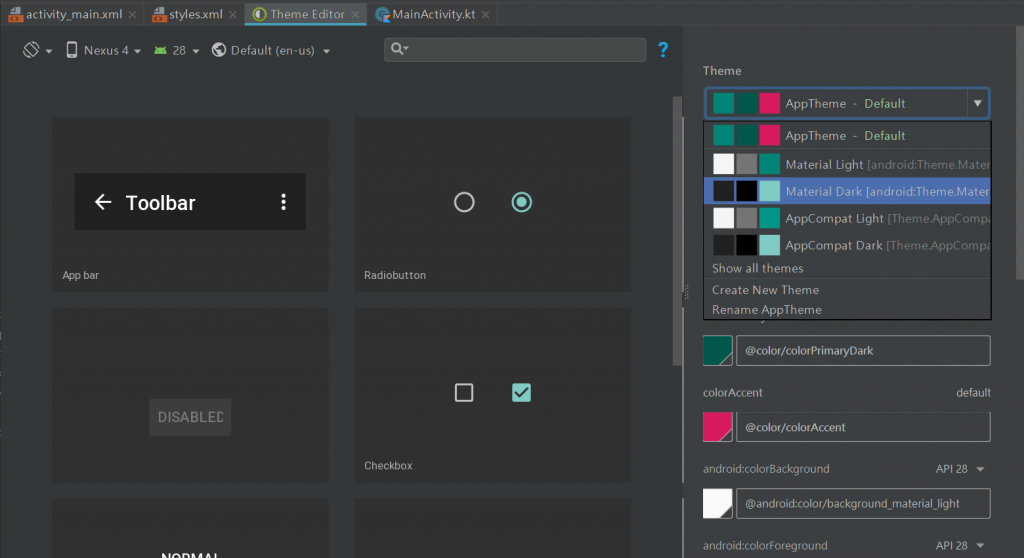
但由於專案設定最低 API Level 關係沒辦法套用一些新的主題,可以手動透過修改 res > values > styles.xml 指定對應的顏色處理:
<resources>
   <!-- Base application theme. -->
   <style name="AppTheme" parent="Theme.AppCompat.Light.NoActionBar">
       <!-- Customize your theme here. -->
       <item name="colorPrimary">@color/primary_material_dark</item>
       <item name="colorPrimaryDark">@color/primary_dark_material_dark</item>
       <item name="colorAccent">@color/accent_material_dark</item>
   </style>
</resources>
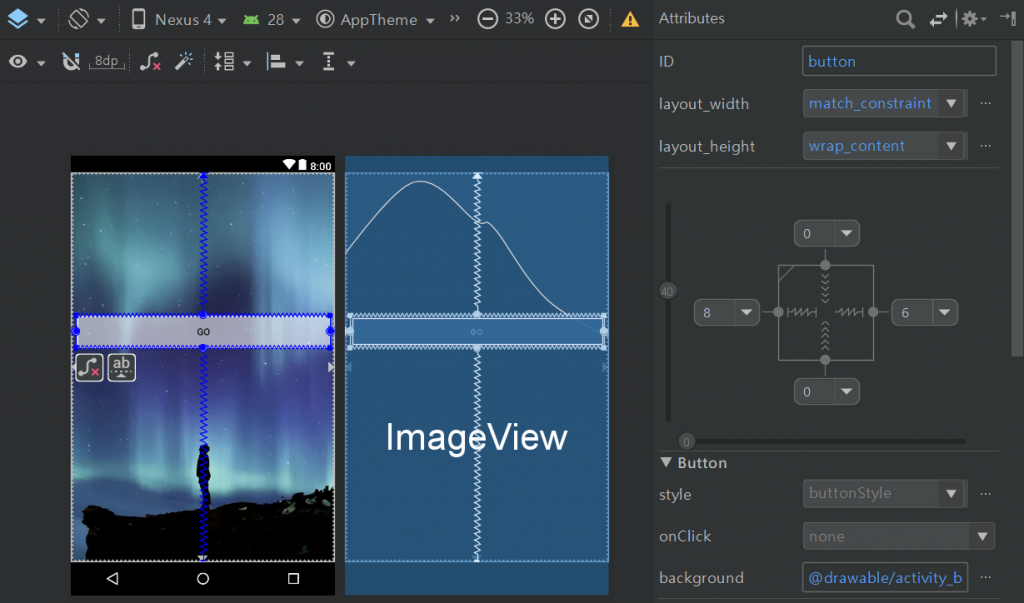
回到版面設計頁面,API Level 設為 28,新增一個 ImageView,並將它設定為全版面,詳細設定方式在之前的章節都有提過,若忘記的讀者不妨回溫一下哦。
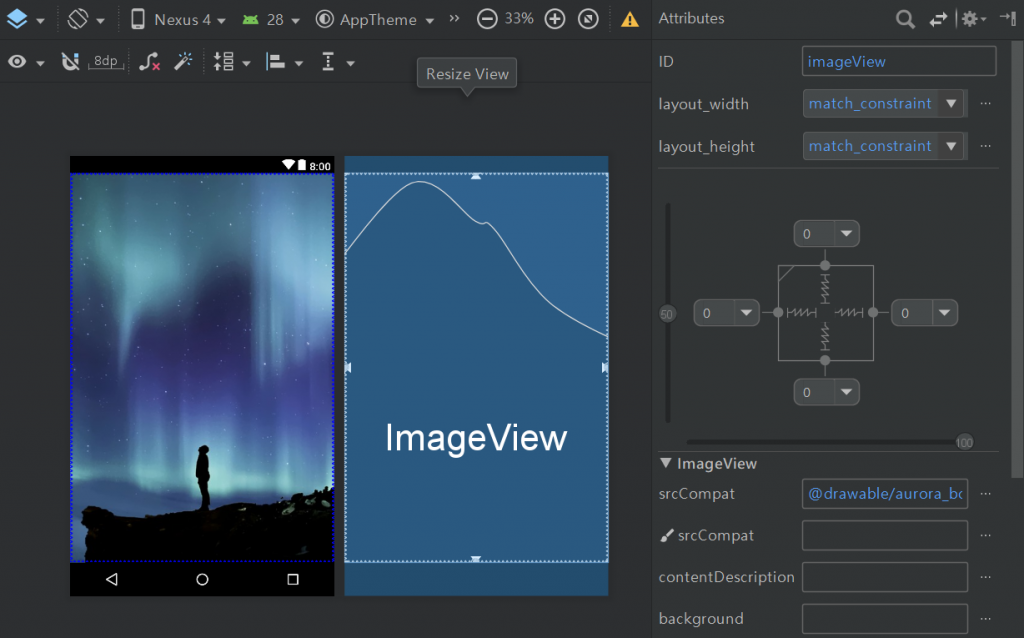
程式中使用之背景圖來源皆為公開允許再利用,來源: https://pixabay.com/photo-2464940/
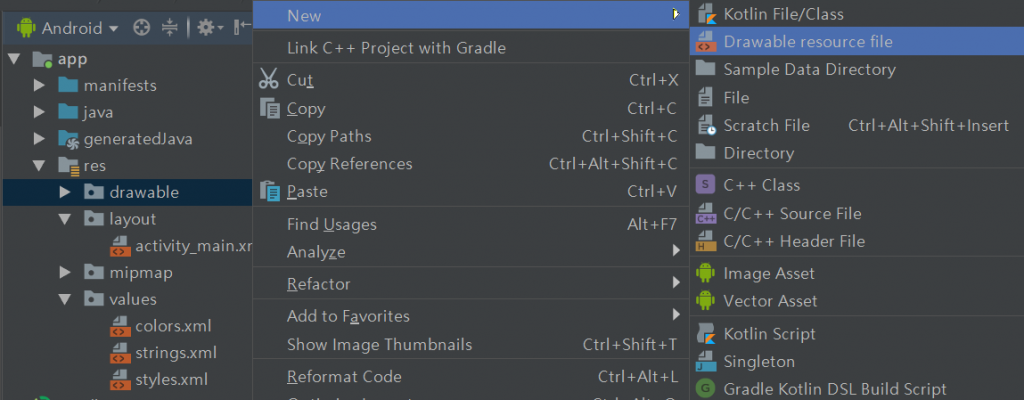
另外再新增一個按鈕,要作為等等觸發 Activity 的接觸點。這裡作者額外介紹:如何設計一個樣式表,讓應用程式中所有相同類型的按鈕,都能夠套用呈現相同的樣式。首先到 res > drawable 點右鍵新增一個資源檔。
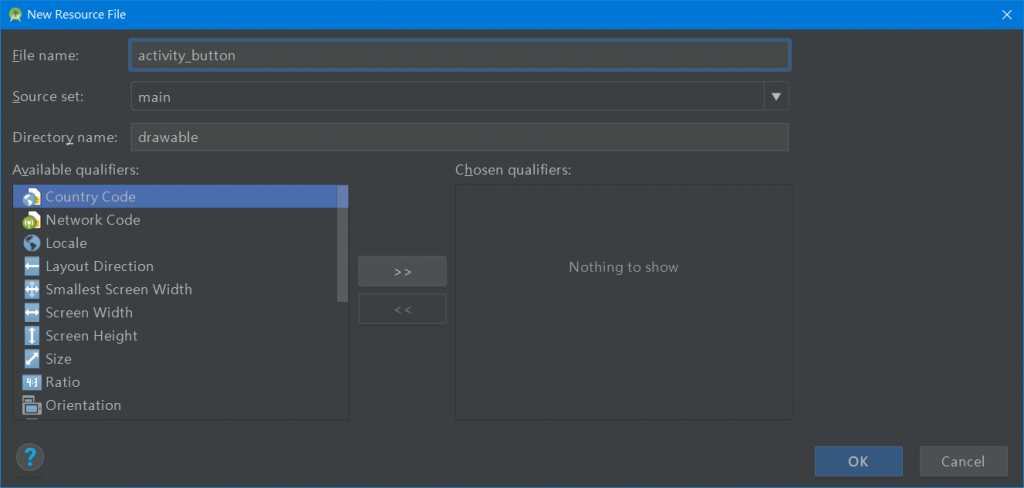
資源檔名稱建議定為:可以清楚識別用於哪個種類的按鈕上,其他的選項都不用調整。
進入新建的 xml 檔案後,將原本為 selector 的標籤改為 shape,接著新增 solid 標籤,這個部分是為了指定按鈕的背景顏色,# 字號後方接 2 位的十六進位數值,代表透明度,值越小越透明,緊接著的六位數就是熟知的色碼。而 stroke 表示外框,顏色的設定除了剛剛使用色碼法外,也可以直接使用顏色資源,另外 width 則是設定線的寬度。

下一步,於剛剛新增的按鈕上,設定 Button > background,指向上一個步驟設定的樣式表,就能看到自訂的按鈕樣式。
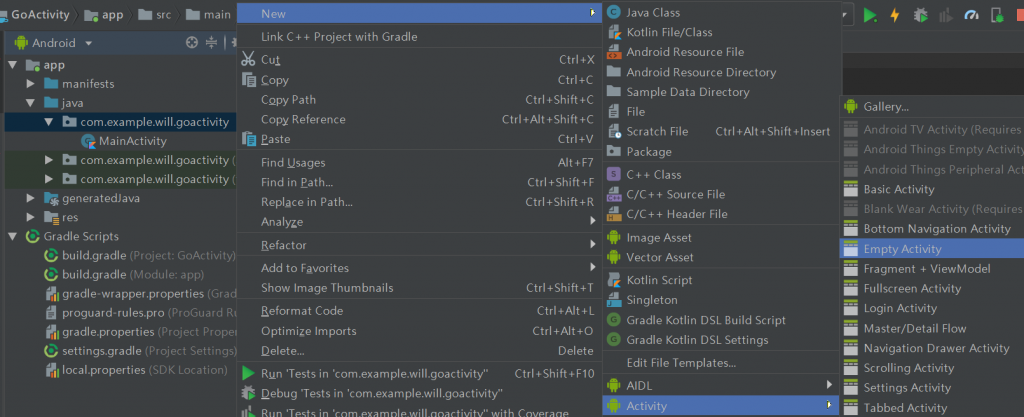
接著進入本章節重點,新增第二個頁面。在 app > java > 第一個目錄 > New > Activity 新增一個空的頁面。
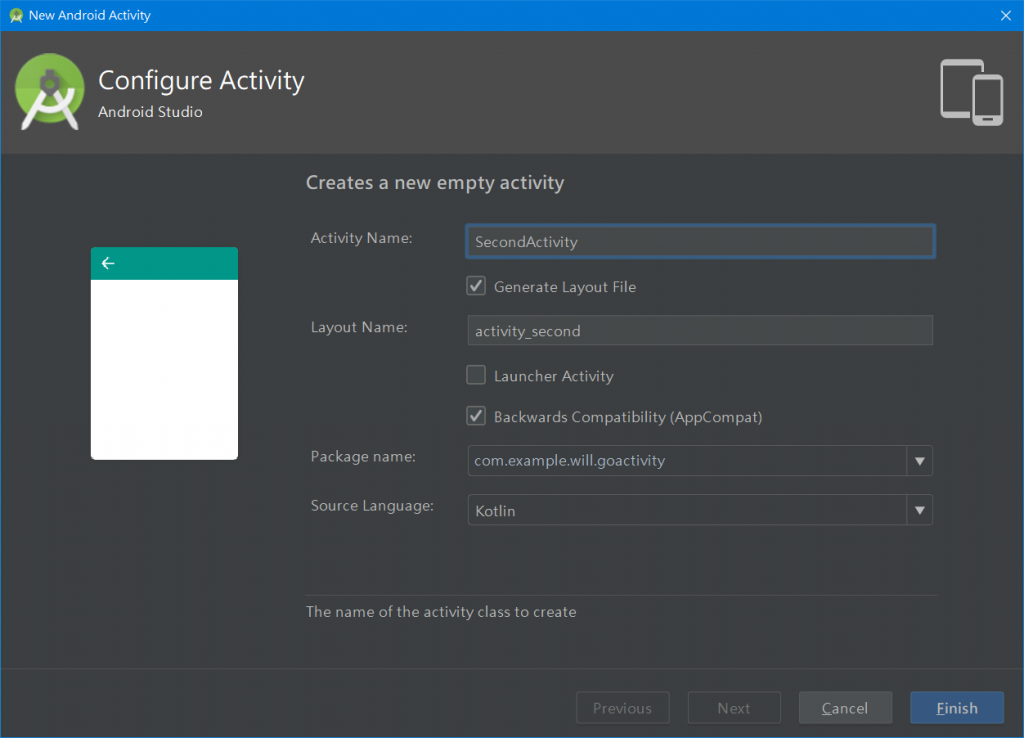
在示範中先將名稱命為 SecondActivity,實際情境視該頁面要做的事情決定,下方語言的部分確認有預設為 Kotlin,按下 Finish 後就會產生新的頁面。

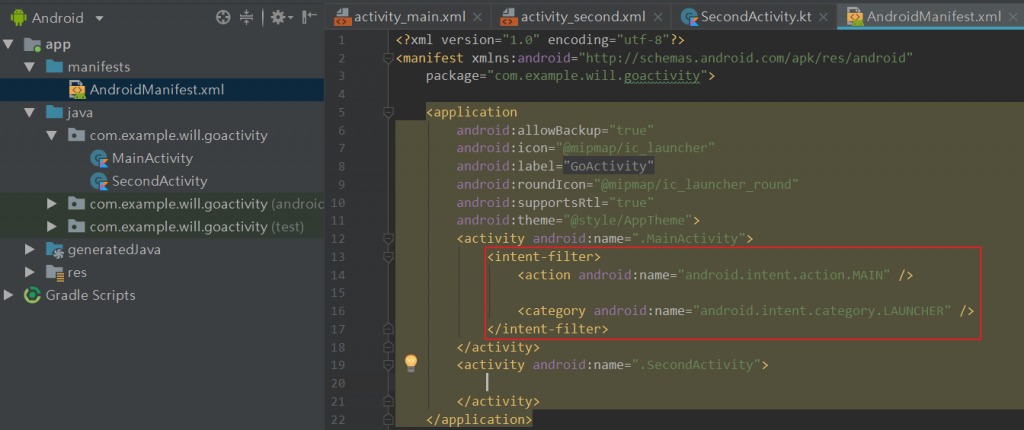
讓我們先到 app > manifests 查看一下,這邊可以發現 Main 與 Second 兩個區塊,其中 Main 裡面多了 intent-filter 區段,紅框處的用意是告訴程式執行時,要以哪一個 Activity 當作起始頁面,讀者可以試著將此段移動到 Second 內,再啟動模擬器觀察結果,會看到是一個空白頁面-activity_second。
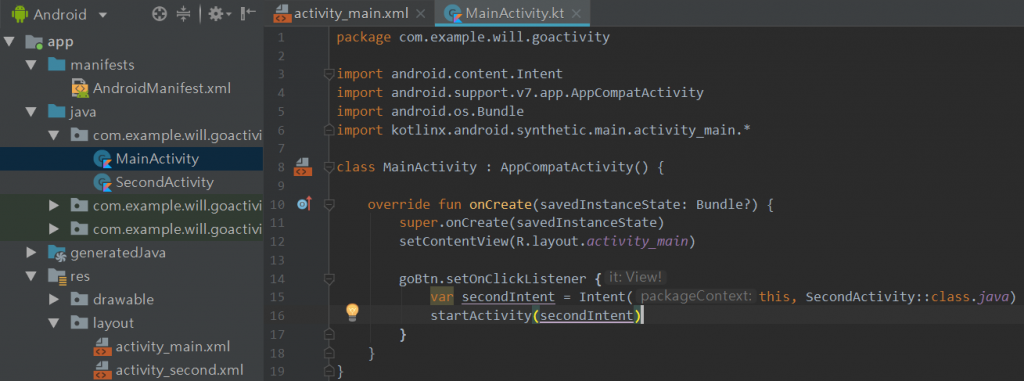
開始動手,透過 MainActivity,將按鈕 goBtn 設定監聽點擊動作,再實做一個 Intent,第一個參數傳入 this,第二個參數設定要跳往的頁面名稱,並以 ::class.java 修飾一下,再來就可以使用 startActivity() 完成跳轉的動作,到這邊已經可以執行模擬機,實際按一下畫面上的按鈕看看效果如何吧 (記得把上一個步驟修改 manifests 的部分復原)。
接下來還有更多 Activity 說明,我們明天見!
資料參考
Activity-Android Developers (中文)
https://developer.android.com/guide/components/activities?hl=zh-twToggle Buttons-Android Developers
https://developer.android.com/guide/topics/ui/controls/togglebuttonKotlin for Android: Beginner to Advanced | Udemy
https://www.udemy.com/devslopes-android-kotlin/
