Vue 的應用程式由多個實體所串連,形成一棵組件樹,它只會有一個根節點,就是 new Vue 的實體,底下都是稱為 Component 的組件,組件的開發方式跟 new Vue 相同,都是設定選項物件,但物件內的屬性跟 new Vue 會有些差異,現在讓我們看看如何建立及使用組件吧。
組件的建立是使用 Vue.component 註冊組件,然後使用跟 new Vue 相同的選項物件設定組件的定義,但因為只有 new Vue 可以使用 el 屬性定義掛載目標(因為它是根節點),所以組件需要使用 template 或是 render 函數設定目標模板,如下例所示:
Vue.component('button-counter', {
  data: function() {
    return {
      count: 0
    }
  },
  template: '<button v-on:click="count++">You clicked me {{ count }} times.</button>'
})
註冊一個 button-counter 的組件,這個組件的模板是定義在 template 屬性上的按紐,按鈕有設定一個 click 事件,按下去會使組件裡設定的資料屬性 count 加一。
<div id="app">
  <button-counter></button-counter>
</div>
var vm = new Vue({
  el: '#app'
});
在 new vue 的掛載 DOM 元素中只要使用註冊組件時設定的名稱 button-counter 當作 DOM 元素設置在 HTML 上就可以把組件掛到目標位置上。
在同個 Vue 實體中,我們可以同時使用多個相同的組件,如下所示:
<div id="app">
  <button-counter></button-counter>
  <button-counter></button-counter>
  <button-counter></button-counter>
</div>
這樣我們就可以有三個計算按紐,它們都有自己的實體屬性,像是 count ,在每一個組件內都是各自獨立的,所以你按下按鈕所加的數字都只有這個組件本身。

new Vue 的差異組件跟 new Vue 的選項設定有兩個不一樣的地方:
el : 只有在 new Vue 時才能設定 el 屬性。data : 組件一定要用函數的方式回傳物件。el 屬性前面章節定義模板的方式都是在 HTML 配置模板後使用 el 屬性掛載模板目標的 DOM 元素,可是 component 沒有這個屬性,所以必須要使用前面介紹的 template 屬性來設定。
new Vue 實作 button-counter :<button id="button-counter" v-on:click="count++">
You clicked me {{ count }} times.
</button>
var buttonCounter = new Vue({
  el: '#button-counter',
  data: {
    count: 0
  }
});
button-counter :<div id="app">
<button-counter></button-counter>
</div>
Vue.component('button-counter', {
  data: function() {
    return {
      count: 0
    }
  },
  template: '<button v-on:click="count++">You clicked me {{ count }} times.</button>'
})

var vm = new Vue({
  el: '#app',
  data: {
    count: 0
  }
});
data 屬性由於組件可能會有復用的情形,因此每個資料屬性必須要擁有獨立的實體,所以在組件中的 data 屬性需要使用函數來回傳一個全新的物件。
下面的例子模擬所有的 component 共用同個物件時會發生的問題:
var buttonCounter2Data = { count: 0 }
Vue.component('button-counter', {
  data: function() {
    return buttonCounter2Data;
  },
  template: '<button v-on:click="count++">You clicked me {{ count }} times.</button>'
})
組件的資料屬性都是回傳一個 buttonCounter2Data 的物件,代表這個物件會在 button-counter 中被共用,現在我們跟之前的例子一樣,在同一個實體渲染三個 button-counter 組件:
<div id="app">
  <button-counter></button-counter>
  <button-counter></button-counter>
  <button-counter></button-counter>
</div>

因為所有的組件都共用同個 buttonCounter2Data 物件中的 count ,因此修改了其中一個組件的 count 資料,其他兩個也會一起更新。
任何的 Vue 實體,包括 new Vue 及組件,因為 render 函數使用上的限制,它們的根元素只能有一個,因此如果想要在組件中有兩個以上的元素時,要使用一個包裝用元素包住多個元素才能使用。
以上面的計算按紐為例,現在我們想要在每個組件中加上 count 的顯示:
Vue.component('button-counter', {
  data: function() {
    return {
      count: 0
    }
  },
  template: `
    <div>
      <p>{{count}}</p>
      <button v-on:click="count++">Click</button>
    </div>
  `
})
因為多了一個 <p> 標籤,使得組件 DOM 元素變成了兩個,所以要多使用一個 <div> 來包住這兩個元素,使得根 DOM 元素只有一個。
上面的例子使用了 template literal 讓字串的設定可以直接換行,但在 IE 會無法使用這個特性,如果有 IE 需求的話請使用一般的 newline escapes 或是 Babel 之類的轉譯器。
如果想要設定組件內容的話,可以使用 <slot> 標籤來決定組件內容的配置:
Vue.component('button-counter', {
  data: function() {
    return {
      count: 0
    }
  },
  template: `
    <div>
      <p>{{count}}</p>
      <button v-on:click="count++">
        <slot>
          Click
        </slot>
      </button>
    </div>
  `
});
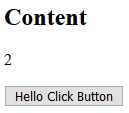
我們將原本的按鈕內容中加上 <slot> 標籤,當我們要客製按鈕上的字串時,只要像下面這樣:
<div id="app4">
  <button-counter>Hello Click Button</button-counter>
</div>
利用設定 內容,我們可以改變 slot ,因此按鈕會變為 Hello Click Button:
<slot>標籤內的內容是預設值,所以當你的組件內容是空的時候(像是<button-counter></button-counter>)會使用預設的Click字串渲染按紐。
is 屬性is 屬性可以改變設定此 DOM 元素欲使用的組件,有兩個情境會使用到這個屬性:
如果此組件會在程式執行時改變,那就不能直接設定在模板上,可以使用 is 取得組件, Vue.js 會依照這個組件去渲染 DOM 元素,如下例所示:
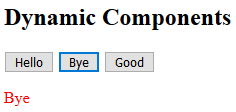
<div id="app3">
  <button @click="dynamicComponent='hello'">Hello</button>
  <button @click="dynamicComponent='bye'">Bye</button>
  <button @click="dynamicComponent={template: `<p style='color: purple'>Good</p>`}">Good</button>
  <component :is="dynamicComponent"></component>
</div>
在 component 標籤上設定 is 屬性綁定 dynamicComponent ,而上面有三個按紐,分別使用:
hello 組件。bye 組件。第一個跟第二個按紐示使用組件名稱設定,而第三個是直接使用選項物件來設定。
因此在按下不同按紐時會依照不同的組件設定改變:
在像是 <ul> 、<ol> 、 <table> 及 <select> 標籤下會有限制使用的元素,例如 <table> 下層就一定要使用 <tr> ,可是當你使用組件設定這些下層元素時,會如下面這樣設定:
<table id="app2">
  <my-row></my-row>
</table>
這時 會因為是錯誤的標籤而被抬升:
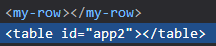
可以看到 <my-row> 被抬到 <table> 外面了,為了防止這樣的問題,我們可以用 is 屬性在 <tr> 標籤上設定想要使用的組件,這樣就不會被判定為錯誤的標籤了:
<table id="app2">
  <tr is="my-row"></tr>
</table>
今天介紹了組件的定義及設定方式,還有與 new Vue 的不同之處(el 及 data 屬性),最後說了一些組件在設定上需要注意的點(單一根節點)及特別的使用方式( <slot> 標籤及 is 屬性)。
下一節會是組件基礎的第二部分,會介紹上層組件及下層組件如何透過 props 屬性及 $emit 方法溝通。

 iThome鐵人賽