
回到Android程式碼的部份,主要是建立SQLite資料庫的實體檔案及執行建立資料表的SQL,最後將更新的資料,更新到資料庫。完整的程式碼,如下:

在看更新程式碼之前,要先在列表Activity,要先建立ListView的onItemClick事件的觸發程式碼,才能取得列表資料的資料欄位_id,才能帶到更新Activity來當更新的主鍵。
@Override
public void onItemClick(AdapterView<?> parent, View view, int position, long id) {

    //取得按下ListView的那個Item的值。
    TextView txtid = (TextView) view.findViewById(android.R.id.text1);

    //prc_showmessage("id:" + txtid.getText().toString() + " " );

    //按下Item時,要呼叫編輯的Activity,利用Intent物件帶參數過去。
    Intent it = new Intent();
    it= new Intent(this,frm_cust_edit.class);

    it.putExtra("pid",txtid.getText().toString());

    startActivity(it);

    //關閉本身的Activity。
    this.finish();

}
更新Activity完整的程式碼:
public class frm_cust_edit extends AppCompatActivity {

    //宣告物件
    private SQLiteDatabase db = null;
    private EditText txt_name;
    private EditText txt_phone;
    private TextView lbl_id;

    @Override
    protected void onCreate(Bundle savedInstanceState) {
        super.onCreate(savedInstanceState);
        setContentView(R.layout.activity_frm_cust_edit);

        txt_name = (EditText)findViewById(R.id.txtname);
        txt_phone = (EditText)findViewById(R.id.txtphone);
        lbl_id = (TextView)findViewById(R.id.lblid);

        //建立SQLite 資料庫的實體檔案
        db = openOrCreateDatabase("cust.db", Context.MODE_PRIVATE,null);

        //建立資料表的SQL語法
        String strcreatedb = "CREATE TABLE IF NOT EXISTS " +
                "tcustomer (_id INTEGER PRIMARY KEY, cname TEXT, ctel TEXT) ";

        //執行SQL語法,建立資料表
        db.execSQL(strcreatedb);

        //再取得編輯的資料。
        Intent it2 = getIntent();
        String strcustid = it2.getStringExtra("pid");

        //查詢資料
        Cursor cursor = db.rawQuery("SELECT * FROM tcustomer where _id=" + strcustid ,null);

        int int_id = 0;
        String strcname = "";
        String strctel = "";

        //如果查詢有資料的話,就跟ListView做連結
        if (cursor != null && cursor.getCount() >=0)
        {
            while (cursor.moveToNext()) {
                int_id = cursor.getInt(0);
                strcname = cursor.getString(1);
                strctel = cursor.getString(2);
            }
        }

        txt_name.setText(strcname);
        txt_phone.setText(strctel);
        lbl_id.setText(String.valueOf(int_id));

    }

    public void prc_btnupdate(View v)
    {
//        String strinsertsql = "INSERT INTO tcustomer (cname,ctel) values " +
//                "('" + txt_name.getText().toString() + "','" + txt_phone.getText().toString() + "')";
//
//        db.execSQL(strinsertsql);

        String strupdatesql = "UPDATE tcustomer SET " +
                "cname='" + txt_name.getText().toString() + "', " +
                "ctel='" + txt_phone.getText().toString() + "' " +
                "WHERE _id=" + lbl_id.getText();

        db.execSQL(strupdatesql);

        //完成新增後,要呼叫列表的Activity,利用Intent物件。
        Intent it = new Intent();
        it= new Intent(this,frm_cust_list.class);

        startActivity(it);

        //關閉本身的Activity。
        this.finish();
    }

    public void prc_cancel(View v)
    {
        //按下「取消」,就呼叫列表的Activity,利用Intent物件。
        Intent it = new Intent();
        it= new Intent(this,frm_cust_list.class);

        startActivity(it);

        //關閉本身的Activity。
        this.finish();
    }
}
執行出來的輸入畫面,如下圖所示: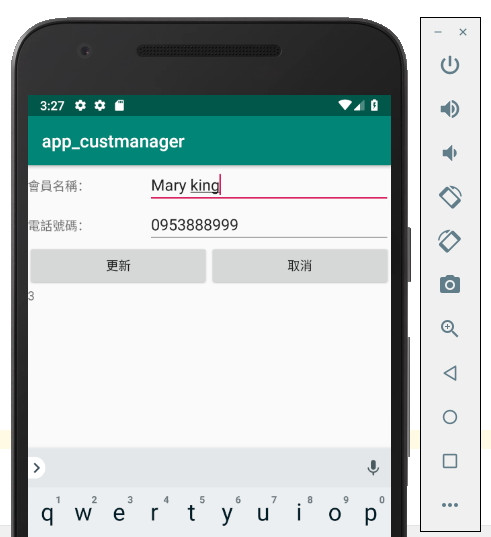
回到列表,完成資料的更新。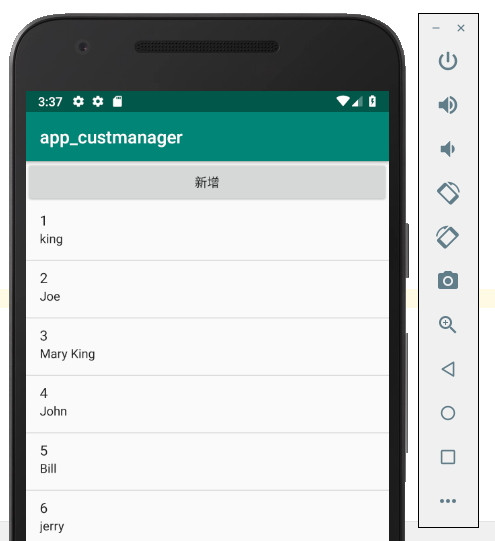
在更新資料時,我們為了要帶出資料欄位的_id,而讓它是出現在表單中,這樣不是很好,所以,我今天有找到下述的屬性,來讓它可以隱藏,請參考之。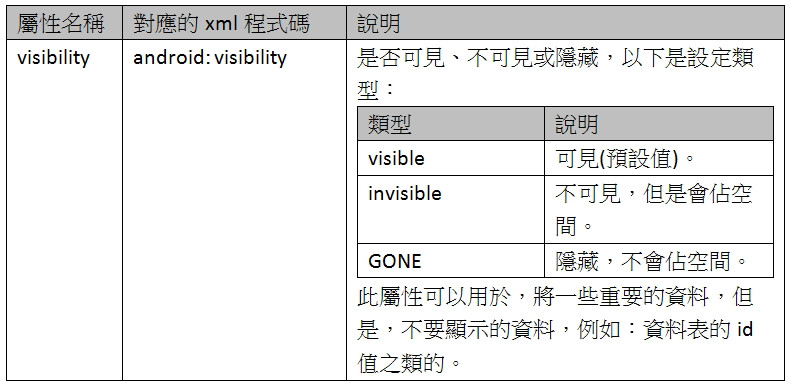
時間真是過的真快,一下就過三十天了,不過,我後續也是繼續寫下去,當然,就不是天天更新了。
這段日子,謝謝大家的收看。
