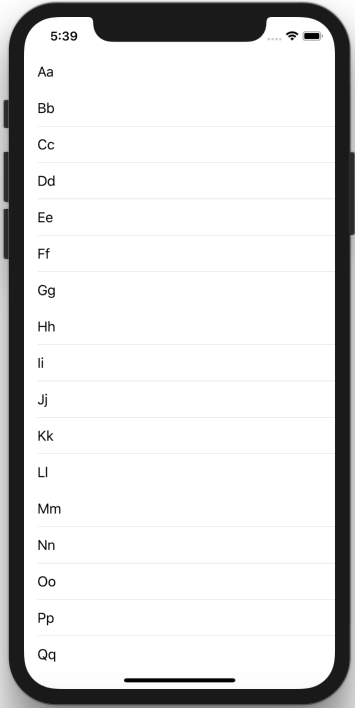
今天岔開一下,來實作一下。
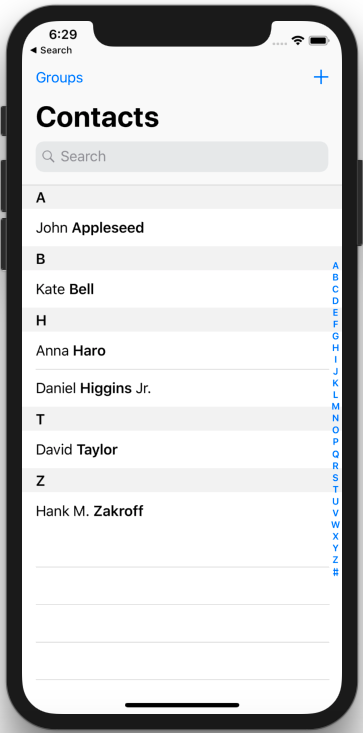
表格視圖App(Table View)是iOS App中常見的UI元件,最簡單的例子,打開你的手機通訊錄,就是一個表格視圖。
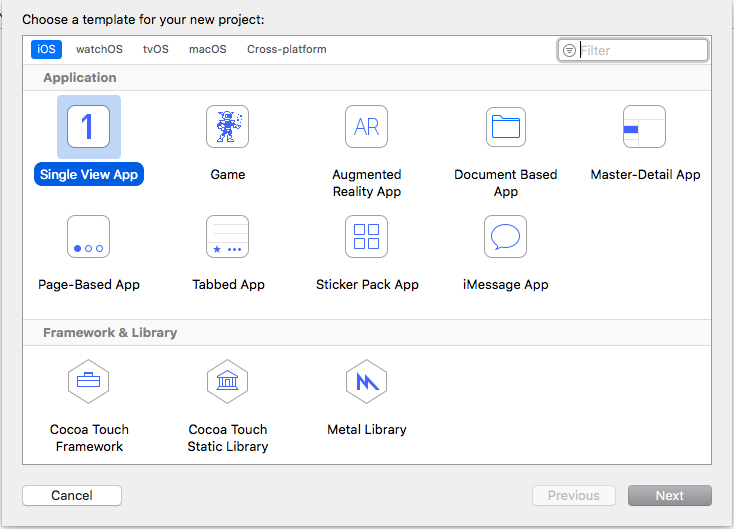
我們先開啟新專案,選擇「Sing View application」建立新專案,點選「Next」,接著選擇儲存路徑,然後點選「Create」。
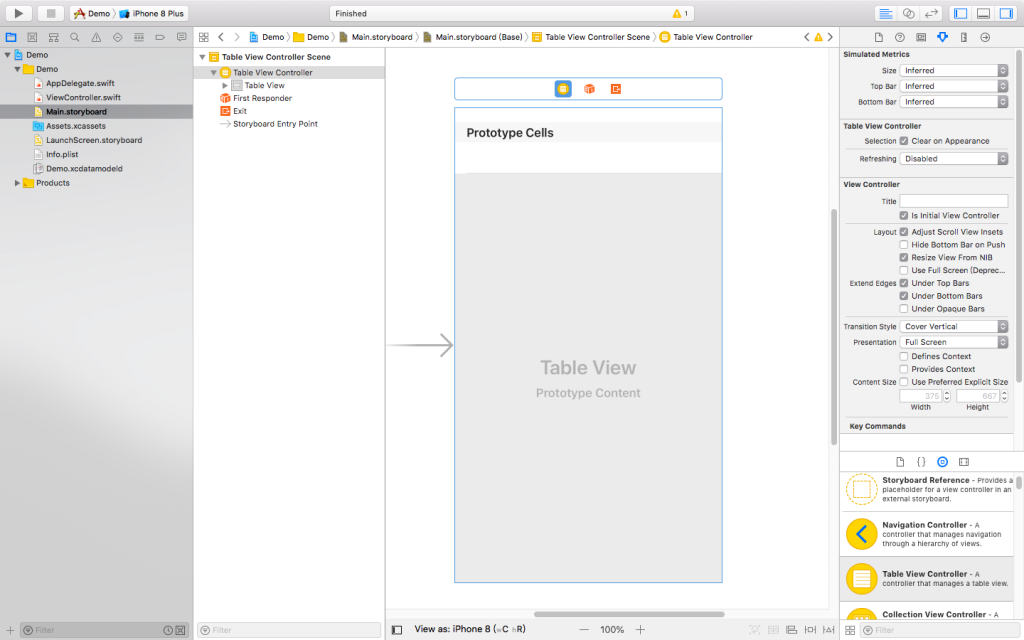
接著選擇Main.storyboard切換至介面建構器,刪除View Controller並從元件庫中找到「Table View Controller」,拉至Storyboard中,再來是最重要的一部,到屬性檢閱器,將「Is Initial View Controller」打勾,預設為初始控制器,同時你會看到一個箭頭指向這個表個試圖控制器。
再來,刪除ViewController.swift,在Demo的資料夾上按右鍵,點選「New Files…」,來產生一個新檔案,選取「Cocoa Touch Class」,名稱為「DemoTableViewController」、「Subclass of」變更為「UITableViewController」,其他保持不變,點選「Next」建立一個新的DemoTableViewController.swift檔到專案管理器中。
我們要如何連結DemoTableViewController及Storyboard呢?在識別控制器(Identity Inspector)中,將Custom Class設定為DemoTableViewController,這樣我們就可以將表格控制器雨DemoTableViewController做連結了!
接下來我們選取Prototype,將Style設定為Basic,並將Identifier設定為「Cell」。
點擊DemoTableViewController,並宣告一個實例變數來存放表格資料。
var demoNames = ["Aa", "Bb", "Cc", "Dd", "Ee", "Ff", "Gg", "Hh", "Ii", "Jj", "Kk", "Ll", "Mm", "Nn", "Oo", "Pp", "Qq", "Rr", "Ss", "Tt", "Uu", "Vv", "Ww", "Xx", "Yy", "Zz"]
接著我們加入下列方法:
override func tableView(_ tableView: UITableView, cellForRowAt indexPath: INdexPath) -> UITableView {
let cellIdentifier = "Cell"
let cell = tableView.dequeueReusableCell(withIdentifier: cellIdentifier, for: indexPath)

cell.textLabel?.text = demoNames[indexPath.row]

return cell

}
並更新下列程式碼:
override func numberOfSections(in tableView: UiTableView) -> Int {
return 1
}

override func tableView(_ tableView: UITableView, numberOfRowInSection section: Int) -> Int {
return demoNames.count
}
最後我們將專案用模擬器執行看看!
