
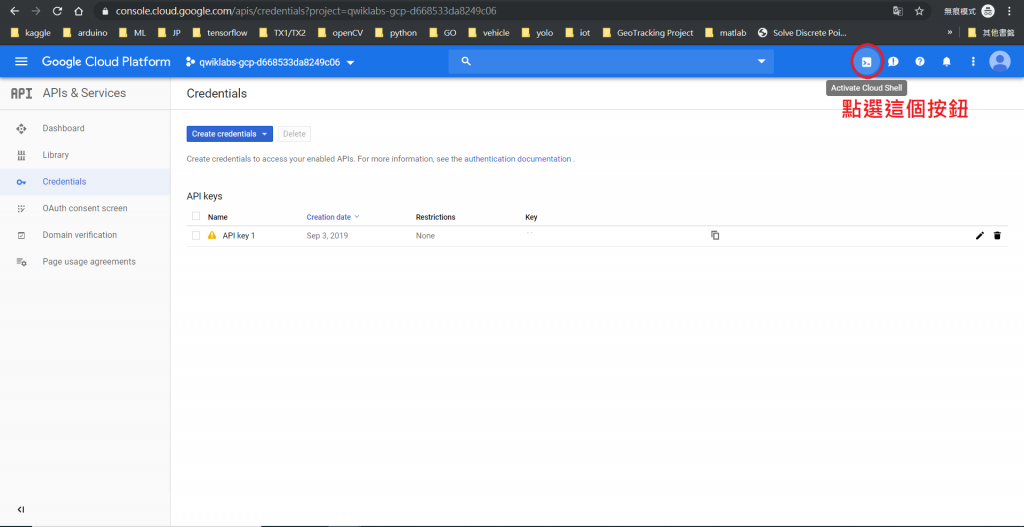
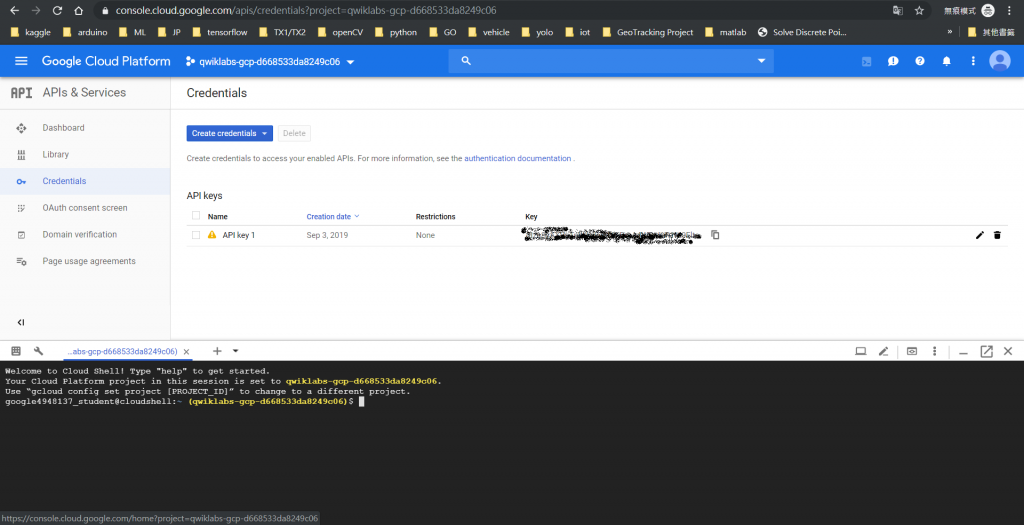
這篇文章會用到的GCP工具:cloud shell, vision API

gcloud services enable vision.googleapis.com
export PROJECT_ID=$(gcloud config get-value core/project)
gcloud iam service-accounts create my-vision-sa --display-name "my vision service account"
gcloud iam service-accounts keys create ~/key.json --iam-account my-vision-sa@${PROJECT_ID}.iam.gserviceaccount.com
export GOOGLE_APPLICATION_CREDENTIALS="/home/${USER}/key.json"
pip freeze | grep google-cloud-vision
ipython
從網路上找一張圖片測試cloud vision API的text detection功能。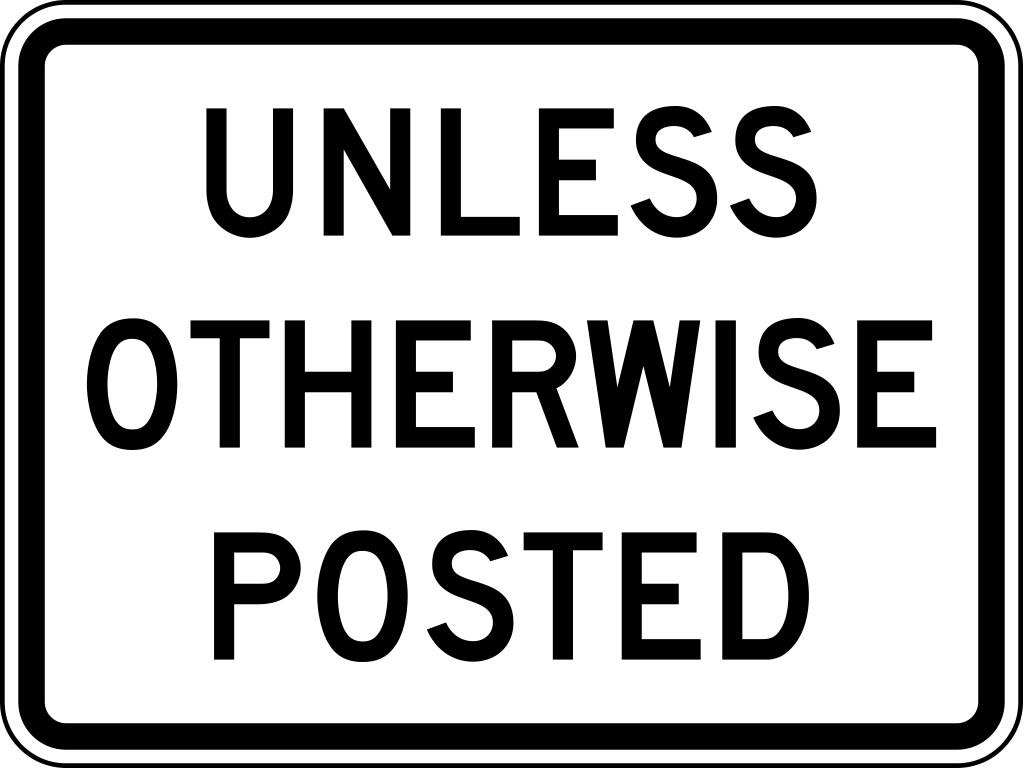
先不要管code的內容是什麼,就先貼吧,看看能不能跑出什麼結果。在貼程式碼之前要先說一個小技巧,當程式碼都貼好了,要怎麼執行?將游標移動到最後一行的第一個位置,也就是下圖中箭頭所指的地方,然後按下Enter鍵,就可以執行了。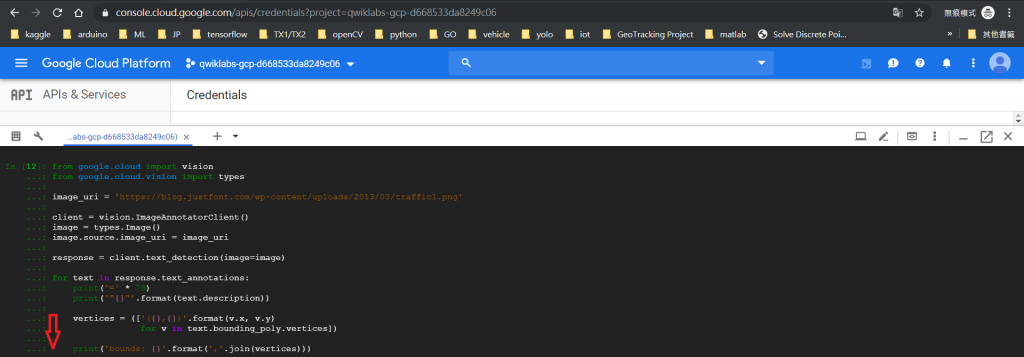
from google.cloud import vision
from google.cloud.vision import types

image_uri = 'https://blog.justfont.com/wp-content/uploads/2013/03/traffic1.png'

client = vision.ImageAnnotatorClient()
image = types.Image()
image.source.image_uri = image_uri

response = client.text_detection(image=image)

for text in response.text_annotations:
    print('=' * 79)
    print('"{}"'.format(text.description))

    vertices = (['({},{})'.format(v.x, v.y)
                 for v in text.bounding_poly.vertices])

    print('bounds: {}'.format(','.join(vertices)))
得到的結果如下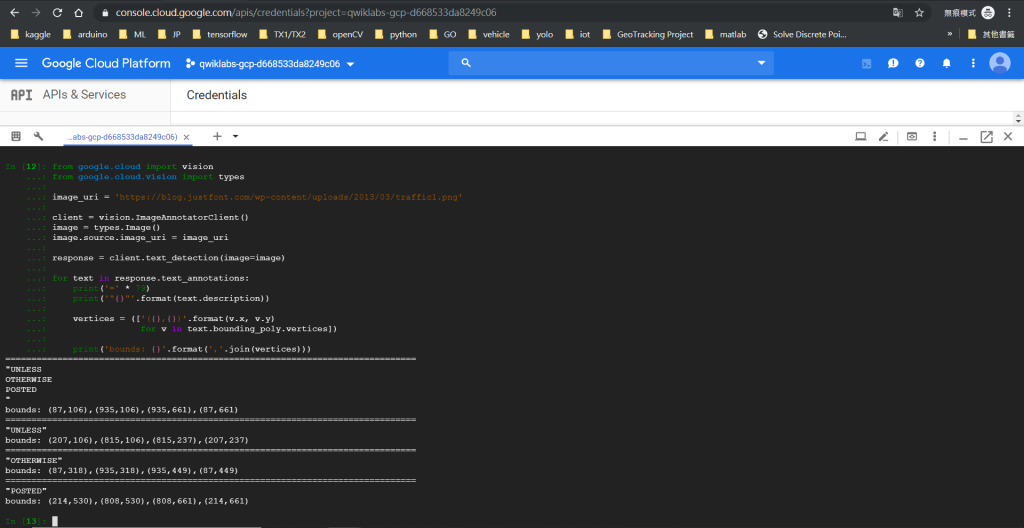
圖片中的字真的都偵測到了!恭喜完成一次AI的操作
UPDATE: 將程式碼的內容做了簡單的註解說明,並附上API Doc的連結
from google.cloud import vision
from google.cloud.vision import types

client = vision.ImageAnnotatorClient()
image = types.Image()
'''
以上4行是要基本啟用方式:
在google.cloud.vision下只有兩個class,分別是ImageAnnotatorClient及ProductSearchClient
分別看一下這兩個class的描述,首先是ImageAnnotatorClient:
Service that performs Google Cloud Vision API detection tasks over client images, such as face, landmark, logo, label, and text detection. The ImageAnnotator service returns detected entities from the images.
然後是ProductSearchClient:
Manages Products and ProductSets of reference images for use in product search.
'''

image_uri = 'gs://cloud-vision-codelab/otter_crossing.jpg'
image.source.image_uri = image_uri
# 設定了image的內容來源

response = client.text_detection(image=image)
# 在ImageAnnotatorClient下,除了text_detection之外,還有web_detection, object_localization, face_detection等
# https://googleapis.dev/python/vision/latest/gapic/v1/api.html

for text in response.text_annotations:
    print('=' * 79)
    print('"{}"'.format(text.description))

    vertices = (['({},{})'.format(v.x, v.y)
                 for v in text.bounding_poly.vertices])

    print('bounds: {}'.format(','.join(vertices)))
# text_detection所得到的response是一個json格式,我們將內容分析之後要寫出這個迴圈列印出內容,就不是個難事
google.cloud.vision API Doc
google.cloud.vision.type API Doc
GCP的UI設計得很簡單,但相反地,API文件在閱讀的時候,不那麼直覺~ 這樣對於開發者來說會比較辛苦一點。
API文件的完整度,AWS好過GCP喔~
老師您好,請問Google cloud API是否需要付費呢?
跟著您的步驟到ipython執行程序沒辦法順利執行,看了錯誤回報感覺是沒有付費的問題

 iThome鐵人賽