
昨天筆者提到如何使用 TypeScript Compiler API 來修改檔案,但想必大家多少應該有感覺到,如果要從那一層又一層的資料結構中找到需要用的區塊,其實會令開發者感到相當頭痛。
就拿我們昨天的程式碼來說,光是要從一個 .ts 檔中找到 declarations,就花了十行程式碼,而且那還是在筆者已經使用 ! 的情況下,如果是在正常情況下至少就還要再多一倍的程式碼。
這時,身為 Angular 的開發者就有福了!因為 Angular 官方其實已經有非常多的 API 可以使用,畢竟他們自己也都是用這些 API 來開發的。
所以筆者今天要來分享這些好用的 API ,或者是之前有用過,但沒有特別說明的 API 給大家,然後再使用這些 API 來重構我們昨天的程式碼:
以下以及後續幾章所使用的版本皆為
8.3.2,如果讀者現在使用時它已經不在原本的地方甚至已經沒有的話還請見諒
用途:驗證傳入的字串是否為有效的 name ,不正確則拋出錯誤。
用法:
import { validateName } from '@schematics/angular/utility/validation'
validateName('leo');  // pass
validateName('2leo'); // throw error
用途:驗證傳入的字串是否為有效的 selector ,不正確則拋出錯誤。
用法:
import { validateHtmlSelector } from '@schematics/angular/utility/validation';

validateHtmlSelector('app-leo-chen');    // pass
validateHtmlSelector('app1-leo2-chen3'); // pass
validateHtmlSelector('app1-2leo-chen3'); // throw error
用途:根據傳入的參數找出最相近的 .module.ts 的路徑 。
用法:
import { findModuleFromOptions } from '@schematics/angular/utility/find-module';

const moduleOptions: ModuleOptions = { name: 'Leo Chen', path: '/projects/world/src/app/feature' };
findModuleFromOptions(tree, moduleOptions); // '/projects/world/src/app/app.module.ts'
用途:從傳入的兩個路徑之中得出相對的路徑。
用法:
import { buildRelativePath } from '@schematics/angular/utility/find-module';

const modulePath = '/projects/hello/src/app/app.module.ts';
const componentPath = '/projects/hello/src/app/feature/hello-leo-chen.component.ts';

buildRelativePath(modulePath, componentPath); // ./feature/hello-leo-chen.component.ts
用途:取得新增 declaration 的宣告進 NgModule 所需的變動資訊。
用法:
import { addDeclarationToModule } from '@schematics/angular/utility/ast-utils';

const modulePath = '/projects/hello/src/app/app.module.ts';
const sourceFile = ts.createSourceFile(
  'test.ts',
  appTree.readContent(modulePath).toString(),
  ts.ScriptTarget.Latest,
  true
);
const componentPath = '/projects/hello/src/app/feature/hello-leo-chen.component.ts';
const relativePath = buildRelativePath(modulePath, componentPath);
const classifiedName = 'HelloLeoChenComponent';

addDeclarationToModule(sourceFile, modulePath, classifiedName, relativePath);

/* 輸出結果:
[
  InsertChange {
    path: '/projects/hello/src/app/app.module.ts',
    pos: 197,
    toAdd: ',\n    HelloLeoChenComponent',
    description: 'Inserted ,\n' +
      '    HelloLeoChenComponent into position 197 of /projects/hello/src/app/app.module.ts',
    order: 197
  },
  InsertChange {
    path: '/projects/hello/src/app/app.module.ts',
    pos: 148,
    toAdd: ';\n' +
      "import { HelloLeoChenComponent } from './feature/hello-leo-chen.component.ts'",
    description: 'Inserted ;\n' +
      "import { HelloLeoChenComponent } from './feature/hello-leo-chen.component.ts' into position 148 of /projects/hello/src/app/app.module.ts",
    order: 148
  }
]
*/
關於 Schematics API 的部份筆者就先介紹到這裡,一個部分是因為 API 太多,不太可能將其逐條列出;另一個部分則是因為筆者想等到有用到的時候再跟大家說明。
接下來就讓我們用以上這些 API 來改寫昨天的程式碼,首先先加入以下程式碼:
import { validateName, validateHtmlSelector } from '@schematics/angular/utility/validation';
import { buildRelativePath, findModuleFromOptions, ModuleOptions } from '@schematics/angular/utility/find-module';
import { addDeclarationToModule } from '@schematics/angular/utility/ast-utils';
import { InsertChange } from '@schematics/angular/utility/change';

import * as ts from '@schematics/angular/third_party/github.com/Microsoft/TypeScript/lib/typescript';
然後再加上一些調整:
export function helloWorld(_options: HelloWorldSchema): Rule {
  return async (_tree: Tree, _context: SchematicContext) => {

    const workspaceConfigBuffer = _tree.read('angular.json');
    if ( !workspaceConfigBuffer ) {
      throw new SchematicsException('Not an Angular CLI workspace');
    }

    const workspaceConfig = JSON.parse(workspaceConfigBuffer.toString());
    const projectName = _options.project || workspaceConfig.defaultProject;
    const project = workspaceConfig.projects[projectName];
    const defaultProjectPath = buildDefaultPath(project);
    const parsePath = parseName(defaultProjectPath, _options.name);
    const { name, path } = parsePath;

    // 加入名字跟 selector 的驗證
    validateName(name);
    validateHtmlSelector(`hello-${strings.dasherize(name)}`);

    // 用 findModuleFromOptions 找出關連度最高的 module.ts 的 path
    const moduleOptions: ModuleOptions = { name: name, path: path };
    const modulePath = findModuleFromOptions(_tree, moduleOptions) || '';

    const sourceFile = ts.createSourceFile(
      'test.ts',
      (_tree.read(modulePath) || []).toString(),
      ts.ScriptTarget.Latest,
      true
    );

    const componentPath = `${path}/hello-${strings.dasherize(name)}.component`;
    const classifiedName = `Hello${strings.classify(name)}Component`;

    // 用 buildRelativePath 取得 import 路徑
    const relativePath = buildRelativePath(modulePath, componentPath);

    // 用 addDeclarationToModule 取得變動的內容( InsertChange )
    const declarationChanges = addDeclarationToModule(sourceFile, modulePath, classifiedName, relativePath);

    // 實作變動
    const declarationRecorder = _tree.beginUpdate(modulePath);
    for (const change of declarationChanges) {
      if (change instanceof InsertChange) {
        declarationRecorder.insertLeft(change.pos, change.toAdd);
      }
    }
    _tree.commitUpdate(declarationRecorder);

    const sourceTemplates = url('./files');
    const sourceParametrizedTemplates = apply(sourceTemplates, [
      template({
        ..._options,
        ...strings,
        name
      }),
      move(path)
    ]);

    return mergeWith(sourceParametrizedTemplates);
  };
}
用 Angular Schematics 的 API 重構完之後,光程式碼行數就減少了二十幾行,程式也變得更加聰明且直觀,是不是超棒的?!
改完之後,記得輸入
npm test來驗證自己有沒有將程式碼改壞。
今天的程式碼: https://github.com/leochen0818/angular-schematics-30days-challenge/tree/day12
或許有人會覺得,為什麼筆者不一開始就分享最快最好的做好,要這樣不斷地繞圈圈?
其實這是因為筆者覺得,如果我們真的想要把某樣東西學好,不能夠單單只學會「怎麼用」,而是要去理解「為什麼」要這樣用。惟有這樣,我們才能學習地夠透徹、完整,才能舉一反三。
明天筆者將會分享如何做出一個支援 ng add 的 Schematic ,敬請期待!
Hi 朋友您好,给您提一个小小的建议:就是说明Angular应用所使用的版本、@angular-devkit的版本、@schematics/angular的版本,因为如果现在按照最新版本使用在按照文章代码执行的时候会遇到一些问题,例如下图中所示: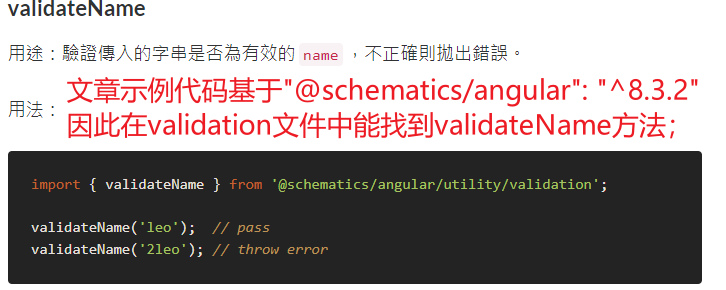
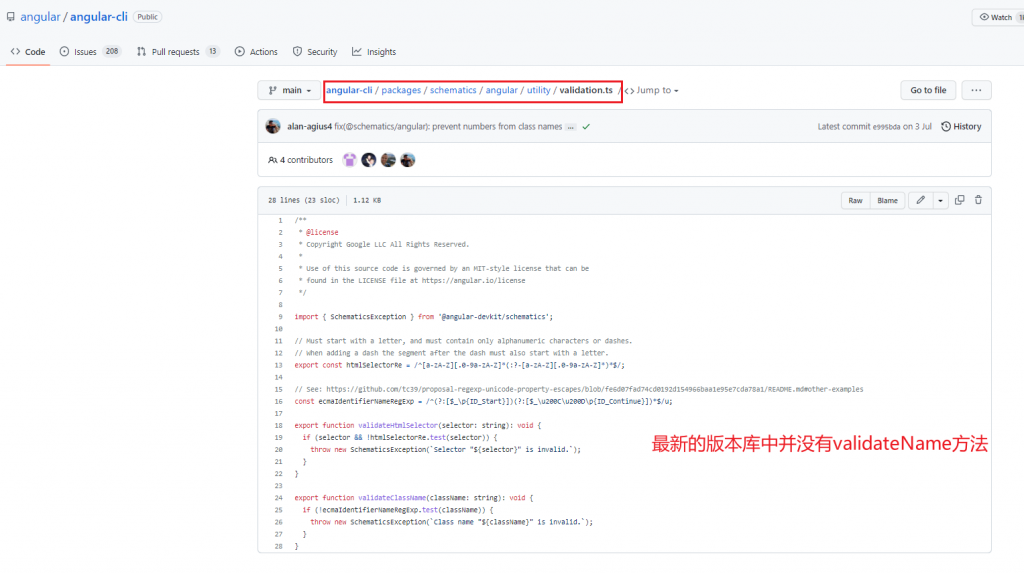
Hi xiaote0225, 沒問題,非常感謝你的建議
