今天介紹 硬體的 MQTT 使用與連結實際操作部分,會有較多程式碼。
一般來說安裝的程式庫會介紹找Adafruit MQTT這種通用性的程式庫,今天我們介紹另一套
Async MQTT client for ESP8266 and ESP32這個程式庫。有何特點呢?
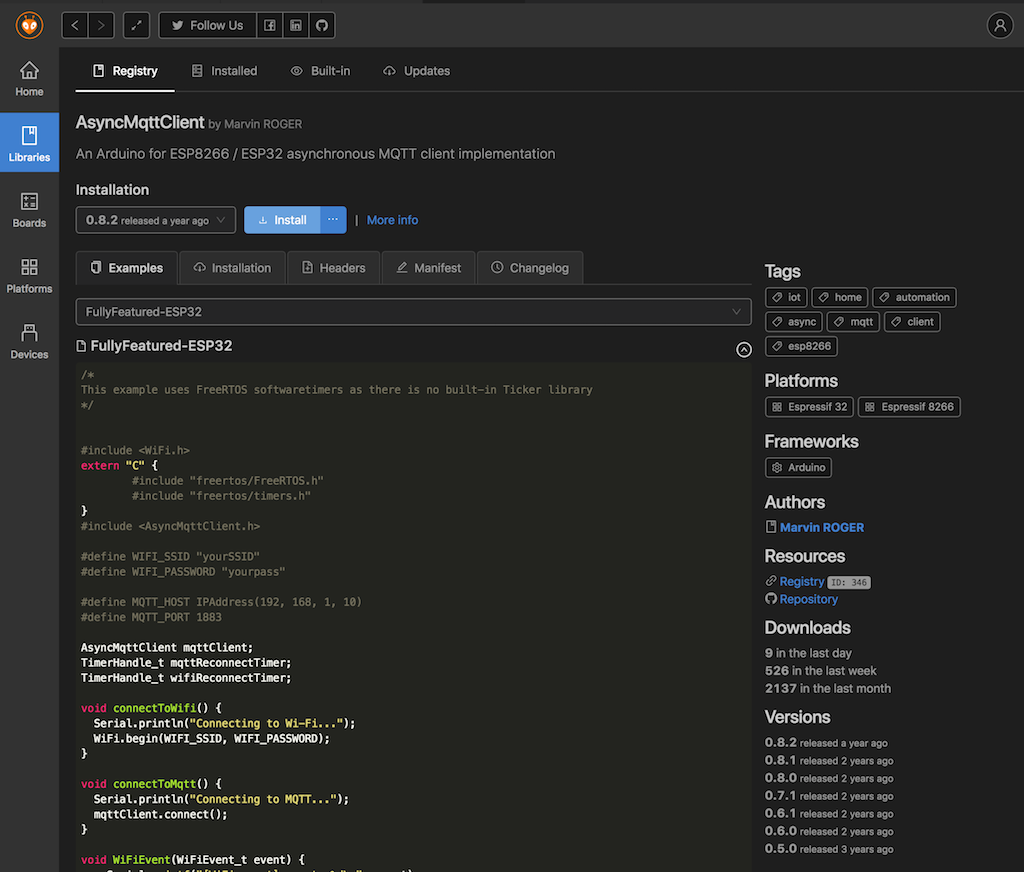
Async MQTT client for ESP8266 and ESP32
我們依樣在之前專案修改 platformio.ini 增加:
[env:nodemcuv2]
platform = espressif8266
board = nodemcuv2
framework = arduino

monitor_speed = 115200

lib_deps =
    ThingSpeak
    AsyncMqttClient
直接上完整範例檔案
#include <Arduino.h>
#include <Wire.h>

#include <ESP8266WiFi.h>
#include "secrets.h"
#include "aht1x.h"
#include <Ticker.h>
#include <AsyncMqttClient.h>
#include "ThingSpeak.h"

#define THINGSPEAK_DELAY 15000

uint8_t readBuffer[17] = {0};
uint8_t writeBuffer[3] = {0};
uint32_t timeout, loop_timeout;

float hum = 0;
float temp = 0;

const char *ssid = STASSID;
const char *password = STAPSK;

WiFiClient client;

unsigned long myChannelNumber = SECRET_CH_ID;
const char *myWriteAPIKey = SECRET_WRITE_APIKEY;

// Mqtt
#define MQTT_HOST IPAddress(192, 168, 0, 51)
#define MQTT_PORT 1883
AsyncMqttClient mqttClient;
Ticker mqttReconnectTimer;

WiFiEventHandler wifiConnectHandler;
WiFiEventHandler wifiDisconnectHandler;
Ticker wifiReconnectTimer;

void connectToWifi()
{
  Serial.println("Connecting to Wi-Fi...");
  WiFi.begin(ssid, password);
}

void connectToMqtt()
{
  Serial.println("Connecting to MQTT...");
  mqttClient.connect();
}

void onWifiConnect(const WiFiEventStationModeGotIP &event)
{
  Serial.println("Connected to Wi-Fi.");
  connectToMqtt();
}

void onWifiDisconnect(const WiFiEventStationModeDisconnected &event)
{
  Serial.println("Disconnected from Wi-Fi.");
  mqttReconnectTimer.detach(); // 先關閉Mqtt連線
  wifiReconnectTimer.once(2, connectToWifi);
}

//MQTT 連線後一系列的發送與接收 demo
void onMqttConnect(bool sessionPresent)
{
  Serial.println("Connected to MQTT.");
  Serial.print("Session present: ");
  Serial.println(sessionPresent);
  uint16_t packetIdSub = mqttClient.subscribe("test/day14", 2);
  Serial.print("Subscribing at QoS 2, packetId: ");
  Serial.println(packetIdSub);
  mqttClient.publish("test/lol", 0, true, "test 1");
  Serial.println("Publishing at QoS 0");
  uint16_t packetIdPub1 = mqttClient.publish("test/day14", 1, true, "test 2");
  Serial.print("Publishing at QoS 1, packetId: ");
  Serial.println(packetIdPub1);
  uint16_t packetIdPub2 = mqttClient.publish("test/day14", 2, true, "test 3");
  Serial.print("Publishing at QoS 2, packetId: ");
  Serial.println(packetIdPub2);
}

// MQTT 斷線
void onMqttDisconnect(AsyncMqttClientDisconnectReason reason)
{
  Serial.println("Disconnected from MQTT.");

  if (reason == AsyncMqttClientDisconnectReason::TLS_BAD_FINGERPRINT)
  {
    Serial.println("Bad server fingerprint.");
  }

  if (WiFi.isConnected())
  {
    mqttReconnectTimer.once(2, connectToMqtt);
  }
}

// MQTT 訂閱
void onMqttSubscribe(uint16_t packetId, uint8_t qos)
{
  Serial.println("Subscribe acknowledged.");
  Serial.print("  packetId: ");
  Serial.println(packetId);
  Serial.print("  qos: ");
  Serial.println(qos);
}

// MQTT 取消訂閱
void onMqttUnsubscribe(uint16_t packetId)
{
  Serial.println("Unsubscribe acknowledged.");
  Serial.print("  packetId: ");
  Serial.println(packetId);
}

// MQTT 接收訊息
void onMqttMessage(char *topic, char *payload, AsyncMqttClientMessageProperties properties, size_t len, size_t index, size_t total)
{
  Serial.println("Publish received.");
  Serial.print("  topic: ");
  Serial.println(topic);
  Serial.print("  qos: ");
  Serial.println(properties.qos);
  Serial.print("  dup: ");
  Serial.println(properties.dup);
  Serial.print("  retain: ");
  Serial.println(properties.retain);
  Serial.print("  len: ");
  Serial.println(len);
  Serial.print("  index: ");
  Serial.println(index);
  Serial.print("  total: ");
  Serial.println(total);
}

//MQTT 發布訊息
void onMqttPublish(uint16_t packetId)
{
  Serial.println("Publish acknowledged.");
  Serial.print("  packetId: ");
  Serial.println(packetId);
}

//溫濕度感測器 起始設定
void AHT10_setup()
{
  //AHT10 setup
  Wire.begin();
  Wire.beginTransmission(0x38);
  Wire.write(AHT1X_RESET);
  Wire.endTransmission();
  delay(AHT1X_RESET_DURATION);
  Wire.beginTransmission(0x38);
  writeBuffer[0] = AHT1X_INIT;
  writeBuffer[1] = AHT1X_INIT_DATA0;
  writeBuffer[2] = AHT1X_INIT_DATA1;
  for (int i = 0; i < AHT1X_CMD_SIZE; i++)
  {
    Wire.write(writeBuffer[i]);
  }
  Wire.endTransmission();
}

void setup()
{
  Serial.begin(115200);

  WiFi.mode(WIFI_STA);
  ThingSpeak.begin(client);

  mqttClient.onConnect(onMqttConnect);
  mqttClient.onDisconnect(onMqttDisconnect);
  mqttClient.onSubscribe(onMqttSubscribe);
  mqttClient.onUnsubscribe(onMqttUnsubscribe);
  mqttClient.onMessage(onMqttMessage);
  mqttClient.onPublish(onMqttPublish);
  mqttClient.setServer(MQTT_HOST, MQTT_PORT);
  wifiConnectHandler = WiFi.onStationModeGotIP(onWifiConnect);
  wifiDisconnectHandler = WiFi.onStationModeDisconnected(onWifiDisconnect);
  AHT10_setup();
  loop_timeout = millis();
}

// 曲的溫濕度
void getTempHum()
{
  uint32_t xresult;
  Wire.beginTransmission(0x38);
  writeBuffer[0] = AHT1X_READ;
  writeBuffer[1] = AHT1X_READ_DATA0;
  writeBuffer[2] = AHT1X_READ_DATA1;
  for (int i = 0; i < AHT1X_CMD_SIZE; i++)
  {
    Wire.write(writeBuffer[i]);
  }
  Wire.endTransmission();
  delay(AHT1X_RH_MEASUREMENT_DELAY);
  Wire.requestFrom((uint8_t)0x38, (uint8_t)AHT1X_DATA_SIZE);

  timeout = millis() + DEFAULT_TIMEOUT;
  while (millis() < timeout)
  {
    if (Wire.available() < AHT1X_DATA_SIZE)
    {
      delay(AHT1X_RH_MEASUREMENT_DELAY / 4);
    }
    else
    {
      for (int i = 0; i < AHT1X_DATA_SIZE; i++)
      {
        readBuffer[i] = Wire.read();
      }
      xresult = (((uint32_t)readBuffer[1] << 16) | ((uint32_t)readBuffer[2] << 8) | (uint32_t)readBuffer[3]) >> 4;
      hum = (float)xresult;
      hum *= 100;
      hum /= 1048576;
      xresult = (((uint32_t)readBuffer[3] & 0x0F) << 16) | ((uint32_t)readBuffer[4] << 8) | (uint32_t)readBuffer[5];
      temp = (float)xresult;
      temp *= 200;
      temp /= 1048576;
      temp -= 50;
    }
  }
}

// the loop function runs over and over again forever
void loop()
{
  if (millis() > loop_timeout && WiFi.status() == WL_CONNECTED)
  {
    getTempHum();
    if ((temp > -50) && (hum > 0))
    {
      Serial.println(String("") + "Humidity(%RH):\t\t" + hum + "%");
      Serial.println(String("") + "Temperature(C):\t" + temp + " C");
      ThingSpeak.setField(1, temp);
      ThingSpeak.setField(2, hum);
      int x = ThingSpeak.writeFields(myChannelNumber, myWriteAPIKey);
      if (x == 200)
      {
        Serial.println("Channel update successful.");
      }
      else
      {
        Serial.println("Problem updating channel. HTTP error code " + String(x));
      }
    }
    loop_timeout = millis() + THINGSPEAK_DELAY;
  }
}
這個範例會先訂閱然後執行三種發布訊息範例。
上傳後會看到輸出範例:
Connected to Wi-Fi.
Connecting to MQTT...
Connected to MQTT.
Session present: 0
Subscribing at QoS 2, packetId: 1
Publishing at QoS 0
Publishing at QoS 1, packetId: 2
Publishing at QoS 2, packetId: 3
Publish acknowledged.
  packetId: 2
Subscribe acknowledged.
  packetId: 1
  qos: 2
Publish received.
  topic: test/day14
  qos: 2
  dup: 0
  retain: 0
  len: 6
  index: 0
  total: 6
Publish received.
  topic: test/day14
  qos: 1
  dup: 0
  retain: 0
  len: 6
  index: 0
  total: 6
Publish received.
  topic: test/day14
  qos: 2
  dup: 0
  retain: 0
  len: 6
  index: 0
  total: 6
Publish acknowledged.
  packetId: 3
而且我們去 上一篇介紹的 EMQ X 管理介面可以看到連線的裝置!
http://PI ip:18083/#/connections
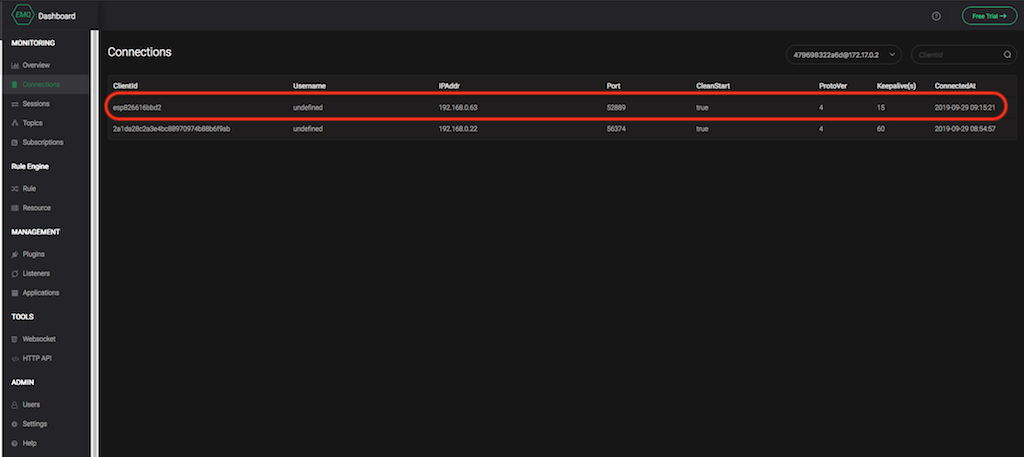
EMQ X 管理介面
這邊示範我們除了將濕度資料送到 ThingSpeak 同時透過 MQTT 發布到我們的主機 MQTT Broker。
程式碼範例與上方相同只有發送區塊不同:
void loop()
{
  if (millis() > loop_timeout && WiFi.status() == WL_CONNECTED)
  {
    getTempHum();
    if ((temp > -50) && (hum > 0))
    {
      Serial.println(String("") + "Humidity(%RH):\t\t" + hum + "%");
      Serial.println(String("") + "Temperature(C):\t" + temp + " C");
      ThingSpeak.setField(1, temp);
      ThingSpeak.setField(2, hum);
      int x = ThingSpeak.writeFields(myChannelNumber, myWriteAPIKey);
      if (x == 200)
      {
        Serial.println("Channel update successful.");
      }
      else
      {
        Serial.println("Problem updating channel. HTTP error code " + String(x));
      }
      char buff[20];
      mqttClient.publish("home/temp", 1, true, dtostrf(temp, 8, 6, buff));
      mqttClient.publish("home/hum", 1, true, dtostrf(hum, 8, 6, buff));
    }
    loop_timeout = millis() + THINGSPEAK_DELAY;
  }
}
資料發送到:
上傳後會看到輸出範例:
Humidity(%RH):          62.23%
Temperature(C): 28.75 C
Channel update successful.
Publish acknowledged.
  packetId: 90
Publish acknowledged.
  packetId: 91
Humidity(%RH):          62.24%
Temperature(C): 28.75 C
Channel update successful.
Publish acknowledged.
  packetId: 92
Publish acknowledged.
  packetId: 93
Humidity(%RH):          62.30%
Temperature(C): 28.75 C
Channel update successful.
Publish acknowledged.
  packetId: 94
Publish acknowledged.
  packetId: 95
那我們用電腦去連線 MQTT 訂閱:
我們訂閱 home/# 這樣可以直接收到兩個。
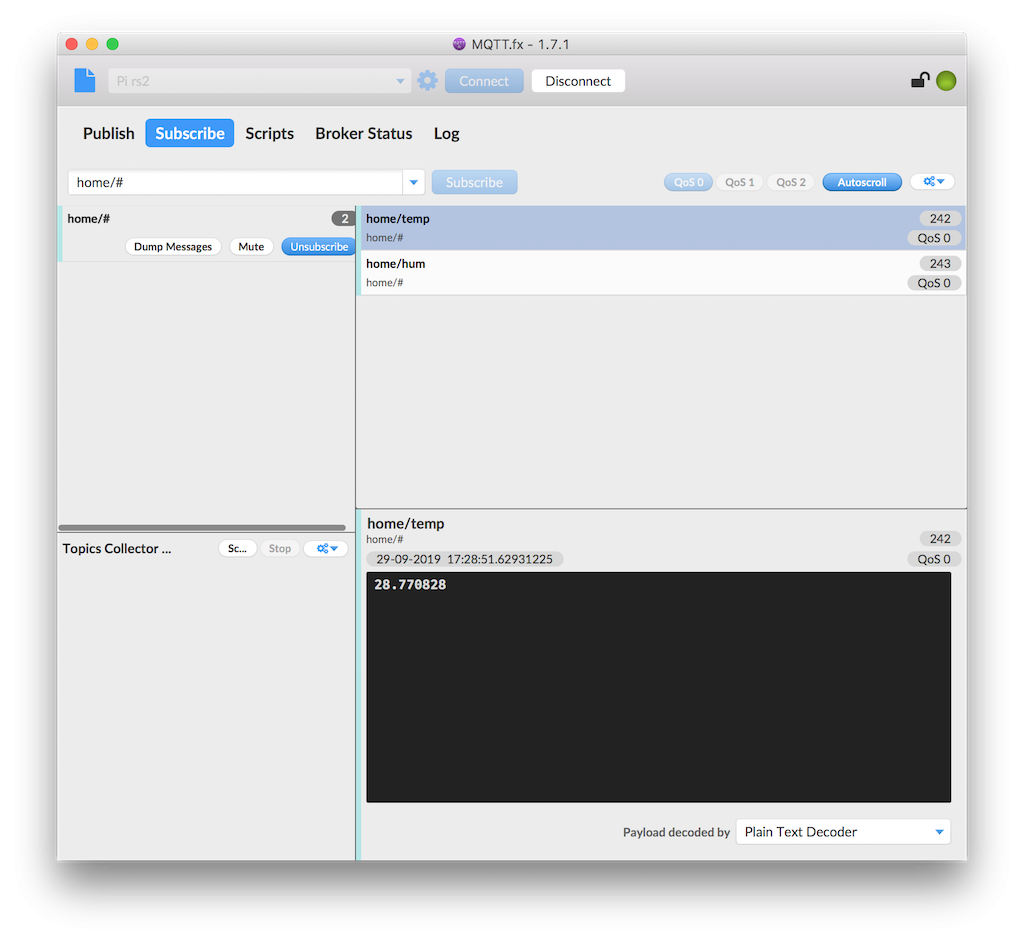
mqtt 溫度
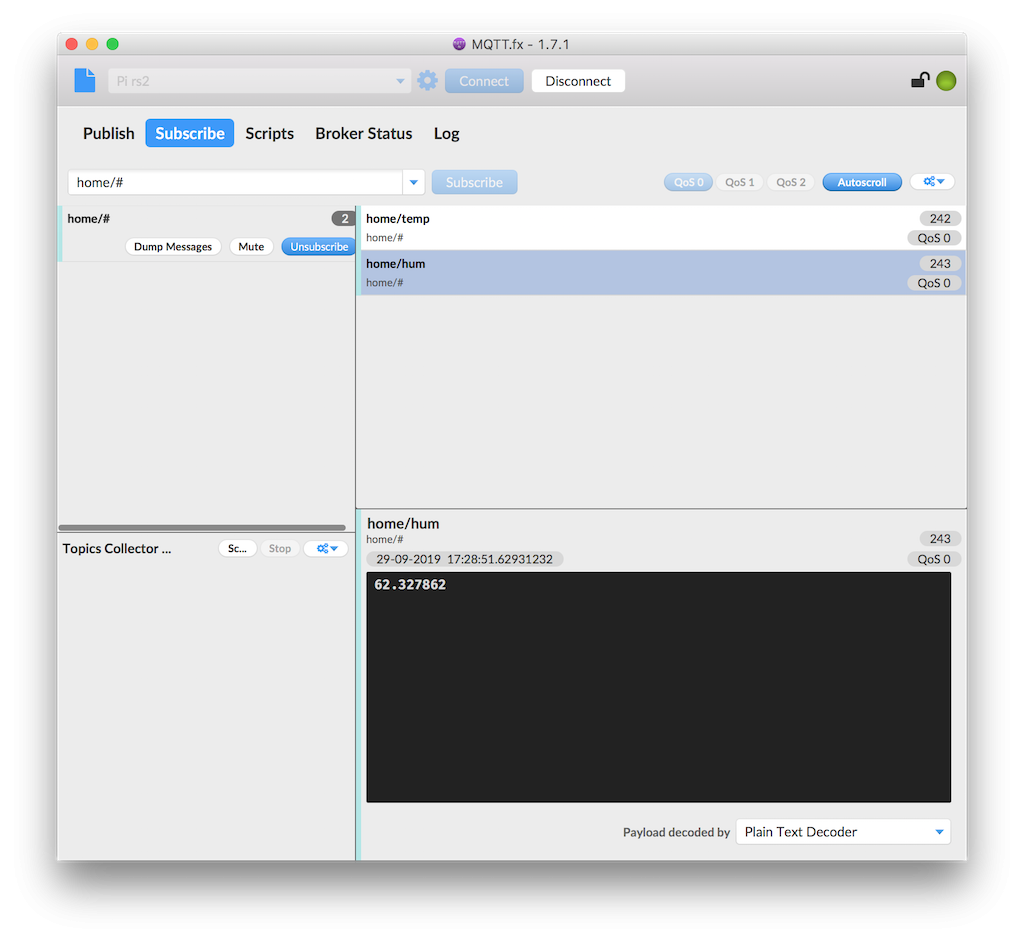
mqtt 濕度
今天介紹 MQTT 硬體實際使用與介紹,硬體以往要將資料發送到電腦端是需要具備很煩瑣的資料處理與連接那透過無線網路大大降低了便利性與難度。
怎麼不用esp32去實作???
MqttClient這部分,我會寫在php服務器裡面.
這樣esp32程式碼會輕巧些
以ESP32 作為MqttClient很多好處,直接持續連線有斷線很快可以知道。你再多做一層用PHP接http送只是多麻煩且HTTP 交握程序太多比起一般tcp 繁瑣。
1.你的回答很棒!!作為一個設備偵測,使用mqtt快速回應,這點我倒沒想到
2.另外想請教
mqtt 如果設備是訂閱的.那如果設備沒上線,是否能有一個方法,讀取之前,沒收到的訂閱訊息
感謝你的回答


 iThome鐵人賽