今天這一篇又要來把重中之重的網頁架構再來說一遍了!!
在經過這幾天的了解(折磨?)之後,發現Lektor真的提供很大的開放性,修改上也十分簡單。只要掌握好整個網頁的建置邏輯、流程,基本上就差不多了,所以今天要再來介紹一次建立網頁的方式。
在開始之前呢,要先說明一下今天的情境。我想要建立一個可以列出我的所有專案的網站。
首先要建立一個專案預覽頁面,這一頁將告訴Lektor我要放在專案預覽頁面下的子頁面為project,並且這一頁不能被其他頁面使用(hidden),也不能被刪除(protected)。因為有設定hidden = yes,所以等一下要先建立content才能使用。在確認這樣的邏輯之後,我們先建立專案預覽頁面的model:
projects.ini
專案預覽頁面只會有一個,在Label的地方使用固定的值即可,等一下可以跟子頁面的model比較看看。
[model]
name = Projects
label = Projects
hidden = yes
protected = yes

[children]
model = project
order_by = -date, name
設定完專案預覽頁面後,再來就是子頁面啦~子頁面著重於你想要在頁面中顯示那些資訊,通常設定會有:標題、內文、時間、類型、專案網站等資訊,並提供附件上傳。所以接下來要建立子頁面的model,並在model中設定要顯示資訊的項目屬性:
project.ini
[model]
name = Project
label = {{ this.name }}
hidden = yes

[attachments]
order_by = _id

[fields.name]
label = Name
type = string
size = large

[fields.date]
label = Date
type = date
size = 1/4

[fields.type]
label = Project type
type = string
size = 1/4

[fields.website]
label = Website
type = url
size = 1/2

[fields.description]
label = Description
type = markdown
建立完model後,再來就是設定版面啦!
projects.html
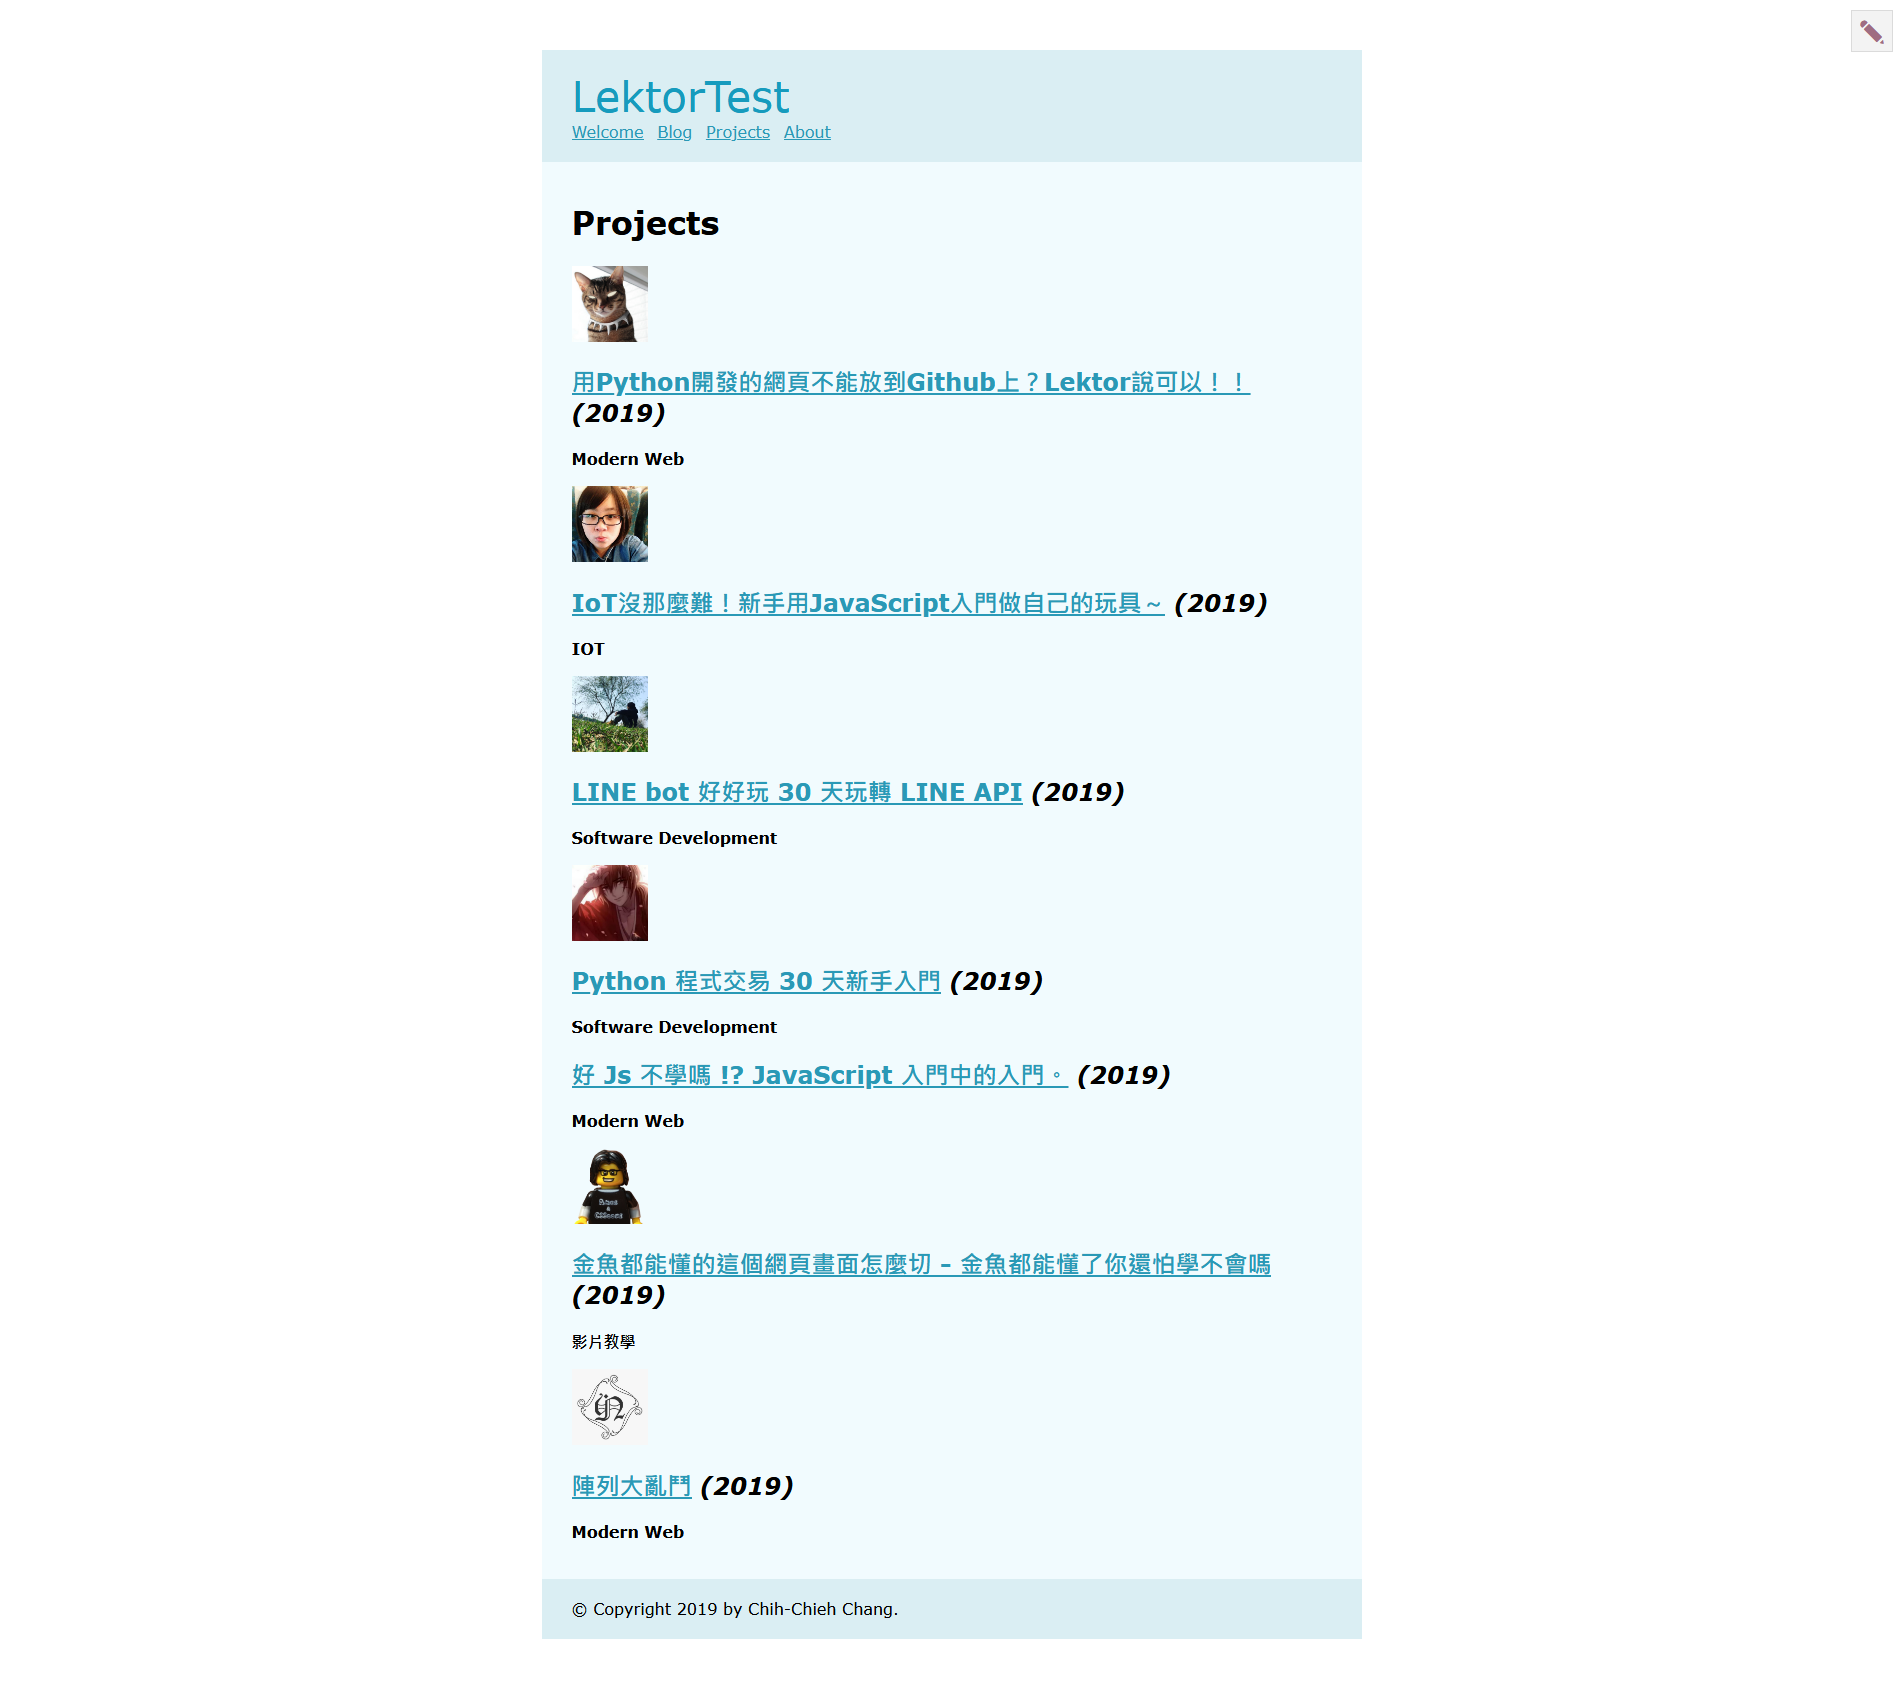
這邊除了將專案排列顯示出來,若附件有照片的話則會顯示照片,並透過imagemagick調整圖片大小。
{% extends "layout.html" %}
{% block title %}Projects{% endblock %}
{% block body %}
  <h1>Projects</h1>
  <div class="projects">
  {% for project in this.children %}
    <div class="project">
      {% set image = project.attachments.images.first() %}
      {% if image %}
        <img src="{{ image.thumbnail(320)|url }}" alt="">
      {% endif %}
      <h2><a href="{{ project|url }}">{{ project.name }}</a>
        <em>({{ project.date.year }})</em></h2>
      <p><strong>{{ project.type }}</strong></p>
    </div>
  {% endfor %}
  </div>
{% endblock %}
project.html
再來設定子頁面的版面:
{% extends "layout.html" %}
{% block title %}{{ this.name }} ({{ this.date.year }}){% endblock %}
{% block body %}
  <h1>{{ this.name }}</h1>
  <dl>
    <dt>Date
    <dd>{{ this.date|dateformat }}
    {% if this.website %}
    <dt>Website
    <dd><a href="{{ this.website }}">{{ this.website.host }}</a>
    {% endif %}
    <dt>Project type
    <dd>{{ this.type }}
  </dl>
  <h2>Description</h2>
  <div class="description">{{ this.description }}</div>
  {% set images = this.attachments.images.all() %}
  {% if images %}
    <h2>Images</h2>
    {% for image in images %}
      <div class="image">
        <img src="{{ image.thumbnail(640)|url }}" alt="">
        {% if image.exif %}
        <p class=meta>
          {{ image.exif.camera }}
          {% if image.exif.created_at %}
            ({{ image.exif.created_at|dateformat }})
          {% endif %}
        {% endif %}
      </div>
    {% endfor %}
  {% endif %}
{% endblock %}
於是我照著上面的步驟成功建立了網頁,同時將我們團員的文章各自建立一個專案,順便宣傳一下我們團隊的系列文,請大家多多訂閱喔!

版面是不是很醜,沒關係,今天這篇只是教你如何建立這樣的網頁,之後也不會教你怎麼排版喔(?)
想切出美美的版面,可以到下面進入CSScoke的文章學習,金魚都懂了你應該可以學會。如果還是不懂的話,那你可以聯絡CSScoke報名暴力班!
這個bug在之前就有遇到,就是image.thumbnail(640)|url使得網頁中無法正常顯示圖片,當初是刪掉後面的.thumbnail(640)就可以正常顯示。.thumbnail(640)是讓imagemagick去掌控圖片的大小,透過這樣的方式可以快速調整圖片的大小,統一圖片規格。
查詢之後發現這應該是windows的bug,在github上有issue,windows安裝imagemagick 後依舊無法讓lektor使用。有人回覆修復方式,但我去下載程式後安裝也沒有看到他所說的選項,所以還是沒有試成功。
CSScoke - 金魚都能懂的這個網頁畫面怎麼切 - 金魚都能懂了你還怕學不會嗎
King Tzeng - IoT沒那麼難!新手用JavaScript入門做自己的玩具~
Hina Hina - 陣列大亂鬥
阿斬 - Python 程式交易 30 天新手入門
Clarence - LINE bot 好好玩 30 天玩轉 LINE API
塔塔默 - 用Python開發的網頁不能放到Github上?Lektor說可以!!
Vita Ora - 好 Js 不學嗎 !? JavaScript 入門中的入門。
