還記得在Angular的時候有提到元件(Component)嗎?
元件就像樂高的一小塊積木,如果設計的好,就可以和其他元件自由組合。
一個基本的元件會包含:
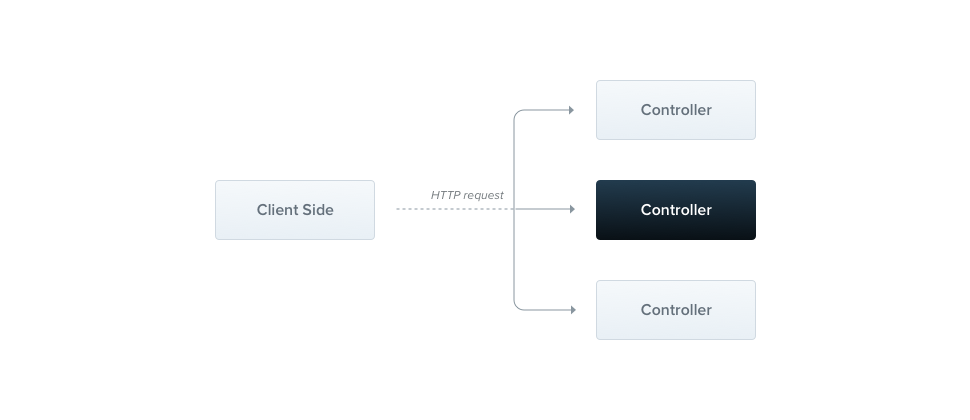
Nestjs為後端的框架,沒有元件要處理的顯示內容與樣式,因此不稱為元件(Component),而稱為控制器(Controller)。
控制器負責處理傳入的請求(request),並且回傳對於請求的結果
利用Nestjs CLI 建立控制器,指令為:
nest generate controller <controllerNmae>
現在建立一個處理文件的控制器,稱為document
nest generate controller document
一個空白的控制器建立起來了
import { Controller } from '@nestjs/common';


@Controller('document')
export class DocumentController {}
和Angular一樣,使用裝飾器來表示檔案的類型是控制器,在裝飾器裡面可以加上參數,Nestjs CLI 會自動幫我們加上參數
@Controller('documents')
參數表示API的路由,假如在本機的開發環境使用時,連接到路徑的時候,就會由控制器控制,例如:
http://localhost:3000/document
由於只是初體驗,所以先在控制器定義假資料
data = [
        {
            name: '存有與虛無',
            author: '沙特',
            id: 1
        },
        {
            name: '單子論',
            author: '萊布尼茲',
            id: 2
        },
        {
            name: '物不遷論',
            author: '僧肇',
            id: 3
        },
        {
            name: '道德經',
            author: '老子',
            id: 4
        }
    ]
CRUD就是create, read, update, read四種API常見的方法,現在就要來建立這四種方法的API
在開始之前,先引入Nestjs處理好的模組
import { Controller, Get, Post, Patch, Delete, Param, Body, Response, HttpStatus } from '@nestjs/common';
從引入的關鍵字就可以看出來,今天要做的內容
@Get()
getAllDocuments(@Response() res) {
    res.status(HttpStatus.OK).json(this.data);
}
@Get()代表要使用get方法才會配對到getAllDocuments這個方法@Response()表示這個方法是會回傳東西到客戶端,在這裡另外設定res簡稱這個方法HttpStatus.OK(這是一個enum,會轉換成200),並且將假資料轉換成json格式回傳利用postman測試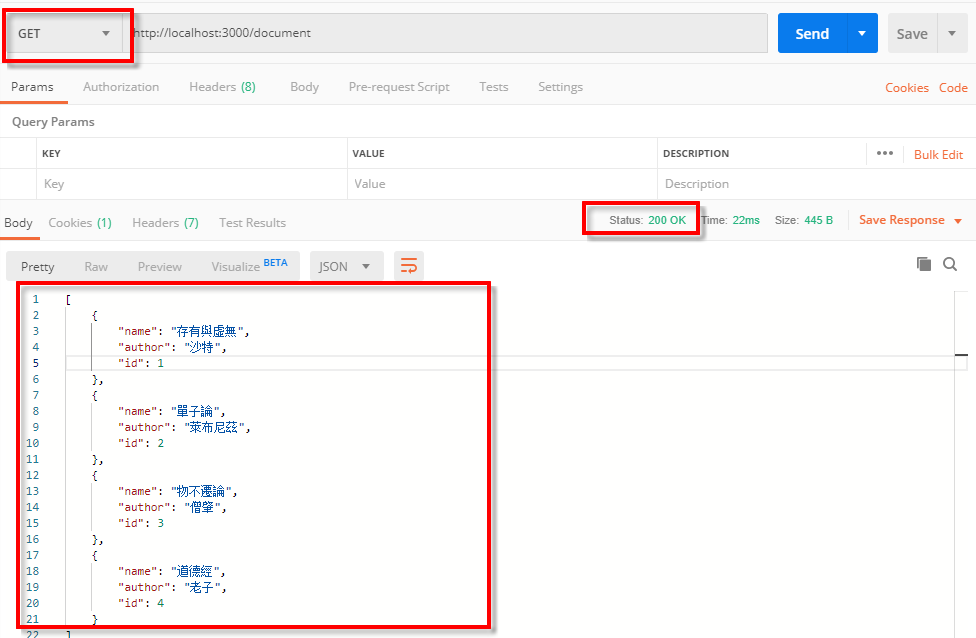
@Get('/:id')
getDocument(@Param() param, @Response() res) {
    let resData = this.data.filter(data => data.id === Number(param.id)) // 特別注意,所有的參數都是字串
    res.status(HttpStatus.OK).json(resData);
}
@Get('/:id')
@Param()方法取得參數,並稱呼為param。如此一來就可以使用param.id,就可以取到id參數現在來示範取得編號id為1的資料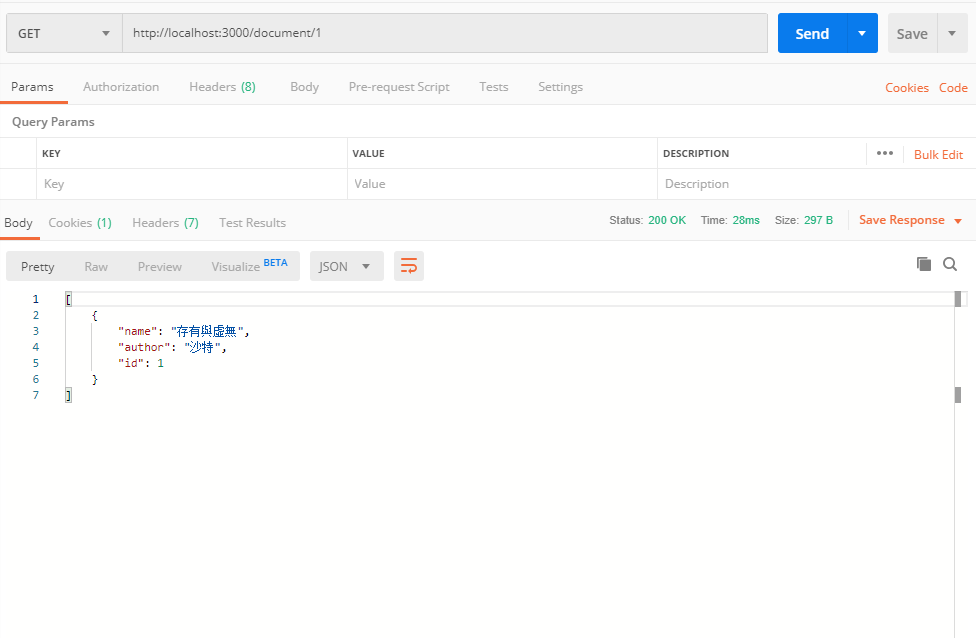
@Post()
addDocument(@Response() res, @Body() document) {
    // 做些什麼
    res.status(HttpStatus.CREATED).json(document);
}
@Post post方法@Body()取得新增的資料,並且使用document稱呼HttpStatus.CREATED(201)表示建立成功,並且直接回傳新增內容。在這裡新增一筆資料測試: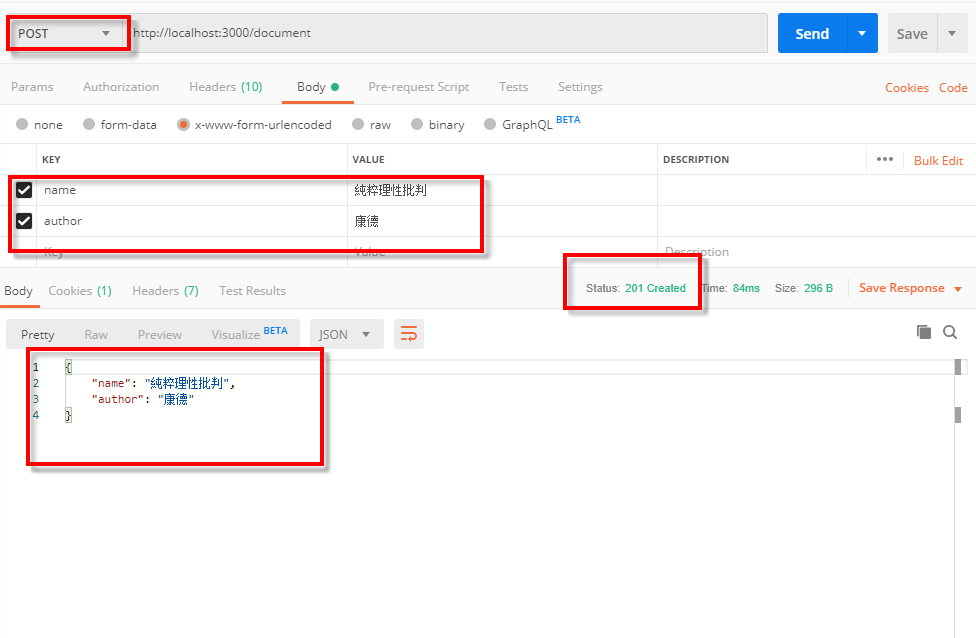
@Patch('/:id')
updateDocument(@Param() params, @Response() res, @Body() document) {
    // 做些什麼
    res.status(HttpStatus.OK).json(document);
}
@Patch()
@Delete('/:id')
deleteDocument(@Param() param, @Response() res) {
    // 做些什麼
    res.status(HttpStatus.OK).json(document);
}
@Delete()
今天的範例內容
import { Controller, Get, Post, Patch, Delete, Param, Body, Response, HttpStatus } from '@nestjs/common';


@Controller('document')
export class DocumentController {
    data = [
        {
            name: '存有與虛無',
            author: '沙特',
            id: 1
        },
        {
            name: '單子論',
            author: '萊布尼茲',
            id: 2
        },
        {
            name: '物不遷論',
            author: '僧肇',
            id: 3
        },
        {
            name: '道德經',
            author: '老子',
            id: 4
        }
    ]
    @Get()
    getAllDocuments(@Response() res) {
        res.status(HttpStatus.OK).json(this.data);
    }


    @Get('/:id')
    getDocument(@Param() param, @Response() res) {
        let resData = this.data.filter(data => data.id === Number(param.id))
        res.status(HttpStatus.OK).json(resData);
    }
    @Post()
    addDocument(@Response() res, @Body() document) {
        // 做些什麼
        res.status(HttpStatus.CREATED).json(document);
    }


    @Patch('/:id')
    updateDocument(@Param() params, @Response() res, @Body() document) {
        // 做些什麼
        res.status(HttpStatus.OK).json(document);
    }


    @Delete('/:id')
    deleteDocument(@Param() param, @Response() res) {
        // 做些什麼
        res.status(HttpStatus.OK).json(document);
    }
}
今天學到的事情有: