成品參考: https://linsheng24.github.io/gatsby-blog/
今天實作留言版的部分,因為react不同於文章,畫面的改變必須馬上反映給使用者,因此不是在build的時候抓取資料的,而是要動態的跟Contentful的API抓取資料。
post-template.js中引入一個CommentArea的組件,並放在文章內容下方,此組件需傳入這篇文章的id,所以在graphQL的contentfulPost中許多抓取contentful_id這個field,並傳入postId props,如下:src/components/post-template.js
import React from "react"
import Layout from "./layout"
import CommentArea from "./comment-area"

const PostPage = (props) => {
const post = props.data.contentfulPost
...
...
    </article>
    <CommentArea postId={post.contentful_id} />
  </Layout>
src/components/comment-area.js
import React, { useEffect, useState } from "react"
import Comment from "./comment"
import {client, clientManage} from "../cms-config"

const CommentArea = (props) => {
  const postId = props.postId
  const [input, setInput] = useState(
    {
      userId: "",
      text: ""
    }
  )
  const [comments, setComments] = useState([])

  const getComments = () => {
    client.getEntries({
      'sys.id': postId,
    })
    .then((response) => {
      if(response.items[0].fields.hasOwnProperty("comments")) {
        const result = response.items[0].fields.comments.filter(comment => comment.hasOwnProperty("fields"));
        setComments(result)
      }
    })
    .catch(console.error)
  }

  const inputHandler = (e, type) => {
    switch(type){
      case "userId":
        setInput({...input, userId: e.target.value});
        break;
      case "text":
        setInput({...input, text: e.target.value});
        break;
    }
  }

  const clickHandler = () => {
    let newEntry
    const clientSpace = clientManage.getSpace('3uaeu4rxc51m')
    clientSpace
    .then((space) => space.createEntry('comment', {
      fields: {
        userId: {"en-US": input.userId},
        content: {"en-US": input.text}
      }
    }))
    .then((entry) => {
      setInput({userId: "", text: ""})
      entry.publish()
      newEntry = entry
    })
    .then(() => {
      clientSpace
      .then((space)=>space.getEntry(postId))
      .then((entry) => {
        let add = {
        sys:{
          type: "Link",
          linkType: "Entry",
          id: newEntry.sys.id
          }
        }
        if(!entry.fields.hasOwnProperty("comments")){
          entry.fields.comments = {"en-US":[]}
        }
        entry.fields.comments["en-US"].push(add)
        return entry.update()
      })
      .then((entry) => {
        entry.publish()
      })
      .then(()=>{
        setTimeout(getComments,3000)

      })
      .catch(console.error)
    })
  }

  useEffect(()=>{
    getComments();
  },[])


  return (
  <>
    <div style={{background: "#f7f7f7", padding: "30px 0"}}>
      <div className="container">
        <div className="row">
          <form className="col-lg-8 col-md-10 mx-auto">
            <div className="form-group">
              <label htmlFor="FormControlInput">使用者名稱</label>
              <input className="form-control" id="FormControlInput" value={input.userId} onChange={(e)=>inputHandler(e, "userId")}/>
            </div>
            <div className="form-group">
              <label htmlFor="FormControlTextarea">留言</label>
              <textarea className="form-control" id="FormControlTextarea" rows="6" value={input.text} onChange={(e)=>inputHandler(e, "text")}></textarea>
            </div>
            <button type="button" className="btn btn-secondary btn-sm" onClick={clickHandler}>Submit</button>
          </form>
        </div>
      </div>

      <div className="container" style={{padding: "70px auto 70px", padding: "30px 20px 0"}}>
        {comments.map((comment)=><Comment key={comment.sys.id} data={comment}/>)}
      </div>
    </div>
  </>
)}
export default CommentArea
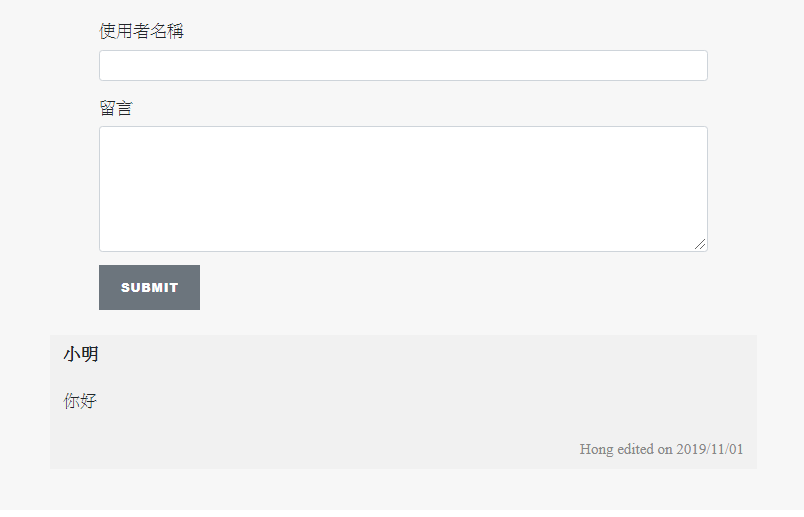
因為程式碼比較常,所以我們分開來看一下,首先是渲染的內容的部分,是使用bootstrap去做簡單做出來的畫面,極度簡化以後,就是只有這樣:
return (
  <>
    <input className="form-control" id="FormControlInput" value={input.userId} onChange={(e)=>inputHandler(e, "userId")}/>
    <textarea className="form-control" id="FormControlTextarea" rows="6" value={input.text} onChange={(e)=>inputHandler(e, "text")}></textarea>
    <button type="button" className="btn btn-secondary btn-sm" onClick={clickHandler}>Submit</button>
    {comments.map((comment)=><Comment key={comment.sys.id} data={comment}/>)}
  </>
)}
inputHandler(e, "userId")跟inputHandler(e, "text"),其作用是在輸入文字時,去根據輸入值修改state,詳細可見官方文件:表單。comments,也就是我們用useState做出來的狀態來渲染出多則留言框元件。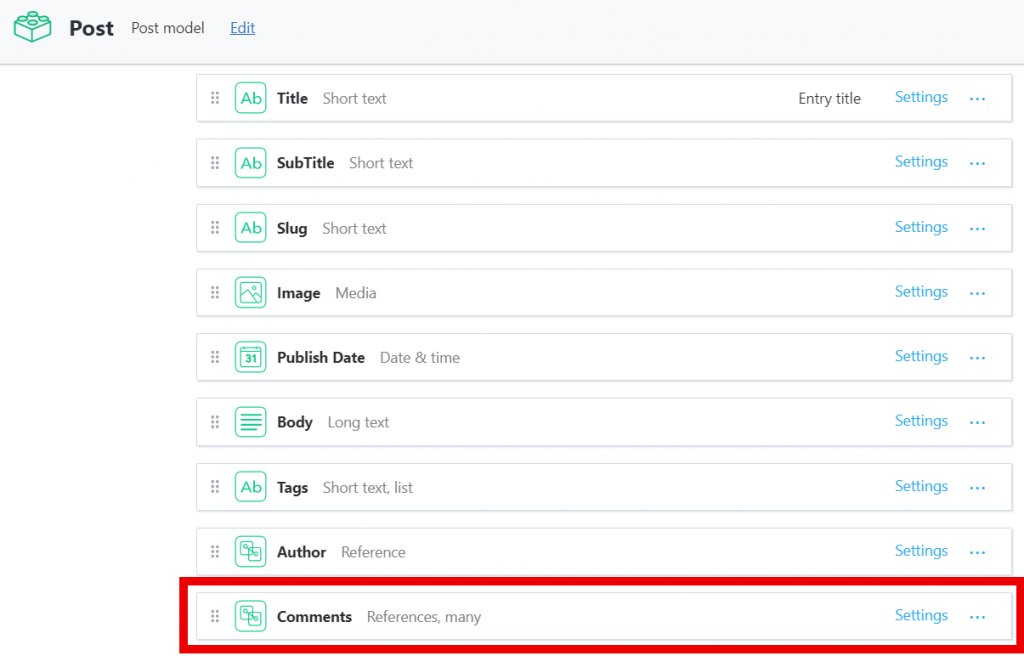
comment-area.js中去跟contentful API抓取我的這篇文章的Comments資料。npm install --save contentful安裝contentful的sdk,並引入var contentful = require('contentful')
如此就能使用了。
而新增或更新資料也是,但是是安裝contentful-management並使用require('contentful-management')
這邊,我新增一個./src/cms-config.js,來存放相關設定:
const contentful = require('contentful')
const contentManage = require('contentful-management')

export const client = contentful.createClient({
  space: '3uaeu4rxc51m',
  accessToken: 'klyMztikgtixidQzIqUmLOdySOM2MPvzmXN_gM17LT8'
})

export const clientManage = contentManage.createClient({
  accessToken: 'CFPAT-nVjBYI3YBDGA9AWFg_SxJhR2uZ-mRTX5pp9RLfB0XZ8'
})
此檔案會匯出兩個物件,提供了我們使用API的方法。
使用方式可參考:
Content Delivery API(抓取內容): https://www.contentful.com/developers/docs/references/content-delivery-api/
Content Management API(傳送內容,發布內容): https://www.contentful.com/developers/docs/references/content-management-api/
comment-area.js的程式碼,分段來看:import React, { useEffect, useState } from "react"
import Comment from "./comment"
import {client, clientManage} from "../cms-config"
const CommentArea = (props) => {
const postId = props.postId ///文章id
const [input, setInput] = useState(
{
userId: "",
text: ""
}
)
const [comments, setComments] = useState([])
const getComments = () => {
client.getEntries({
'sys.id': postId,
})
.then((response) => {
if(response.items[0].fields.hasOwnProperty("comments")) {
const result = response.items[0].fields.comments.filter(comment => comment.hasOwnProperty("fields")); //正常情況下應該不需要這個filter(是為了避免在Contentful內的不當操作)
setComments(result)
}
})
.catch(console.error)
}
hasOwnProperty("comments")是因為在reference為空時,抓到的資料不會預設為空陣列,因此會抓不到屬性。setComments設定comment狀態,並渲染畫面。 const inputHandler = (e, type) => {
switch(type){
case "userId":
setInput({...input, userId: e.target.value});
break;
case "text":
setInput({...input, text: e.target.value});
break;
}
}
inputHandler的作用為更新input狀態。
  const clickHandler = () => {
    let newEntry
    const clientSpace = clientManage.getSpace('3uaeu4rxc51m') //使用Manage API
    clientSpace
    .then((space) => space.createEntry('comment', { //新增Comment entry
      fields: {
        userId: {"en-US": input.userId},
        content: {"en-US": input.text}
      }
    }))
    .then((entry) => {
      setInput({userId: "", text: ""}) //新增完後,清空輸入框
      entry.publish()  //發布entry
      newEntry = entry  //將entry存起來,等等會用到
    })
    .then(() => {
      clientSpace
      .then((space)=>space.getEntry(postId)) //取得這篇文章的entry object
      .then((entry) => {
        let add = { //定義新增的資料內容
        sys:{
          type: "Link",
          linkType: "Entry",
          id: newEntry.sys.id // 新增的comment的id
          }
        }
        if(!entry.fields.hasOwnProperty("comments")){
          entry.fields.comments = {"en-US":[]}  //若文章原先沒有comment,則會沒有comment這個屬性,因此須自己新增
        }
        entry.fields.comments["en-US"].push(add)
        return entry.update() //更新資料
      })
      .then((entry) => {
        entry.publish() //發布資料
      })
      .then(()=>{
        setTimeout(getComments,3000) //資料發布完成後,再抓取新的comments陣列來渲染,使用setTimeout做延遲的原因是因為發現若是不延遲會有剛更新完的資料抓不到的情形

      })
      .catch(console.error)
    })
  }
按下按鈕->創建新的comment->publish->更新post的comments field->update->publish->重新getComments
  useEffect(()=>{
    getComments();
  },[])
在文章頁面剛載入時,會執行getComments()來抓到文章資料。
useEffect hook的詳細用法可參考官方文件
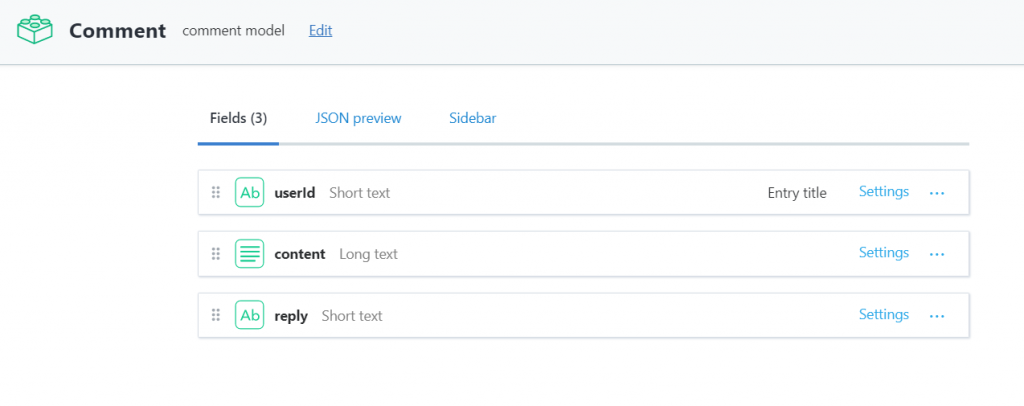
src/components/comment.js
import React from "react"

const Comment = (props) => {
  const data = props.data
  return (
    <div className="row">
        <div className="col-lg-9 col-md-10 mx-auto" style={{background: "#F1F1F1", padding: "10px 15px", marginBottom: "20px"}}>
            <h5>{data.fields.userId}</h5>
            <p>{data.fields.content}</p>
            {data.fields.hasOwnProperty("reply")=="" ? "" : <p style={{fontSize: "18px", color: "#888888", background: "#E3E3E3", padding: "20px", margin: "0", maxWidth: "550px"}}>版主: {data.fields.reply}</p>}
            <span style={{float: "right", fontSize: "18px", color: "#888888"}}>Hong edited on {data.sys.createdAt.split('T').shift().split('-').join('/')}</span>
        </div>
    </div>
)}
export default Comment
這次的步驟比較瑣碎也比較多細節,有些瑣碎的修改也不容易講得清楚,要自己去用用看。
所以文章看完有疑問的,可以把github的程式碼抓回去研究,有疑問的也可以留言一起討論。
部落格功能,也算完成得差不多了,雖然還有不少完善的空間(navbar的首頁按鈕,送出留言時的等待畫面),但可能都會留做事後再修改了。