今天開始把網頁跟Contentful做連結。
Editor: 文章編輯者(雖然可能只有一人)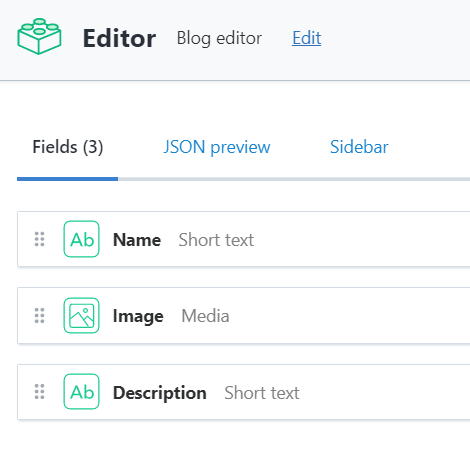
Post: 文章內容(slug屬性是到時候我們拿來當作文章的路由名稱使用)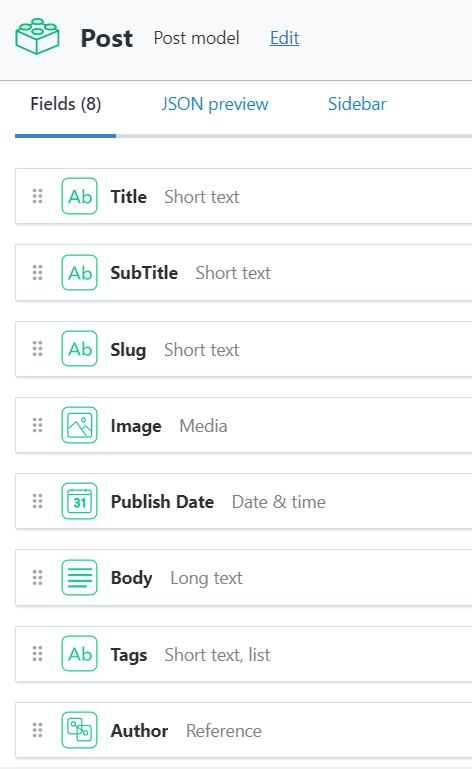
Head: 首頁Header的文字以及圖片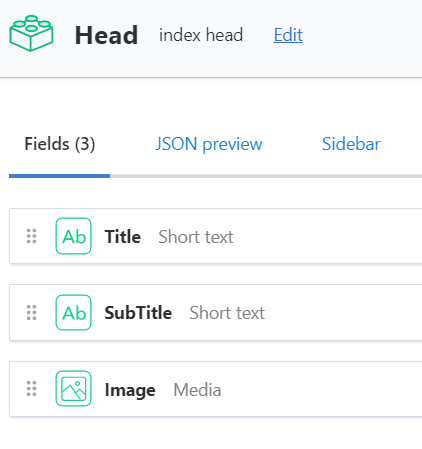
完成後,新增會用到的圖片至Media,並且至Content新增一筆Head的資料,一筆Editor,跟幾筆Post,作為等等要給Gatsbyby抓的資料。
gatsby-source-contentful這個plugin,並且我們需要'gatsby-transformer-remark'來幫助我們將markdown格式的資料進行轉換成html格式,而我們Post的內容部分就會以markdown的格式傳遞,因此會用到這個Gatsby提供的方便工具。執行:npm install --save gatsby-source-contentful
和
'gatsby-transformer-remark',
並且在gatsby-config.js的plugins中加入
{
  resolve: `gatsby-source-contentful`,
  options: {
    spaceId: {SPACE ID},
    accessToken: {DELIVERY ACCESS TOKEN},
  }
},
'gatsby-transformer-remark',
token的獲取方法在Day19.用Gatsby+Contentful五分鐘內做出一個部落格吧中有說明。
gatsby develop,http://localhost:8000/___graphql中執行:{
allContentfulPost {
edges {
node {
title
subTitle
slug
publishDate(formatString: "MMMM Do, YYYY") #回傳指定格式的日期
image {
file {
url
}
}
author {
name
}
tags
body {
#childMarkdownRemark這個field是因為安裝gatsby-source-contentful才產生的,不然原本只能抓到markdown的格式
childMarkdownRemark {
html
}
}
}
}
}
}
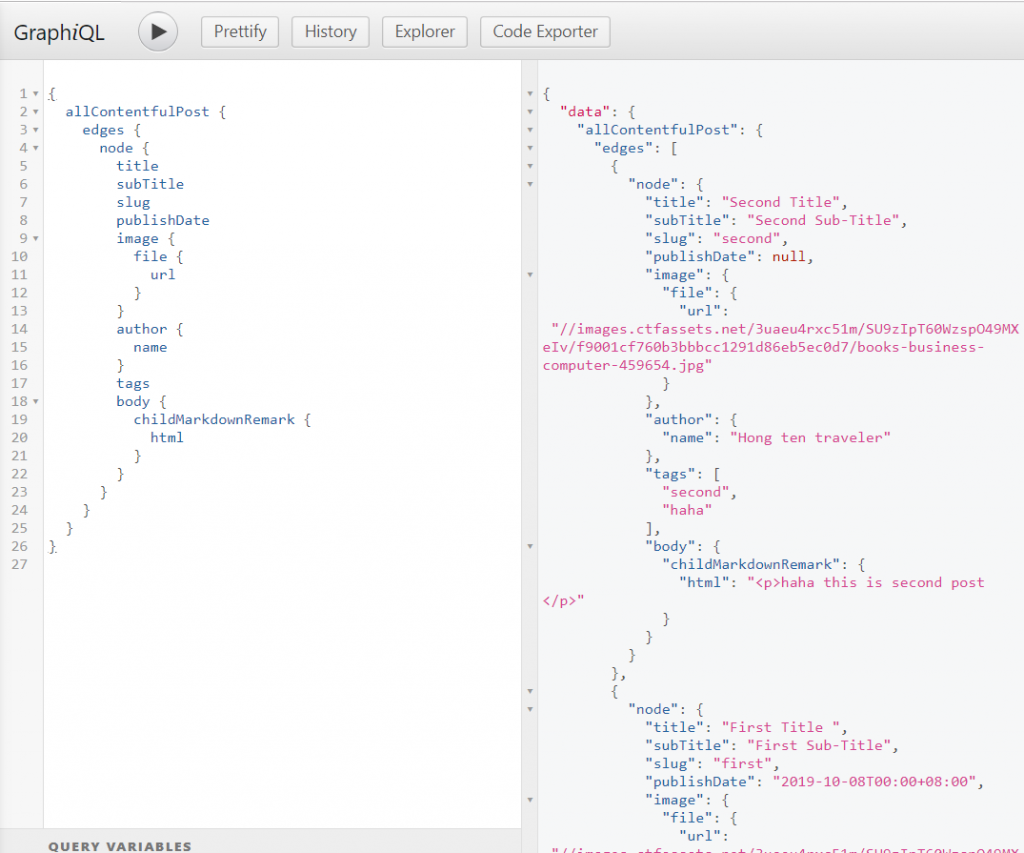
就可以輕易抓到我們要的資料了。
此外,可以觀察一下左邊Explore的部分: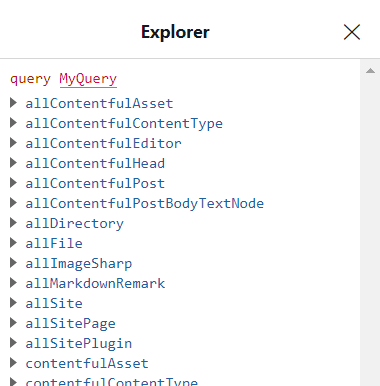
Gatsby已經幫我們創好了Contentful資料的query field了,如果不知道語法怎麼下,就點點看,它就會幫你完成語法了,不會太困難。
能夠做到這麼方便的功能,正是因為Gatsby在建置階段便已經從Contentful抓完資料了,但也因為如此,如果contentful資料有更新,就必須重新啟動Gatsby。
gatsby-node.js:const Promise = require('bluebird')
const path = require('path')
exports.createPages = ({ graphql, actions }) => {
const { createPage } = actions
// 須回傳promise物件,因為graphql查詢為非同步事件。
return new Promise((resolve, reject) => {
resolve(
graphql(
`
{
allContentfulPost {
edges {
node {
title
slug
}
}
}
}
`
).then(result => {
if (result.errors) {
console.log(result.errors)
reject(result.errors)
}
// 根據抓到的文章slug來創建文章頁面,並且使用我們的post-template.js樣板
const posts = result.data.allContentfulPost.edges
posts.forEach((post) => {
createPage({
path: `/blog/${post.node.slug}/`,
component: path.resolve('./src/components/post-template.js'),
// 將slug傳遞過去,作為頁面抓取文章資料的識別符(當然,這裡創建頁面的同時把所需要的資料一次傳過去也是另一種方法)
context: {
slug: post.node.slug
},
})
})
})
)
})
}
如此一來,頁面便會在建置時被創出來了。
重新執行gatsby develop,在網址後面亂打一些字來檢查一下:
http://127.0.0.1:8000/hkjh
完成~
import React from 'react'
export (props)=>{
  return <div>{props.data.example.name}<div>
}
export const pageQuery = graphql`
  query {
    example {
      name
    }
  }
`
於是,我們修改src/components/post-template.js
import React from "react"
import Layout from "./layout"

const PostPage = (props) => {
  const post = props.data.contentfulPost
  return (
  <Layout>
    <header className="masthead" style={{backgroundImage: `url('${post.image.file.url}')`}}>
      <div className="overlay"></div>
      <div className="container">
        <div className="row">
          <div className="col-lg-8 col-md-10 mx-auto">
            <div className="post-heading">
              <h1>{post.title}</h1>
              <h2 className="subheading">{post.subTitle}</h2>
              <span className="meta">Posted by {post.author.name} on {post.publishDate}</span>
            </div>
          </div>
        </div>
      </div>
    </header>
    <article>
      <div className="container">
        <div className="row">
          <div className="col-lg-8 col-md-10 mx-auto" dangerouslySetInnerHTML={{
                __html: post.body.childMarkdownRemark.html,
              }}>  {/*這個語法是為了防止CSRF攻擊,在JSX中放入HTML語法時,你必須確定很確定要放上去的資料是安全無誤的,以免你做一些蠢事,或被有心人士鑽漏洞*/}
          </div>
        </div>
      </div>
    </article>
    <hr/>

  </Layout>
)}
export default PostPage

export const pageQuery = graphql`
  query PostBySlug($slug: String!) {
    contentfulPost(slug: { eq: $slug }) {
      contentful_id
      title
      subTitle
      slug
      publishDate(formatString: "MMMM Do, YYYY")
      image {
        file {
          url
        }
      }
      author {
        name
      }
      tags
      body {
        childMarkdownRemark {
          html
        }
      }
    }
  }
`
查詢語法的部分,使用了一個引入$slug參數的查詢式,Gatsby便會把剛剛gatsby-node.js傳過來的slug帶入查詢式,功能十分強大!
到這邊,頁面就完成了~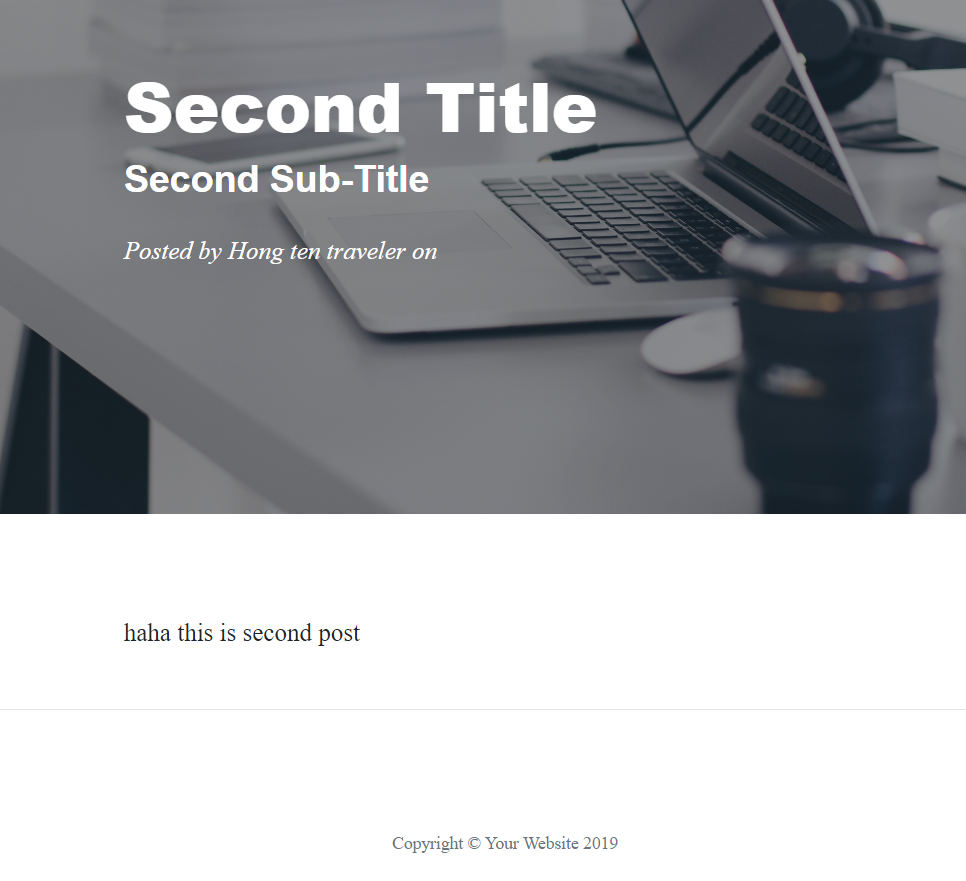
我們的下一步,是要在index頁面顯示文章列表,並做出分頁。
部落格實作文章的每一篇都會commit一次,需要的人可以自行抓下來。
github