iT邦幫忙

0

Vue 畫面處理 & API 串接 自學筆記

接續前個文章 API的基本操作 https://ithelp.ithome.com.tw/articles/10232465
我們直接來透過實戰練習如何串接API並且,將畫面同步渲染,功能為可新增所輸入的資料至畫面,並且可將輸入中的資料做清除,也可對增添至畫面的資料作處理如修改、刪除,並且API資料部分也會與畫面同步。

https://ithelp.ithome.com.tw/upload/images/20200722/20126182zQHHpiWkUj.png

首先,為了串接資料,我們需要引入axios,axios 是一個基於 promise 的 HTTP 庫,簡單的講就是可以發送get、post請求,他支援 Promise API、自動轉換 JSON、在瀏覽器中傳送 XMLHttpRequests 請求等等...


  <script src="https://cdnjs.cloudflare.com/ajax/libs/axios/0.18.0/axios.js"></script>

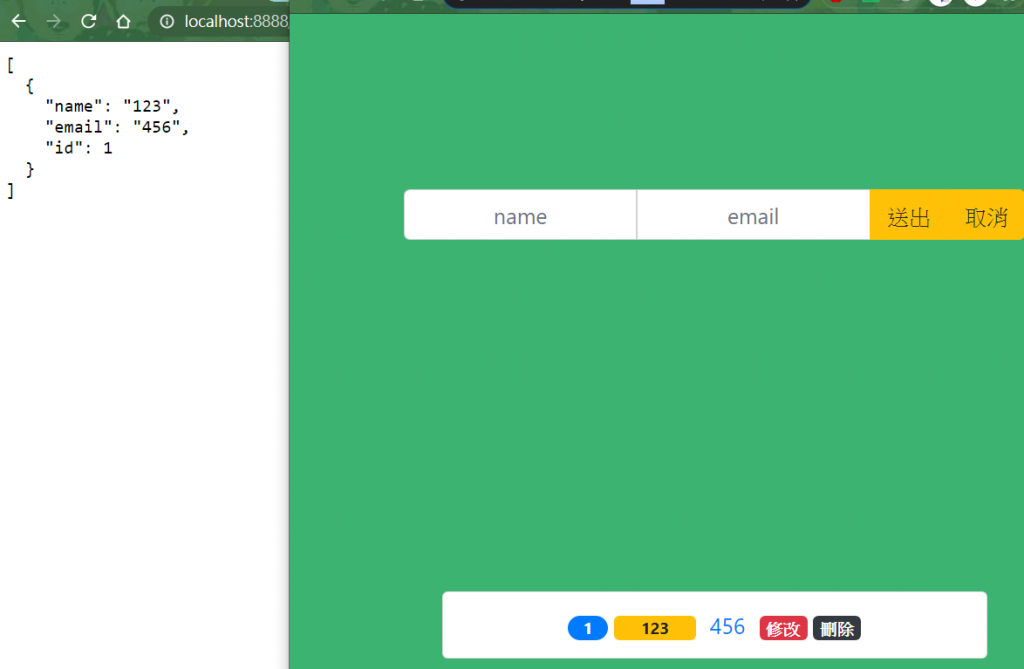
而我們的API也就是前章利用npm run json所得到的Url http://localhost:8888/contcat
首先,我們先建立Vue實體,並設置會使用到的資料,而loading為頁面的載入完成狀態。

            new Vue({
                el: '#app',
                data: {
                    loading: false,
                    // 保存聯絡人
                    contacts: [],
                    // 來判斷是否在修改
                    editIndex: null,
                    // 輸入的資料
                    input: {
                        name: '',
                        email: ''
                    }
                },

並且我們在html部分,判斷loading狀態,如果載入完成(loading=false),才顯示畫面,如果還在載入(loading=true)就顯示Loading...。


        <section v-if="loading">
            Loading....
        </section>
        <section v-else>
        ...

再來,我們將input及送出、取消按鈕綁定資料及事件,input部分與我們資料做綁定,而送出及取消按鈕做事件的綁定。


                    <div class="input-group">
                        <!-- .trim 去頭尾空白 -->
                        <input
                            type="text"
                            class="form-control"
                            placeholder="name"
                            v-model.trim="input.name"
                        />
                        <input
                            type="text"
                            class="form-control"
                            placeholder="email"
                            v-model.trim="input.email"
                        />
                        <div class="input-group-append">
                            <button
                                class="btn btn-warning"
                                type="button"
                                @click="submitHandler"
                            >
                                送出
                            </button>
                            <button
                                class="btn btn-warning"
                                type="button"
                                @click="cancelHandler"
                            >
                                取消
                            </button>
                        </div>
                    </div>

而在資料顯示部分,我們利用v-for獲取在contacts的資料及其下標,並將修改及刪除按鈕做事件綁定。


                       <li
                            class="list-group-item"
                            v-for="(item,index) in contacts"
                        >
                            <span class="badge badge-pill badge-primary number col-sm-1">{{item.id}}
                            </span>
                            <span class="badge badge-warning name col-sm-2">
                                {{item.name}}
                            </span>
                            <a
                                class="col-sm-4"
                                href="'mailto:'item.email"
                            >
                                {{item.email}}
                            </a>
                            <span
                                class="badge badge-danger"
                                class="col-sm-1"
                                @click="editHandler(index)"
                            >修改</span>
                            <span
                                class="badge badge-dark"
                                class="col-sm-1"
                                @click="delectHandler(index)"
                            >刪除</span>
                        </li>

axios.get(url[, config])

首先,我們要讀取API,而我們在mounted的階段讀取,也就是新創建的 vm$el 取代掉原本寫好的$el(#app上的html),正式掛載至畫面上後,而此處我們利用axios.get('url')也就是我們所要獲取的API,會回傳一個 Promise 物件,在Promise有內建4個方法 then :處理 Promise返回的結果 catch:抓取Promise 上異常 constructor:Promise的構造函數 finally:不管最後成功失敗 都會執行的方法,而我們在這邊使用then,他會返回一個 response,而其response下有一個data,也就是我們要獲取的API資料,而catch則是直接回報錯誤。


                mounted() {
                    // 資料在更新時,就顯示loading
                    this.loading = true;
                    // 將路徑貼上
                    axios.get('http://localhost:8888/contcat')
                        .then((res) => {
                            console.log(res);
                            // 將獲取的資料同步到我們contacts
                            this.contacts = res.data;
                            // 成功讀取再改回loading狀態
                            this.loading = false;
                        })
                        .catch((err) => {
                            console.log(err);
                        })
                },

此為取消按鈕的函數,因為我們沒有進行修改,故將修改的狀態設為null,並將在畫面上input中的資料都清除。


                    cancelHandler() {
                        this.editIndex = null;
                        this.input.name = "";
                        this.input.email = "";
                    },

axios.delete(url[, config])

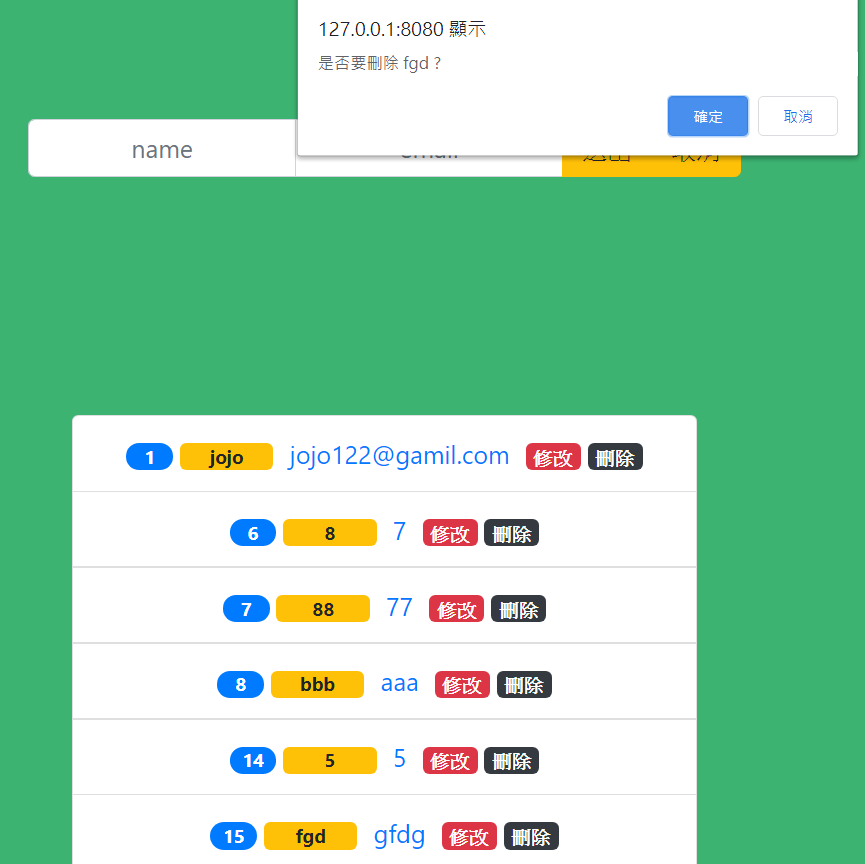
此為刪除資料的函數,首先利用confirm方法(產生確定與取消的對話框,點擊確定按鈕,返回 true,反之false),來做一個是否要刪除地確認,而後將loading改為true因為正在載入資料,接著利用axios.delete來刪除我們指定的API中的資料,在URL後面加上我們所要刪除資料的位置(target.id為當前點擊資料的id),在畫面部分,我們利用splice方法將起始位置設為當前下標,而刪除數目設為1,也就是刪除當前下標的資料,而後呼叫cancelHandler,來清除input中的資料,並將loading狀態改為false,代表已經載入完成。


                    delectHandler(index) {
                        let target = this.contacts[index];
                        if (confirm(`是否要刪除 ${target.name} ?`)) {
                            this.loading = true;
                            // axios.delete(url[, config])
                            axios.delete('http://localhost:8888/contcat/' + target.id)
                                .then((res) => {
                                    // 將input的資料push至畫面
                                    // splice(index,1) 起始位置為傳入的下標,並刪除一個
                                    this.contacts.splice(index, 1);
                                    this.cancelHandler();
                                    // 資料更新完成時,初始化loading
                                    this.loading = false;

                                })
                                .catch((err) => {
                                    console.log(err);
                                })
                        }

https://ithelp.ithome.com.tw/upload/images/20200722/20126182F1M6PzCWAd.png

axios.post(url[, data[, config]])

此為送出資料部分的函數,首先我們要判斷如果其中一筆資料(name or email)為空就退出,並且判斷是否為修改階段(editIndex == null?),不是的話我們就利用axios.post,第一個參數為我們要傳入的URL,第二個(this.input)為我們要傳入的資料,同步更新到API,而在畫面部分,我們將獲取的資料(input的資料)利用push方法渲染至畫面。


                    submitHandler() {
                        // 解構出資料name,email
                        let {
                            name,
                            email
                        } = this.input;
                        if (!name || !email) return
                        // 資料在更新時,就顯示loading
                        this.loading = true
                        // 判斷是否為修改階段,如果不是才進去
                        if (this.editIndex == null) {
                            // 目標位址,資料,初始配置
                            // axios.post(url[, data[, config]])
                            // 將input送出的資料,同步更新到URL
                            axios.post('http://localhost:8888/contcat',
                                    // this.input 也就是我們要更新上url的資料
                                    // {name,email}
                                    this.input
                                )
                                .then((res) => {
                                    // 將獲取的資料(input的資料)push至畫面
                                    this.contacts.push(res.data);
                                    // 記得清空input
                                    this.cancelHandler();
                                    // 資料更新完成時,初始化loading
                                    this.loading = false;
                                    console.log(res.data, this.contacts);
                                })
                                .catch((err) => {
                                    console.log(err);
                                })

此為修改部分的函數,主要就是將我們所要修改的資料,name,email傳至input顯示,並將editIndex的值設為當前下標,表示要進行修改。


                    editHandler(index) {
                        // 將點擊所要修改對應的name,email拆出來
                        let {
                            name,
                            email
                        } = this.contacts[index];
                        // 再將其要修改的值賦予至input
                        // this.input.name = name ; 
                        // this.input.email = email ; 

                        // 資料擺放順序並不會影響
                        this.input = {
                            email,
                            name
                        }
                        // 當在修改就賦值
                        this.editIndex = index;
                        this.loading = false;
                    }
                },

axios.put(url[, data[, config]])

此部分為修改的處理,與送出的函數在同一個位置,當editIndex不為null即會進入此段程式碼,修改資料利用axios.put一次將全部資料覆蓋URL的部分指定在當前要修改的API位置(this.contacts[this.editIndex].id),在畫面渲染部分,我們直接將修改的資料,賦予至我們當前要修改的資料。


{
                            // 修改資料利用put一次將全部資料覆蓋
                            // axios.put(url[, data[, config]])
                            // url為當前要修改的那筆資料
                            axios.put('http://localhost:8888/contcat/' + this.contacts[this.editIndex].id,
                                    this
                                    .input)
                                .then((res) => {
                                    console.log(this.input)
                                    console.log(res.data);
                                    // 將input的資料傳至畫面
                                    this.contacts[this.editIndex] = res.data
                                    this.cancelHandler();
                                    // 資料更新完成時,初始化loading
                                    this.loading = false;
                                })
                                .catch((err) => {
                                    console.log(err);
                                })
                        }


圖片
  直播研討會
圖片
{{ item.channelVendor }} {{ item.webinarstarted }} |
{{ formatDate(item.duration) }}
直播中

2 則留言

2
eric19740521
iT邦新手 1 級 ‧ 2020-07-23 12:22:03

後面文章會有 權限的文章嗎???
比如使用者登入系統.才能新增修改刪除...

no027843 iT邦新手 5 級 ‧ 2020-07-23 18:07:05 檢舉

看我的學習進度 哈哈 短時間內應該是不會有 拍謝 /images/emoticon/emoticon25.gif
不過我會努力ㄉ

0
iT邦新手 5 級 ‧ 2020-08-14 15:50:14

get 可以寫在 mounted 之前的三個生命週期
參考

我要留言

立即登入留言