熬了好久,終於要開始做用戶相關的功能啦!雖然 Laravel 預設有幫我們做了一些相關的功能,但沒有完全滿足這個 Lightning 的需求,先來做一些調整。
基本的用戶名稱、E-mail、密碼等都有了,不過我還想要增加用戶簡介、頭像兩個欄位。首先是 Migration,在 password 後面增加兩個欄位。用戶簡介不是必填,所以後面要串 nullable(),即允許值為 null:
database/migrations/2014_10_12_000000_create_users_table.php
Schema::create('users', function (Blueprint $table) {
    ...
    $table->string('password');
    $table->string('avatar');
    $table->string('description', 100)->nullable();
    $table->rememberToken();
    $table->timestamps();
});
然後跑 Migrate:
php artisan migrate
在 User Model 的 $fillable 裡要加上兩個欄位:
app/User.php
protected $fillable = [
    'name', 'email', 'password', 'description', 'avatar',
];
用戶頭像的預設值會使用 Gravatar 取得,Gravatar 是一個用戶頭像服務,只要你在 Gravatar 上傳你的頭像,在任何支援的平台都可以使用 E-mail 取得頭像。根據 Gravatar 的 PHP 使用方式,我們可以在 User Model 裡增加取得頭像的網址。而且如果找不到頭像時,還可以設定 Gravatar 回傳的預設圖片:
app/User.php
public function getAvatarUrl(string $default = 'mp', int $size = 80)
{
    return sprintf(
        'https://www.gravatar.com/avatar/%s?d=%s&s=%s',
        md5(strtolower(trim($this->email))), urlencode($default), $size
    );
}
然後要監聽當新增 Model 時,自動設定預設頭像:
app/User.php
protected static function booted()
{
    static::creating(function (self $user) {
        if (! $user->avatar) {
            $user->avatar = $user->getAvatarUrl();
        }
    });
}
這樣用戶頭像的基本功能就搞定了!
產生假用戶資料的 UserFactory 也要改一下:
database/factories/UserFactory.php
$factory->define(User::class, function (Faker $faker) {
    return [
        ...
        'password' => '$2y$10$92IXUNpkjO0rOQ5byMi.Ye4oKoEa3Ro9llC/.og/at2.uheWG/igi', // password
        'description' => $faker->realText(10),
        'remember_token' => Str::random(10),
    ];
});
還有需要新增 UserSeeder:
php artisan make:seeder UserSeeder
為了方便測試,先新增一個我指定名稱的用戶,其他隨便產生:
database/seeds/UserSeeder.php
use App\User;

public function run()
{
    factory(User::class)->create([
        'name' => 'Lucas Yang',
        'email' => 'yangchenshin77@gmail.com',
        'description' => '夜空中的小星星,也會閃耀著光芒~~',
    ]);

    factory(User::class, 9)->create();
}
再來把 DatabaseSeeder 裡的 UserSeeder 去掉註解就行了:
database/seeds/DatabaseSeeder.php
public function run()
{
    $this->call(UserSeeder::class);
}
最後執行產生假資料:
php artisan db:seed
把 Tinker 打開,查一下剛才產生的用戶帳號:
php artisan tinker
>>> App\User::where('email', 'yangchenshin77@gmail.com')->first()
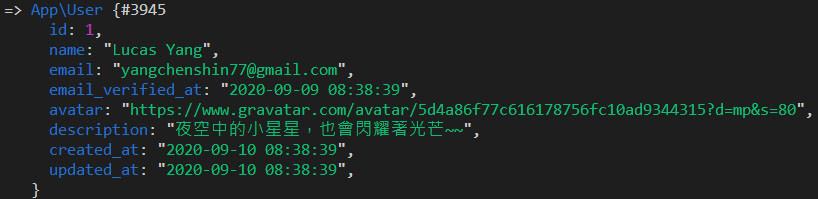
之後就可以用這隻帳號闖蕩異世界登入 Lightning 囉!
前端會花比較長的篇幅做,先偷跑登入的後端部分。能少打字就少打,人家已經幫我們做好的的 Laravel UI 直接拿來用:
composer require laravel/ui
Jetstream 不會在本系列中使用,如果你有興趣,可以自行把 Jetstream 加到 Lightning 試試。
原本 Laravel UI 附的視圖不需要,我們只要後端的 Controllers:
php artisan ui:controllers
雖然提供了滿多功能的,但我這次只打算做登入和註冊,留下 LoginController 和 RegisterController,其他扔掉。既然要用我們的視圖,那就要註冊進去。覆蓋原本的 showLoginForm() 回傳我們的 Inertia 視圖:
app/Http/Controllers/Auth/LoginController.php
use Inertia\Inertia;

public function showLoginForm()
{
    return Inertia::render('Auth/Login');
}
註冊登入的路由,把不用的忘記密碼功能先關掉:
routes/web.php
use Illuminate\Support\Facades\Auth;

Auth::routes(['reset' => false]);
然後改一下登入成功跳轉的頁面:
app/Providers/RouteServiceProvider.php
public const HOME = '/';
暫時先把狀態先調成未登入的狀態,可以看到登入跟註冊兩個按鈕的畫面:
resources/js/Layouts/AppLayout.vue
<template>
  ...
            <template v-if="true">
              ...
            </template>
  ...
</template>
上面大部分都是 Laravel 相關,大家應該都很熟悉。再來就是用戶登入的部分了,篇幅會有點長,提前預警一下!
Lightning 範例程式碼:https://github.com/ycs77/lightning