昨天已經寫完了地圖小工具的所有功能function,今天就要要把這些funtion塞到介面上給使用者自由操作自由開關。
另外再開發一個小功能,可以有一個框框去比較兩個不同的底圖圖層。
今天要來統整地圖小工具,介面主要採用Semantic UI (這會在本系列最後幾天說明),畢竟一個死工程師沒有美感也是再正常不過了,就別勉強自己還是直接套用別人寫好的吧!
先寫一個html頁面,塞到整個網頁左側第二欄空間中,不採用iframe的做法,純粹在Container內載入html,因此為了避免命名參數混淆,我自己後面都會採閉包的方式進行程式碼的撰寫。
但是在WebGIS基本系列我還是會以一般的寫法進行撰寫,讓大家回憶js語法和熟悉邏輯建立。
建立MapControl.html頁面
<!DOCTYPE html>
<html>
<head>
    <meta charset="utf-8" />
    <title></title>
    <style>
        div.checkbox {
            margin: 10px;
        }
    </style>
</head>
<body>
    <h2>圖面顯示功能</h2>
    <div class="ui left aligned grid">
        <div class="column">
            <div class="ui segment" id="mapcontrolgrid">
                <div class="ui toggle checkbox">
                    <input type="checkbox" id="showZoomSlider">
                    <label>顯示縮放滑動條</label>
                </div>
                <div class="ui toggle checkbox">
                    <input type="checkbox" id="showMouseCoor">
                    <label>顯示滑鼠位置坐標</label>
                </div>
                <div class="ui toggle checkbox">
                    <input type="checkbox" id="showScale">
                    <label>顯示比例尺</label>
                </div>
                <div class="ui toggle checkbox">
                    <input type="checkbox" id="showEagleEye">
                    <label>顯示鷹眼</label>
                </div>
                <div class="ui toggle checkbox">
                    <input type="checkbox" id="showFullScreenBtn">
                    <label>顯示全螢幕按鈕</label>
                </div>
            </div>
        </div>
    </div>
    <script type="text/javascript" src="map_module/widget/BasicTool/jMapControl.js"></script>
    <script>
        // 初始化 地圖小工具頁面
        initMapControlPage();
    </script>
</body>
</html>
首先建立工具清單config_mapcontrol
var config_mapcontrol = [
    {
        id: "showZoomSlider",
        container: "",
        open: false
    }, {
        id: "showMouseCoor",
        container: "mouse-position",
        open: false
    }, {
        id: "showScale",
        container: "",
        open: false
    }, {
        id: "showEagleEye",
        container: "",
        open: false
    }, {
        id: "showFullScreenBtn",
        container: "",
        open: false
    }
];
由上述可以看到html最後執行了initMapControlPage()初始化,這邊主要是要寫一支判斷目前哪些功能是開的、哪些是關的
因為每開啟左側功能第二層功能頁面一次,畫面就會重新載入一次(這個是本網頁的設計),但有些功能已經在地圖上了,勢必要把這些功能在html頁面上顯示目前是開啟的狀態。
以下功能寫在jMapControl.js
function initMapControlPage() {
    $.each(config_mapcontrol, function (index, item) {
        if (item.open) {
            $("#" + item.id).prop("checked", true);
        } else {
            $("#" + item.id).prop("checked", false);
        }
    });
}
建立完頁面以後,將onclik事件綁定在開關input上,一點選這個功能即觸發事件,判斷是開啟還是關閉後,呼叫openMapControlFunc()去執行相對應動作。
$("#mapcontrolgrid input").click(function () {
    var checkboxid = $(this)[0].id;
    var config_index = config_mapcontrol.indexOf(config_mapcontrol.filter(i => i.id === checkboxid)[0]);
    console.log(checkboxid);
    if ($(this).prop("checked")) {
        // 開啟 Checked
        config_mapcontrol[config_index].open = true;
        openMapControlFunc(config_mapcontrol[config_index].id, config_mapcontrol[config_index].container, true);
    } else {
        config_mapcontrol[config_index].open = false;
        openMapControlFunc(config_mapcontrol[config_index].id, config_mapcontrol[config_index].container, false);
    }
});
將昨天寫的各種功能寫在openMapControlFunc()內進行toggle
function openMapControlFunc(id, container, open) {
    var zoomsliderControl = new ol.control.ZoomSlider();
    var mousePositionControl = new ol.control.MousePosition({
        //坐標格式
        coordinateFormat: new ol.coordinate.createStringXY(4),
        //坐標系統
        projection: 'EPSG:4326',
        //坐標資訊顯示樣式名稱
        className: 'custom-mouse-position',
        //顯示坐標的容器
        target: container,
        //未定義坐標的標記
        undefinedHTML: ' '
    });

    var scaleLineControl = new ol.control.ScaleLine({
        units: "metric"
    });
    var overviewMapControl = new ol.control.OverviewMap({
        className: 'ol-overviewmap ol-custom-overviewmap',
        layers: [
            new ol.layer.Tile({
                source: new ol.source.XYZ({
                    url: "https://wmts.nlsc.gov.tw/wmts/PHOTO2/default/GoogleMapsCompatible/{z}/{y}/{x}",
                    wrapX: false
                })
            })
        ],
        collapseLabel: '\u00BB',
        label: '\u00AB',
        collapsed: false
    });
    var fullscreenControl = new ol.control.FullScreen();
    if (open) {
        if (id === "showZoomSlider") {
            $("#map .ol-zoom .ol-zoom-out").css("margin-top", "204px");
            map.addControl(zoomsliderControl);
        }else if (id === "showMouseCoor") {
            map.addControl(mousePositionControl);
        } else if (id === "showScale") {
            map.addControl(scaleLineControl);
        } else if (id === "showEagleEye") {
            map.addControl(overviewMapControl);
        } else if (id === "showFullScreenBtn") {
            map.addControl(fullscreenControl);
        }
    } else {
        var controls = map.getControls(); // this is a ol.Collection
        controls.forEach(function (control) {
            if (id === "showZoomSlider" && control instanceof ol.control.ZoomSlider) {
                $("#map .ol-zoom .ol-zoom-out").css("margin-top", "");
                map.removeControl(control);
            } else if (id === "showMouseCoor" && control instanceof ol.control.MousePosition) {
                map.removeControl(control);
            } else if (id === "showScale" && control instanceof ol.control.ScaleLine) {
                map.removeControl(control);
            } else if (id === "showEagleEye" && control instanceof ol.control.OverviewMap) {
                map.removeControl(control);
            } else if (id === "showFullScreenBtn" && control instanceof ol.control.FullScreen) {
                map.removeControl(control);
            }
        });
    }
}
新增css
.custom-mouse-position {
    color: rgb(255, 255, 255);
    font-size: 12px;
    font-family: "微軟正黑";
}

.ol-scale-line {
    left: inherit;
    right: 50px;
}

.ol-custom-overviewmap, .ol-custom-overviewmap.ol-uncollapsible {
    bottom: 50px;
    left: auto;
    right: 0;
    top: auto;
}
    /* 鷹眼控件展開時外框樣式 */
    .ol-custom-overviewmap:not(.ol-collapsed) {
        border: 1px solid black;
    }
    /* 鷹眼地圖容器樣式 */
    .ol-custom-overviewmap .ol-overviewmap-map {
        border: none;
        width: 200px;
    }
    /* 鷹眼對應範圍樣式 */
    .ol-custom-overviewmap .ol-overviewmap-box {
        border: 2px solid red;
    }
    /* 鷹眼控件展開時的樣式 */
    .ol-custom-overviewmap:not(.ol-collapsed) button {
        bottom: auto;
        left: auto;
        right: 1px;
        top: 1px;
    }
建完上述功能即可自由開關地圖小工具~就是右側那邊一群小按鈕和視窗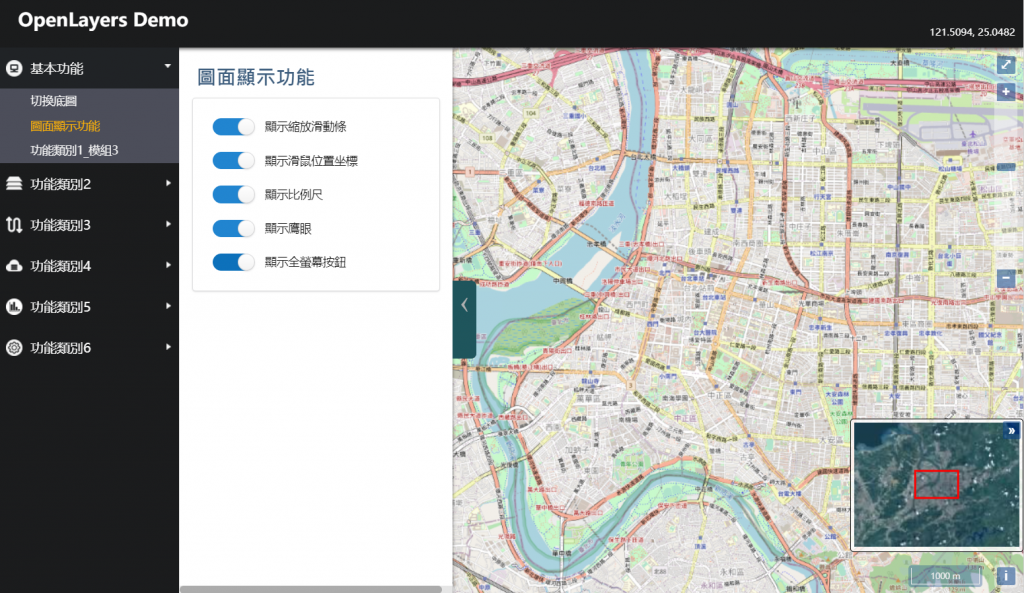
Openlayers的官網範例
這個功能可以去比對不同圖層的差異,自由的移動視窗位置與大小
首先先建立預計畫面,一樣寫在MapControl.html的小工具下方
規劃是會自動產生可以比較的底圖列表 (去除現在正在使用的底圖),有一個勾選區可以進行選擇,並且只能選擇一種
HTML頁面如下
<div class="ui left aligned grid">
    <div class="column">
        <div class="ui segment">
            <div>
                <div class="ui toggle checkbox">
                    <input type="checkbox" id="showLayerSearch">
                    <label>開啟圖層探查功能</label>
                </div>
                <table class="ui very basic compact table" id="layersearchtable" style="display:none;width:100%;">
                    <thead>
                        <tr>
                            <th>圖層名稱</th>
                            <th class="center aligned">探查</th>
                        </tr>
                    </thead>
                    <tbody>
                    </tbody>
                </table>
                <!--這個是後來新加的,因此後面的成果圖會看不到這塊-->
                <div class="ui info small message">
                    <ul class="list">
                        <li>目前使用之底圖不會出現在清單中</li>
                        <li>可使用鍵盤 ↑ 和 ↓ 調整圓圈大小</li>
                    </ul>
                </div>
            </div>
        </div>
    </div>
</div>
建立開啟圖層探查功能的觸發事件
$("#showLayerSearch").click(function () {
    if ($(this).prop("checked")) {
        // 開啟 Checked
        initLayerSearchTable();
        // 顯示table區塊
        $("#layersearchtable").show('fast');
    } else {
        // 隱藏table區塊
        $("#layersearchtable").hide('fast');
    }
});
初始化圖層探查列表
function initLayerSearchTable() {
    var tablehtml = "";
    // 迴圈組html
    $.each(config_basemap, function (index, item) {
        if (item.id !== map.e_getBasemap().id) {
            tablehtml += '<tr id="' + item.id + '_SearchTable"><td>' + item.name + '</td><td class="center aligned"><div class="ui fitted radio checkbox"><input type="radio" name="left" onclick="selectSearchLyr(this)"><label></label></div></td></tr>';
        }
    });
    // 將組完的html塞回頁面顯示
    $("#layersearchtable tbody").html(tablehtml);
}
畫面如下,接下來就要建置選擇圖層以後的功能
function selectSearchLyr()為點選後第一個執行的函式,主要就是建立圖層與設定該圖層的透明度,接著即執行openLayerSearchFunc()
function selectSearchLyr(checkbox) {
    if ($(checkbox).prop("checked")) {
        map.e_changeBasemap(map.e_getBasemap().id);
        // 抓layerID
        var searchlytid = $(checkbox).parents("tr")[0].id.replace("_SearchTable", "");
        //圈裡面圖層的順序要在後面
        map.e_getLayer(searchlytid).setZIndex(1);
        map.e_getLayer(searchlytid).setVisible(true);
        openLayerSearchFunc(searchlytid);
    }
}
openLayerSearchFunc()為主要功能建置之函式
撰寫keyDown事件,可以在按下任何按鍵時觸發,其事件的代碼可以使用 Key and Character Codes vs. Event Types 這個網站進行測試與查詢
本次用到的有:↑:38↓:40
每按一次就增加/減少半徑5個單位
後面的程式碼則是在說明滑鼠移動的mousemove、mouseout監聽事件、和圖面渲染的prerender、postrender監聽事件
最後綁定當unchecked的時候,移除監聽事件,恢復一般的地圖頁面
function openLayerSearchFunc(searchlyrid) {
    var imagery = map.e_getLayer(searchlyrid);
    var container = document.getElementById('map');
    var radius = 75;
    // 撰寫 keydown 監聽
    document.addEventListener('keydown', function (evt) {
        if (evt.which === 38) {
            radius = Math.min(radius + 5, 150);
            map.render();
            evt.preventDefault();
        } else if (evt.which === 40) {
            radius = Math.max(radius - 5, 25);
            map.render();
            evt.preventDefault();
        }
    });
    var mousePosition = null;
    var RespondMouseOver = function (event) {
        mousePosition = map.getEventPixel(event);
        map.render();
    };
    var RespondMouseOut = function (event) {
        mousePosition = null;
        map.render();
    };
    container.addEventListener('mousemove', RespondMouseOver);
    container.addEventListener('mouseout', RespondMouseOut);
    var RespondPreRender = function (event) {
        var ctx = event.context;
        ctx.save();
        ctx.beginPath();
        if (mousePosition) {
            // only show a circle around the mouse
            var pixel = ol.render.getRenderPixel(event, mousePosition);
            var offset = ol.render.getRenderPixel(event, [mousePosition[0] + radius, mousePosition[1]]);
            var canvasRadius = Math.sqrt(Math.pow(offset[0] - pixel[0], 2) + Math.pow(offset[1] - pixel[1], 2));
            ctx.arc(pixel[0], pixel[1], canvasRadius, 0, 2 * Math.PI);
            ctx.lineWidth = 5 * canvasRadius / radius;
            ctx.strokeStyle = 'rgba(0,0,0,0.5)';
            ctx.stroke();
        }
        ctx.clip();
    };
    var RespondPostRender = function (event) {
        var ctx = event.context;
        ctx.restore();
    };
    imagery.on('prerender', RespondPreRender);
    // after rendering the layer, restore the canvas context
    imagery.on('postrender', RespondPostRender);
    $("#showLayerSearch").click(function () {
        if ($(this).prop("checked") === false) {
            container.removeEventListener('mousemove', RespondMouseOver);
            container.removeEventListener('mouseout', RespondMouseOut);
            imagery.un('prerender', RespondPreRender);
            imagery.un('postrender', RespondPostRender);
            map.e_changeBasemap(map.e_getBasemap().id);
        }
    });
}
最後完成畫面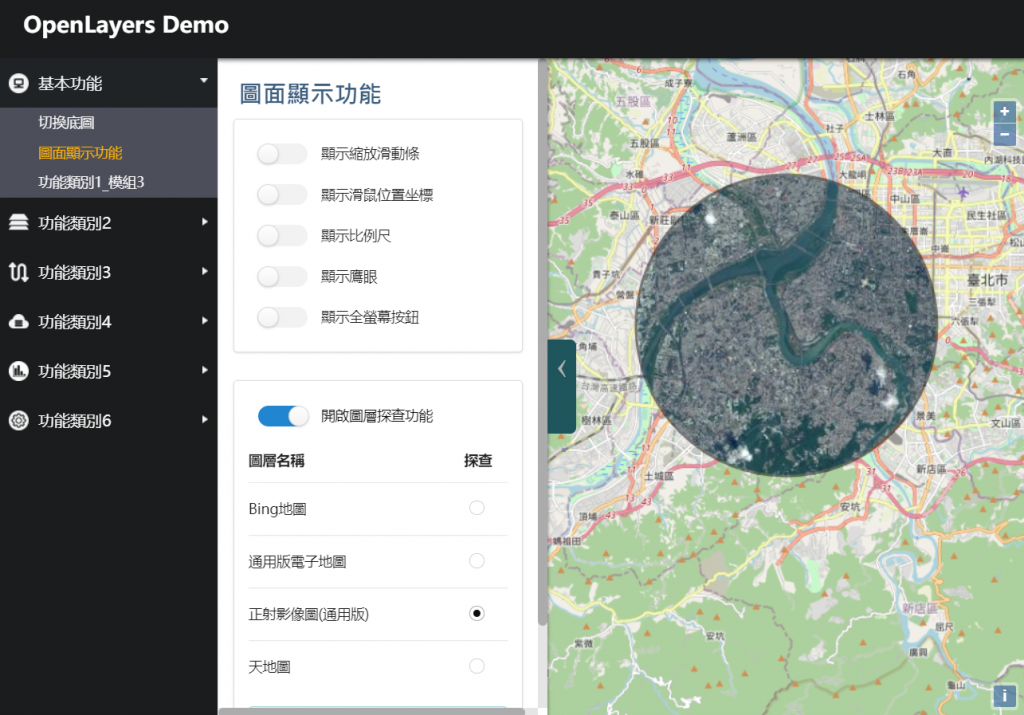
今天的進度就是將昨天已經建立好的功能給他一個頁面,便於使用者操作,另外開發了圖層探查的功能,該程式碼較為複雜可能需要花一點時間吸收和理解。
到目前還是基本功能的建置,基本功能已經快到尾聲了,剩下明天的圖面量測功能了!
後面就要開始寫一些實務上比較會碰到的相關議題,雖然會變得越來越複雜,但不用擔心,中間時不時會穿插一些理論介紹的頁面,可以當作無腦看科普文章學學知識、喘口氣、調整心情、思考人生後再出發。