俗話說的好,長得好看就是吃香
在經歷了昨天慘不忍睹的規劃階段後,就很想趕快把頁面弄得能看一點。
雖然可能沒辦法在這一篇內翻新整個頁面,但其實只要改一個地方就能夠改變很多。
那就是我們一進來就看的到的主畫面:FeaturedBoard。
那我們就開始來做吧!
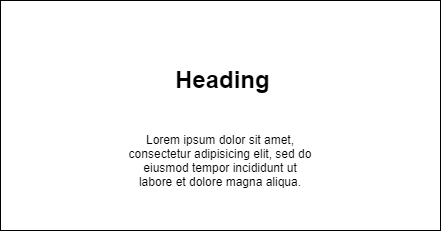
預設畫面會長這樣。

(別擔心,最後的成果不會看起來這麼單調的~)
首先先附上今天會用到的 css 。
/* 這是套用到整份文件都會用到的 */
* {
  margin: 0;
  padding: 0;
  box-sizing: border-box;
}
/* 設定會常用到的顏色 */
:root {
  --mainWhite: #ffffff;
  --mainBlack: #000000;
  --mainGrey: #cecece;
  --mainBlue: #5ef0f5;
  --mainBrown: #ebd0ac;
 }
/* 只要使用 body 這個標籤的都會被調用這個 css */
body {
  padding-top: 45px;
  color: var(--mainBlack);
  background: var(--mainWhite);
  font-family: 'Montserrat', sans-serif;
  line-height: 1.4;
}
/*使用相同的 classname 就會套用上去*/
.navbar{
  background: var(--mainGrey);
  position: fixed;
  top: 0;
  left: 0;
  width: 100%;
}
.footer{
  background: var(--mainGrey);
  position: relative;
  margin-top: -100px;
  left: 0;
  height: 100px;
  width: 100%;
}
/* board */
.board,
.featuredboard{
  height:360px;
  background: var(--mainBlue);
  display: flex;
  justify-content: center;
  width: 100%;
}
.featuredboard{
  background: url("./images/1.jpg") center/cover no-repeat;
  min-height: 100vh
}
.coverboard{
  background :rgba(0, 0, 0, 0.5);
  color: var(--mainWhite);
}
/* board end */
.banner{
  display: inline-block;
  color: var(--mainWhite);
  padding: 2rem 1rem;
  margin-top: 6rem;
  margin-left: 10rem;
  margin-right: 10rem;
}
.banner article{
  font-size: 1.5rem;
}
.title{
  text-align: center;
  margin-top: 12rem;
}
.title h1{
  font-size: 4rem;
}
依照我們所規劃的,第一個主頁面會有
首先先創造兩個新 component :Title & Banner,並各自加上備註:
{/* this is banner*/}
import React from 'react'
export default function banner() {
    return (
        <div>
            banner
        </div>
    )
}

{/* this is title */}
import React from 'react'
export default function title() {
    return (
        <div >
            title
        </div>
    )
}
然後把 banner import 進 app.js 裡
{/* this is app.js */}
    <div>
      <Navbar />
      <FeaturedBoard/>
        <Banner/>
      <h3>Person blog by react</h3>
      <InfoBoard />
      <Footer />
    </div>
然後 title import 進 FeaturedBoard
{/* this is FeaturedBoard.js */}

    <div className="featuredboard">
      <Title/>
    </div>
這樣基本的設定都做好了。
註:可能你這時候會想問說,為什麼要把 banner 和 title 分開 import ?
這是因為我們要將 banner 作為 props 傳進 FeaturedBoard 裡。
一來是因為如果後面 component 寫的太複雜,易讀性會很低,也會難以維護。二來是因為我想將他當作一個可以重複呼叫的模組,不過可能是我太菜了,也沒辦法想很遠,有可能也不會實現,總之就先做吧XD。
所以這時候我們就來把 FeaturedBoard 改造一下吧,在這裡也順便套一下 css。
import React from "react";
import Title from "./Title";
export default function FeaturedBoard({ children, title }) {
  return (
    <div className="featuredboard">
      <div className="coverboard">
      <Title title={title}/>
      {children}
      </div>
    </div>
  );
}
回到 app.js 把 banner 放進去
{/* this is banner*/}
    <div>
      <Navbar />
      <FeaturedBoard >
        <Banner />
      </FeaturedBoard>
      <h3>Person blog by react</h3>
      <InfoBoard />
      <Footer />
    </div>
這樣基本上架構就好了,這樣 banner 就可以作為 children 被傳進 FeaturedBoard 了,接下來設置接收資料的接口。
{/* this is banner*/}
import React from 'react'
export default function banner({article}) {
    return (
        <div className="banner">
            <article>{article}</article>
        </div>
    )
}

{/* this is title */}
import React from 'react'
export default function title({title}) {
    return (
        <div className="title">
            <h1>{title}</h1>
        </div>
    )
}
回到 app.js 把資料設定好傳進去看看吧!
{/* this is app.js*/}
export default function App() {
  let article =
    "Lorem ipsum dolor sit amet, consectetur adipiscing elit. Donec pretium ante erat, vitae sodales mi varius quis. Etiam vestibulum lorem vel urna tempor, eu fermentum odio aliquam. Aliquam consequat urna vitae ipsum pulvinar, in blandit purus eleifend.";
  return (
    <div>
      <Navbar />
      <FeaturedBoard title="FeaturedBoard" >
        <Banner  article={article} />
      </FeaturedBoard>
      <h3>Person blog by react</h3>
      <InfoBoard />
      <Footer />
    </div>
  );
}
也要記得把 title 的資料接近去喔。
{/* this is FeaturedBoard */}

export default function FeaturedBoard({ children, title }) {
  return (
    <div className="featuredboard">
      <div className="coverboard">
      <Title title={title}/>
      {children}
      </div>
    </div>
  );
}
接下來剩最後一件事,找一張你喜歡的圖片作為背景,是甚麼應該都沒差啦,自己斟酌哈哈。
找到後在 src 裡新建 images 這個資料夾,並把照片丟進去。
然後打開 app.css ,找到這串,把 1.jpg 換成你的圖片檔名
/* board */
.board,
.featuredboard{
  height:360px;
  background: var(--mainBlue);
  display: flex;
  justify-content: center;
  width: 100%;
}
.featuredboard{
  background: url("./images/1.jpg") center/cover no-repeat;
  min-height: 100vh
}
.coverboard{
  background :rgba(0, 0, 0, 0.5);
  color: var(--mainWhite);
}
/* board end */
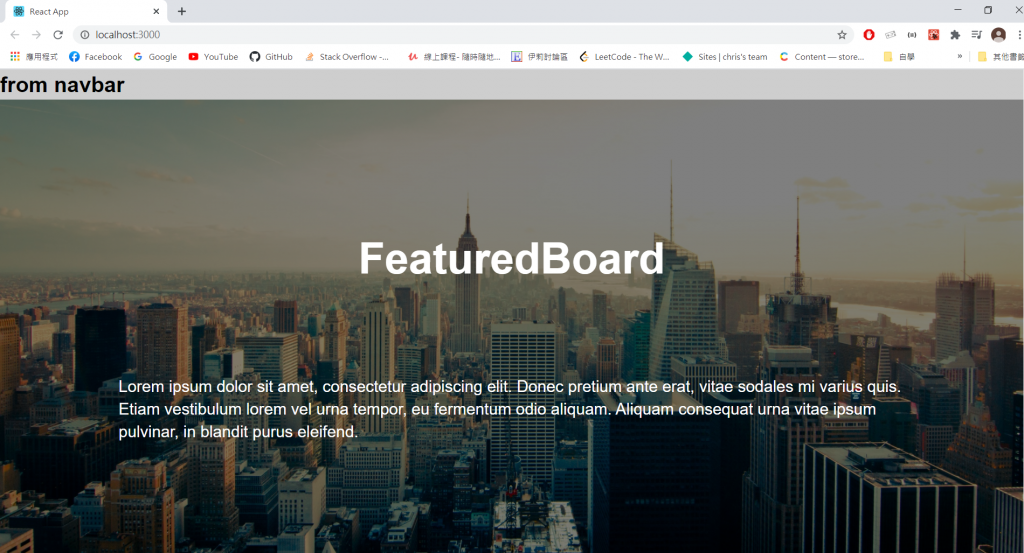
萬事完成之後啟動專案看看!

這樣至少就有模有樣了。
我是 chris,首先必須跟大家道個歉,開始上班之後沒甚麼時間慢慢的一個一個用,想點子和修改頁面也會花一點時間,導致這次的成品有點陽春,也有一部分原因是我第一次邊寫教學邊做,對 react 也沒有很精熟,我會盡量調適的,希望能快一點抓到步調,那我們明天見!
