在上篇中,新增 Model 附贈了 Resource Controller,這裡也要新增 Resource 路由:
routes/web.php
// Posts
Route::resource('posts', 'Post\PostController');
之後跟文章有關的 Controller 都放在 Post 資料夾下,要把 PostController.php 移進去,記得 namespace 也要更新。然後還有最重要的撰寫文章頁面,這個表單頁面會和修改文章共用,所以要塞一個空的 Post Model 進視圖:
app/Http/Controllers/Post/PostController.php
<?php

namespace App\Http\Controllers\Post;

use App\Http\Controllers\Controller;
use App\Post;
use App\Presenters\PostPresenter;
use Illuminate\Http\Request;
use Inertia\Inertia;

class PostController extends Controller
{
    public function __construct()
    {
        $this->middleware('auth');
    }
    ...
    public function create()
    {
        return Inertia::render('Post/Form', [
            'post' => PostPresenter::make(Post::make())->get(),
        ]);
    }
    ...
}
內容的輸入框先放單純的文字輸入框,之後會改成 Markdown 編輯器:
resources/js/Pages/Post/Form.vue
<template>
  <div class="py-6 md:py-8">
    <form @submit.prevent="submit" class="card card-main">
      <h1 class="text-3xl text-center">{{ pageTitle }}</h1>
      <div class="w-12 mt-1 mx-auto border-b-4 border-purple-400"></div>

      <div class="grid gap-6 mt-6">
        <text-input v-model="form.title" :error="$page.errors.title" label="標題" ref="titleInput" autocomplete="off" />
        <textarea-input v-model="form.content" :error="$page.errors.content" label="內容" />
        <file-input v-model="form.thumbnail" :error="$page.errors.thumbnail" accept="image/*" label="分享預覽圖片" browseText="選擇圖片" />
        <img v-if="post.thumbnail" :src="post.thumbnail" class="max-w-xs rounded shadow">
        <div class="font-light mb-4">
          <label>
            <input type="checkbox" class="form-checkbox" v-model="form.published"> 發布文章
          </label>
        </div>
        <div class="flex items-center space-x-4">
          <loading-button :loading="loading" class="btn btn-purple">{{ btnText }}</loading-button>
        </div>
      </div>
    </form>
  </div>
</template>

<script>
import AppLayout from '@/Layouts/AppLayout'
import TextInput from '@/Components/TextInput'
import TextareaInput from '@/Components/TextareaInput'
import FileInput from '@/Components/FileInput'
import LoadingButton from '@/Components/LoadingButton'

export default {
  layout: AppLayout,
  metaInfo() {
    return {
      title: this.pageTitle
    }
  },
  components: {
    TextInput,
    TextareaInput,
    FileInput,
    LoadingButton
  },
  props: {
    post: Object
  },
  data() {
    return {
      form: {
        title: this.post.title,
        content: this.post.content,
        thumbnail: null,
        published: this.post.published
      },
      loading: false
    }
  },
  computed: {
    pageTitle() {
      return '撰寫文章'
    },
    btnText() {
      return '儲存文章'
    }
  },
  methods: {
    submit() {
      const data = new FormData()
      for (const key in this.form) {
        data.append(key, this.form[key] || '')
      }

      this.$inertia.post('/posts', data, {
        onStart: () => this.loading = true,
        onFinish: () => this.loading = false,
        onSuccess: () => {
          if (! Object.keys(this.$page.errors).length) {
            this.form.thumbnail = null
          }
        }
      })
    }
  },
  mounted() {
    this.$refs.titleInput.focus()
  }
}
</script>
Inertia.js v0.3 已棄用 Promise 調用方式
現在全系列已更新為 Inertia.js v0.3,增加了 Event system (事件系統),Promise 調用的方式已棄用,若尚未更新至 v0.3 請更新版本:
yarn add @inertiajs/inertia@^0.3 @inertiajs/inertia-vue@^0.2.4並參考 Day 09 Lightning 用戶登入 的「載入進度條」篇安裝進度條套件。
但如果你還是想要使用舊方法或者不想升級,請參考以下用法:
submit() {
  this.loading = true

  const data = new FormData()
  for (const key in this.form) {
    data.append(key, this.form[key] || '')
  }

  this.$inertia.post('/posts', data).then(() => {
    this.loading = false
    if (! Object.keys(this.$page.errors).length) {
      this.form.thumbnail = null
    }
  })
}
和右上選單增加撰寫文章連結:
resources/js/Layouts/AppLayout.vue
<template #menu="{ close }">
  <dropdown-item :href="`/user/${user.id}`" icon="heroicons-outline:home" @click="close">
    我的主頁
  </dropdown-item>
  <dropdown-item href="/posts/create" icon="heroicons-outline:pencil" @click="close">
    撰寫文章
  </dropdown-item>
  ...
</template>
現在可以瀏覽 /posts/create 了,這時他會報 "Call to a member function format() on null" 錯誤。因為上面我們塞了一個空的 Post Model 進去,PostPresenter 裡又讓 created_at (這時是 null) 呼叫 format(),當然會有問題,解決方法是套一個 optional() (Laravel 的眾多輔助函數之一),確保該物件是 null 時也不會報錯:
app/Presenters/PostPresenter.php
public function values(): array
{
    return [
        ...
        'created_at' => optional($this->created_at)->format('Y-m-d H:i:s'),
        'created_ago' => optional($this->created_at)->diffForHumans(),
        ...
    ];
}
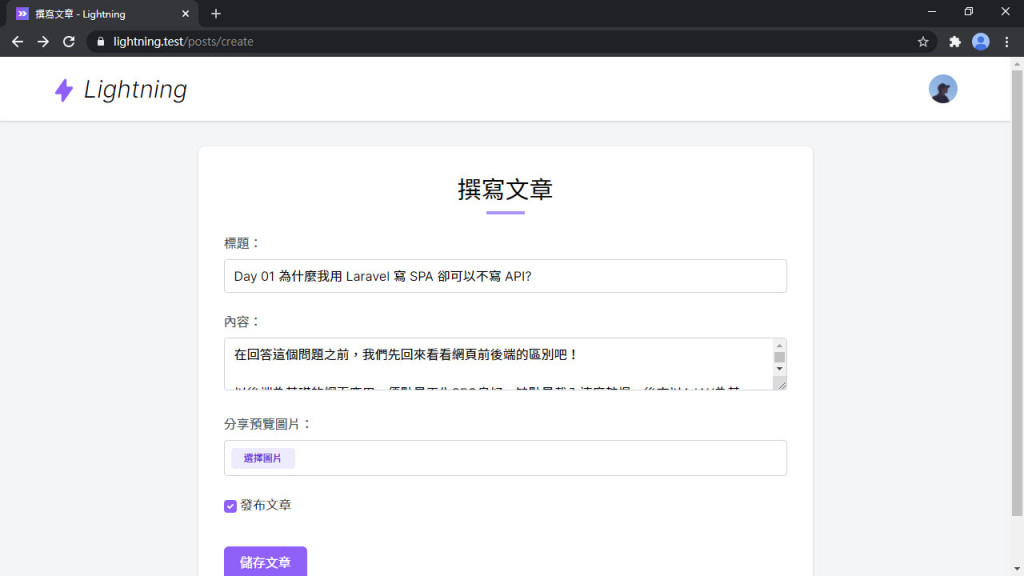
然後就正常了:

假設你輸入到一半,在當前分頁瀏覽別的頁面,突然想到又點瀏覽器的回上一頁回來,很遺憾,輸入的資料都不見了。這時要介紹一個 Inertia.js 的緩存資料功能,用 remember 指定要緩存的 key,Inertia.js 會自動將該資料儲存到瀏覽器的歷史紀錄中:
export default {
  ...
  remember: 'form',
  data() {
  ...
}
現在在表單隨便打上幾個字,去別的網站,然後再回上一頁,輸入的資料依然還在~~
PostRequest 也是新增/修改共用:
php artisan make:request PostRequest
app/Http/Requests/PostRequest.php
public function rules()
{
    return [
        'title' => 'required|max:80',
        'content' => 'required',
        'thumbnail' => 'nullable|image|max:5120',
        'published' => 'boolean',
    ];
}
thumbnail 分享的預覽圖片也是可選的,也要在 validationData() 裡調整。這裡會有另一個問題,前面傳資料是用 FormData,傳過來 published 的型別會是文字 ("true" or "false"),要轉換成 Boolean 型別:
app/Http/Requests/PostRequest.php
public function validationData()
{
    $data = parent::validationData();

    $data['published'] = $data['published'] === 'true';

    if (! $data['thumbnail']) {
        unset($data['thumbnail']);
    }

    return $data;
}
還要讓 Post Model 自動儲存圖片:
app/Post.php
use Illuminate\Http\UploadedFile;
use Illuminate\Support\Facades\Storage;

public function setThumbnailAttribute($thumbnail)
{
    $this->attributes['thumbnail'] = $thumbnail instanceof UploadedFile
        ? Storage::url($thumbnail->store('posts'))
        : $thumbnail;
}
最後就可以新增文章:
app/Http/Controllers/Post/PostController.php
public function store(PostRequest $request)
{
    $post = $this->user()
        ->posts()
        ->create($request->validated());

    return redirect("/posts/{$post->id}")->with('success', '文章新增成功');
}
然後現在就可以愉快的送出文章...

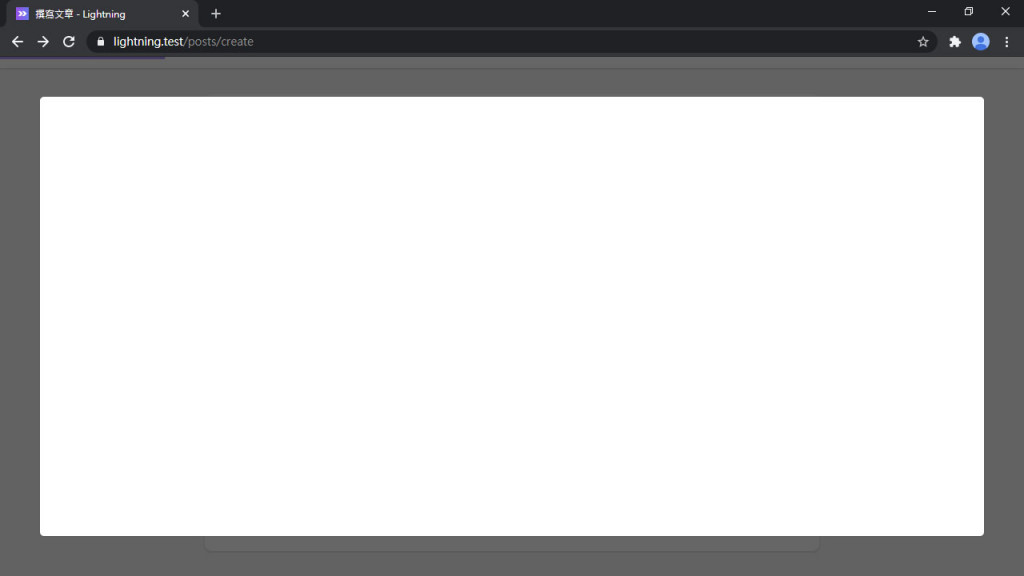
啊!空的?對,現在是空的。因為文章的頁面還沒有任何東西,如果回傳的頁面沒有 X-Inertia: true,他就會塞到彈出視窗裡。頁面會在下篇做,現在可以用 Tinker 確認剛才有沒新增成功:
php artisan tinker
>>> App\Post::find(1)

一個簡易的發文功能出來了。下篇要做文章的頁面,繼續加油吧!
Lightning 範例程式碼:https://github.com/ycs77/lightning
