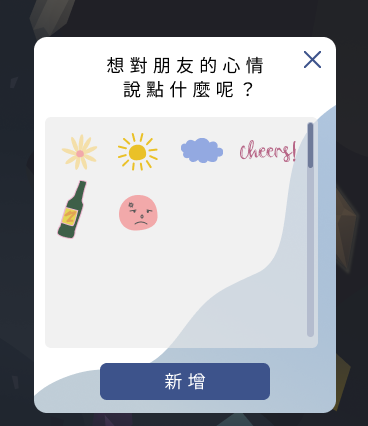
相信直接從StoryBoard製作的CollectionView的教學網路上一定滿滿都是,所以今天就和大家分享我是如何用純程式來製作CollectionView!
首先先介紹最基本如何用程式產生CollectionView的方法☆
class View Controller除了要繼承UIViewController也要繼承UICollectionViewDelegate、UICollectionViewDataSource (檔案範例FriendHomeViewController.swift)
定義一個class CollectionViewCell 繼承UICollectionViewCell (範例PicCellCollectionViewCell.swift)
因為內容要放圖片所以定義一個imageView,沒有要放圖片就不用,如要放其他的可以定義UILabel、UIView等等…
class PicCellCollectionViewCell: UICollectionViewCell {
    let imageView:UIImageView = {
           let imageView = UIImageView()
            imageView.contentMode = .scaleAspectFit
            imageView.isUserInteractionEnabled = true
            imageView.layer.borderColor = UIColor(hexString: "#6388B2").cgColor
            imageView.layer.borderWidth = 0
            imageView.layer.cornerRadius = 8
            return imageView
        }()
//被選到的時候會有邊框
    override var isSelected: Bool {
        didSet {
                if self.isSelected {
                    imageView.layer.borderWidth = 2

                } else {
                    imageView.layer.borderWidth = 0
                }
        }
    }
    override init(frame: CGRect) {
        super.init(frame: frame)
        self.addSubview(imageView)
    }

    required init?(coder aDecoder: NSCoder) {
        fatalError("init(coder:) has not been implemented")
    }
}
回到class View Controller, (這裡以變數feedback.count為例)
定義一個變數來存item的內容,這裡是使用圖片
var feedback = [UIImage(named: "flower"),UIImage(named: "sun"),UIImage(named: "cloud"),UIImage(named: "cheers"),UIImage(named: "champagne"),UIImage(named: "face_angry"),UIImage(named: "secret_1"),UIImage(named: "secret_2")]
再來是一些必要的設定
func numberOfSections(in collectionView: UICollectionView) -> Int {
       return 1
}
// 設定個數
func collectionView(_ collectionView: UICollectionView, numberOfItemsInSection section: Int) -> Int {
        return feedback.count
}
// 設定內容
func collectionView(_ collectionView: UICollectionView, cellForItemAt indexPath: IndexPath) -> UICollectionViewCell {
        let cell = collectionView.dequeueReusableCell(withReuseIdentifier: "feedback", for: indexPath) as! PicCellCollectionViewCell
        cell.imageView.image = feedback[indexPath.item]
        cell.imageView.frame = cell.bounds
        return cell
}
// collectionView點擊事件
func collectionView(_ collectionView: UICollectionView, didSelectItemAt indexPath: IndexPath) {

        if(indexPath.item < 6){
            stickNum = indexPath.item + 1
        }
}
還記得上次分享的alert製作方式嗎?
這裡所用的CollectionView範例就是加在alert的function裡面喔~
但若要使用在其他地方也是一樣的方式。
//指定cell的排列方式為UICollectionViewFlowLayout
let layout = UICollectionViewFlowLayout()
//定義名為pic_choose的UICollectionView
let pic_choose = UICollectionView(frame: CGRect(x: 0, y: 0, width: 273,height: 180) , collectionViewLayout: layout)
pic_choose.center.y = 400
pic_choose.center.x = alertView.frame.size.width*0.5
pic_choose.delegate = self
pic_choose.dataSource = self
pic_choose.layer.masksToBounds = true
pic_choose.layer.cornerRadius = 6
//註冊cell
pic_choose.register(PicCellCollectionViewCell.self, forCellWithReuseIdentifier: "feedback")
pic_choose.backgroundColor = UIColor(red: 232/255, green: 232/255, blue: 232/255, alpha: 0.6)
alertView.addSubview(pic_choose)

是不是非常簡單快速就能夠產生一個CollectionView呀?
程式碼裡面有些變數是因為APP需要儲存使用者選擇哪個貼圖到Firebase而使用的,如果你沒有這種需求或是有其他需求都可以以這些程式碼為基礎打造適合你APP使用的程式碼唷~明天就開始中秋連假了,接下來會再和大家分享顏色 countenance內其他有使用到CollectionView的部分,忙著烤肉之餘別錯過顏色app的最新發文唷~
