上一篇介紹了怎麼創建 Azure Pipelines,
再來延續上一篇怎麼使用YAML 來設定 Azure Pipelines 步驟
Yaml 的語法官方說明: Azure Pipelines YAML schema reference
管線 PipeLine 的管理方式,就是如下圖,
編輯程式碼->修改YAML檔->上傳到雲端倉庫->透過Azure Pipeline -> 部署服務
延續 Build, test, and deploy .NET Core apps 教學
預設 azure-pipelines.yaml
# ASP.NET Core
# Build and test ASP.NET Core projects targeting .NET Core.
# Add steps that run tests, create a NuGet package, deploy, and more:
# https://docs.microsoft.com/azure/devops/pipelines/languages/dotnet-core

trigger:
- master

pool:
  vmImage: 'ubuntu-latest'

variables:
  buildConfiguration: 'Release'

steps:
- script: dotnet build --configuration $(buildConfiguration)
  displayName: 'dotnet build $(buildConfiguration)'
監控的Git分支,這邊可以設定單一個或是多個分支,
被監控的分支如果有更新就會驅動pipeline做動作。
單個範例
trigger:
- master
多個範例
trigger:
- master
- develop
建置環境可以設定 Windows、Linux 或是 macOS
可以查看可用環境 Microsoft-hosted agents
以預設的YAML檔來說,就是使用 ubuntu-latest(ubuntu-18.04) 環境
pool:
  vmImage: 'ubuntu-latest'
如果有需要在下面重複使用,可以用變數來取代
設定 buildConfiguration 變數,內容為 Release
variables:
  buildConfiguration: 'Release'
還有變數群組可以使用 Add & use variable groups
階段包含多個Job(工作)
stages:
- stage: Build
  jobs:
  - job: BuildJob
    steps:
    - script: echo Building!
- stage: Test
  jobs:
  - job: TestOnWindows
    steps:
    - script: echo Testing on Windows!
  - job: TestOnLinux
    steps:
    - script: echo Testing on Linux!
- stage: Deploy
  jobs:
  - job: Deploy
    steps:
    - script: echo Deploying the code!
工作包含多個step(步驟)
jobs:
- job: MyJob
  displayName: My First Job
  continueOnError: true
  workspace:
    clean: outputs
  steps:
  - script: echo My first job
jobs:
- job: RunsInContainer
  container: # inline container specification
    image: ubuntu:16.04
    options: --hostname container-test --ip 192.168.0.1
Deployment job
jobs:
  # track deployments on the environment
- deployment: DeployWeb
  displayName: deploy Web App
  pool:
    vmImage: 'Ubuntu-16.04'
  # creates an environment if it doesn't exist
  environment: 'smarthotel-dev'
  strategy:
    # default deployment strategy, more coming...
    runOnce:
      deploy:
        steps:
        - script: echo my first deployment
steps:
- script: echo This runs in the default shell on any machine
- bash: |
    echo This multiline script always runs in Bash.
    echo Even on Windows machines!
- pwsh: |
    Write-Host "This multiline script always runs in PowerShell Core."
    Write-Host "Even on non-Windows machines!"
如果使用 Step templates 可以呼叫不同的檔案
# File: steps/build.yml

steps:
- script: npm install
- script: npm test
# File: azure-pipelines.yml

jobs:
- job: macOS
  pool:
    vmImage: 'macOS-10.14'
  steps:
  - template: steps/build.yml # Template reference

- job: Linux
  pool:
    vmImage: 'ubuntu-16.04'
  steps:
  - template: steps/build.yml # Template reference

- job: Windows
  pool:
    vmImage: 'vs2017-win2016'
  steps:
  - template: steps/build.yml # Template reference
  - script: sign              # Extra step on Windows only
steps:
- task: VSBuild@1
  displayName: Build
  timeoutInMinutes: 120
  inputs:
    solution: '**\*.sln'
- task: DotNetCoreCLI@2
inputs:
  version: '3.1.401'
  command: 'build'
  arguments: '--configuration $(buildConfiguration)'
displayName: 'dotnet build $(buildConfiguration)'
- task: DotNetCoreCLI@2
  inputs:
    version: '3.1.401'
    command: test
    projects: '**/*Tests/*.csproj'
    arguments: '--configuration $(buildConfiguration) --collect "Code coverage"'
  displayName: 'dotnet test $(buildConfiguration)'
- task: DotNetCoreCLI@2
  inputs:
    version: '3.1.401'
    command: publish
    publishWebProjects: True
    arguments: '--configuration $(BuildConfiguration) --output $(Build.ArtifactStagingDirectory)'
    zipAfterPublish: True
  displayName: 'dotnet publish $(buildConfiguration)'
修改 azure-pipelines.yaml 檔案
修改之後 1.加入索引 2.提交版本 3. 上傳 之後 Azure pipeline 就會開始部署
git add .
git commit -m "update azure pipeline yaml"
git push
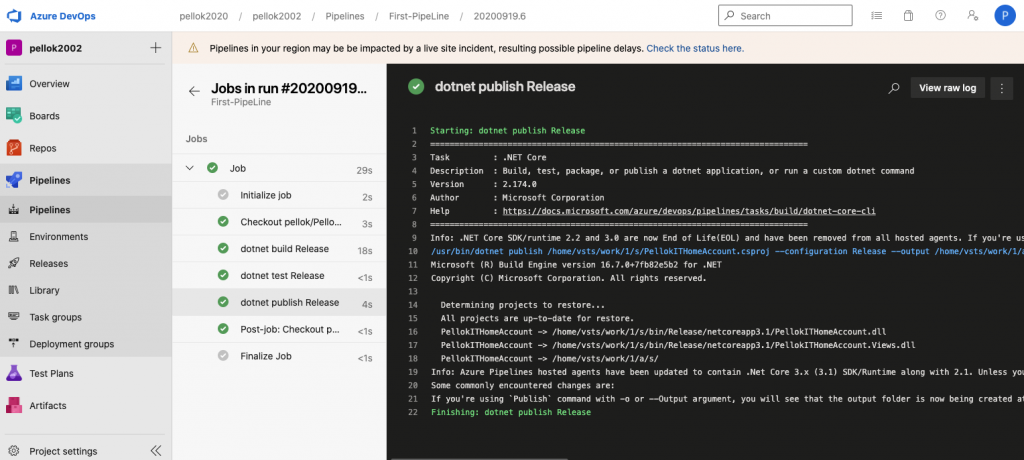
查看部署結果
# ASP.NET Core
# Build and test ASP.NET Core projects targeting .NET Core.
# Add steps that run tests, create a NuGet package, deploy, and more:
# https://docs.microsoft.com/azure/devops/pipelines/languages/dotnet-core

trigger:
- master

pool:
  vmImage: 'ubuntu-latest'

variables:
  buildConfiguration: 'Release'

steps:
- task: DotNetCoreCLI@2
  inputs:
    version: '3.1.401'
    command: 'build'
    arguments: '--configuration $(buildConfiguration)'
  displayName: 'dotnet build $(buildConfiguration)'

- task: DotNetCoreCLI@2
  inputs:
    version: '3.1.401'
    command: test
    projects: '**/*Tests/*.csproj'
    arguments: '--configuration $(buildConfiguration) --collect "Code coverage"'
  displayName: 'dotnet test $(buildConfiguration)'


- task: DotNetCoreCLI@2
  inputs:
    version: '3.1.401'
    command: publish
    publishWebProjects: True
    arguments: '--configuration $(BuildConfiguration) --output $(Build.ArtifactStagingDirectory)'
    zipAfterPublish: True
  displayName: 'dotnet publish $(buildConfiguration)'
上一篇 Day18 Azure Pipelines服務
下一篇 Day20 實作 Dotnet Test 測試範例
