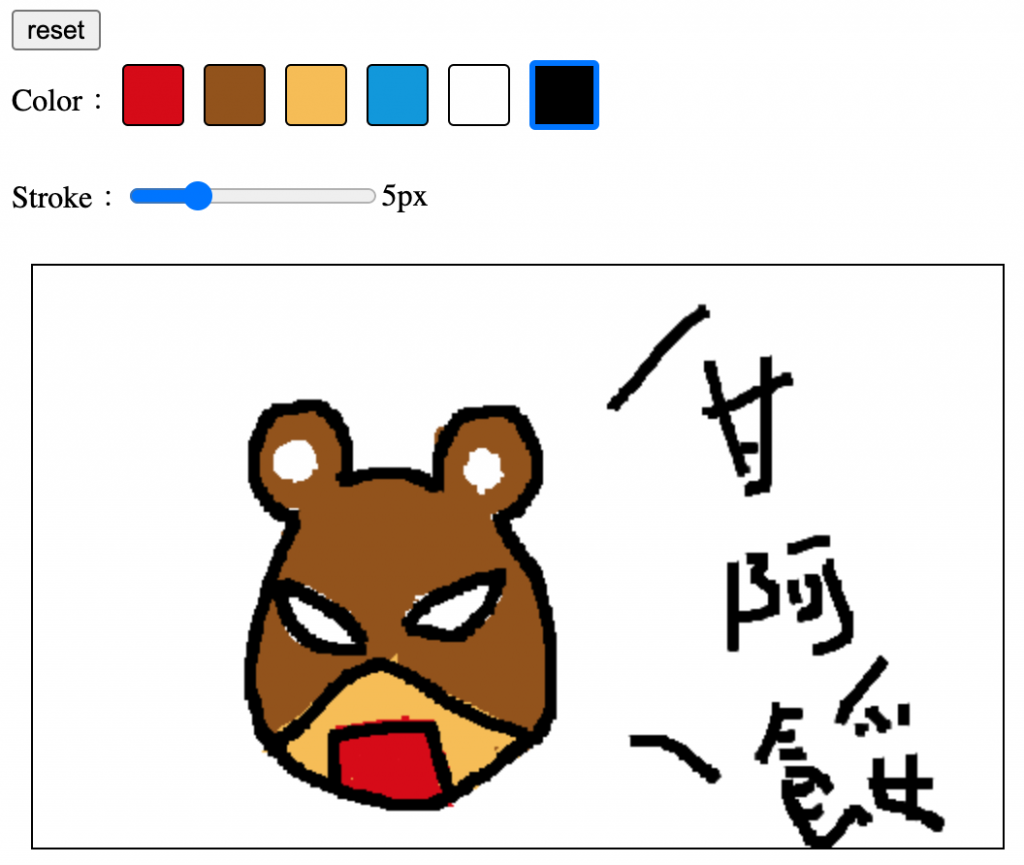
在進入動畫階段以前,讓我做個小小的範例~
看到網路上很多人都用canvas做小畫家,沒創意如我想說也來用前幾天學到的那些基本觀念來試試看~![]()
今天我們要來做出小畫家的三個功能:
【功能 1】 調整筆畫色彩。
【功能 2】 調整筆畫粗細。
【功能 3】 清除畫布。
根據我們選擇的顏色用v-model綁定資料,再設定為畫筆顏色
ctx.strokeStyle=this.color //設定畫筆顏色
根據我們選擇的寬度用v-model綁定資料,再設定為畫筆寬度
ctx.lineWidth=this.width //設定畫筆寬度
this.ctx.clearRect(0,0,500,300) //清除畫布
畫個熊俠試試~
這邊程式碼只有放html canvas部分及主要的三個方法程式,其他詳細內容都在codepen範例連結,大家可以去玩玩看
html
<canvas id="testCanvas" width="500" height="300"
  @mousedown="starDraw"
  @mousemove="drawing"
  @mouseup="endDraw"
  @touchstart="starDraw"
  @touchmove="drawing"
  @touchend="endDraw">
</canvas>
js
genCanvas(){
  const canvas = document.getElementById('testCanvas')
  this.testCanvas=canvas
  if(canvas.getContext('2d')){
    const ctx = canvas.getContext('2d')
    this.ctx=ctx
    ctx.fillStyle='#fff'//設定畫布背景白色
    ctx.fillRect(0, 0, 500, 300)//填滿背景色
    ctx.lineCap="round" //設定畫筆端點為圓的
    ctx.lineJoin="round" //設定畫筆轉彎處為圓的

  }else{
    this.goDraw=false
    window.alert('您的瀏覽器不支援')
  }
},
starDraw(e){
  //偵聽mousedown滑鼠落下後開始設定起點
  this.goDraw=true //偵聽滑鼠按下開始畫畫
  this.ctx.strokeStyle=this.color //設定畫筆顏色
  this.ctx.lineWidth=this.width //設定畫筆寬度
  this.ctx.beginPath() //開始路徑
  this.startPosX=(e.x ? e.x : e.targetTouches[0].pageX)-this.canvasX //X起點為滑鼠落下的位置減掉相對於canvas原點的位置
  this.startPosY=(e.y ? e.y : e.targetTouches[0].pageY)-this.canvasY //Y起點為滑鼠落下的位置減掉相對於canvas原點的位置
  this.ctx.moveTo(this.startPosX,this.startPosY) //將剛剛找出的落筆點設定為畫筆一開始起始位置
},
drawing(e){
//偵聽mousemove滑鼠移動開始畫畫
if(!!this.goDraw){
  //畫畫中
  let X=(e.x ? e.x : e.targetTouches[0].pageX)-this.canvasX
  let Y=(e.y ? e.y : e.targetTouches[0].pageY)-this.canvasY
  this.ctx.lineTo(X,Y) //畫路徑到新的位置
  this.ctx.stroke() //將路徑轉為筆畫
  }
},
endDraw(){
//偵聽滑鼠離開結束畫畫
   this.goDraw=false
}
成果畫面:用滑鼠好難畫,畫得很醜請勿見怪,順便幫我們團隊甘阿餒打個廣告
~如有疑問或是錯誤,歡迎不吝指教~
參考來源:
[1]https://wcc723.github.io/canvas/2014/12/09/html5-canvas-03/
[2]https://codepen.io/hossman/pen/AyaFl
