上篇建立了一個存放學校人員的index,可是大家可以發現上篇使用的mappings只有學生的資訊,今天來教大家如何在同一個index把mappings更換成老師的資訊
關於同一個index把mappings更換成老師的資訊這件事是什麼意思呢,我們假設下面是學生與老師儲存的資料格式
學生:
 {
    "sid": {
        "type": "integer"
    },
    "name": {
        "type": "text"
    },
    "age": {
        "type": "integer"
    },
    "class": {
        "type": "keyword"
    }
}
老師:
{
    "tid": {
        "type": "integer"
    },
    "name": {
        "type": "text"
    },
    "age": {
        "type": "integer"
    },
    "class": {
        "type": "keyword"
    },
    "salary": {
        "type": "integer"
    }
}
可以看到老師跟學生儲存的資料是有點不一樣的,當今天我們匯學生的資料時,因為現在index的mappings是學生的properties(我們已上一篇為例),所以會沒有問題,但當我們今天想匯入老師的資料時會因為資料的格式跟mappings不一樣而出錯,這時候就要把mappings換成老師的,更換的時候用的是indices底下的put_mapping這個方法,下面一樣先定義老師的mappings格式
{
    "properties": {
        "tid": {
            "type": "integer"
        },
        "name": {
            "type": "text"
        },
        "age": {
            "type": "integer"
        },
        "class": {
            "type": "keyword"
        },
        "salary": {
            "type": "integer"
        }
    }
}
可以看到跟之前mappings格式的差異是這次少了最外層的“mappings”,記得在使用put_mapping時直接從“properties”開始就可以了,下面是完整的程式碼
from elasticsearch import Elasticsearch

def change_mappings(es):
    body = get_teacher_mappings()
    es.indices.put_mapping(index='school_members', body=body)

def get_teacher_mappings():
    mappings = {
        "properties": {
            "tid": {
                "type": "integer"
            },
            "name": {
                "type": "text"
            },
            "age": {
                "type": "integer"
            },
            "class": {
                "type": "keyword"
            },
            "salary": {
                "type": "integer"
            }
        }
    }
    return mappings

if __name__ == "__main__":
    es = Elasticsearch(hosts='192.168.1.59', port=9200)
    change_mappings(es)
今天還要講得另外一個就是別名機制,別名機制講簡單一點就是幫index取綽號,在使用的時候不管是用本名還是綽號都找得到這個index,下面直接看程式碼:
#
from elasticsearch import Elasticsearch

es = Elasticsearch(hosts='192.168.1.59', port=9200)
es.indices.put_alias(index='school_members', name='school') #參數index指定index name指定別名
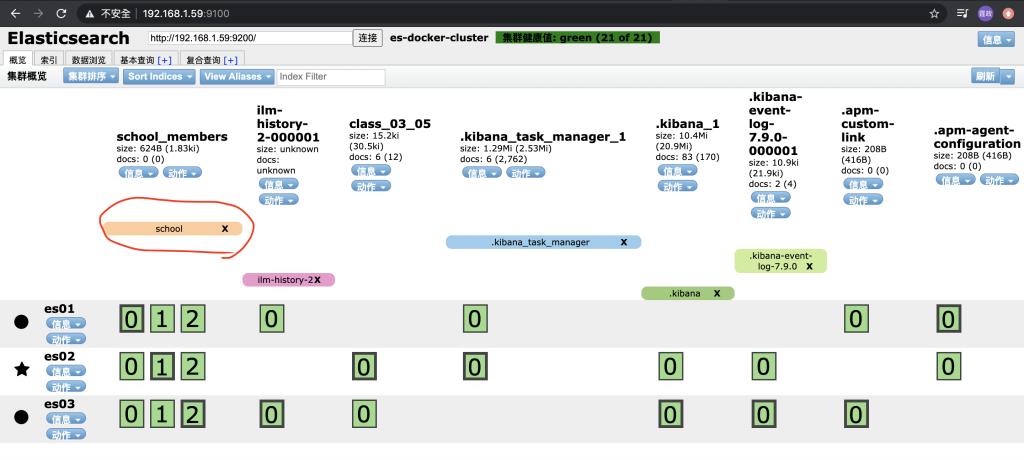
新增完後可以去es-head看看有沒有成功
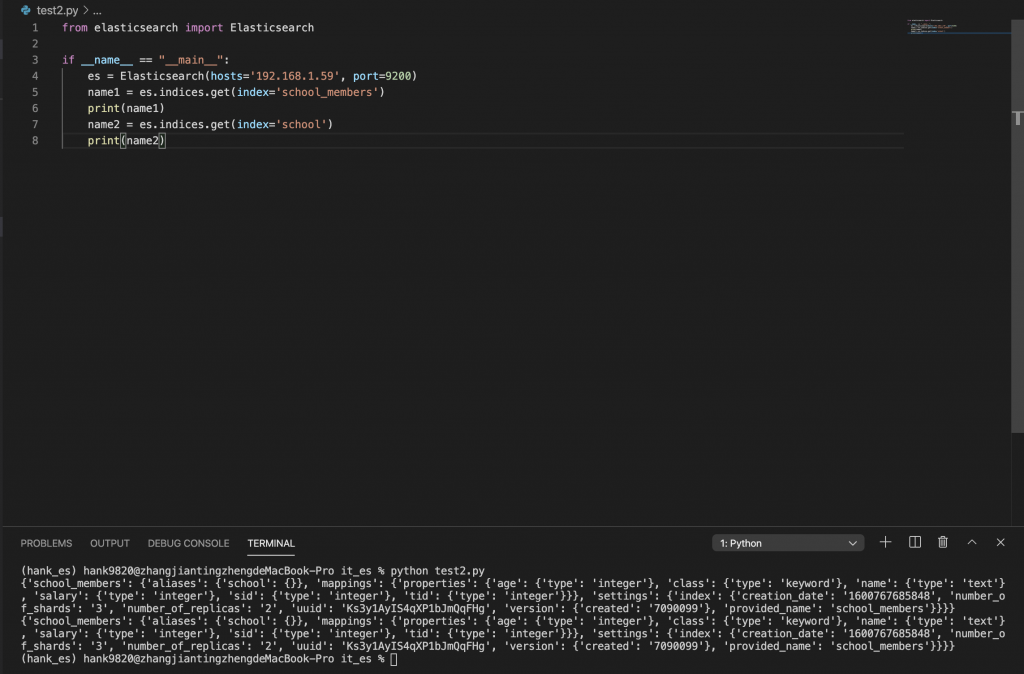
可以看到不管是用“school”還是“school_members”都可以找到index
from elasticsearch import Elasticsearch

es = Elasticsearch(hosts='192.168.1.59', port=9200)
es.indices.delete_alias(index='school_members', name='school')
今天的教學就到這邊,下篇就來試試把資料丟進ES裡面吧
