iT邦幫忙

第 12 屆 iThome 鐵人賽

DAY 21
0

UIStoryboardSegue

UIStoryboardSegue 是畫面與畫面間主要的移動方式

首先打開 Storyboard 多新增幾個 ViewController
https://ithelp.ithome.com.tw/upload/images/20200928/20129677XcQTVzPCE1.png

為了方便區分,我將各個 View 的背景顏色都換掉
https://ithelp.ithome.com.tw/upload/images/20200928/201296779pTVHZZg24.png

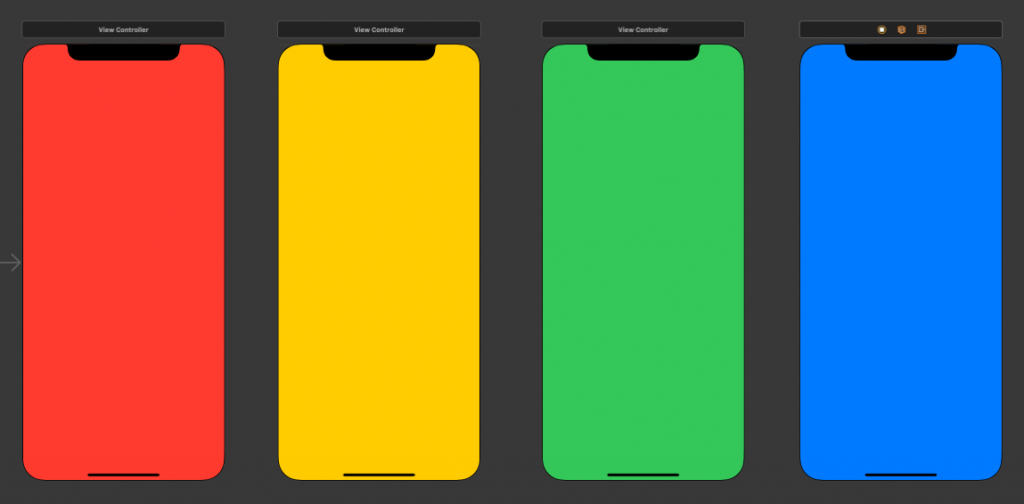
再來選擇第一個 ViewController ,壓著 Control 鍵並拖曳至下一個畫面
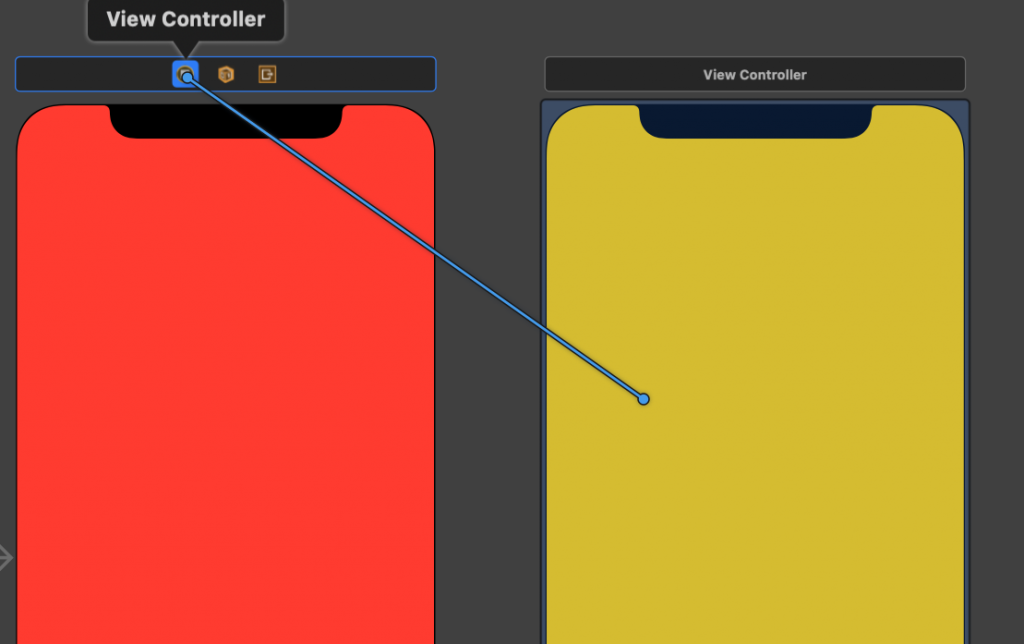
https://ithelp.ithome.com.tw/upload/images/20200928/20129677Ku6qucPSI8.png

放開後選擇 Show
https://ithelp.ithome.com.tw/upload/images/20200928/201296778qUuZXTUSp.png

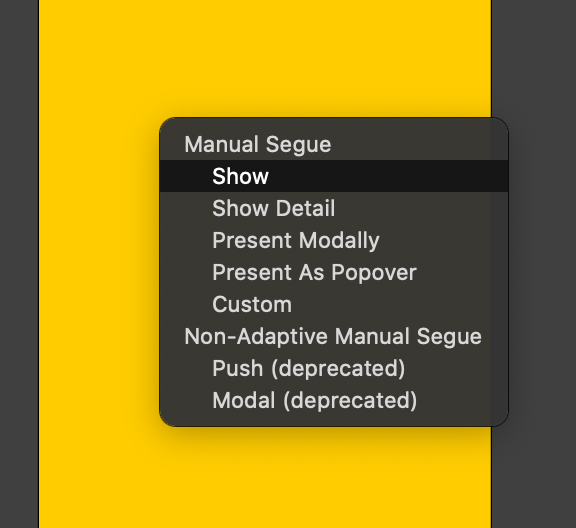
此時兩個 ViewController 之間就會多一個 StoryboardSegue 的箭頭,以及第二個 ViewController 的顯示模式也產生變化
https://ithelp.ithome.com.tw/upload/images/20200928/20129677LRfqiMhYQJ.png

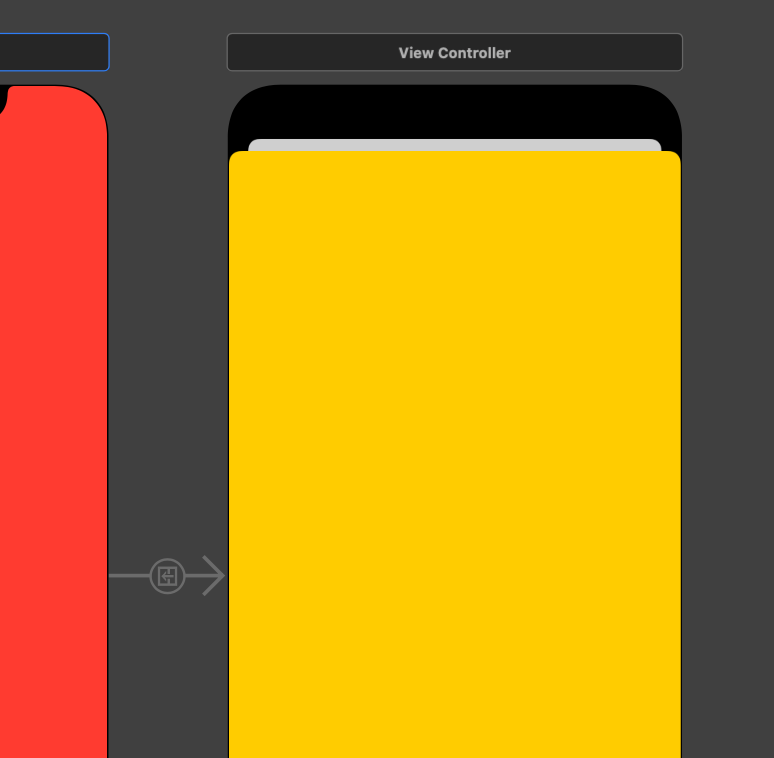
如果想要改成全螢幕的顯示方式,只要點選 ViewController ,並將 Presentation 改成 FullScreen 即可
https://ithelp.ithome.com.tw/upload/images/20200928/20129677VNObY4W4ZZ.png

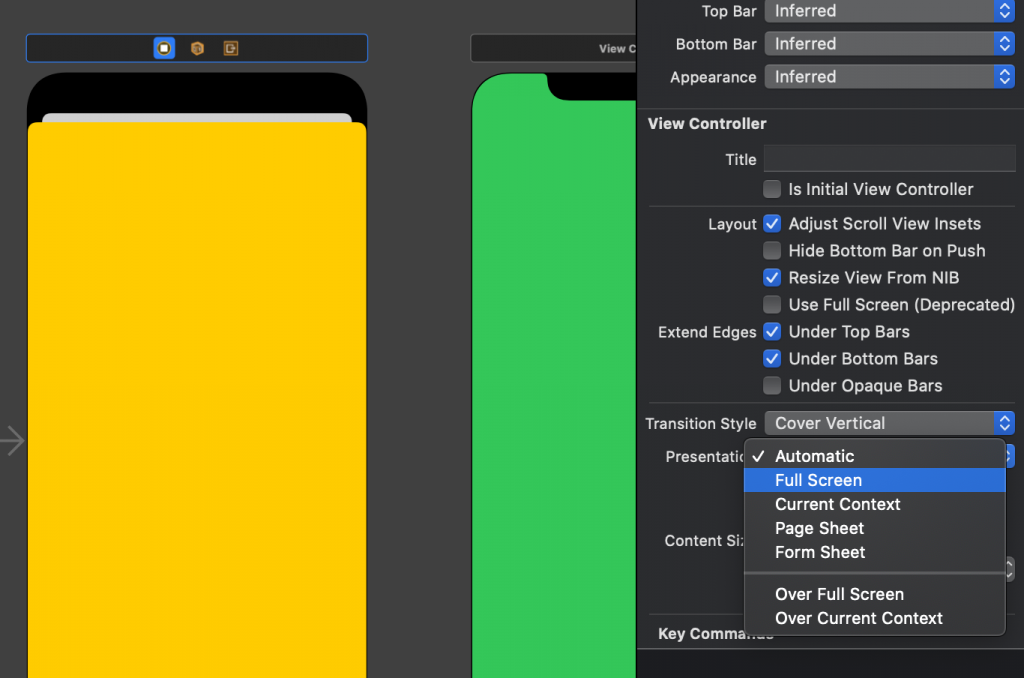
依此類推,將剩下的 ViewController 連接好最後會長這樣
https://ithelp.ithome.com.tw/upload/images/20200928/20129677UM2DbH0btM.png

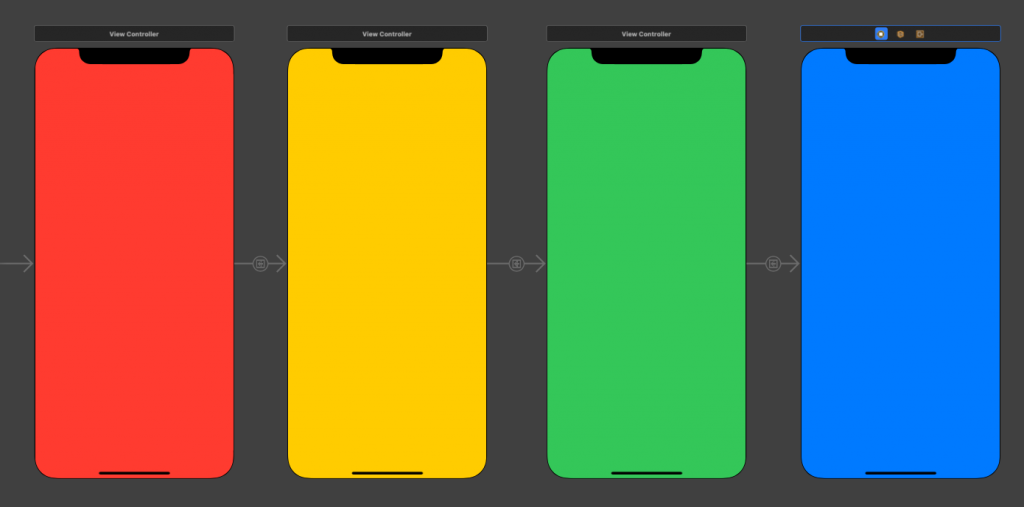
再來,幫每個 ViewController 新增 .swift 檔,用來控制各個 ViewController 的事件
https://ithelp.ithome.com.tw/upload/images/20200928/20129677KALAU6ccSp.png

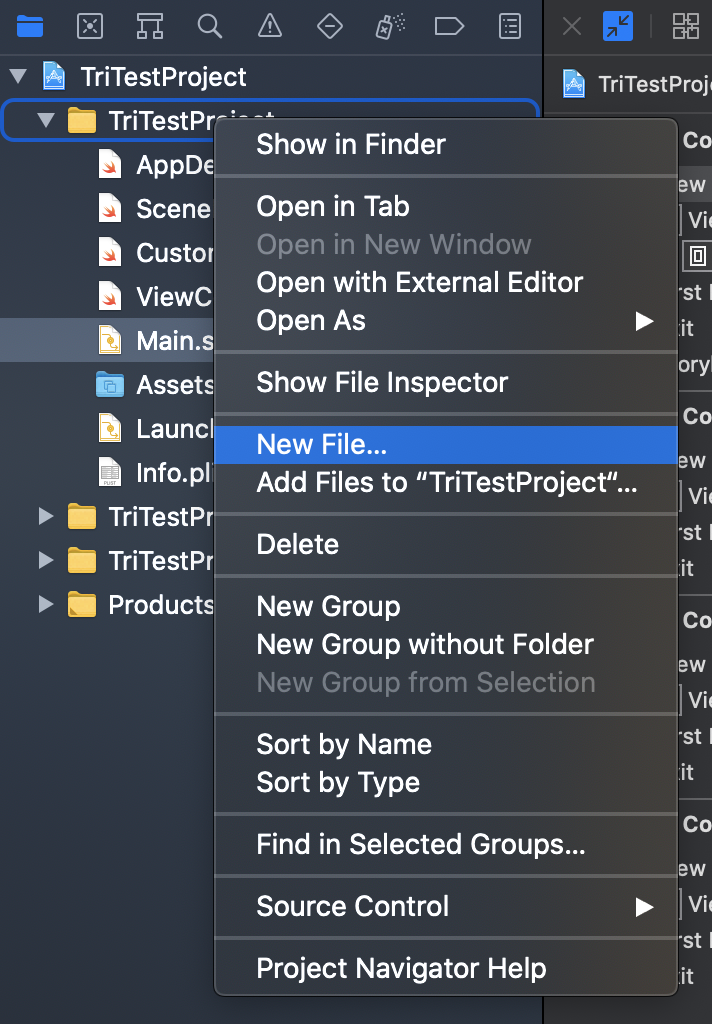
選擇 Cocoa Touch Class
https://ithelp.ithome.com.tw/upload/images/20200928/20129677rLB7qqchCu.png

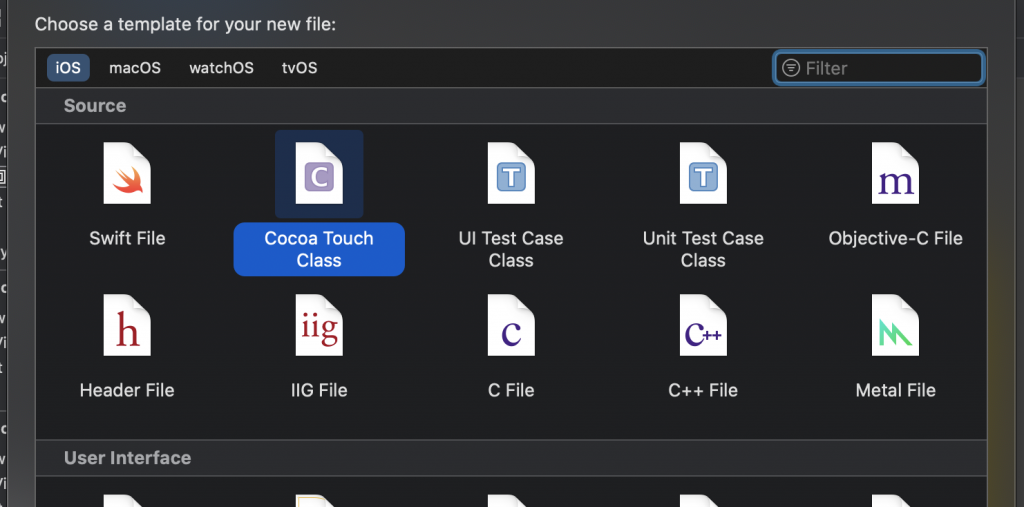
命名,並將 SubClass 設為 ViewController
https://ithelp.ithome.com.tw/upload/images/20200928/20129677dw3oZOL6b0.png

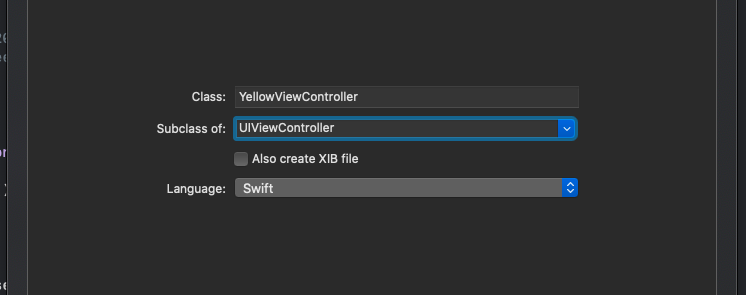
完成後會看到新的 ViewController 文件,剩下的依此類推
https://ithelp.ithome.com.tw/upload/images/20200928/20129677PWB9ktk3Be.png

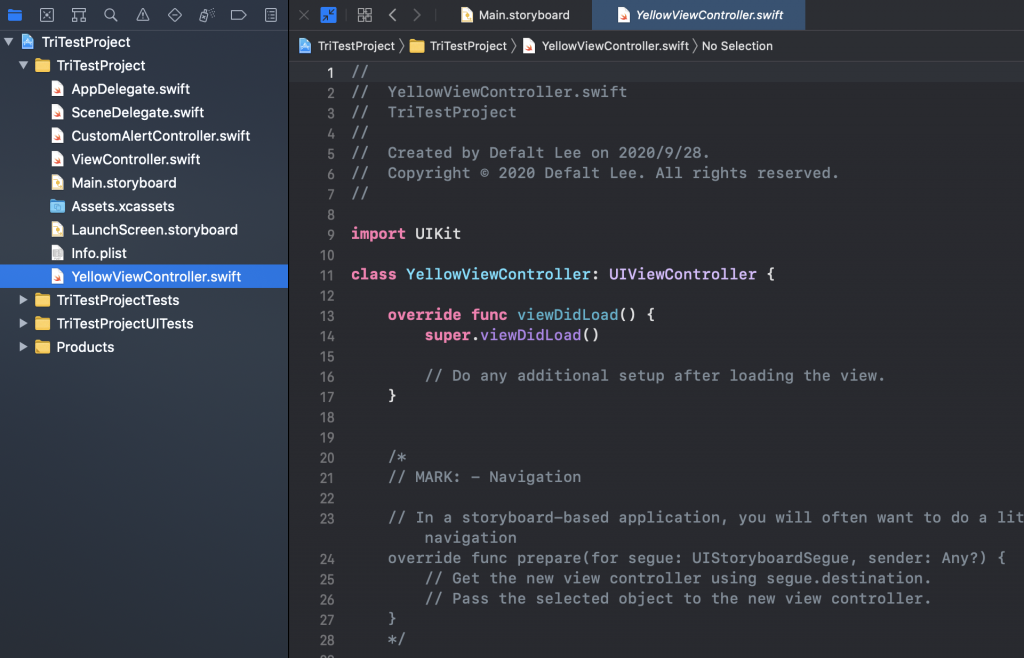
回到 Storyboard 點選 ViewController 並設置 Class
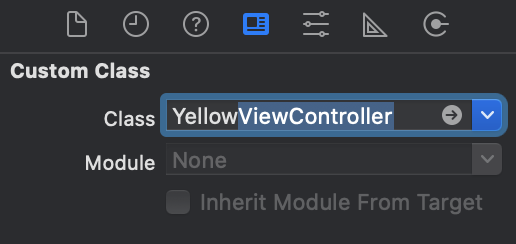
https://ithelp.ithome.com.tw/upload/images/20200928/20129677OigIz0zAy1.png

都完成後會變成這樣
https://ithelp.ithome.com.tw/upload/images/20200928/20129677QNG4oe33C0.png

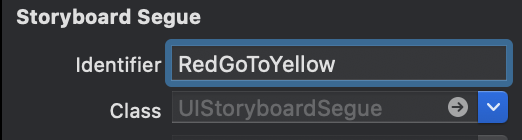
點選 UIStoryboardSegue 並設置 Identifier
https://ithelp.ithome.com.tw/upload/images/20200928/20129677FBlD4bG2wX.png
https://ithelp.ithome.com.tw/upload/images/20200928/201296778Sbz1GRpJP.png

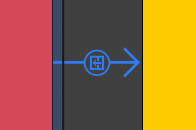
在每個 ViewController 內加入一個 Button 用來觸發跳頁的事件
並再除了最後一頁的 Button 之外其他所有的 Button 內加入以下程式
(因為最後一頁要用來返回第一頁,待會兒會提到)

self.performSegue(withIdentifier: "RedGoToYellow", sender: nil)
// withIdentifier 為剛剛設置的 UIStoryboardSegue 的 Identifier

現在先執行一下,應該能夠正常地跳到最後一個藍色的 ViewController

完成後現在要來教大家往回跳的方法
首先先回到我們的第一個 ViewController 並增加一個 @IBAction

@IBAction func unwindToRed(_ sender:UIStoryboardSegue) {}
// 這個 @IBAction 的存在類似於往回跳的停止座標, Function 名稱是可以自訂的

再來回到 Storyboard 點選後最一個 ViewController ,壓著 Control 並拖曳至 Exit
https://ithelp.ithome.com.tw/upload/images/20200928/20129677n1Ukk53GM7.png

選取剛剛設置的 unwindToRed
https://ithelp.ithome.com.tw/upload/images/20200928/201296778fsWm2KWc1.png

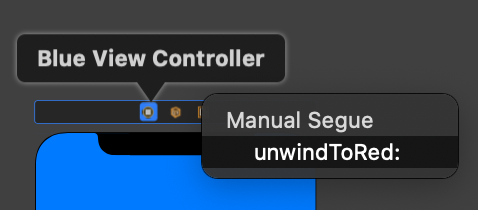
接著旁邊的元件列表就會出現一個 unwindSegue ,選取他並像其他 Segue 一樣設置Identifier
https://ithelp.ithome.com.tw/upload/images/20200928/20129677MN9XK9awPy.png

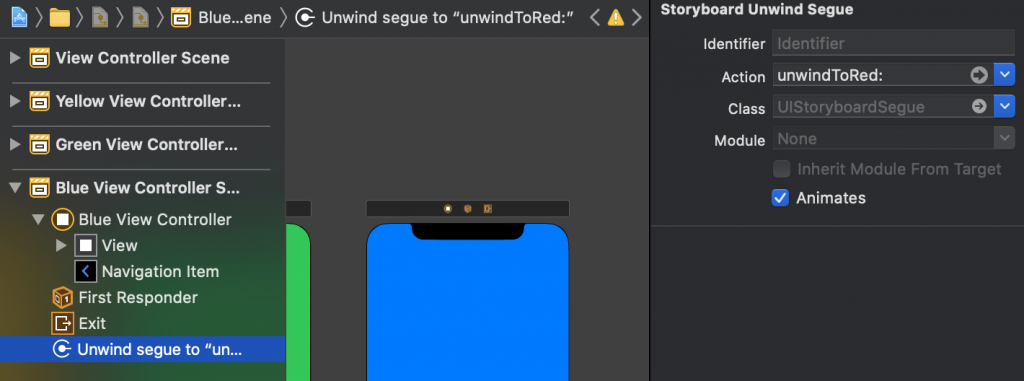
之後的使用方式就和一般的 UIStoryboardSegue 一樣,在最後一個 ViewController 的 Button 下加入以下程式碼

self.performSegue(withIdentifier: "BlueGoToRed", sender: nil)

此時點擊最後一個畫面的 Button 就能跳回第一頁了


上一篇
Day20 Regular Expression
下一篇
Day22 頁面間傳值
系列文
IOS Beginner's 30days 30
圖片
  直播研討會
圖片
{{ item.channelVendor }} {{ item.webinarstarted }} |
{{ formatDate(item.duration) }}
直播中

尚未有邦友留言

立即登入留言