iT邦幫忙

第 12 屆 iThome 鐵人賽

DAY 10
0
Mobile Development

顏色 countenance APP製作筆記系列 第 10

[Day 10] Firebase加入專案(下)

  • 分享至 

  • xImage
  •  

將Firebase專案加入Xcode專案中(下)

參考資料:https://www.youtube.com/watch?v=mPBBNi2Ou6o

  1. 開啟「應用程式/工具程式」,點擊「終端機」圖示
    https://ithelp.ithome.com.tw/upload/images/20200924/20130458pg6EtlYZjR.png

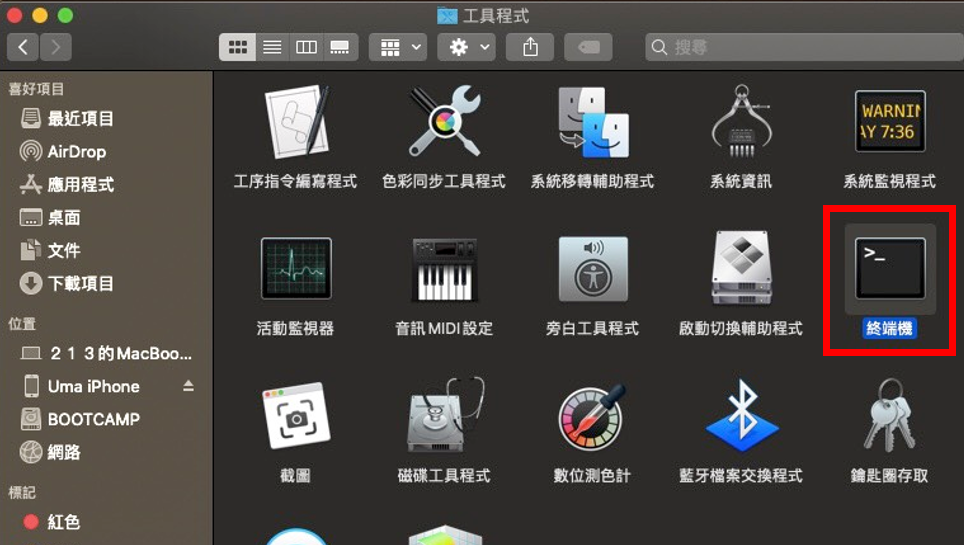
  2. 依照Firebase教學安裝CocoaPods,開啟終端機後輸入「sudo gem install cocopods」指令並輸入密碼等待安裝完成
    https://ithelp.ithome.com.tw/upload/images/20200924/20130458k2D7KWUtfa.png

    • CocoaPods是一種支援Swift和Objective-C程式開發的第三方庫資源相依性管理工具,方便開發人員管理所需的第三方資料庫
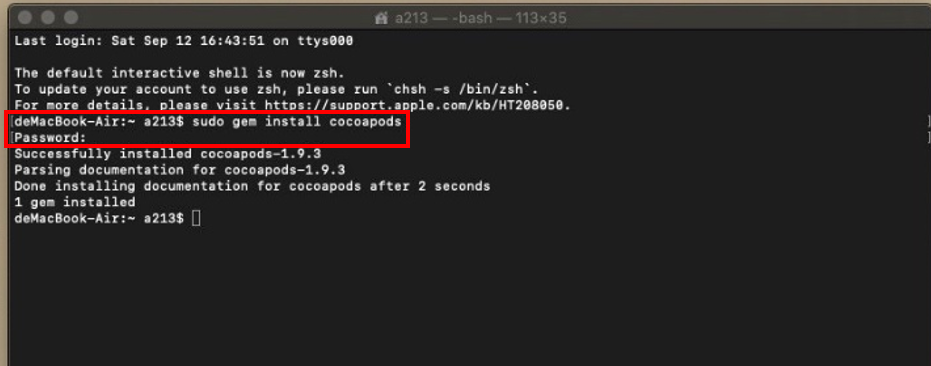
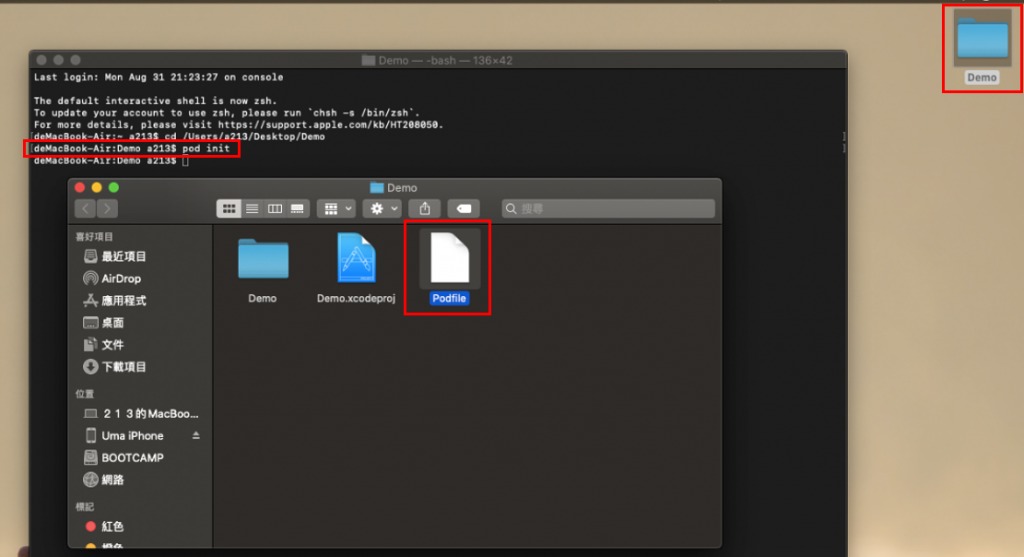
  3. 打「cd (專案儲存位置)」,打完cd指令碼後,可選擇拖曳專案資料夾到終端機中,終端機會自動生成資料夾位置,打完後按「enter」進入專案資料夾中
    https://ithelp.ithome.com.tw/upload/images/20200924/20130458cBClX8hZyM.png

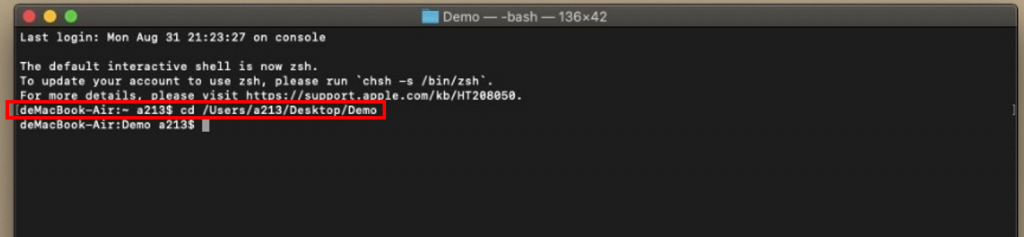
  4. 安裝完成後輸入「pod init」指令並按「enter」執行指令。執行完後,點擊專案資料夾,確認是否新增「Podfile」檔案
    https://ithelp.ithome.com.tw/upload/images/20200924/20130458oqUfqxBvpm.png
    https://ithelp.ithome.com.tw/upload/images/20200924/20130458BoffKcXCqE.png

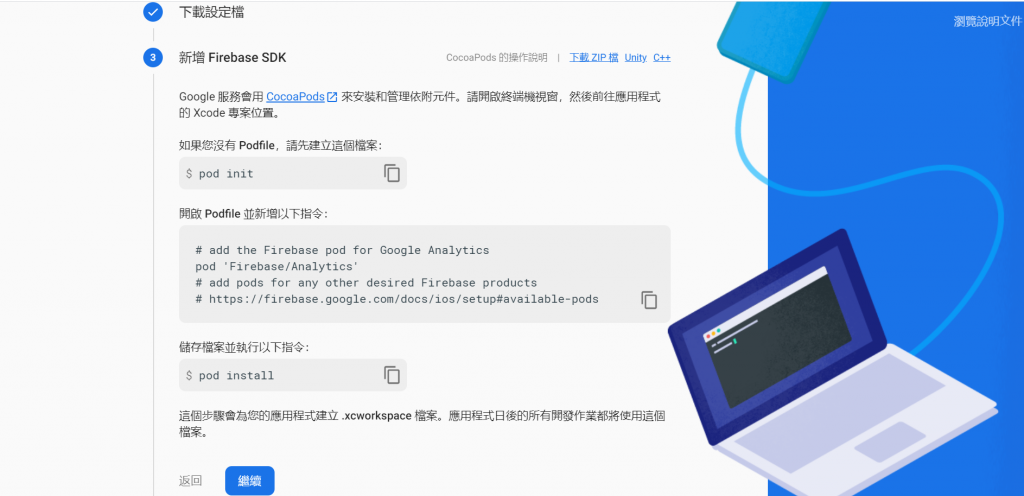
  5. 開啟「Podfile」檔案,將本專案需要使用的函式庫貼入並儲存
    https://ithelp.ithome.com.tw/upload/images/20200924/20130458pIQd9YopJz.png

    • pod 'Firebase/Analytics' #匯入Firebase中的Google分析函式庫
    • pod 'Firebase/Auth' #匯入Firebase中的身份驗證函式庫
    • pod 'Firebase/Firestore' #匯入Firebase中的Firestore函式庫
    • pod 'Charts' #匯入圖表函式庫
    • pod 'FSCalendar' #匯入日曆函式庫
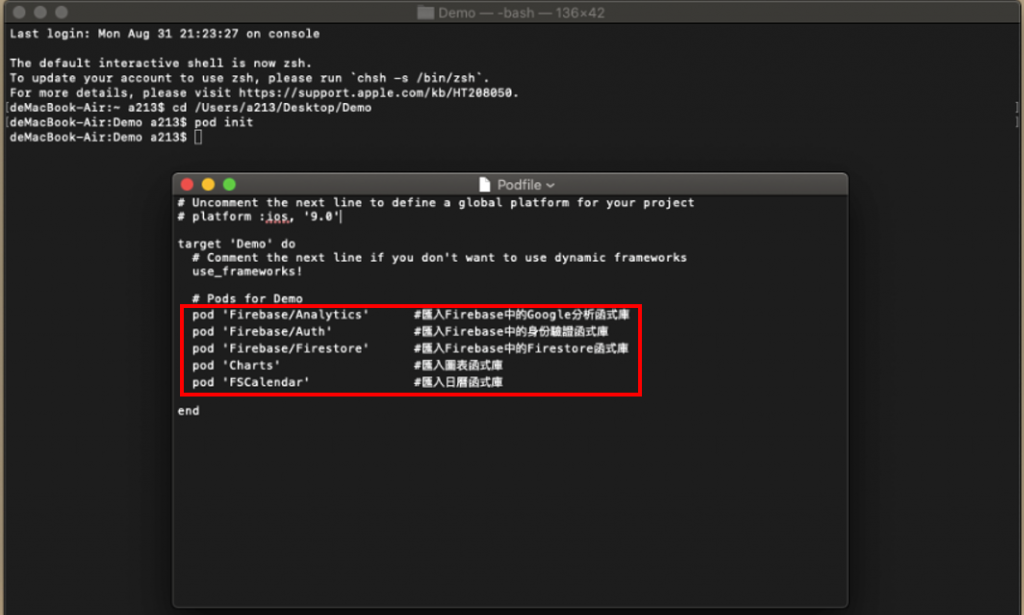
  6. 關閉「Podfile」檔案,於終端機輸入「pod install」指令並按「enter」執行指令,若出現「Pod installation complete!」表示函式庫匯入成功,關閉終端機
    https://ithelp.ithome.com.tw/upload/images/20200924/20130458W8Ar9rp9DM.png
    https://ithelp.ithome.com.tw/upload/images/20200924/201304581vqrHZO0m1.png

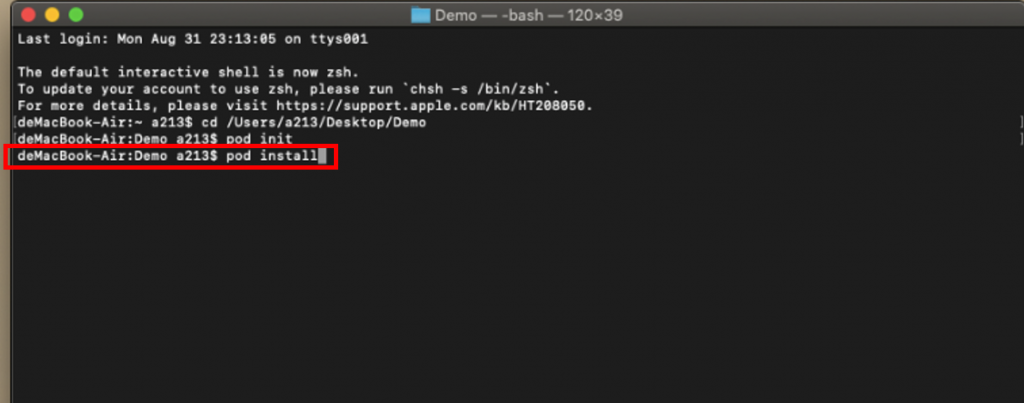
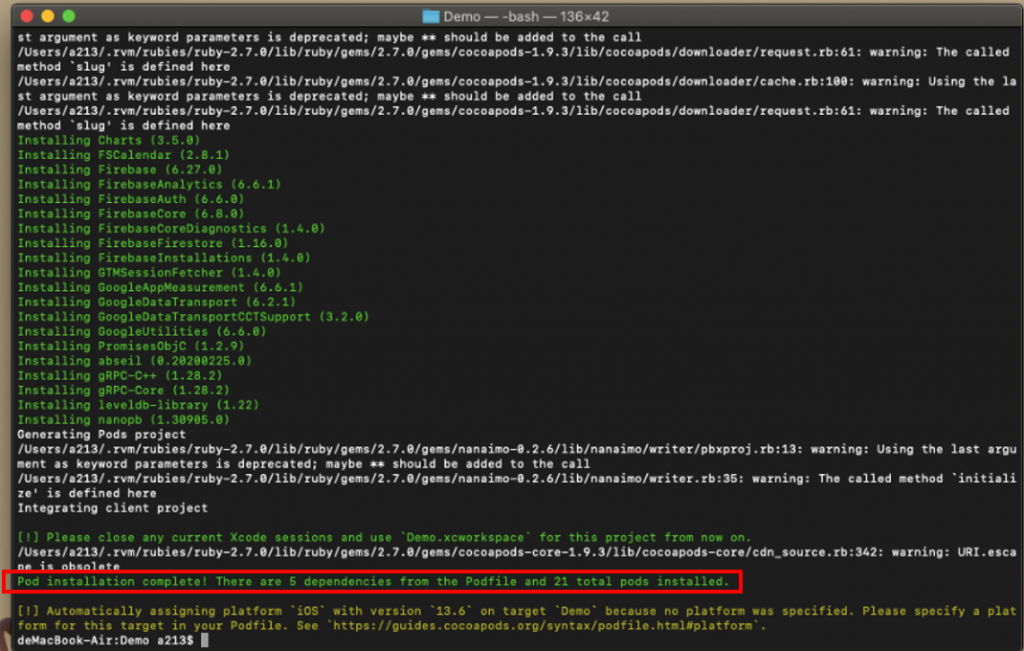
  7. 點擊專案資料夾,確認是否新增「(專案名稱).xcworkspace」檔案
    https://ithelp.ithome.com.tw/upload/images/20200924/20130458AmPtmlDYsF.png

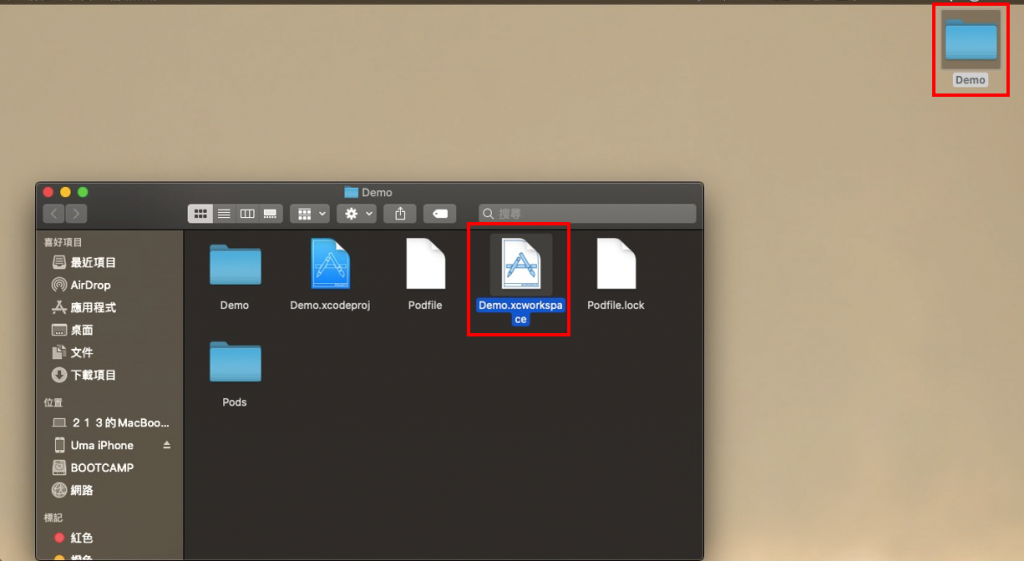
  8. 開啟「(專案名稱).xcworkspace」檔案進入有匯入函式庫的Xcode工作區域,點擊「AppDelegate.swift」檔案
    https://ithelp.ithome.com.tw/upload/images/20200924/20130458NW1nVO1mas.jpg

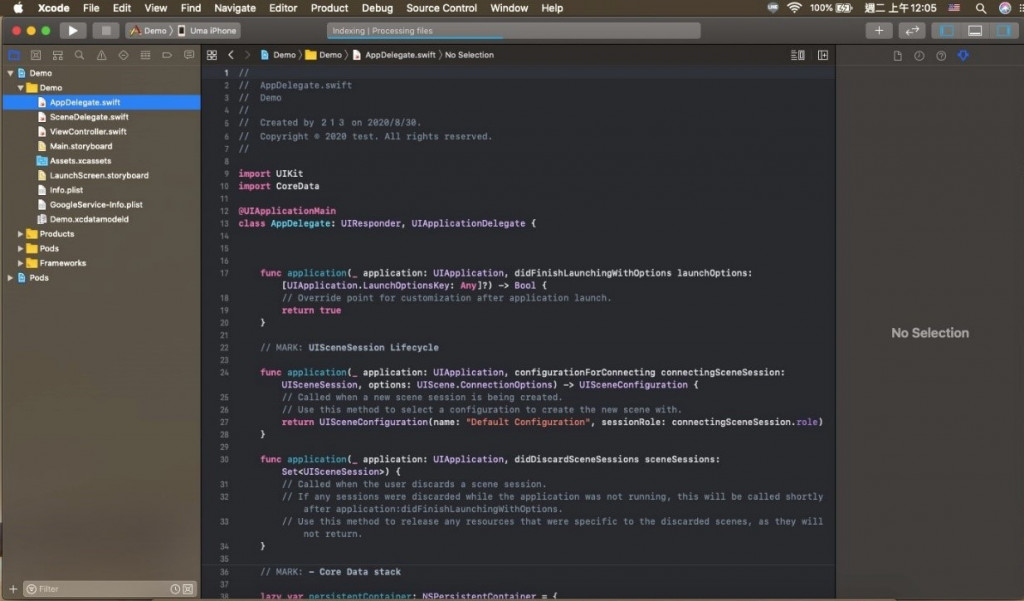
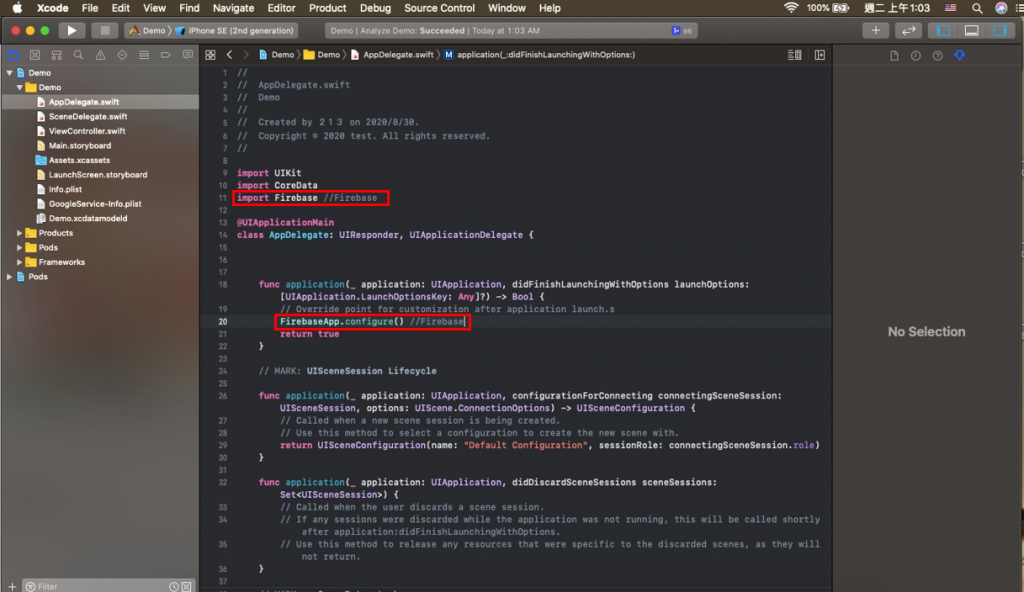
  9. 選擇Swift語言,依照Firebase教學,輸入「import Firebase」和「FirebaseApp.configure()」到「AppDelegate.swift」檔案的指定位置中並儲存
    https://ithelp.ithome.com.tw/upload/images/20200924/20130458fz2YJrHHPp.png
    https://ithelp.ithome.com.tw/upload/images/20200924/20130458zFABq6TI7u.png

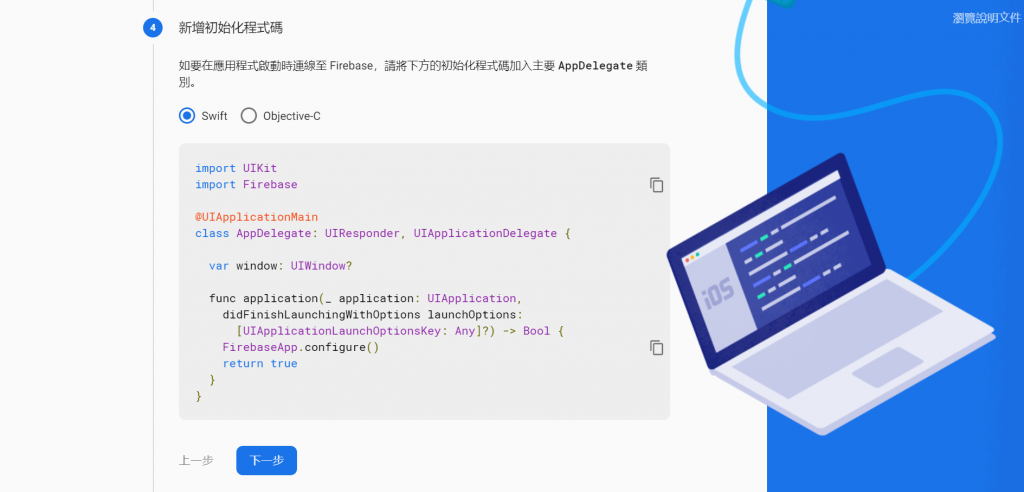
  10. 點擊「下一步」按鈕後,確認Xcode目標是否指向iphone模擬器(左上筆和尺的圖示>iphone模擬器),無誤的話按下執行按鈕(左上三角形圖示),等待模擬器開啟app
    https://ithelp.ithome.com.tw/upload/images/20200924/20130458YeOgJefgAS.png

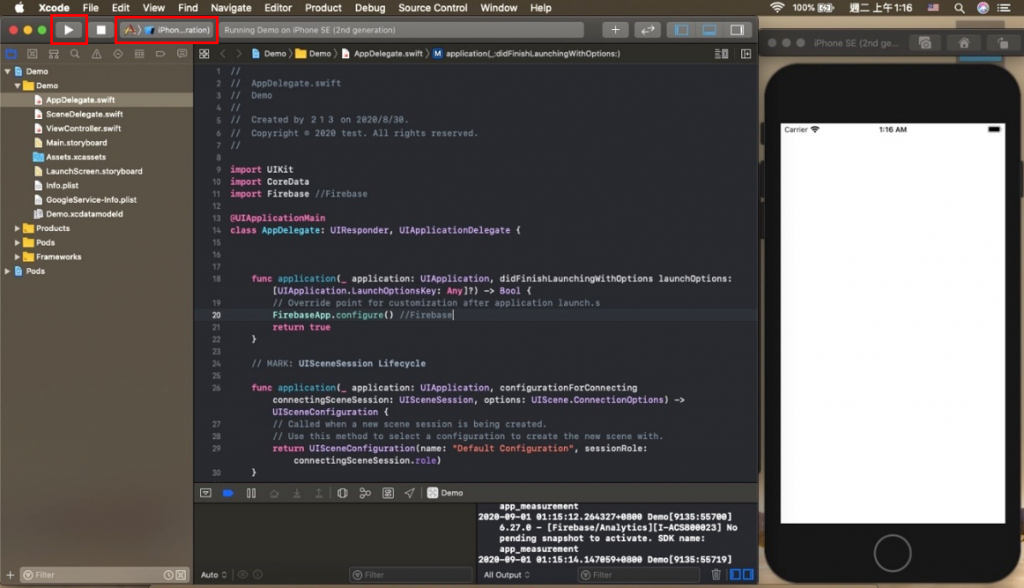
  11. 於模擬器開啟app後,確認Firebase是否安裝成功,若網頁長時間沒有跳出成功,可點擊Xcode停止按鈕(左上正方形圖示),並重新點擊執行按鈕(左上三角形圖示),重新執行app
    https://ithelp.ithome.com.tw/upload/images/20200924/20130458flyQpfSVRq.png

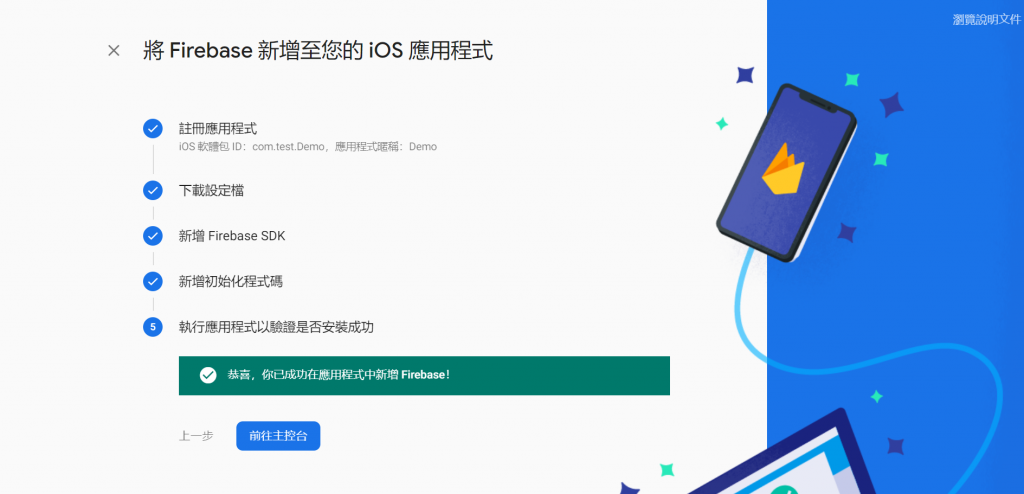
完成上述步驟後,就成功將Firebase加入專案當中啦!點擊「前往主控台」按鈕可以看到新創建的Firebase專案,裡面提供眾多功能,大家有興趣可以上網查看如何將這些功能運用在app中!


上一篇
[Day 9] Firebase加入專案(上)
下一篇
[Day 11] Firebase使用者帳號設定
系列文
顏色 countenance APP製作筆記30
圖片
  直播研討會
圖片
{{ item.channelVendor }} {{ item.webinarstarted }} |
{{ formatDate(item.duration) }}
直播中

尚未有邦友留言

立即登入留言