
Each scope function uses one of two ways to access the context object: as a lambda receiver (this) or as a lambda argument (it).
首先節錄官網的一段話,scope function (標準函數) 使用了兩種方式來存取 context object (也就是我們要處理的對象啦),這兩種方式一個是 lambda receiver (this) 一個是 lambda argument (it)
以上這段話第一個就會想到,什麼是 receiver ?
這裡截圖了一張 Kotlin in Action 書中的圖
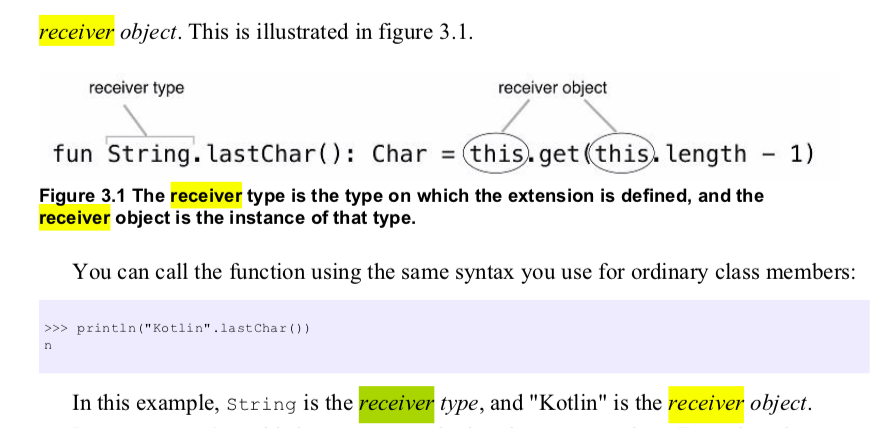
這張圖解釋了什麼是 receiver
這裡舉了一個 String 內建的方法,lastChar() 的原始碼,這段解釋了 String.lastChar() 中的 String 指的是 receiver 的型態(type),而後面實際的實作 this.get(this.length -1 ) 中的 this 就會是 receiver object。
所以在這例子中 "Kotlin" 就會是我們的 receiver object,也就是 receiver!
所以通常在 lambda 看到 this 都會稱之為 lambda receiver (this),其他狀況就會是 lambda argument (it),如之前提過 it 其實就是參數,我們也可以定自己的參數名稱
這裡列了一張整理表如下,其實用久了,我想都會記得!
| scope block 內的關鍵字 => | this | it |
|---|---|---|
| 回傳 this | apply | also, takeIf, takeUnless |
| 回傳結果值 | run, with | let |
以下我都用我自訂的這個 class 來解說
Person class 有兩個可變變數 name 和 id,和其他方法,其中 getResult() 會回傳字串, getBoolean() 會回傳 boolean,其他方法只是會印出訊息
class Person(var name: String, var id: String) {
    fun getResult(): String {
        return "return result!"
    }

    fun sing() {
        println("sing")
    }

    fun jump() {
        println("jump")
    }

    fun getBoolean(): Boolean {
        return true
    }

    override fun toString(): String {
        return "name: $name, id: $id"
    }
}
in: this, out: lambda function 結果
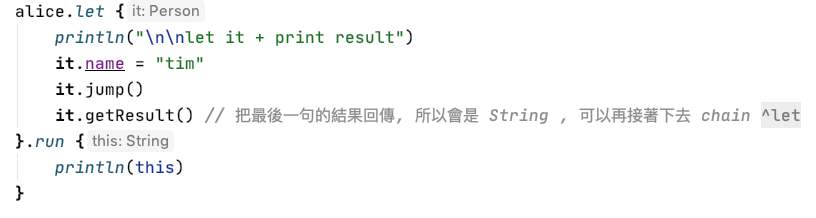
如下圖,首先宣告了一個 alice 是 Person 物件
接著利用
alice.run {

}
這樣呼叫了一個 scope function ,這裡的 alice 就會是 lambda receiver,而在 lambda function 內的會是 this

從上圖可以看到 IntelliJ IDEA 都會很貼心的幫我們顯示在這個 function 內究竟我們用的是 this 或是 it,所以其實我覺得回傳是什麼比較重要。
以 run 來說,最後回傳的就是 lambda function 最後一行的結果,也就是 this.getResult() 這個字串,所以我接著又串了一個 run { } ,編輯器就會顯示這裡的 this 是字串,也就是上個方法最後回傳的結果。
像這樣的使用方式就是 chaining function,函數可以一直接下去。
下圖解釋了,如果是 this 的話,甚至可以省略,因為物件本身在整個 lambda function block 內都可以存取到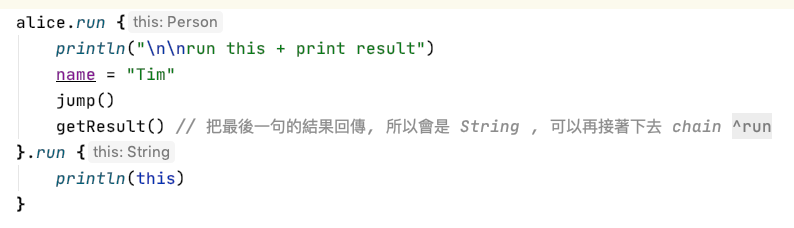
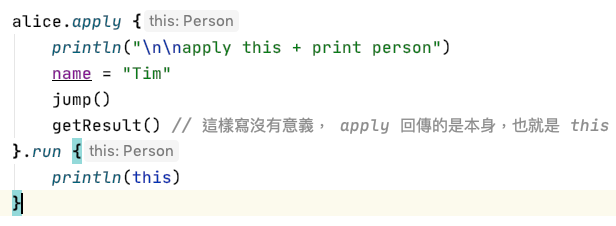
in: this, out: this
apply 這個例子也一樣,alice 會是 lambda receiver,而在 lambda function 內的會是 this
但跟 run 不一樣的地方是 apply 最後回傳的會是 this,所以最後 getResult() 沒有用,而在下一個 run 也可以看到 function 內得到的 this 依然還是 Person 型態,也就會是 alice 這個變數。
再舉一個例子
在以往,很常有像下列設定一個物件的屬性或方法的情境
val file = File("test.txt")
file.setReadable(true)
file.setReadOnly()
file.setExecutable(true)
使用 apply 能讓程式碼看起來更簡潔
//  use apply
val file2 = File("test.txt").apply {
    setReadable(true)
    setReadOnly()
    setExecutable(true)
}
上面這個例子,因為 apply 最後回傳的是 this,也就是 File("test.txt") 本身,所以甚至可以直接用 file2 這個變數把結果存起來,也會是 File 物件。
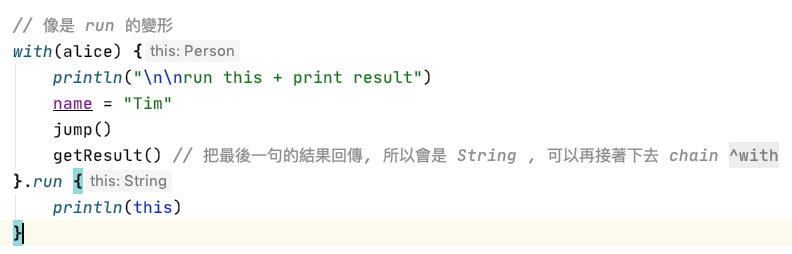
in: this, out: lambda function 結果
with 就像 run 的變形,只是呼叫的方式不大一樣,這裡是唯一這樣使用的,with(物件) { }
但 with 和 run 其實功用上是一樣的,lambda function 內也是 this,最後回傳也是 lambda function 的結果,也就是 getResult(),所以一般來說使用 run 就可以達到一樣的效果。
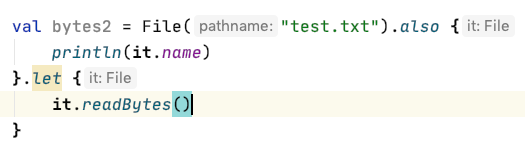
in: it, out: lambda function 結果
從這開始介紹的就不會是 this 了,而是一個變數 it 來代表 alice 這個物件,所以在程式內都要使用 it 來存取變數和呼叫方法, let 最後也是回傳 lambda function 的結果。
值得一提的是 it 在這還會是個 val 參數
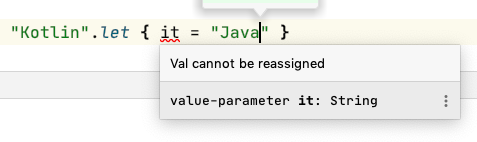
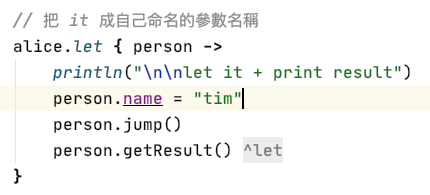
當然,因為 it 是 kotlin 自動幫我們取的一個暫時名稱,我們也可以改成自己的變數名稱
in: it, out: this
also 跟 let 也很相似,只是差在回傳會是 this
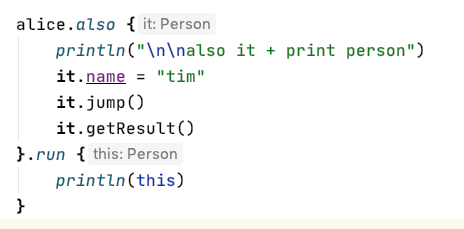
像這個例子,最後 also 因為是回傳 this,所以反而變成要額外宣告變數去給值
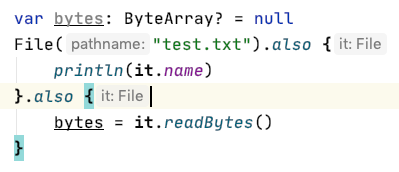
其實最後改成 let,還比較直接一點
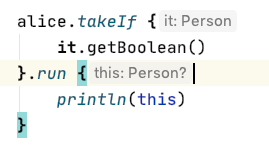
in: it, out: this?
takeif 的進出跟 also 很像,差別在回傳的 this 是 nullable 的,所以會寫成 this?
takeif 顧名思義,是滿足某條件才做事
也就是裡面需要的是一個 predicate 的判斷式,會回傳 true 或 false
所以這個例子就是 it.getBoolean() 為 true 時,才會跑 run
因為回傳是 nullable 的 this,所以嚴謹一點可以寫成這樣
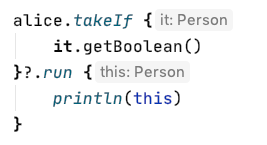
像這個就是一個使用 takeif 很好的例子
val fileText = File("test.txt")
        .takeIf {
            it.canRead() && it.canWrite()
        }?.readText()
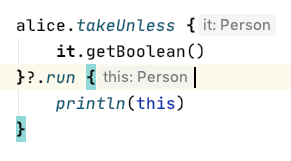
in: it, out: this?
takeUnless 就是 takeif 相反,其實用 takeif 就足夠了
scope function 其實非常好用!日後會常看到!
以上就是今天的內容!謝謝大家!
今日練習的程式在這: 請點我

 iThome鐵人賽