iT邦幫忙

第 12 屆 iThome 鐵人賽

DAY 18
0
自我挑戰組

從零開始的後端異世界生活系列 第 18

Day 18 - 使用指令同步 DB 資料表來生成 Entity(下)

調整 Entity 資料格式

在上一篇章的時候,我們已經透過指令來同步 DB 資料表生成 Entity,目前的 Entity 是長這樣:
https://ithelp.ithome.com.tw/upload/images/20201002/20119619rSARboHgnu.png

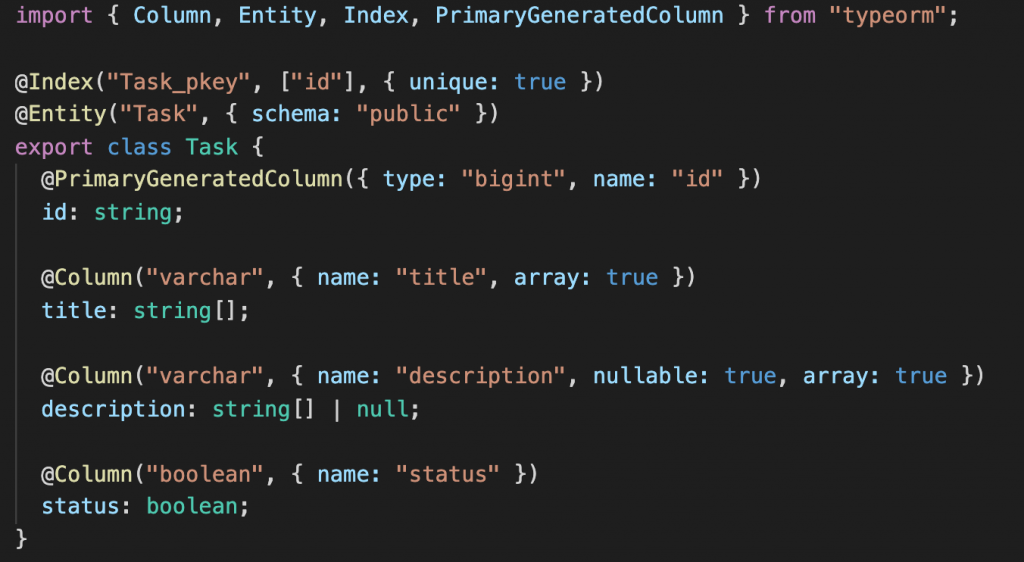
雖然都有照著資料表的格式生成,但是我有些資料格式似乎設錯了,那現在我們來更新它吧!
那我們這次改用 DBeaver,先打開到 Task 這張表,選到屬性的部分:
https://ithelp.ithome.com.tw/upload/images/20201003/20119619LuSU42G4nM.png

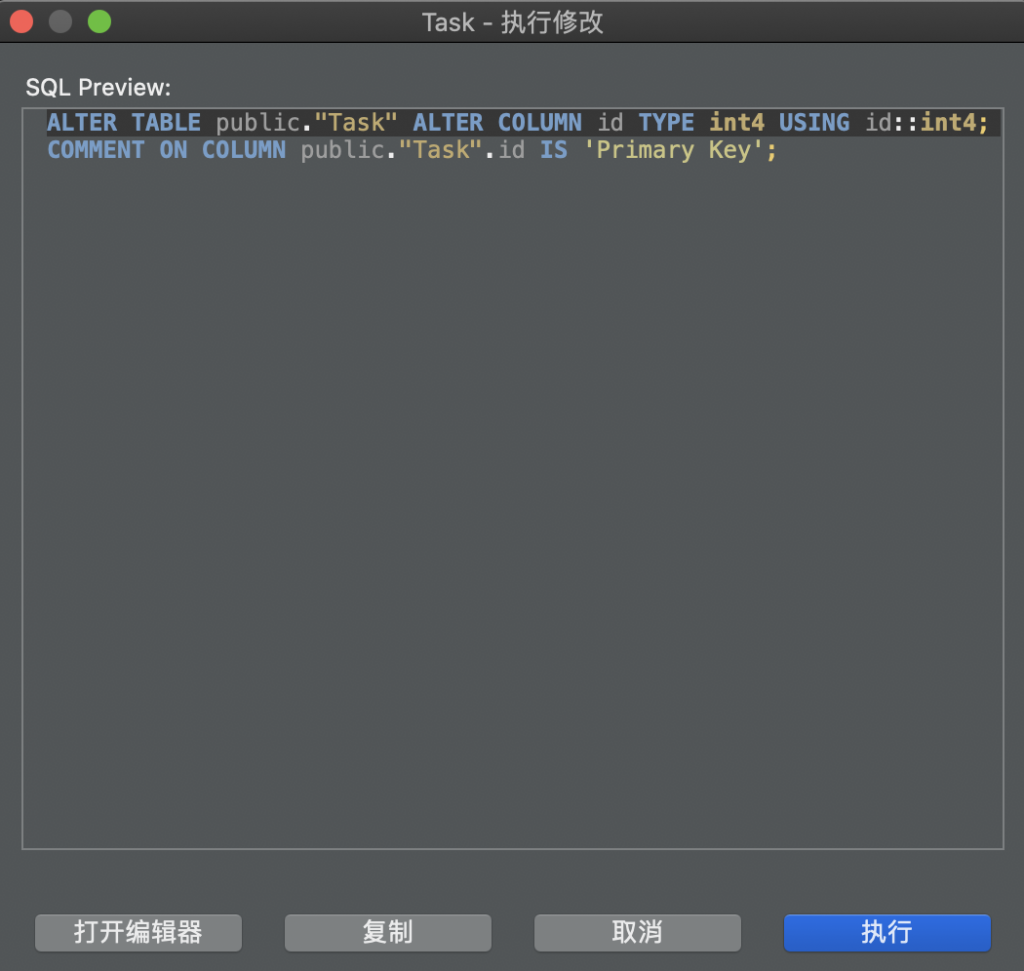
我們先來調整 id 的資料格式,將它調整成 int4,順便給它個敘述:
https://ithelp.ithome.com.tw/upload/images/20201003/20119619MxbB7W2nMh.png

之後按右下角的儲存,將資料表修改完成,它會彈出要執行的事項:
https://ithelp.ithome.com.tw/upload/images/20201003/20119619gytUhx3L1S.png

https://ithelp.ithome.com.tw/upload/images/20201003/20119619thHWgL4gDw.png

好,修改完畢,現在我們再下一次 yarn update:orm 看會變成什麼樣子:
https://ithelp.ithome.com.tw/upload/images/20201003/20119619sNiEiJy0lN.png

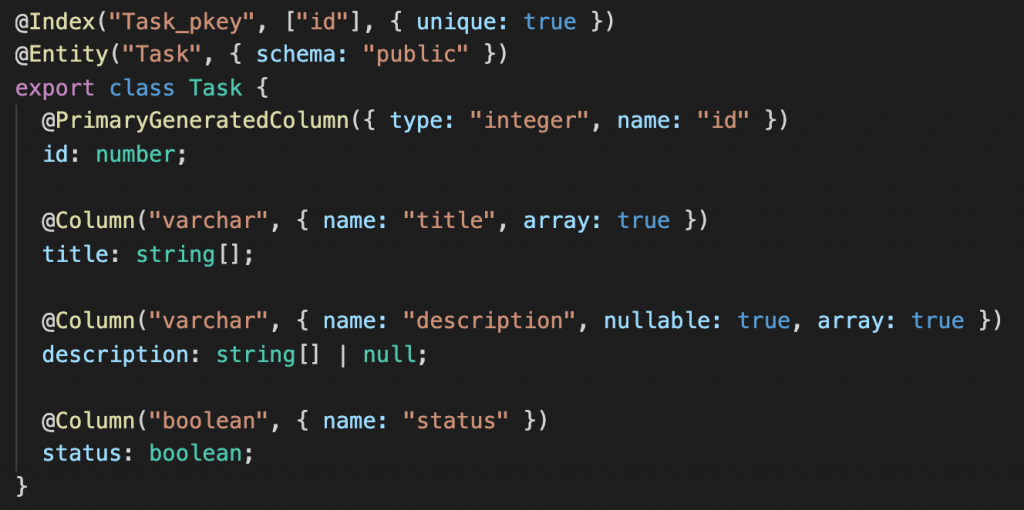
OK,順利變成我們想要的 number 了,再來要修正的是兩個字串的資料格式。
我們把 title 及 description 修改成 varchar 並順便給他們一點敘述:
https://ithelp.ithome.com.tw/upload/images/20201003/20119619xPL5fqbgT3.png

之後下 yarn update:orm,也順利修改成我們想要的格式了:
https://ithelp.ithome.com.tw/upload/images/20201003/20119619tiyw7f5Rp0.png

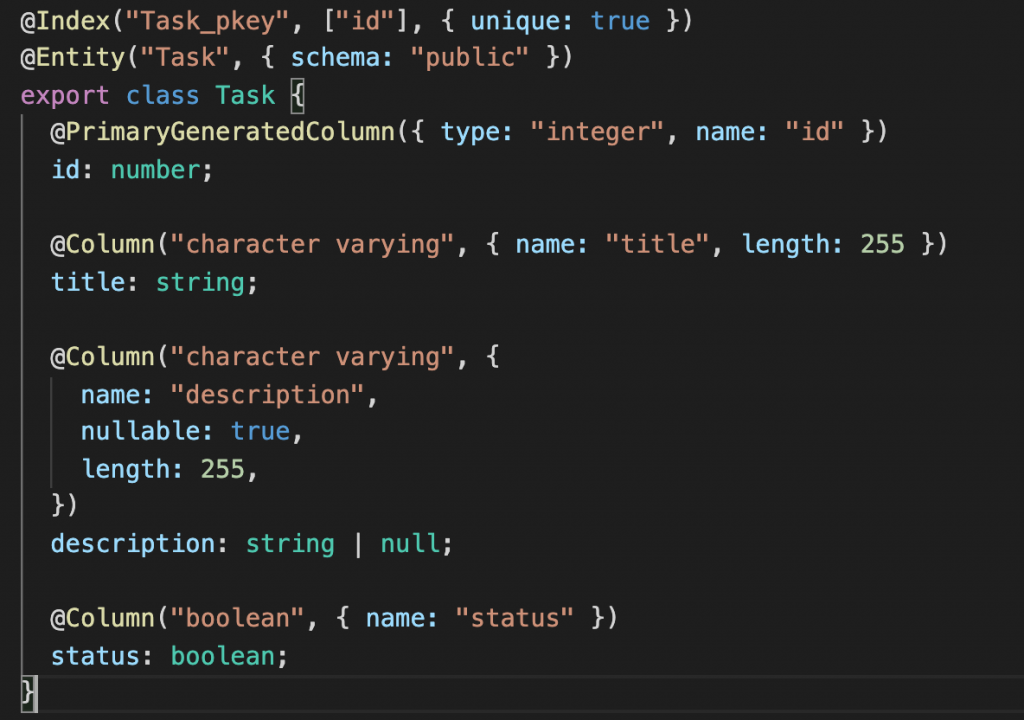
剩下的 status 已經是我們想要的格式了,所以不作調整。

新增資料表欄位

我們在記錄 DB 資料表時,通常還會多兩欄有關時間戳的紀錄,一來是方便查詢某年某月的紀錄,二來是若有想要照某種方式來排列的話,這樣查詢也比較方便,故我們現在來新增 create_timeupdate_time
https://ithelp.ithome.com.tw/upload/images/20201003/2011961903MriwxdFc.png

之後下 yarn update:orm,OK,也順利的新增上去了:
https://ithelp.ithome.com.tw/upload/images/20201003/20119619mtEWilgSNK.png

調整 Entity 生成文件位置

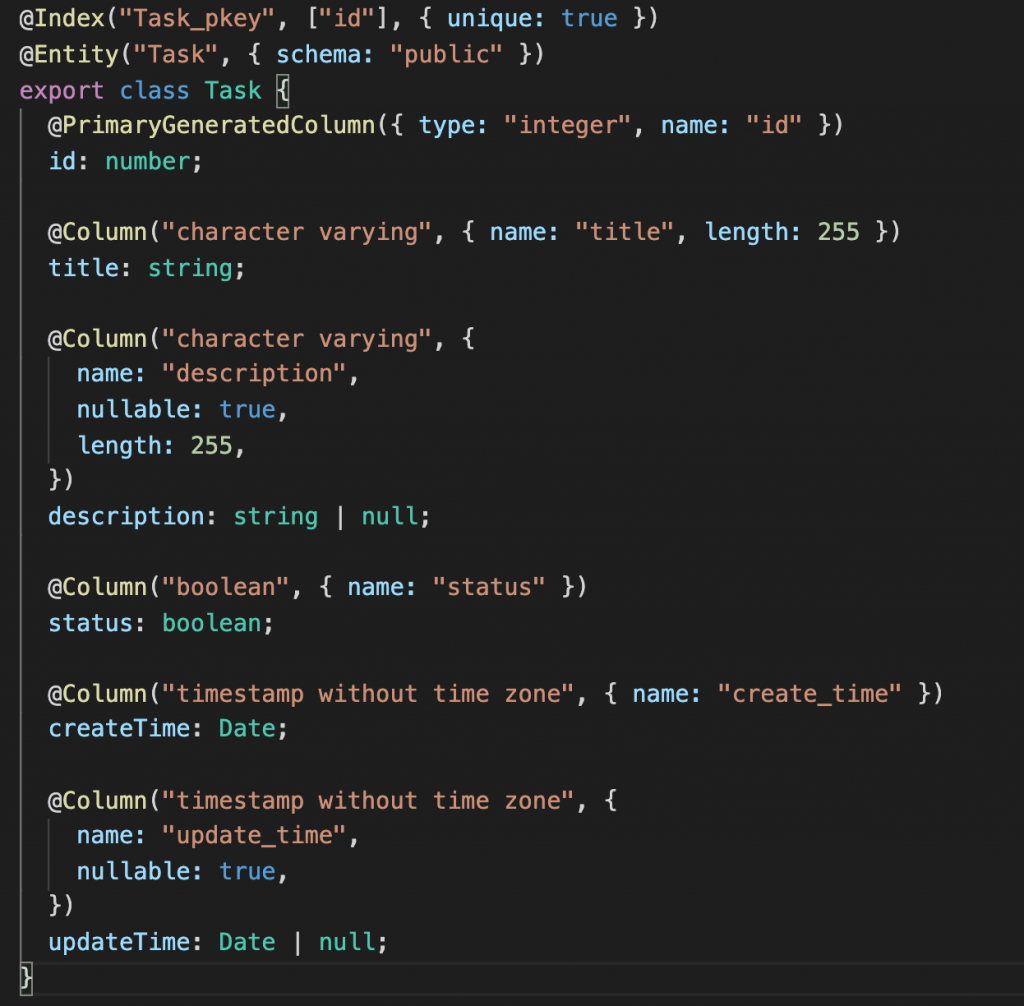
我們現在指令的生成位置是 .,所以它會生在這裡:
https://ithelp.ithome.com.tw/upload/images/20201003/20119619lDN36ZNOcU.png

https://ithelp.ithome.com.tw/upload/images/20201003/20119619yJf8F1lW0r.png

若我們想要讓 Entity 換個位置生成,只要修改一下指令(以下為範例):
https://ithelp.ithome.com.tw/upload/images/20201003/201196192oCIHCrz1D.png

然後再去新增一下自己需要的資料夾,把舊的 Entity 砍掉:
https://ithelp.ithome.com.tw/upload/images/20201003/20119619GBIHJ4F2Cw.png

然後下一次 yarn update:orm,OK,在我們想要的地方生成 Entity 了:
https://ithelp.ithome.com.tw/upload/images/20201003/20119619pAy6Us49K2.png

摘除不必要的自動生成文件

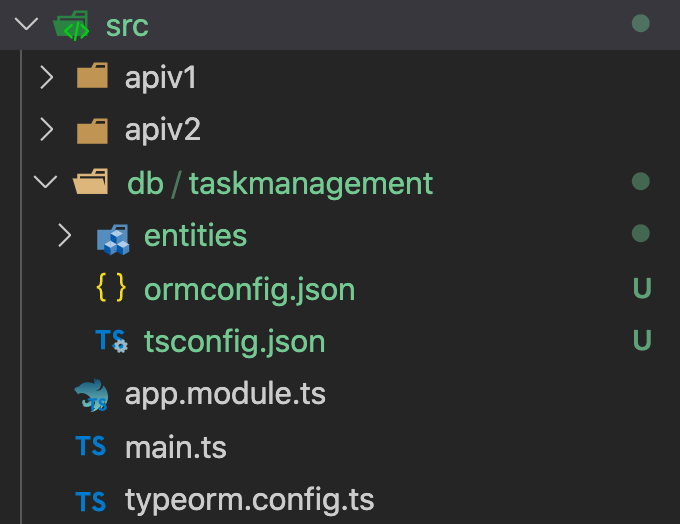
在下指令之後,若有觀察檔案變動的情形,可以發現專案自動生成了 ormconfig.jsontsconfig.json 兩個文件:
https://ithelp.ithome.com.tw/upload/images/20201003/20119619pAy6Us49K2.png

但這兩個文件其實我們都不需要,我們修改一下指令,後面加上不生成 config 文件的指令(生成位置要多加上 /entities):
https://ithelp.ithome.com.tw/upload/images/20201003/201196192bxLW9fpvE.png

試著執行看看,OK,現在那兩個檔案不會出現了:
https://ithelp.ithome.com.tw/upload/images/20201003/201196197DDBigvDbf.png

好,到現在為止我們的指令是長這樣,之後若將 DB 推上遠端的話還需要回來修改 IP、帳密:

"update:orm": "typeorm-model-generator -h localhost -d taskmanagement -u postgres -x !Passw0rd -e postgres -o ./src/db/taskmanagement/entities --noConfig true"

其他

若要使用其他更多功能,可以參考 GitHub 文件,或是一些其他人的教學文,例如:
https://blog.csdn.net/kuangshp128/article/details/98062662

/*
本系列文係個人新手開發心得,可能會有許多錯誤,煩請多多包容不吝指教。
*/


上一篇
Day 17 - 使用指令同步 DB 資料表來生成 Entity(上)
下一篇
Day 19 - 把商業邏輯拆分至 NestJS 的 Service 層中
系列文
從零開始的後端異世界生活30
圖片
  直播研討會
圖片
{{ item.channelVendor }} {{ item.webinarstarted }} |
{{ formatDate(item.duration) }}
直播中

尚未有邦友留言

立即登入留言